How to Manage Your Digital Menu via Merchant Portal?
Marketing and Menu Promotion
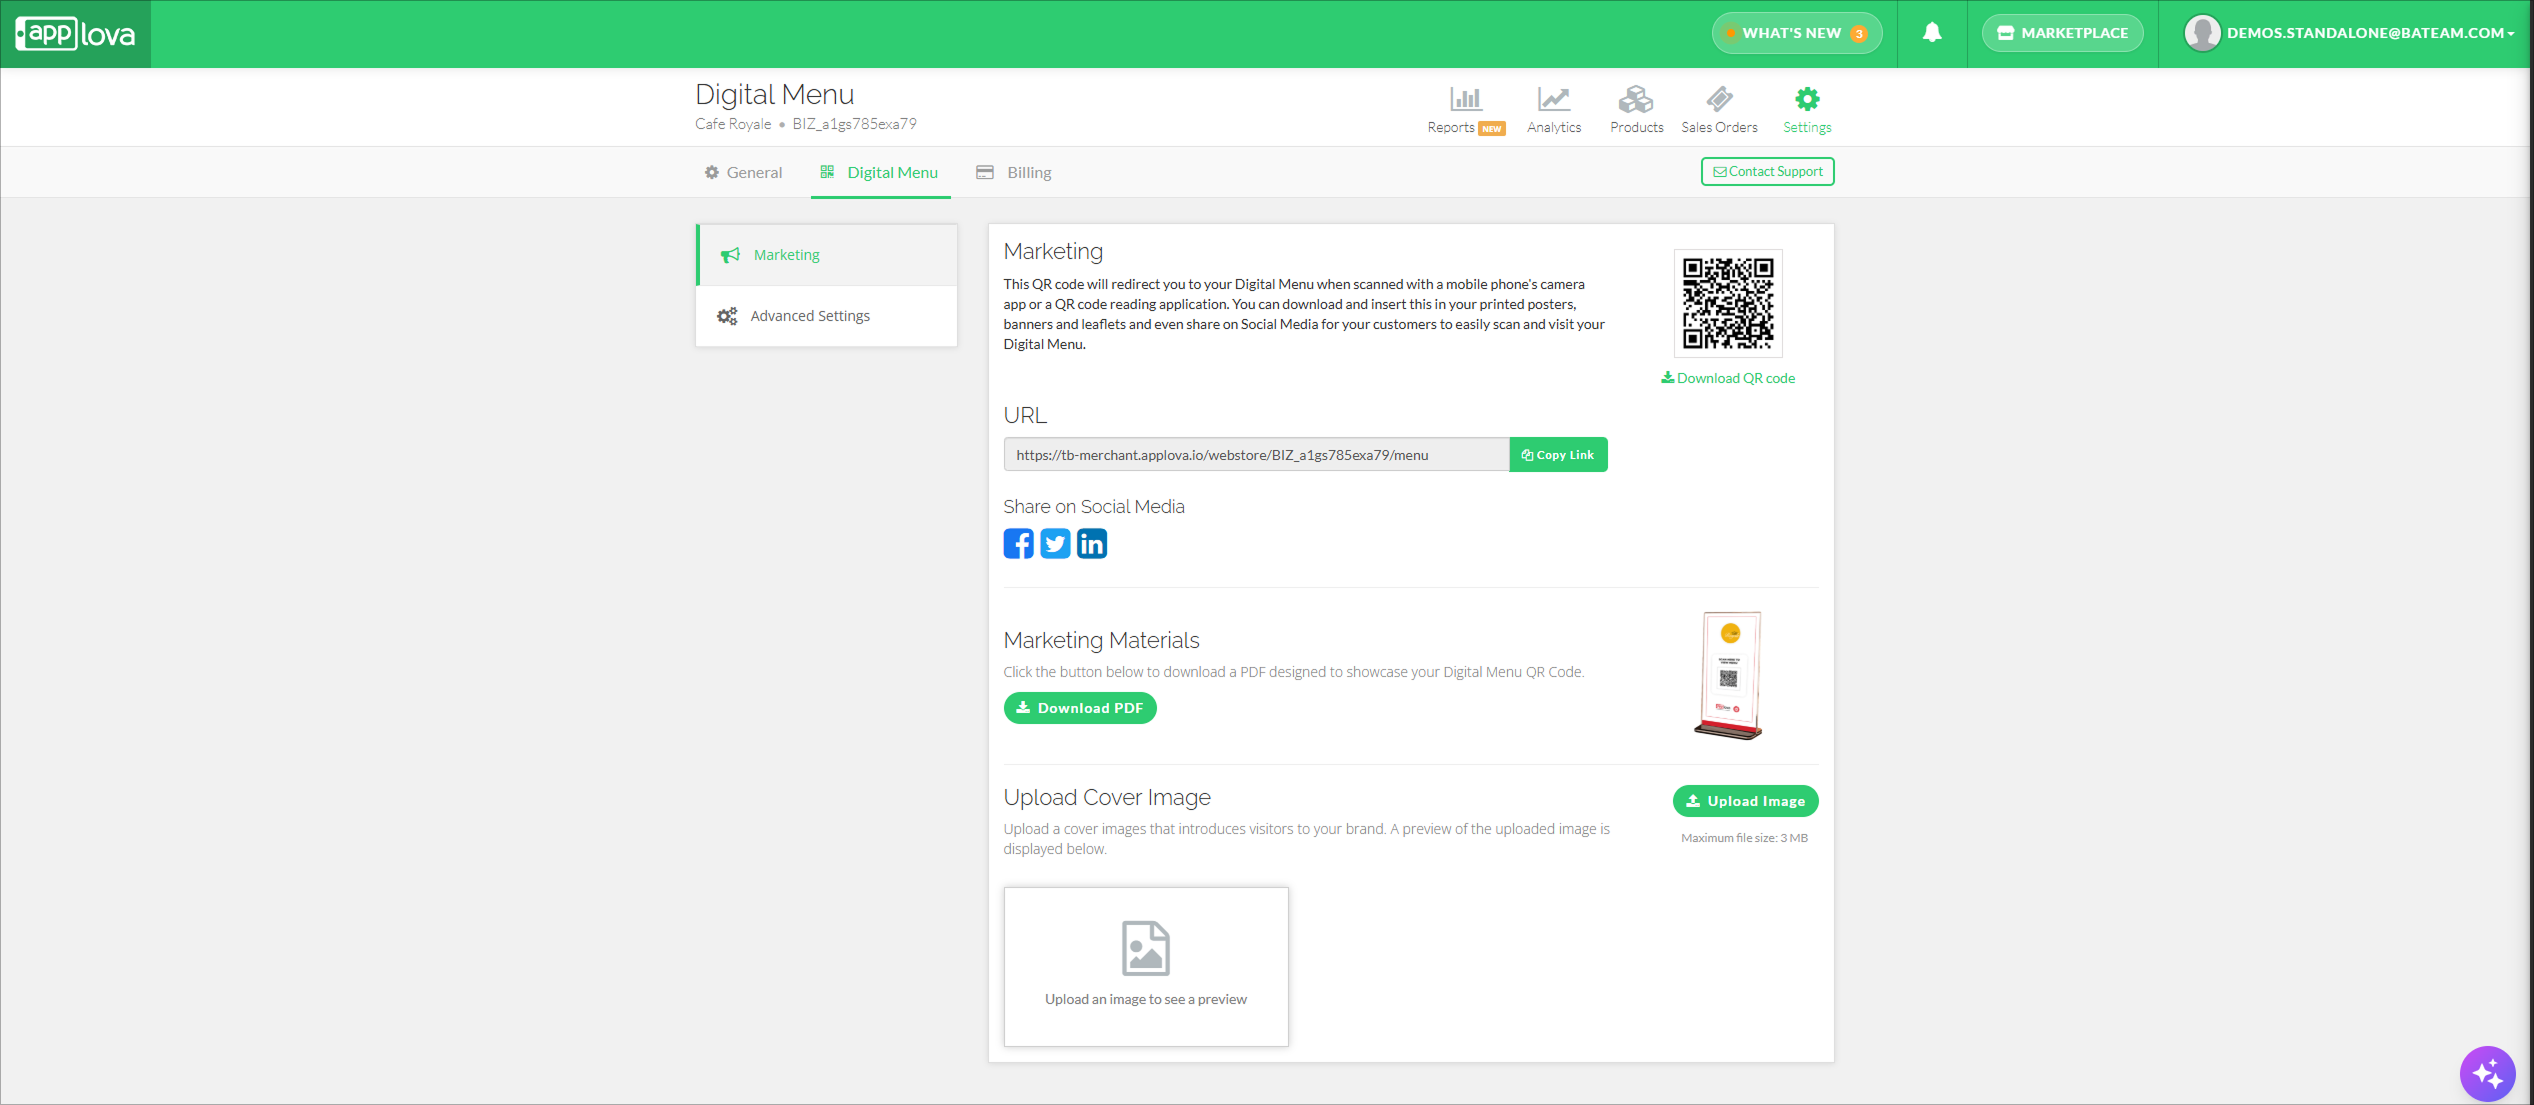
The Digital Menu QR code directs customers to the merchant’s digital menu when scanned using a mobile phone camera or QR code reader.
Step 1
Log in to the Merchant Portal and click Settings.
Step 2
Go to the "Digital Menu" tab.
Click "Download QR Code" below the displayed QR code. The downloaded QR code can be added to printed posters, table displays, banners, leaflets, or other promotional materials.
The Digital Menu link allows merchants to share direct access to their menu through websites, emails, text messages, and other communication channels.
Step 1
Log in to the Merchant Portal and click "Settings".
Step 2
Go to the "Digital Menu" tab.
Locate the URL section and click "Copy Link". The Digital Menu link will be copied to the device clipboard and can then be pasted into the required platform.
The social media sharing options allow merchants to promote their Digital Menu through the supported social media platforms.
Step 1
Log in to the Merchant Portal and click "Settings".
Step 2
Go to the "Digital Menu" tab.
Step 3
Locate the "Share on Social Media" section and click the required social media icon.
Follow the instructions displayed by the selected platform to complete the sharing process.
The Marketing Materials section allows merchants to download a ready-made PDF containing the Digital Menu QR code for promotional use.
Step 1
Log in to the Merchant Portal and click "Settings".
Step 2
Go to the "Digital Menu" tab.
Locate the "Marketing Materials" section and click "Download PDF". The downloaded PDF can be printed and displayed at the business for customers to scan and access the Digital Menu.
The cover image introduces customers to the merchant’s brand when they access the Digital Menu.
Step 1
Log in to the Merchant Portal and click "Settings".
Step 2
Go to the "Digital Menu" tab.
Step 3
Locate the "Upload Cover Image" section and click "Upload Image".
Step 4
Select the required image from the device.
Review the uploaded image in the preview section.

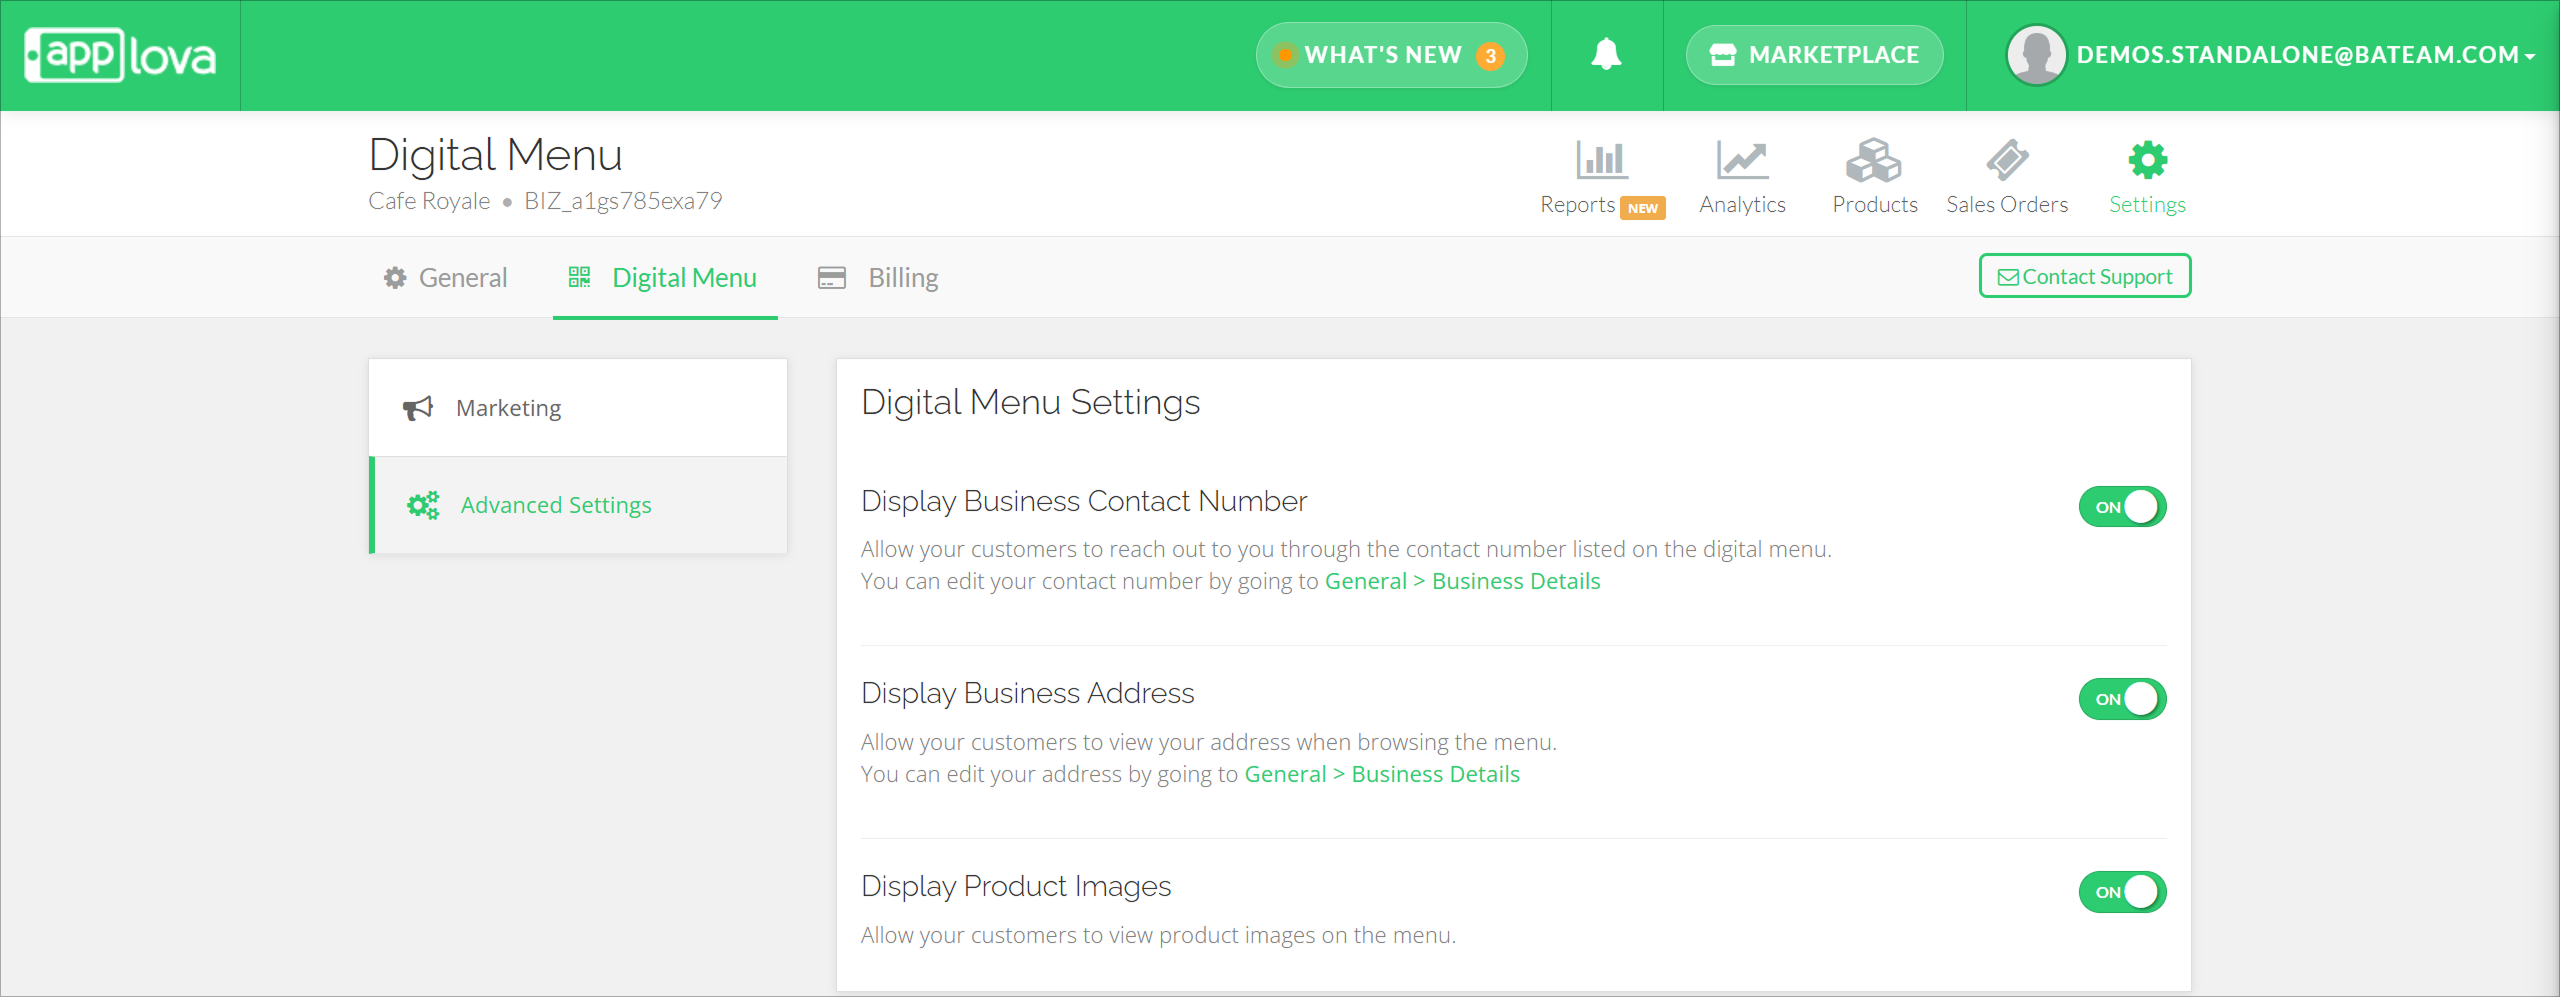
Advanced Settings
Related Articles
How to Manage Self-Service Kiosk via Merchant Portal?
With this feature merchants can manage their Self-Service Kiosk settings through the Merchant Portal. These settings help merchants configure kiosk-related options and control how the kiosk is displayed or used by customers. How to View Activated ...Altering Business Details via Merchant Portal
This guide explains how to update your business information and manage the terms and conditions displayed to customers through Applova Merchant Portal. How to Update Business Details? Step 1 Login to "Applova Merchant Web". Step 2 Click "Settings" ...How to Manage Product Image via Merchant Web?
This feature allows merchants to manage product images through the Merchant Portal. Merchants can use this feature to add, update, or remove product images, helping keep their online menu visually accurate and appealing to customers. How to Add ...How to Manage Product Specific Add-Ons as a Stock Controller User on Merchant Web?
The Stock Controller User, a merchant role with limited privileges solely for stock management, now has the capability to enable or disable the display of product add-ons via the Merchant Web. Step 1 Login to the "Merchant Web Portal" and click on ...How to Manage Products via Merchant Web?
This article explains how merchants can add, edit, duplicate, and delete products by following the steps provided. How to Add a Product? Step 1 Login to "Applova Merchant Web". Step 2 Go to "Products" and click on "Add New Product". Step 3 Fill in ...