How to Manage Self-Service Kiosk via Merchant Portal?
With this feature merchants can manage their Self-Service Kiosk settings through the Merchant Portal. These settings help merchants configure kiosk-related options and control how the kiosk is displayed or used by customers.
How to View Activated Kiosk Devices?
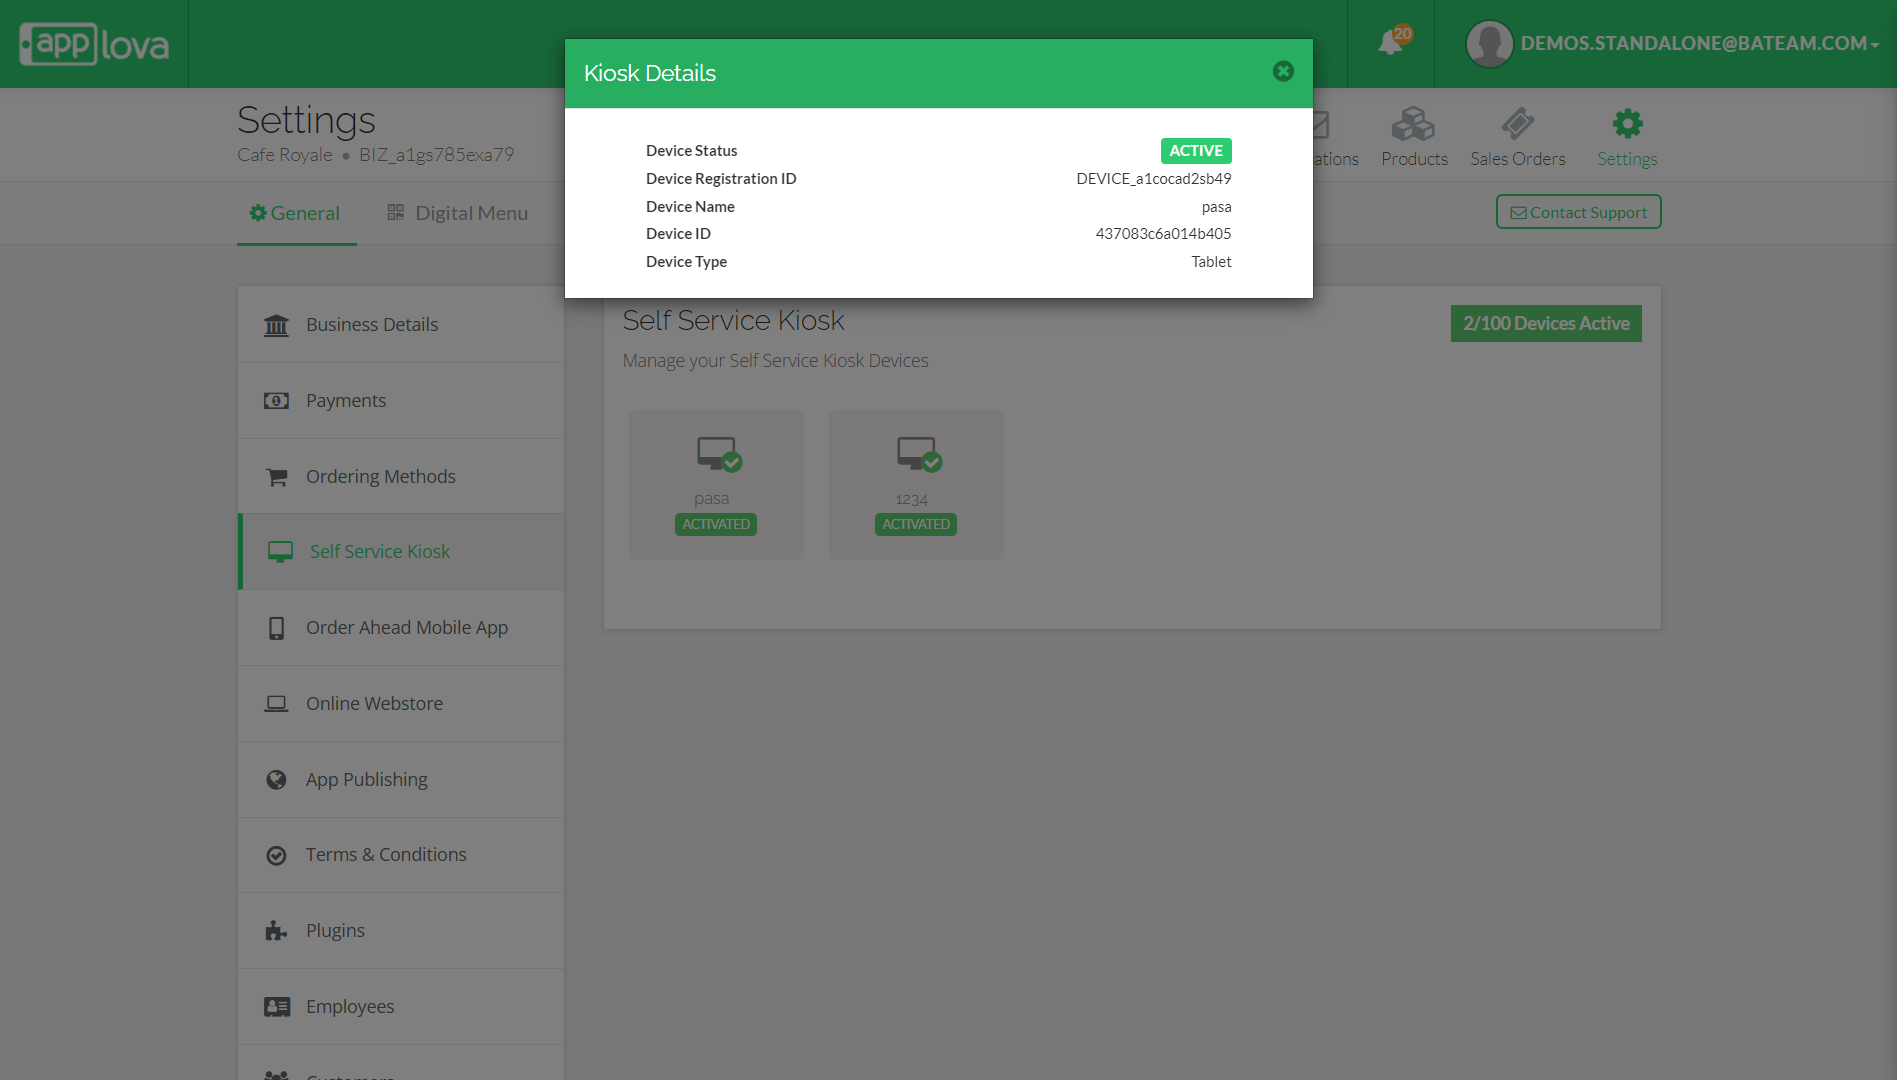
This feature will allow the merchant to view details of activated kiosk devices through the Merchant Web Portal.
Step 1
Login to "Applova Merchant Web".
Step 2
Click "Settings" and go to "General" tab.
Step 3
Click "Self Service Kiosks".
How to Manage Kiosk Welcome Screen?
How to Upload a Welcome Screen Image on Self-Service Kiosk?
Easily brand and personalize your welcome screens on the self-service kiosk with order type settings, and images without any hassle.
Step 1
Navigate to "Merchant Portal" and go to "Settings".
Step 2
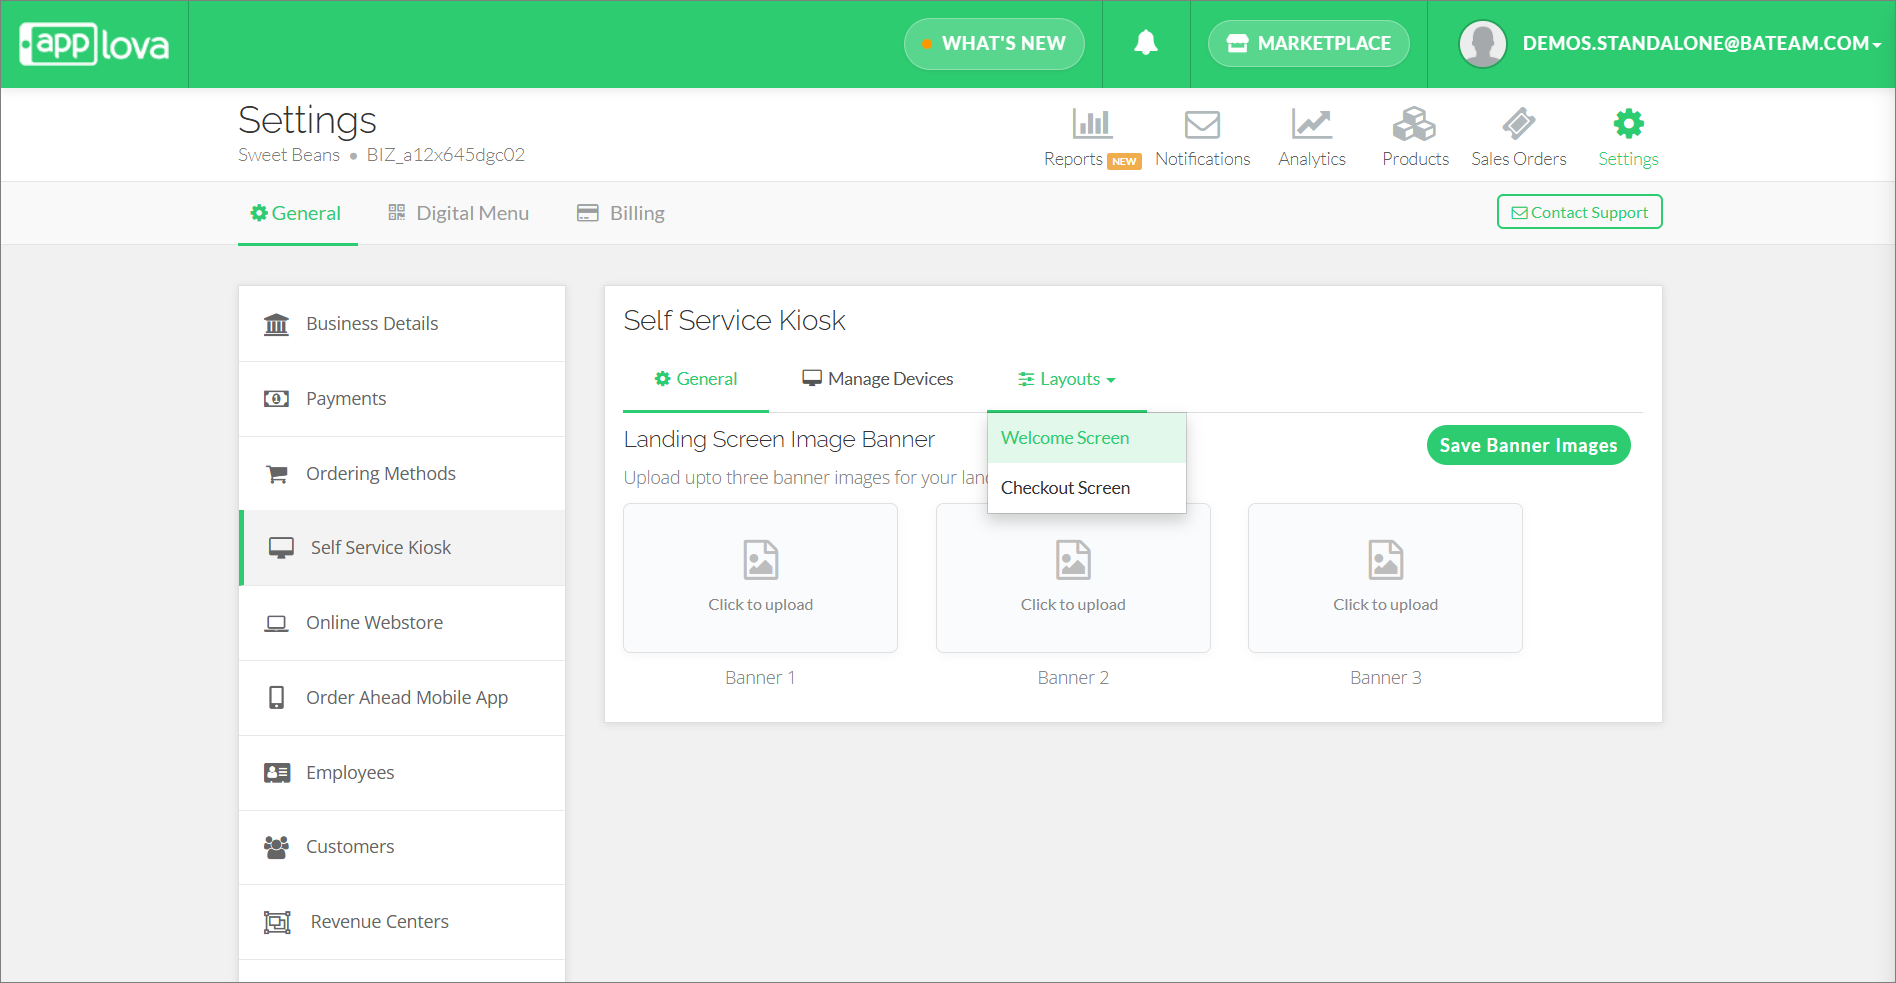
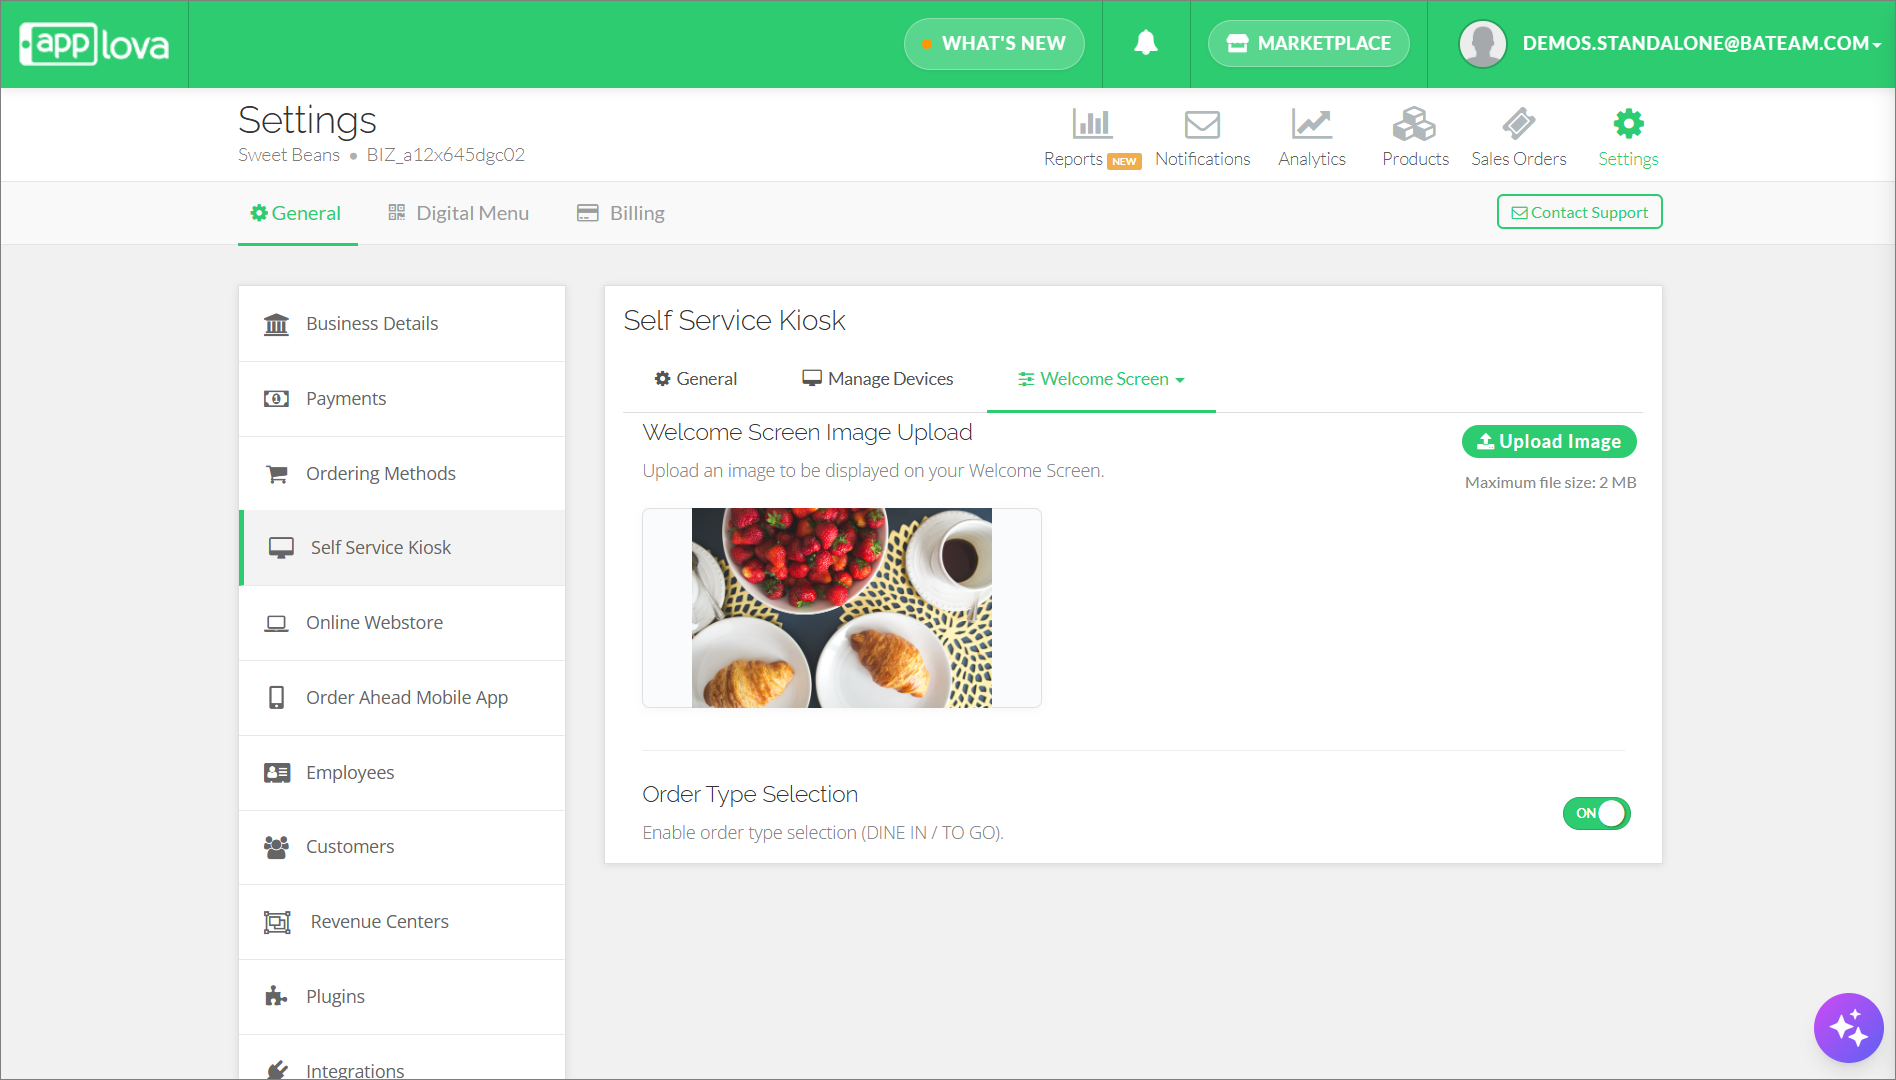
Click on the "Self Service Kiosk" section and from the "Layouts" dropdown, select the "Welcome Screen" tab.
Step 3
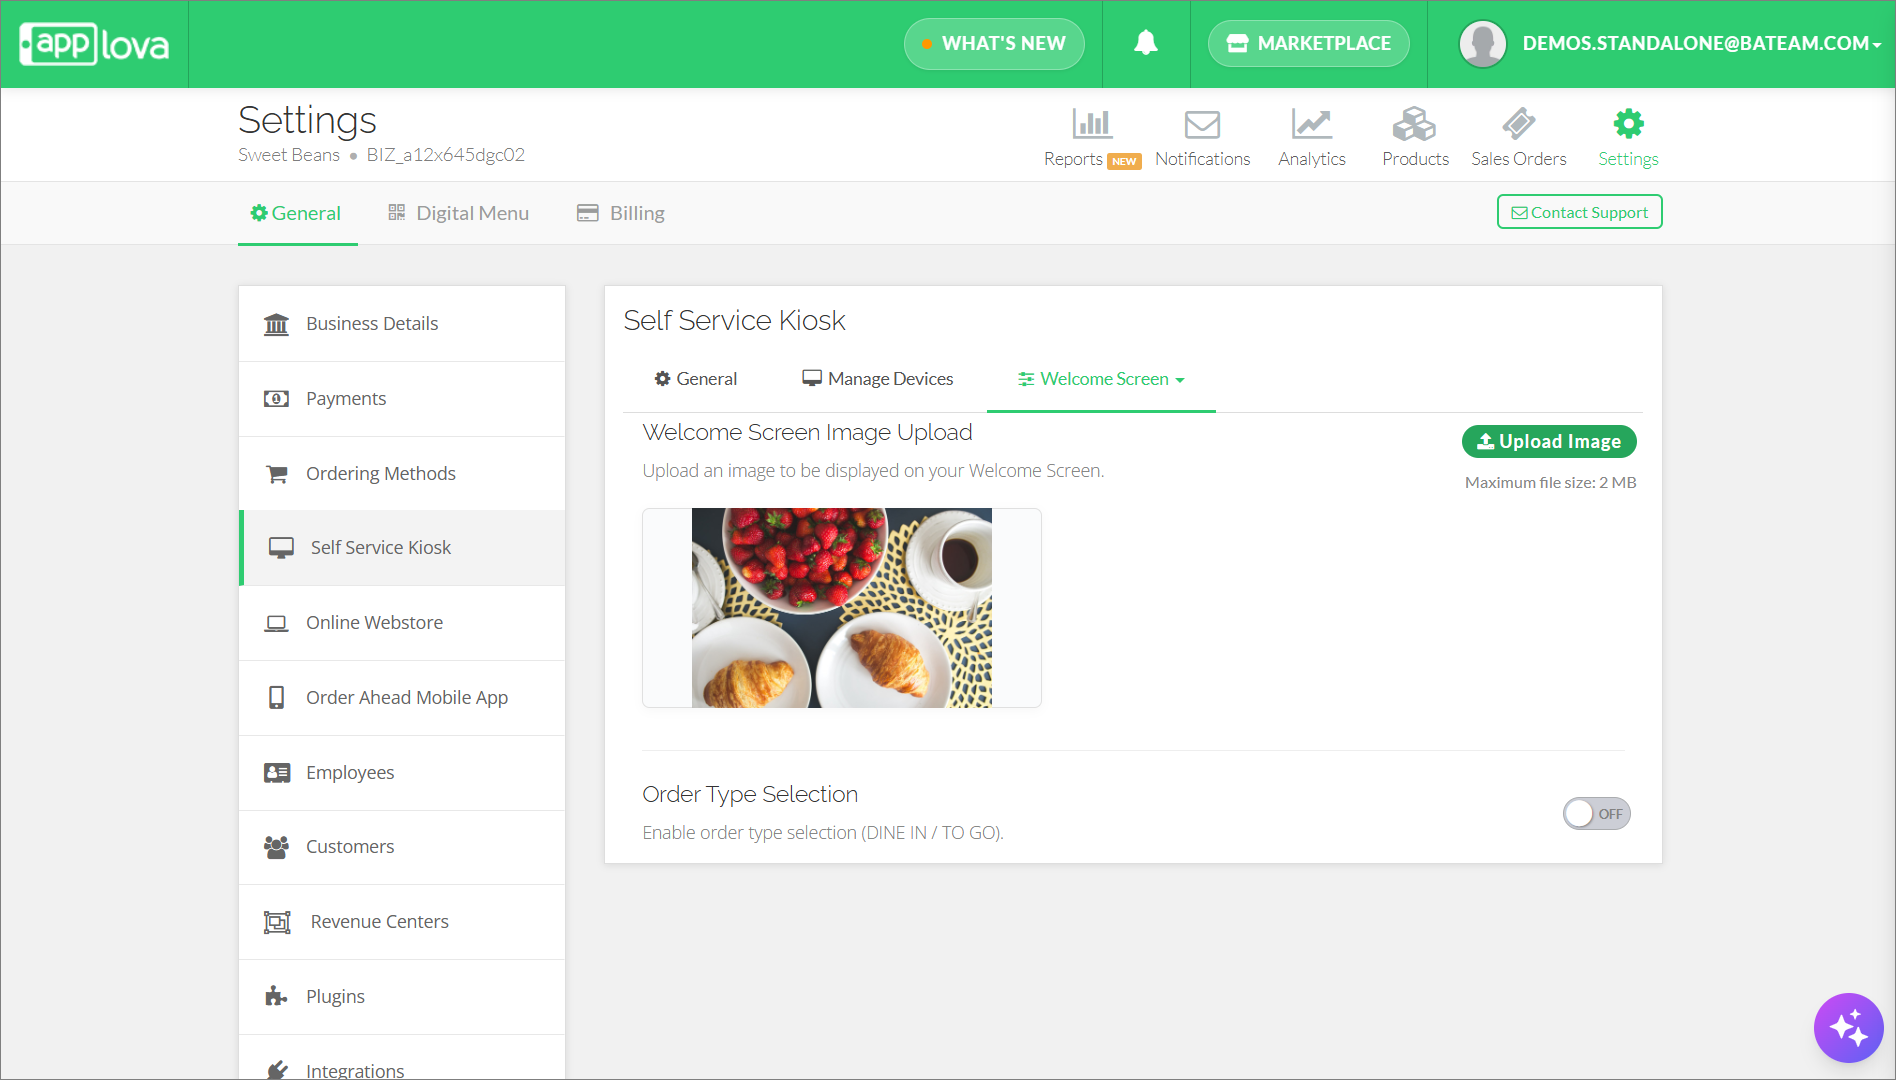
Click "Upload Image" and select your file ( Max 2MB ).
Step 4
Preview the uploaded image in the preview box.
Step 5
The changes will be automatically applied according to your preference.

The image will work across both landscape and portrait kiosk orientations.
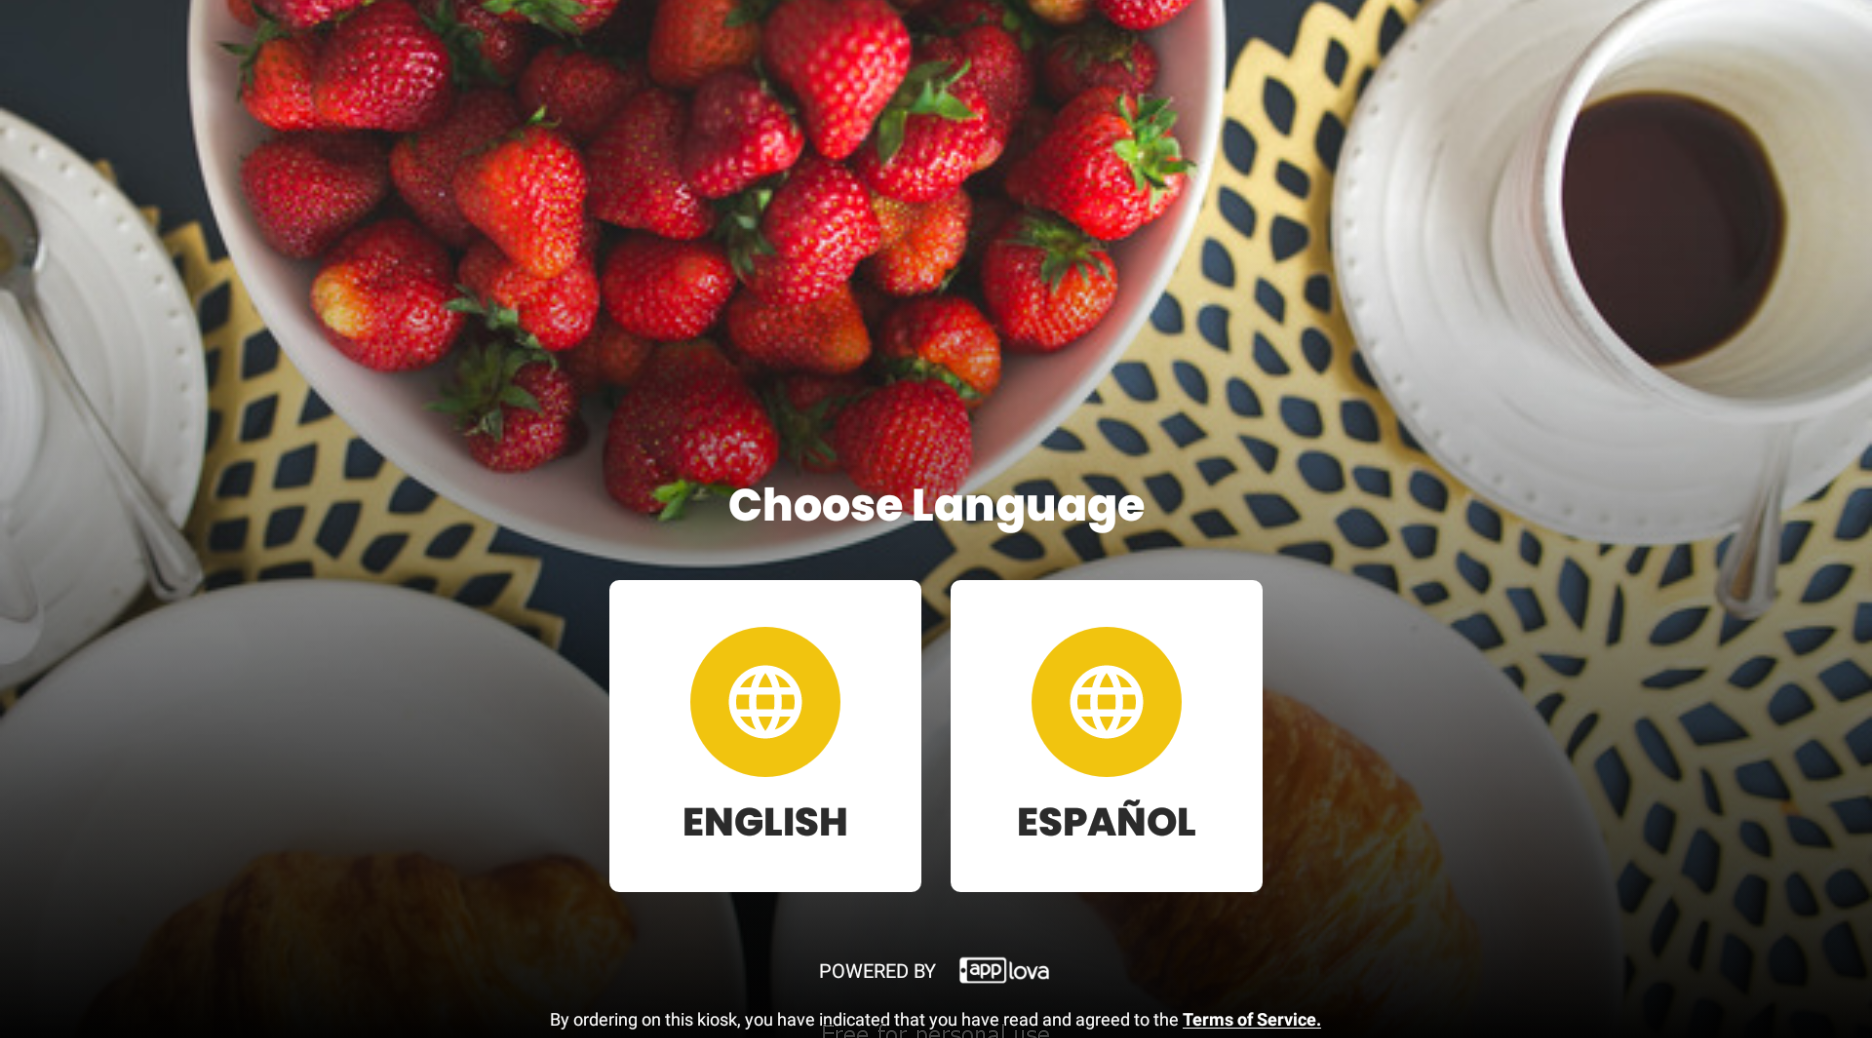
How it Reflects on the Kiosk
How to Enable Order Type Selection on Self-Service Kiosk
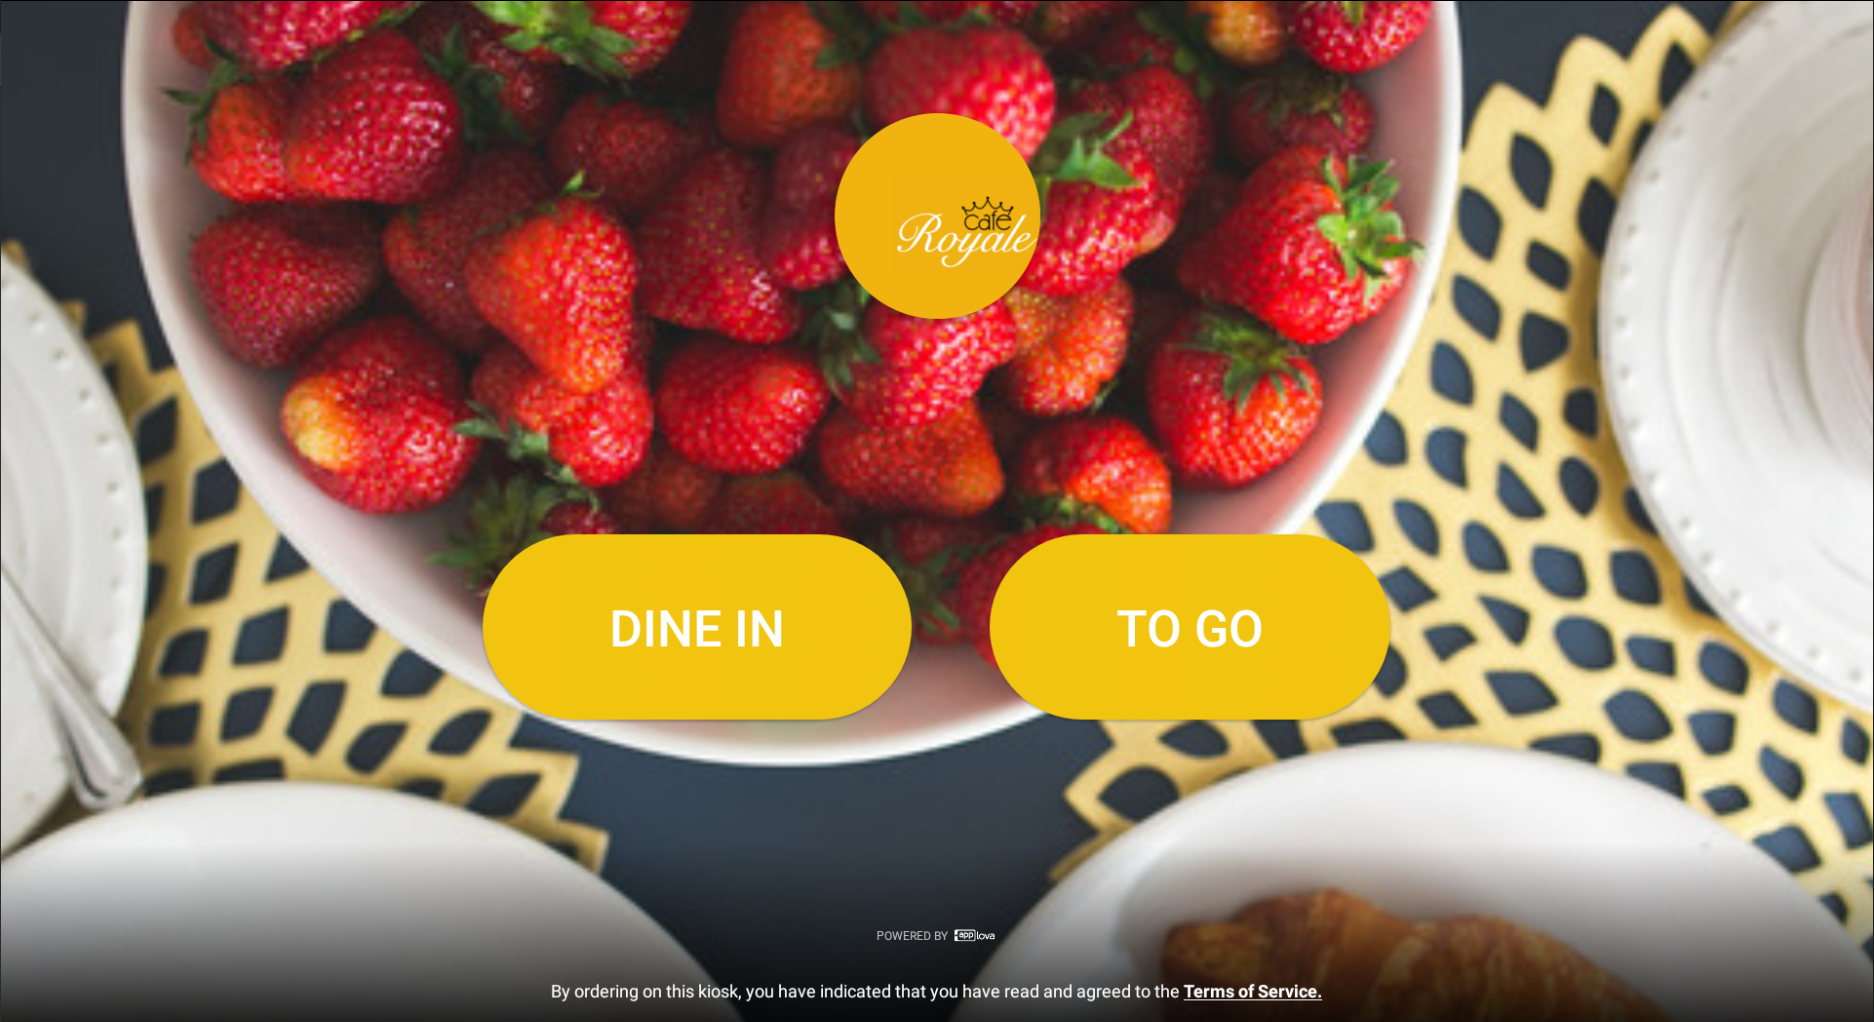
Easily brand and personalize your welcome screens on the self-service kiosk with order type settings without any hassle. If enabled dine-in and to-go will be displayed.
Step 1
Navigate to "Merchant Portal" and go to "Settings".
Step 2
Click on the "Self Service Kiosk" section and from the "Layouts" dropdown, select the "Welcome Screen" tab.
Step 3
Use the toggle under "Order Type Selection" to enable or disable display.
Step 4
The changes will be automatically applied according to your preference.
How it Reflects on the Kiosk
How to Manage Kiosk Checkout Screen?
Easily brand and personalize your checkout screens on the self-service kiosk with checkout messages without any hassle.
How to Customize the Checkout Success Header?
Step 1
Navigate to "Merchant Portal" and go to "Settings".
Step 2
Click on the "Self Service Kiosk" section and from the "Layouts" dropdown, select the "Checkout Screen" tab.
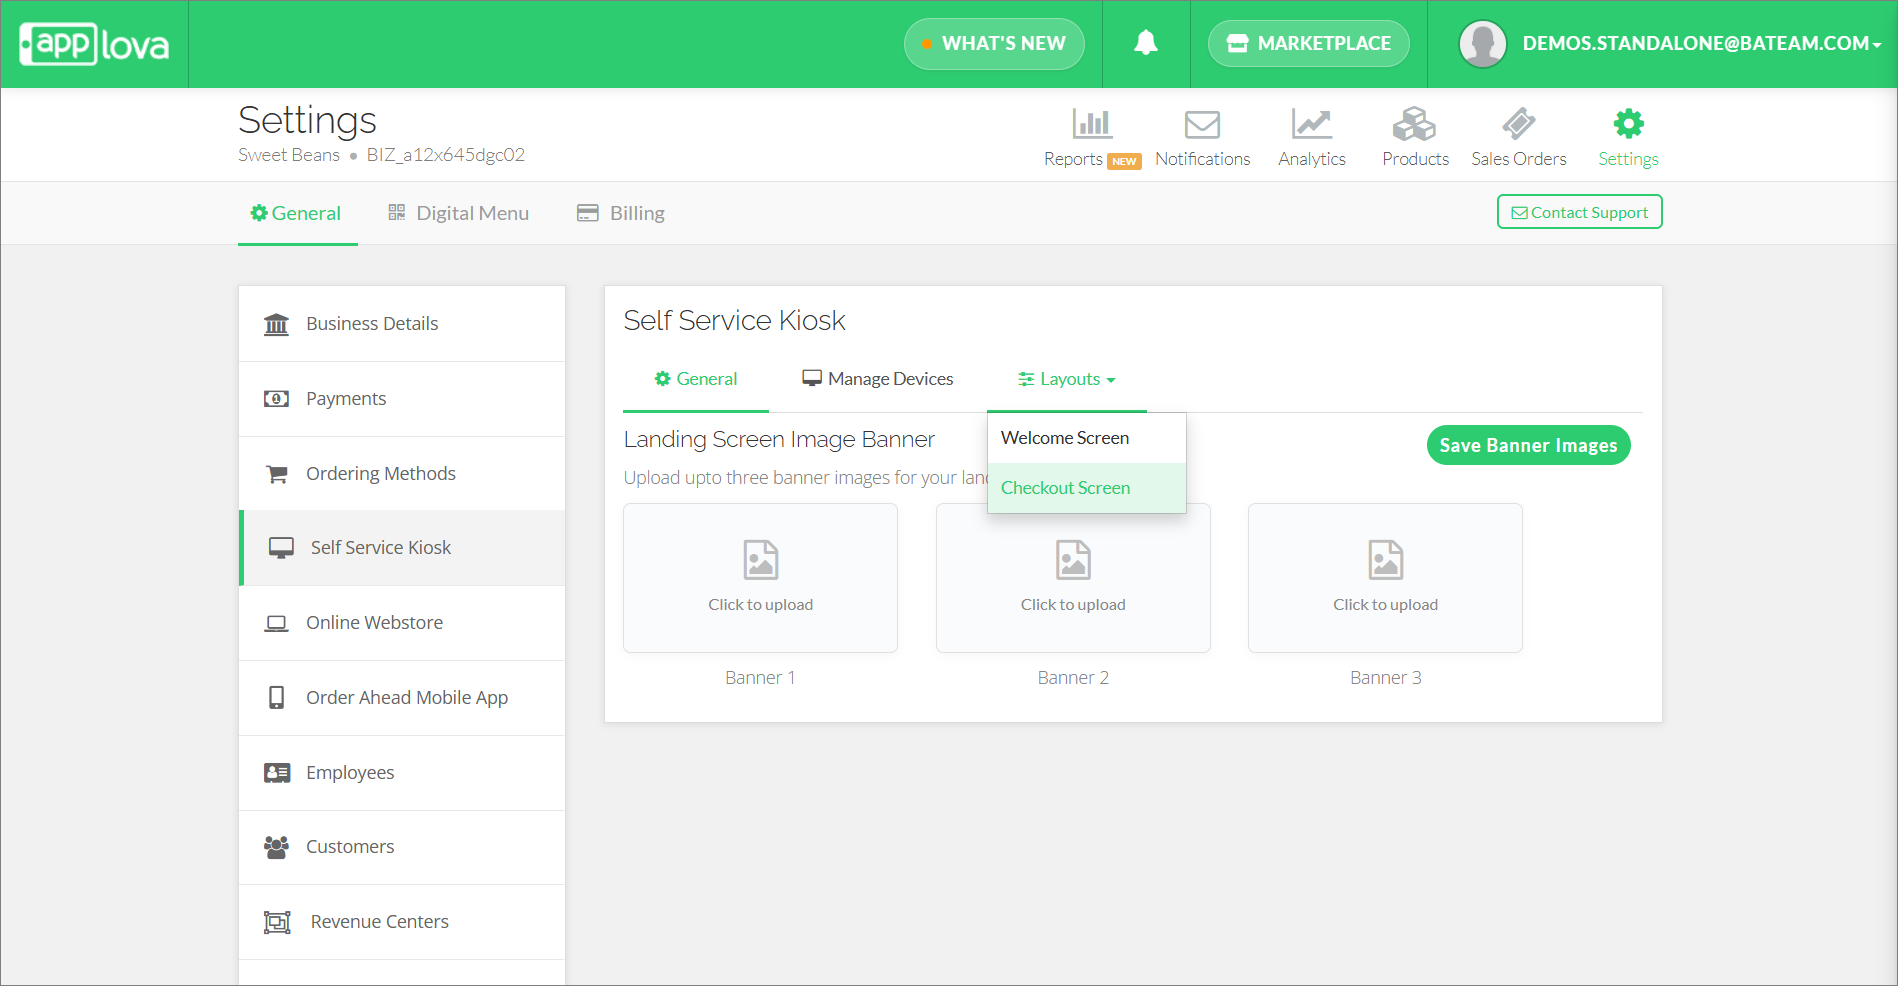
Step 3
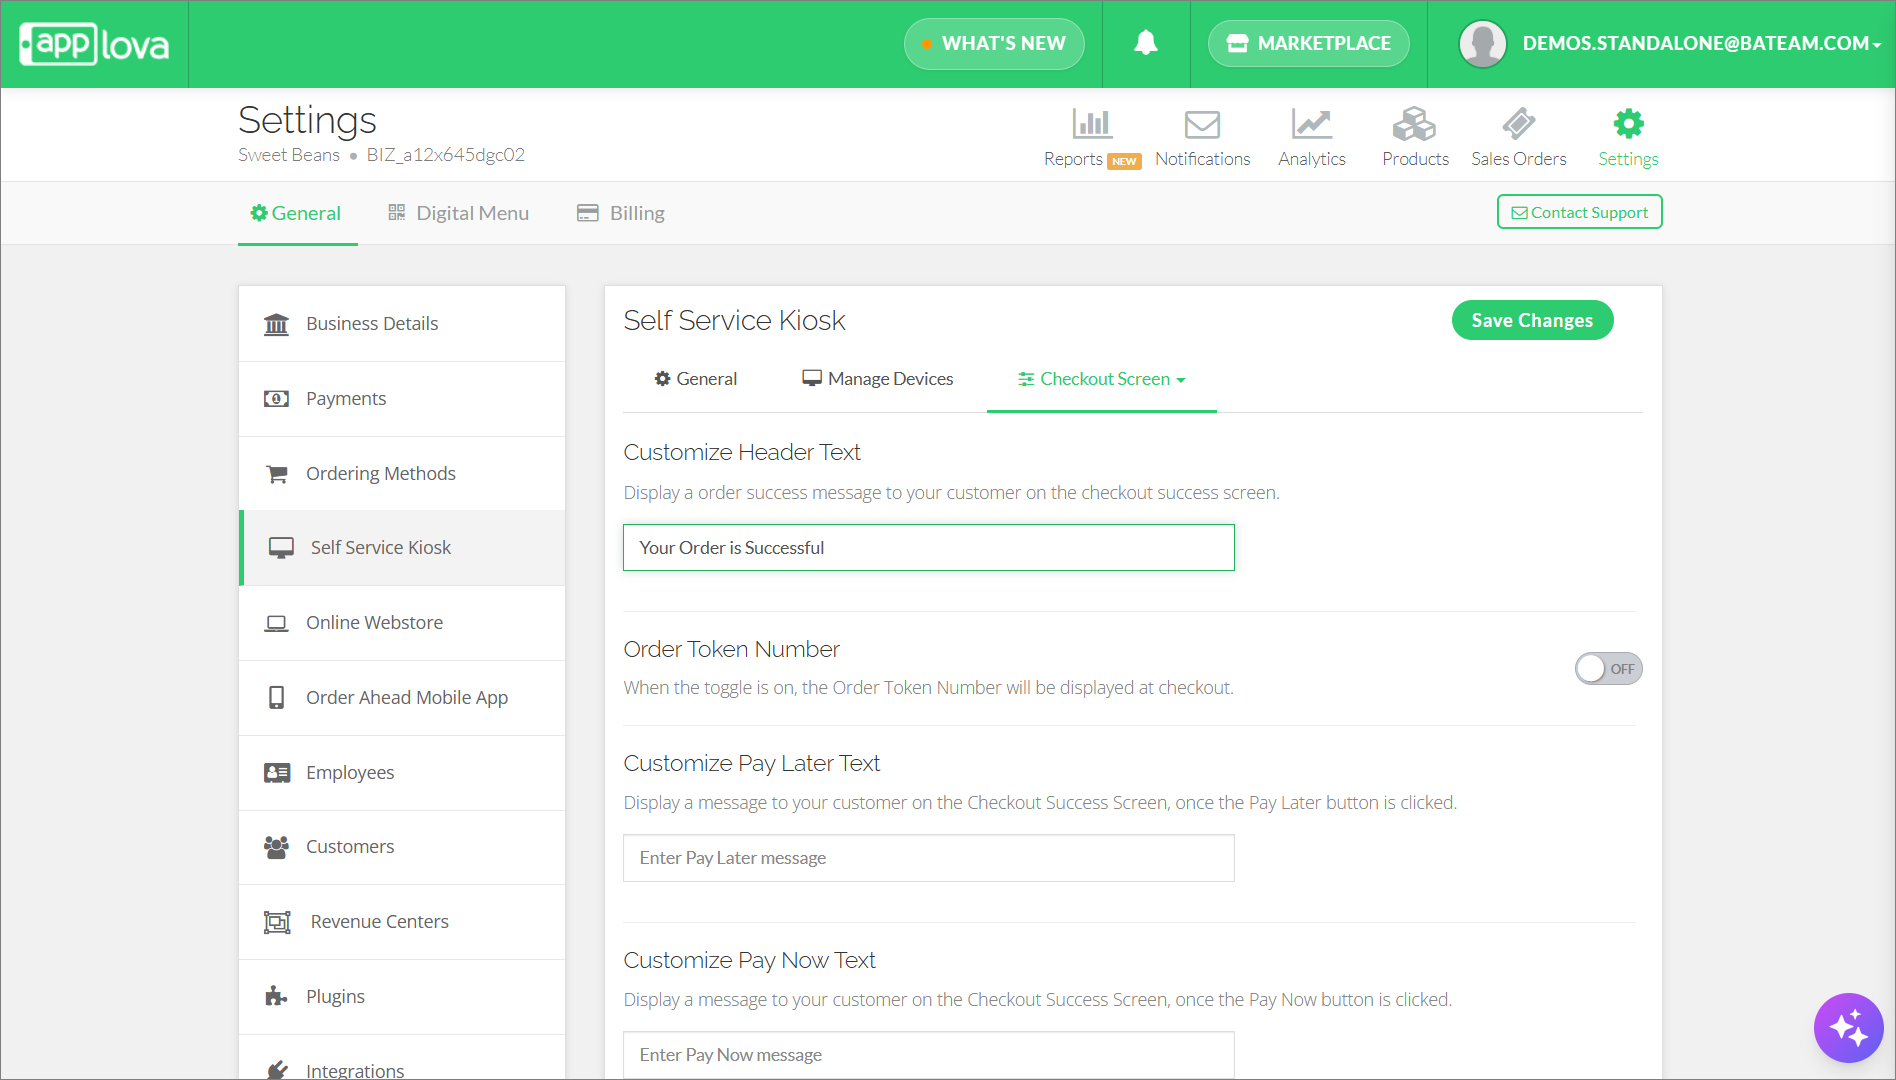
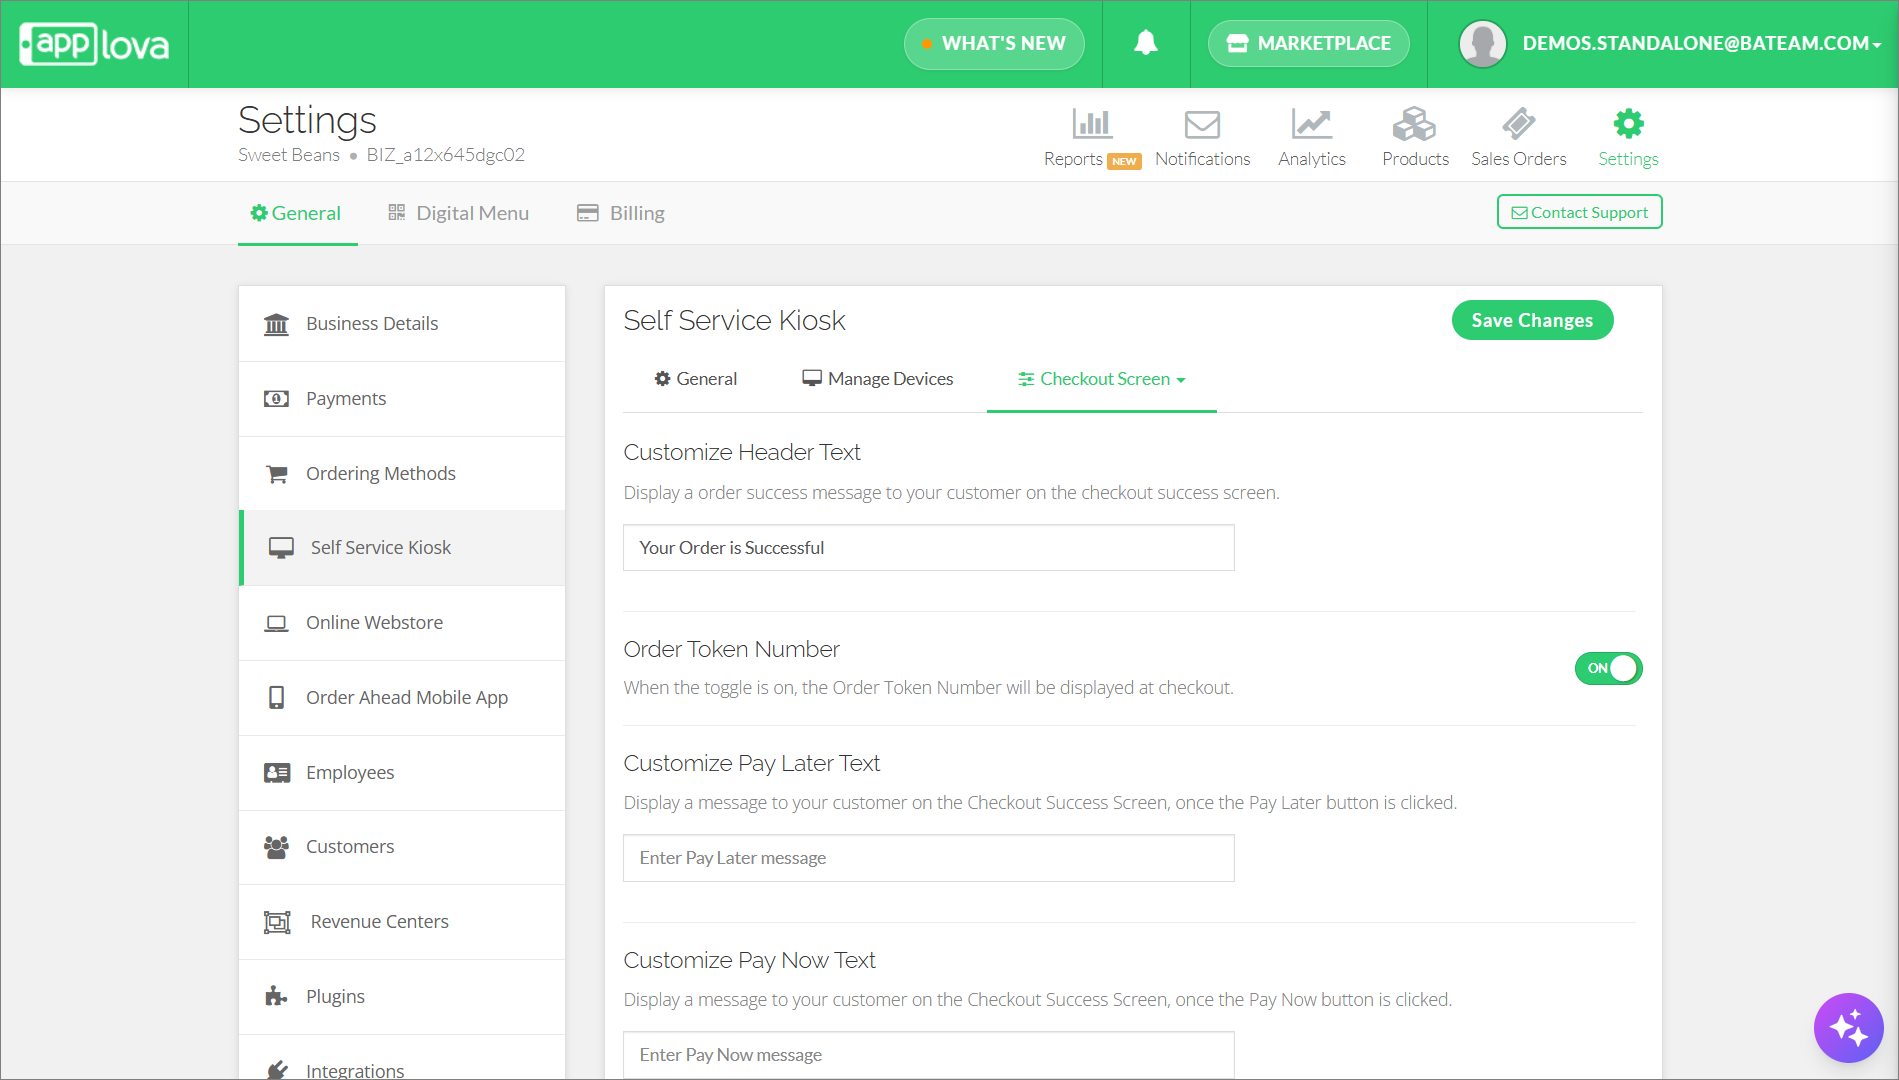
Locate the field labeled "Customize Header Text".
Step 4
Enter your custom header.
Step 5
Click "Save Changes" to confirm.
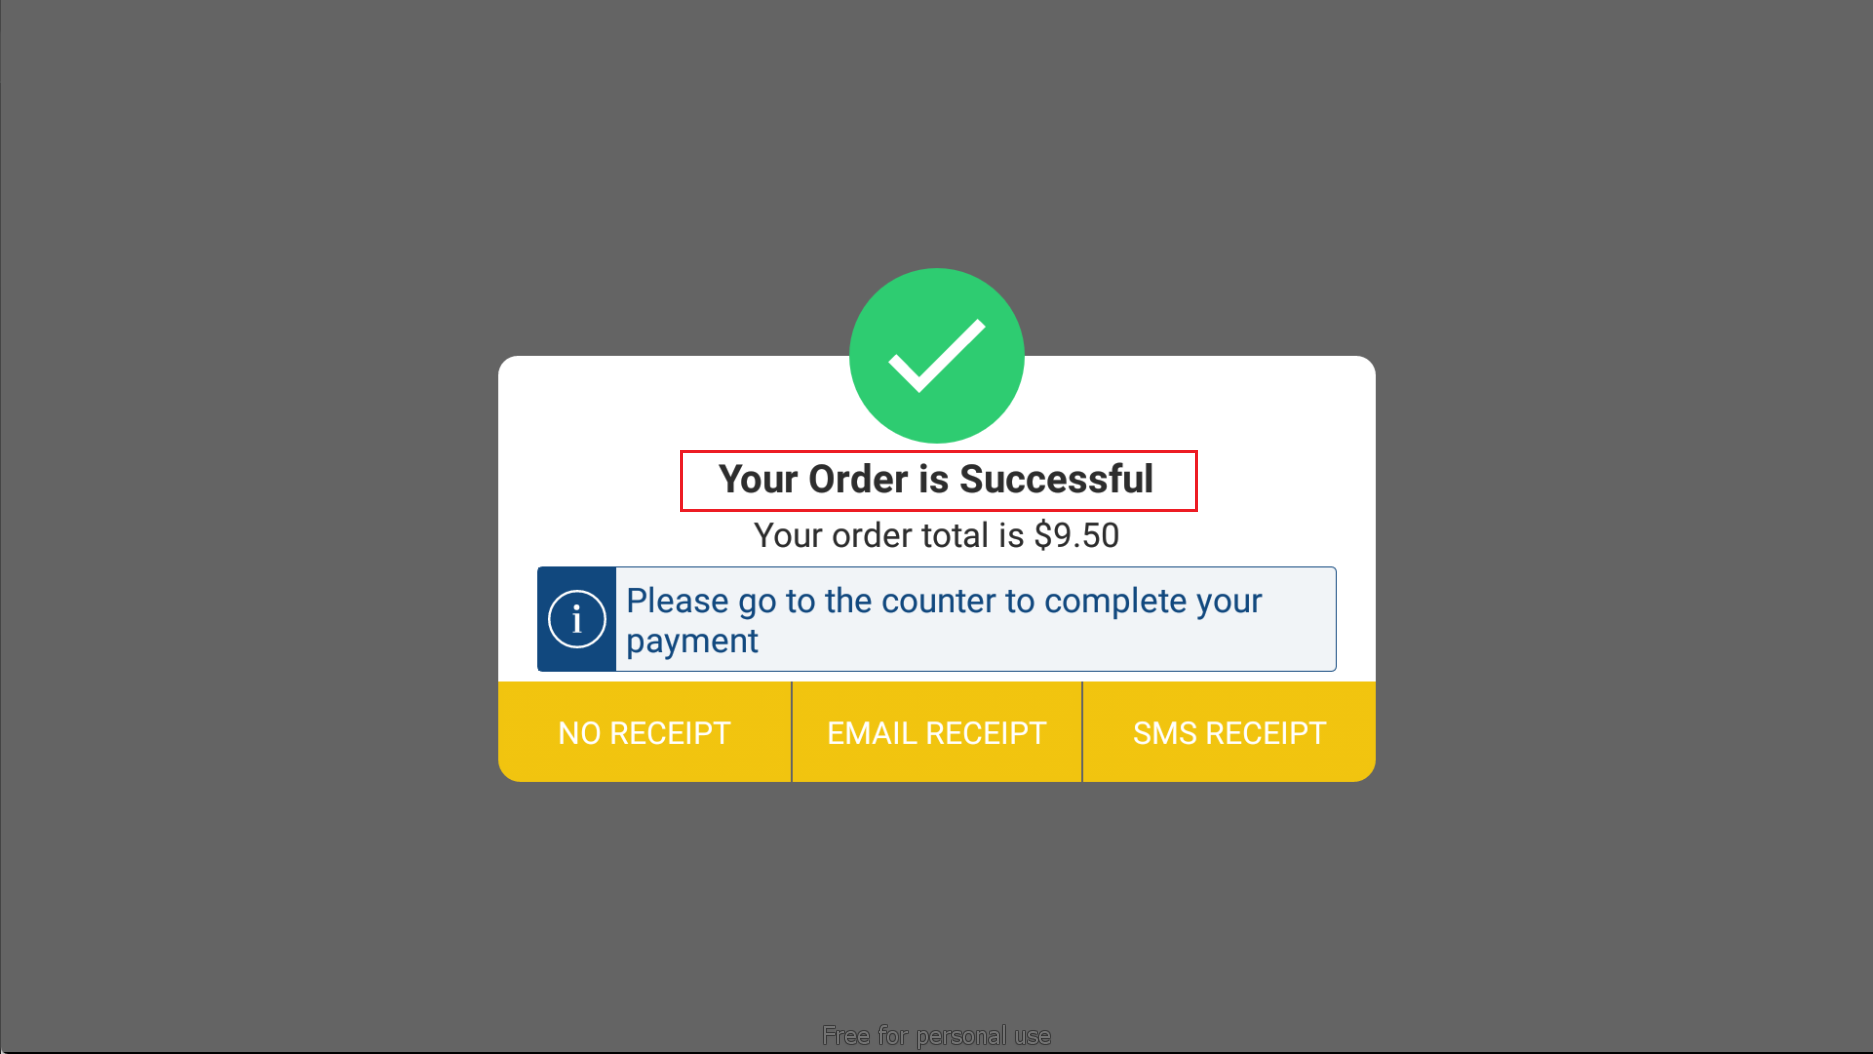
The custom header text will appear at the top of the checkout success screen.How it Reflects on the Kiosk
How to Show or Hide the Order Token Number?
Step 1
Navigate to "Merchant Portal" and go to "Settings".
Step 2
Click on the "Self Service Kiosk" section and from the "Layouts" dropdown, select the "Checkout Screen" tab.
Step 3
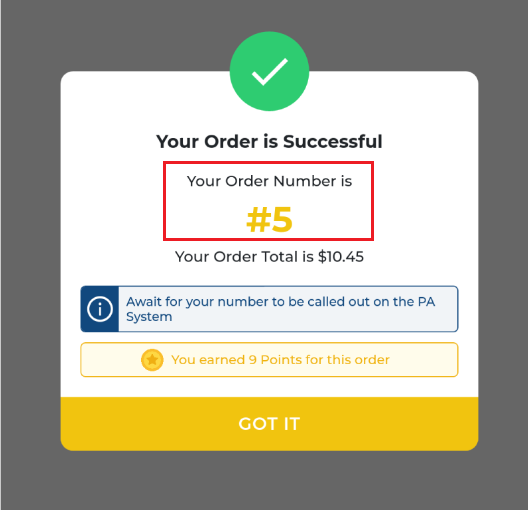
Locate the toggle labeled Order Token Number.
Step 4
Turn the toggle ON or OFF.
Step 5
Click "Save Changes" to apply.
How it Reflects on the Kiosk
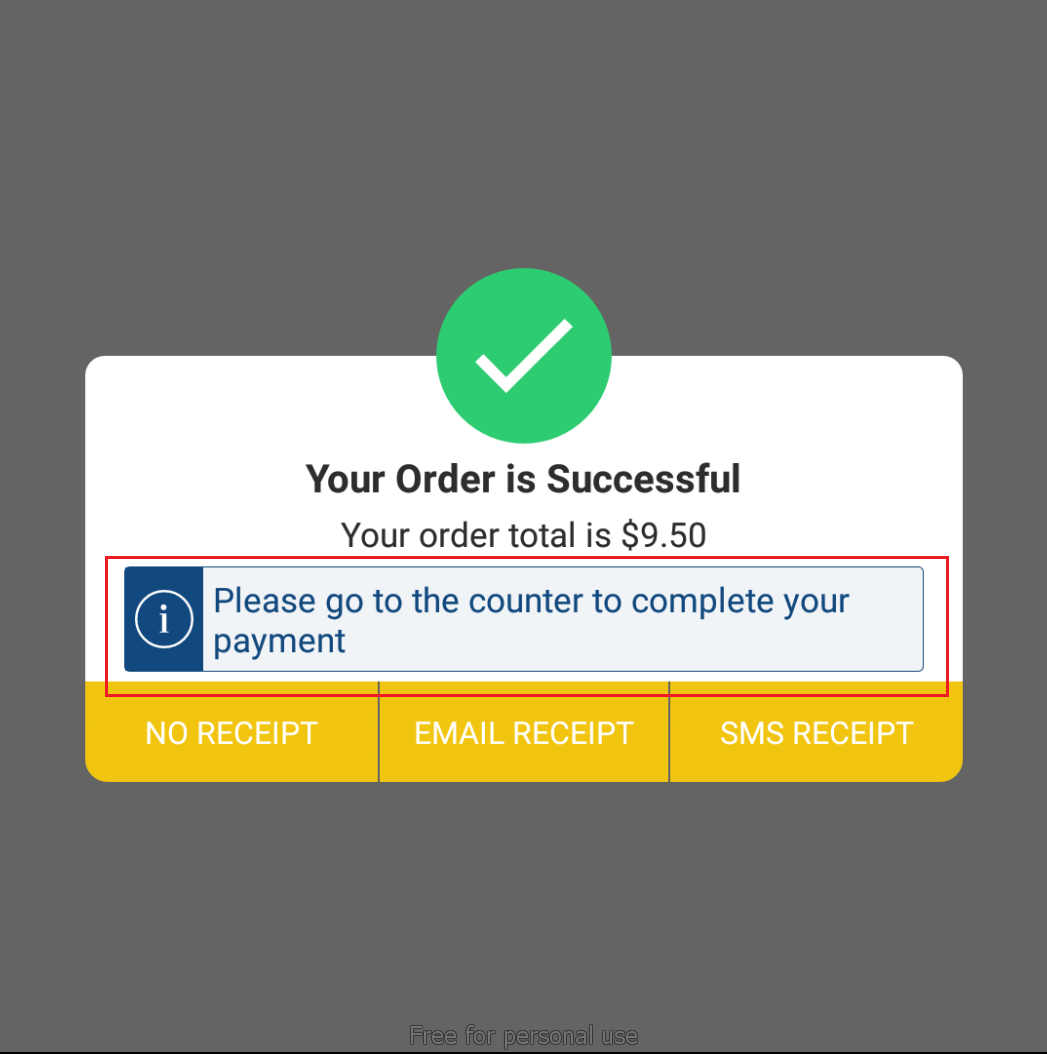
How to Customize the “Pay Later” Message?
Step 1
Navigate to "Merchant Portal" and go to "Settings".
Step 2
Click on the "Self Service Kiosk" section and from the "Layouts" dropdown, select the "Checkout Screen" tab.
Step 3
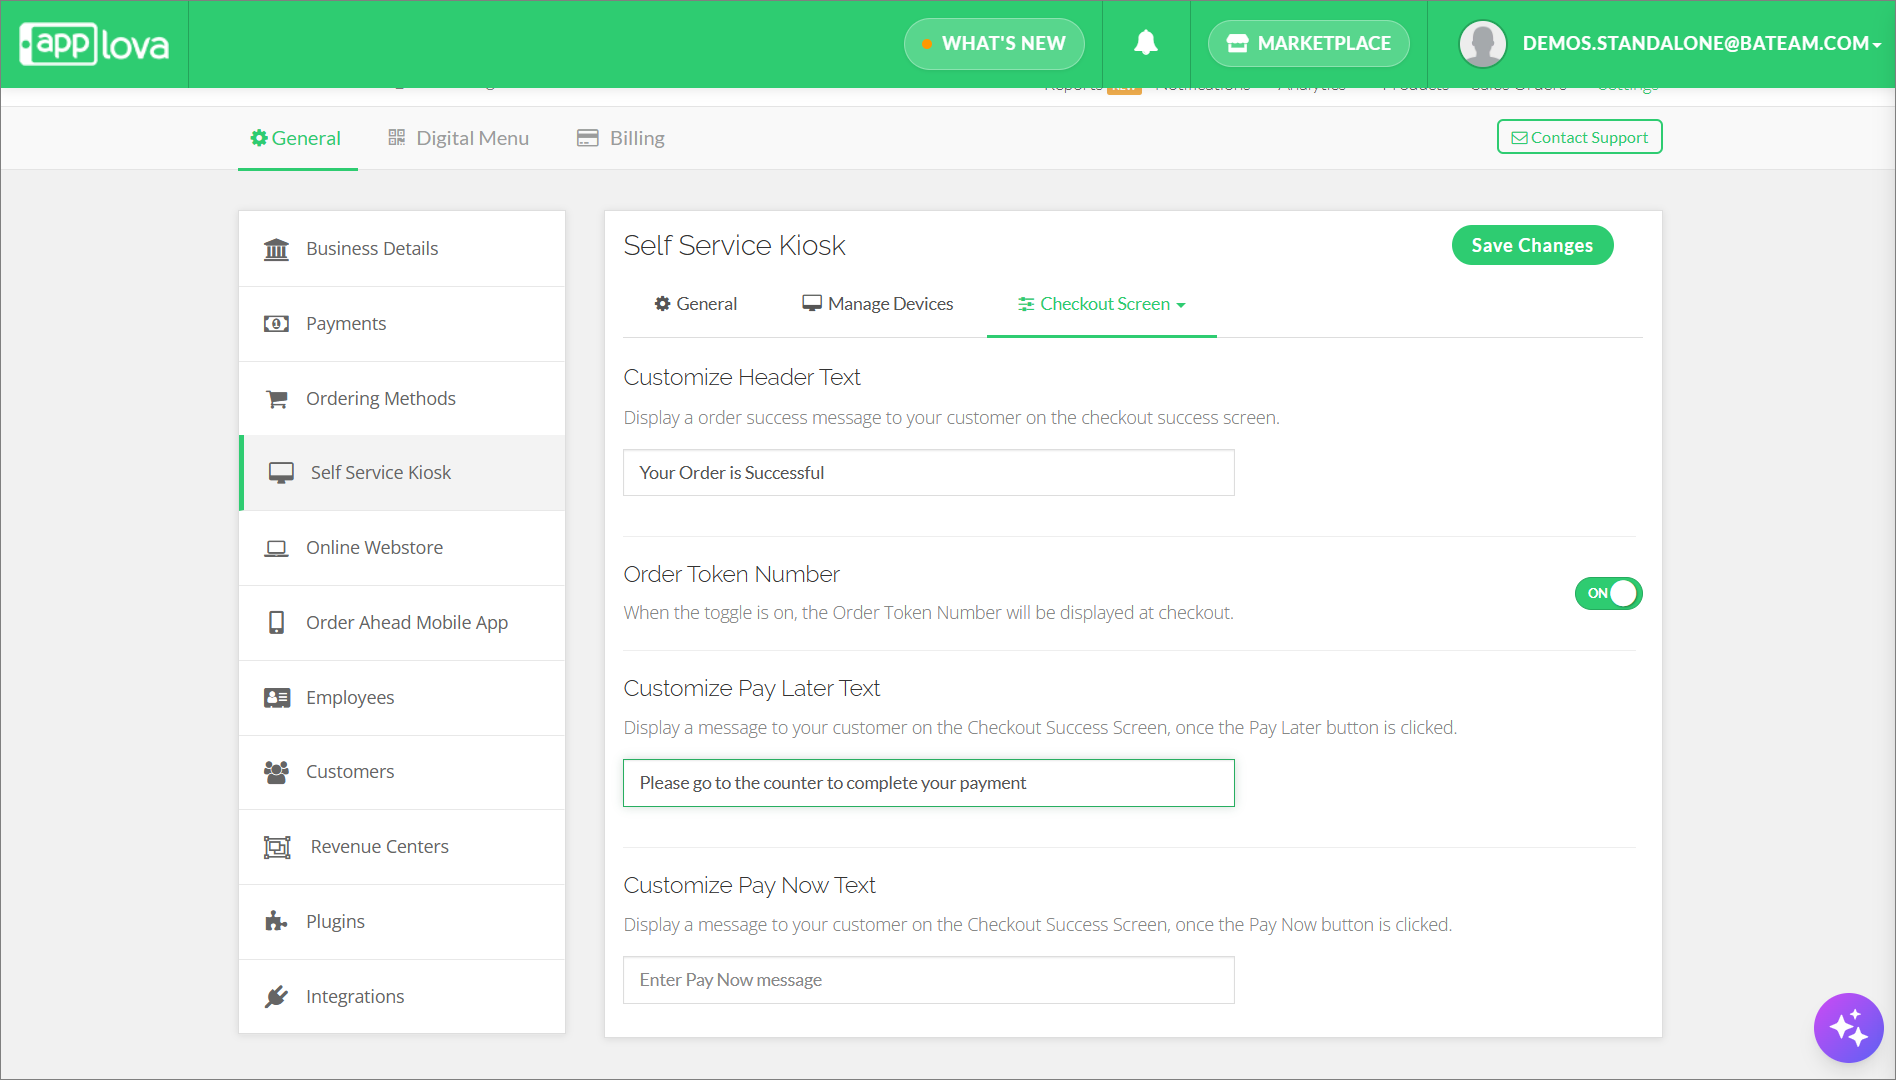
Scroll to the field labeled "Customize Pay Later Text".
Step 4
Enter your custom message.
Step 5
Click "Save Changes" to confirm.
How it Reflects on the Kiosk
How to Customize the “Pay Now” Message?
Step 1
Navigate to "Merchant Portal" and go to "Settings".
Step 2
Click on the "Self Service Kiosk" section and from the "Layouts" dropdown, select the "Checkout Screen" tab.
Step 3
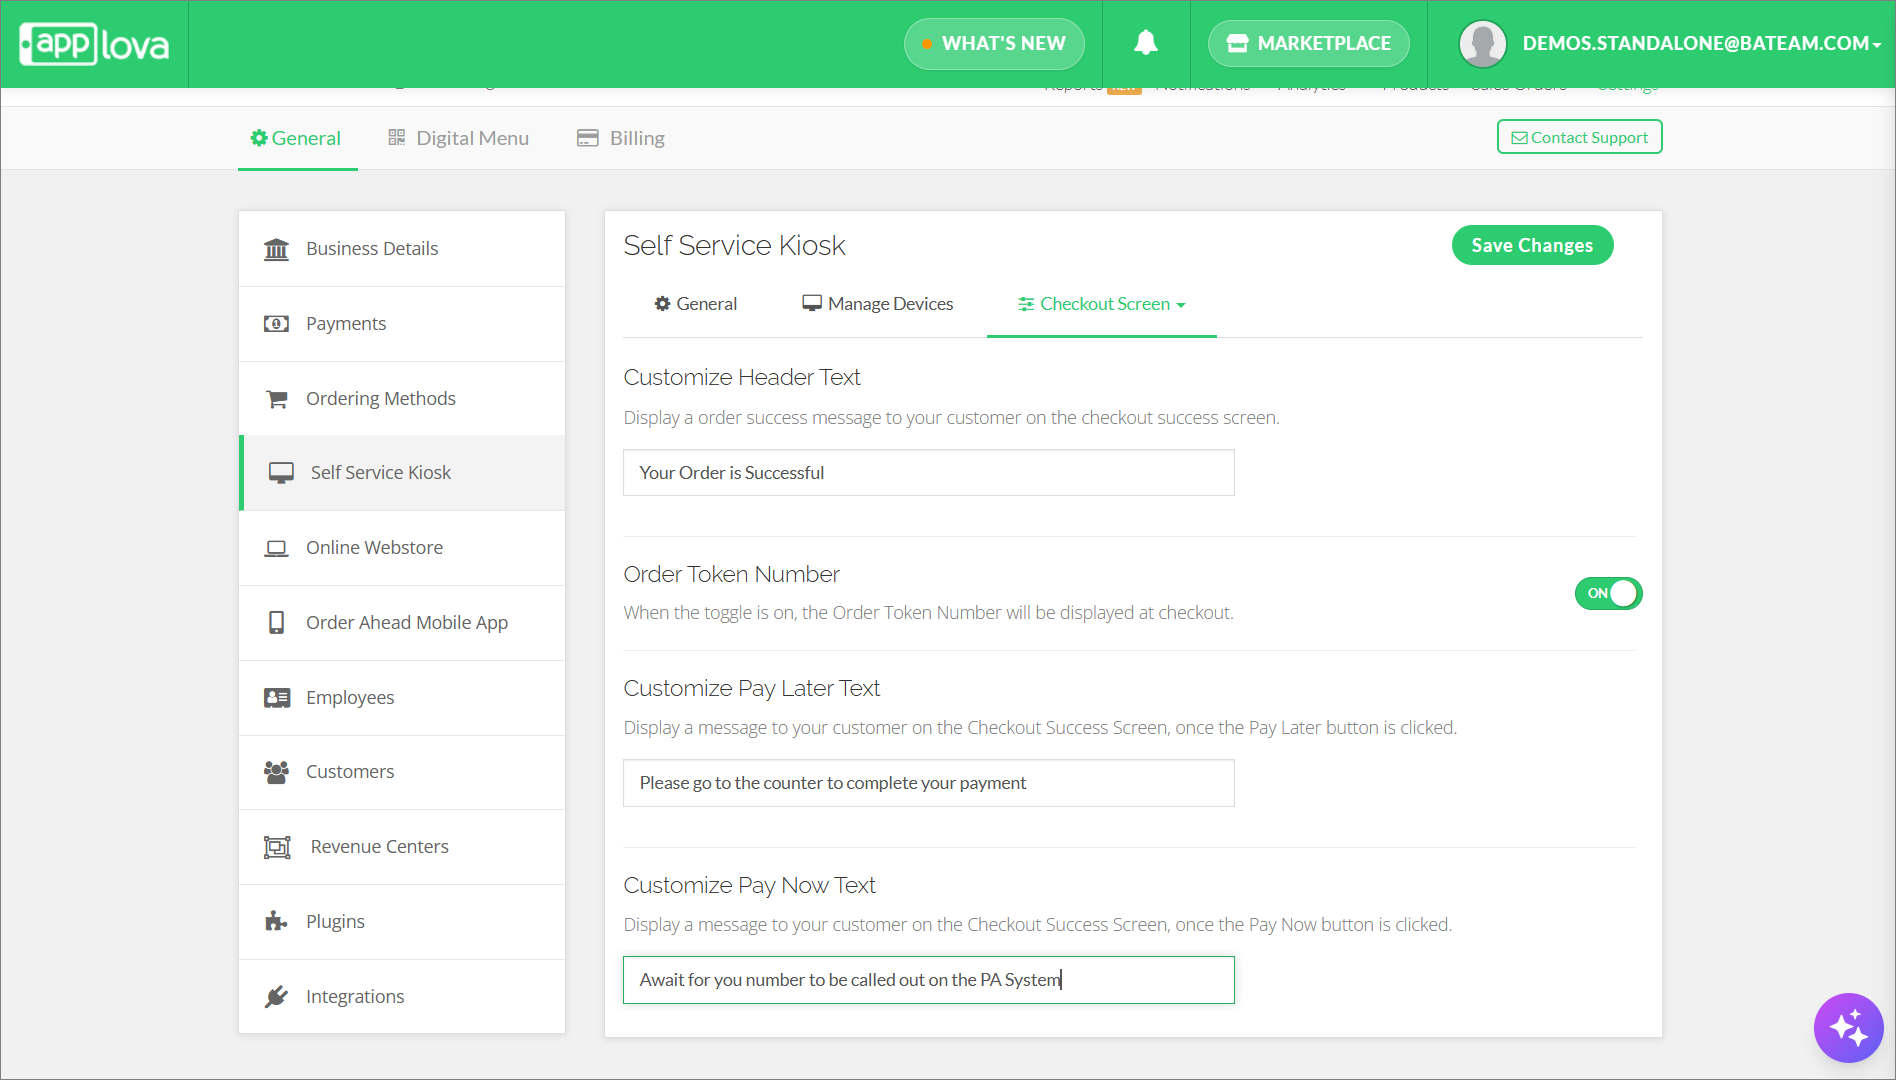
Scroll to the field labeled "Customize Pay Now Text".
Step 4
Enter your custom message.
Step 5
Click "Save Changes" to confirm.
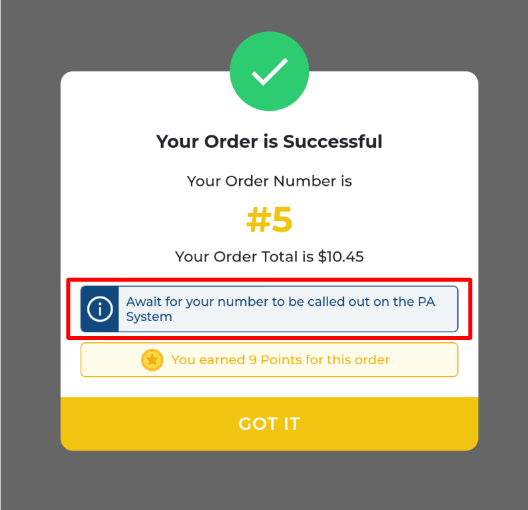
How it Reflects on the Kiosk
Related Articles
How to Manage Categories on Merchant Portal?
In this article, you will learn how to manage category-related settings in the Merchant Portal to keep products clearly organized and displayed correctly. How to Add Category? This feature allows the merchant to add a new product category. Step 1 ...How to Assign Categories and Products to Specific Kiosk Devices?
Supported From : Advanced Android Kiosk, Samsung Kiosk (1.7.0.RELEASE) Once this feature is enabled, you can select the specific kiosk devices where the categories or products should be visible. Use Case Scenario: Urban Bites is a restaurant that ...How to Configure Alcohol Warning Message via Merchant Portal?
Supported on: Clover & Standalone Kiosks This capability enables the display of an alcohol warning message on the cart screen when alcoholic products are added to the cart. You can customize both the message's content and the text on the associated ...How to Manage Customers via Merchant Portal
This feature allows merchants to quickly search for specific customers, filter customer records by a selected date range and delete inactive, duplicate, or invalid customer records from their Customer List. How to Search for a Customer? Step 1 ...How to Manage Products via Merchant Web?
This article explains how merchants can add, edit, duplicate, and delete products by following the steps provided. How to Add a Product? Step 1 Login to "Applova Merchant Web". Step 2 Go to "Products" and click on "Add New Product". Step 3 Fill in ...