How to Manage Categories on Merchant Portal?

How to Manage Categories on Merchant Portal?

In this article, you will learn how to manage category-related settings in the Merchant Portal to keep products clearly organized and displayed correctly.
How to Add Category?
This feature allows the merchant to add a new product category.

Step 1

Login to "Applova Merchant Portal".  


Step 2

Go to "Categories" and click on "Add New Category".
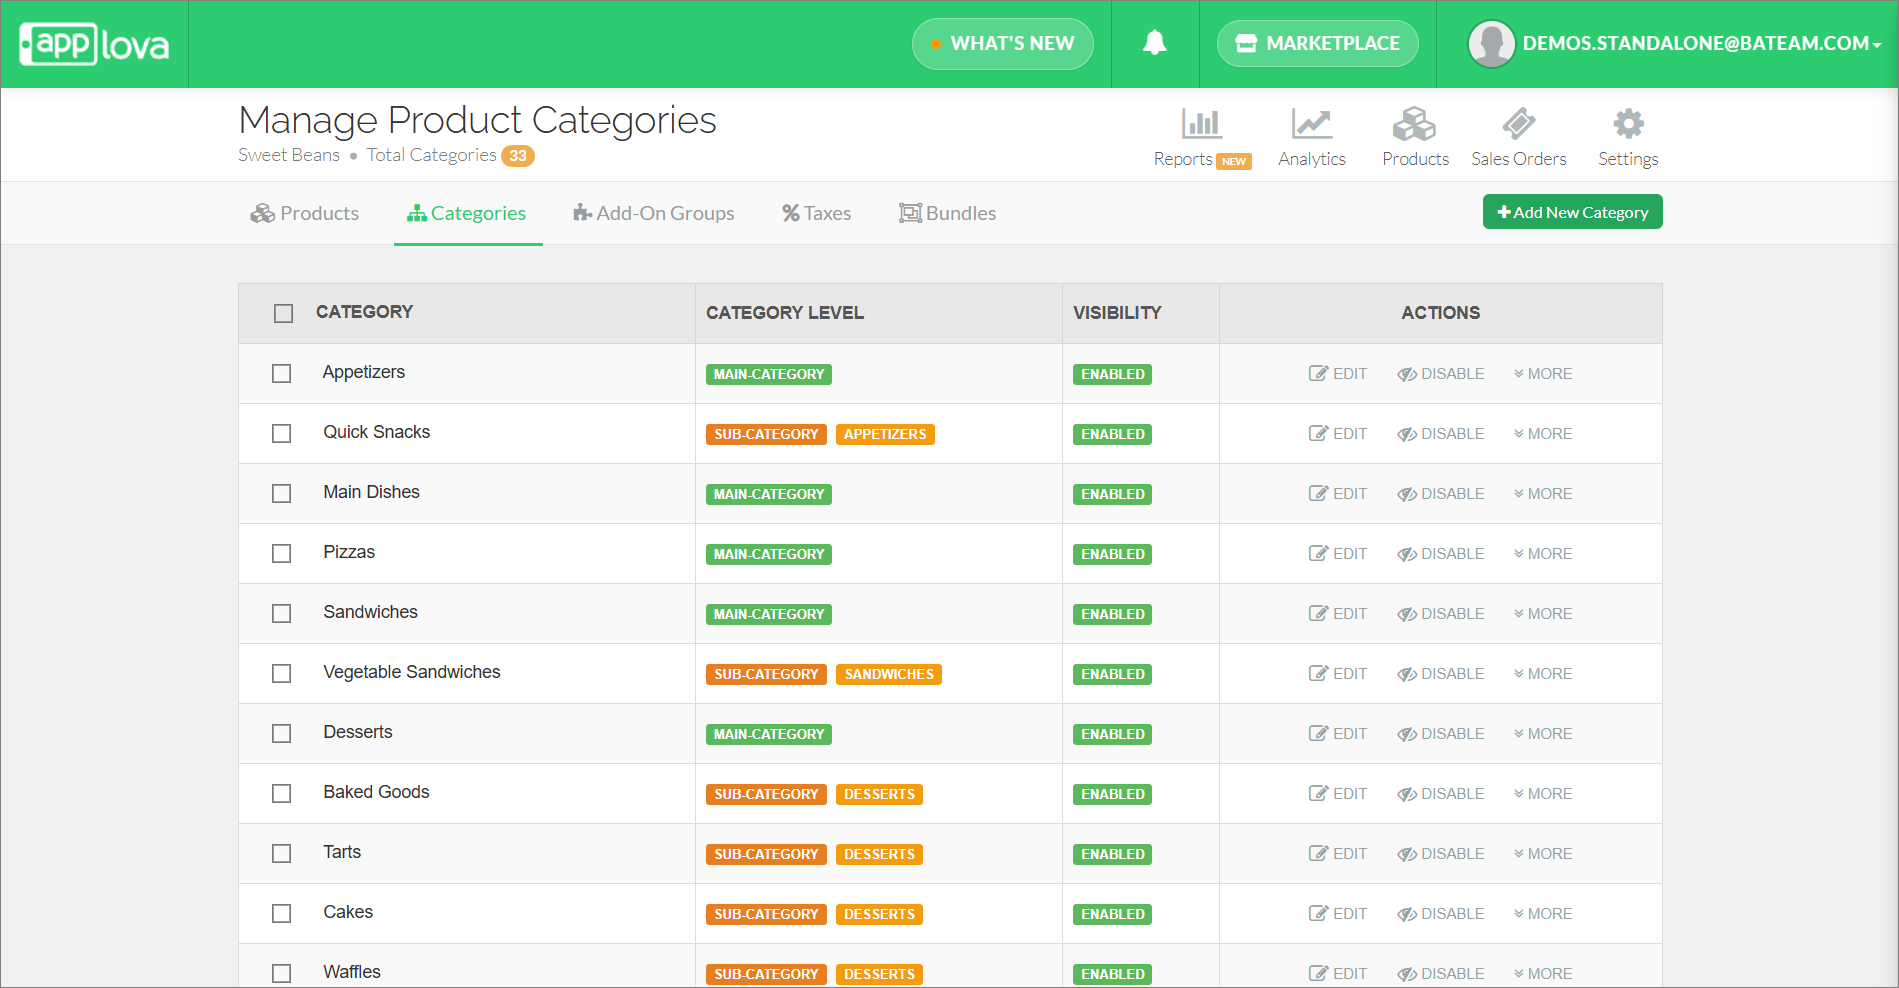


Step 3

Fill in the required fields and enable the preferred channels: Mobile App / Web Store / Self-Service Kiosk / Digital Dine-In / POS Register. 
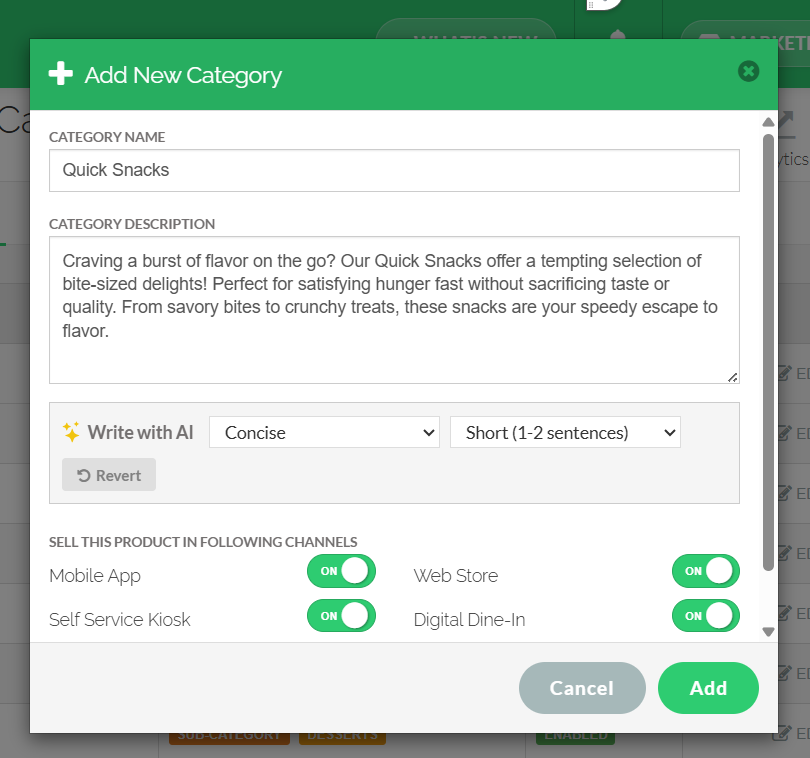


Step 4
Then click on "Add".  
Info
Feature in Action (Watch Video):
How to Edit a Category?
This feature allows the merchant to edit a product category.

Step 1

Login to "Applova Merchant Web".


Step 2

Click "Products" and go to the "Categories" tab.


Step 3
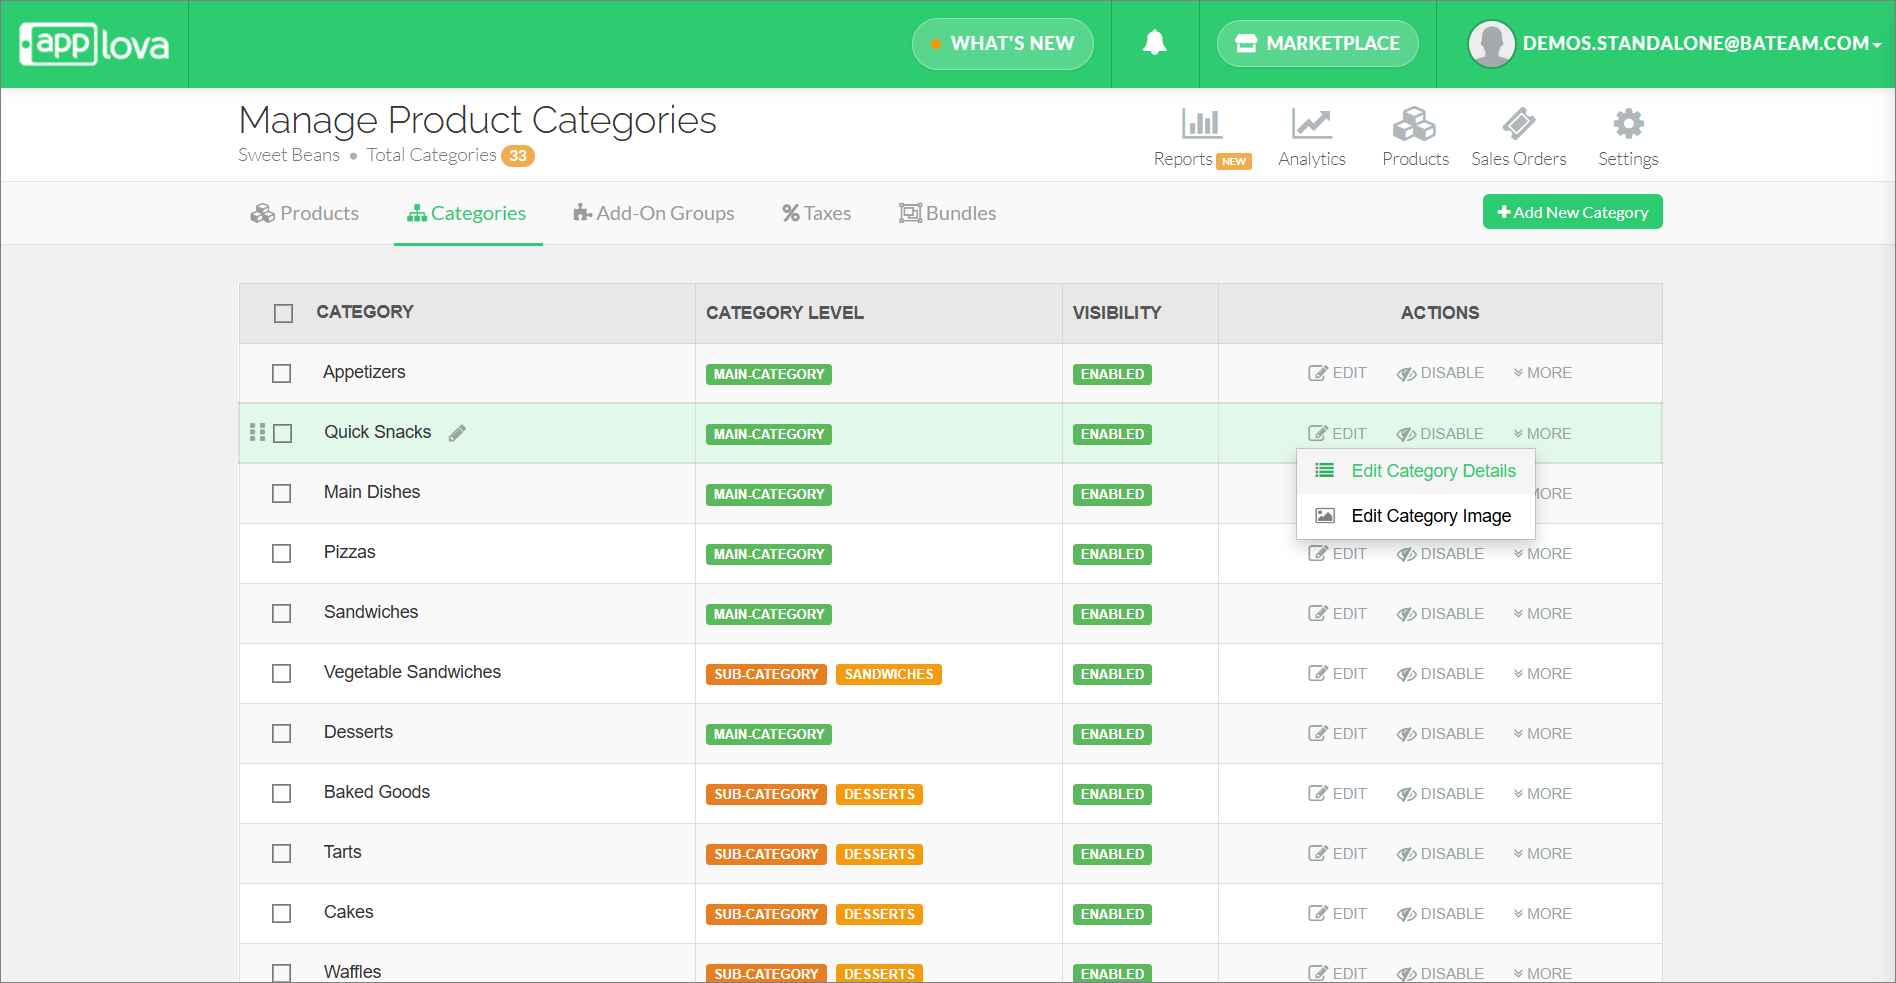
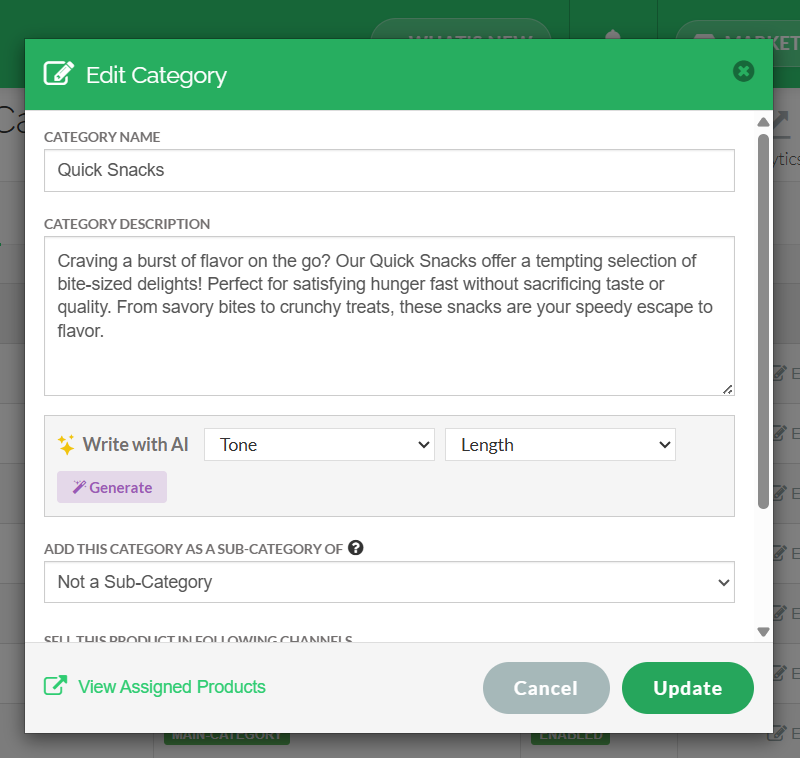
Click "Edit" and select "Edit Category Details".


Step 4

Edit the required fields and click "Update".

How to Edit a Category Image?

Step 1

Login to "Applova Merchant Web".


Step 2

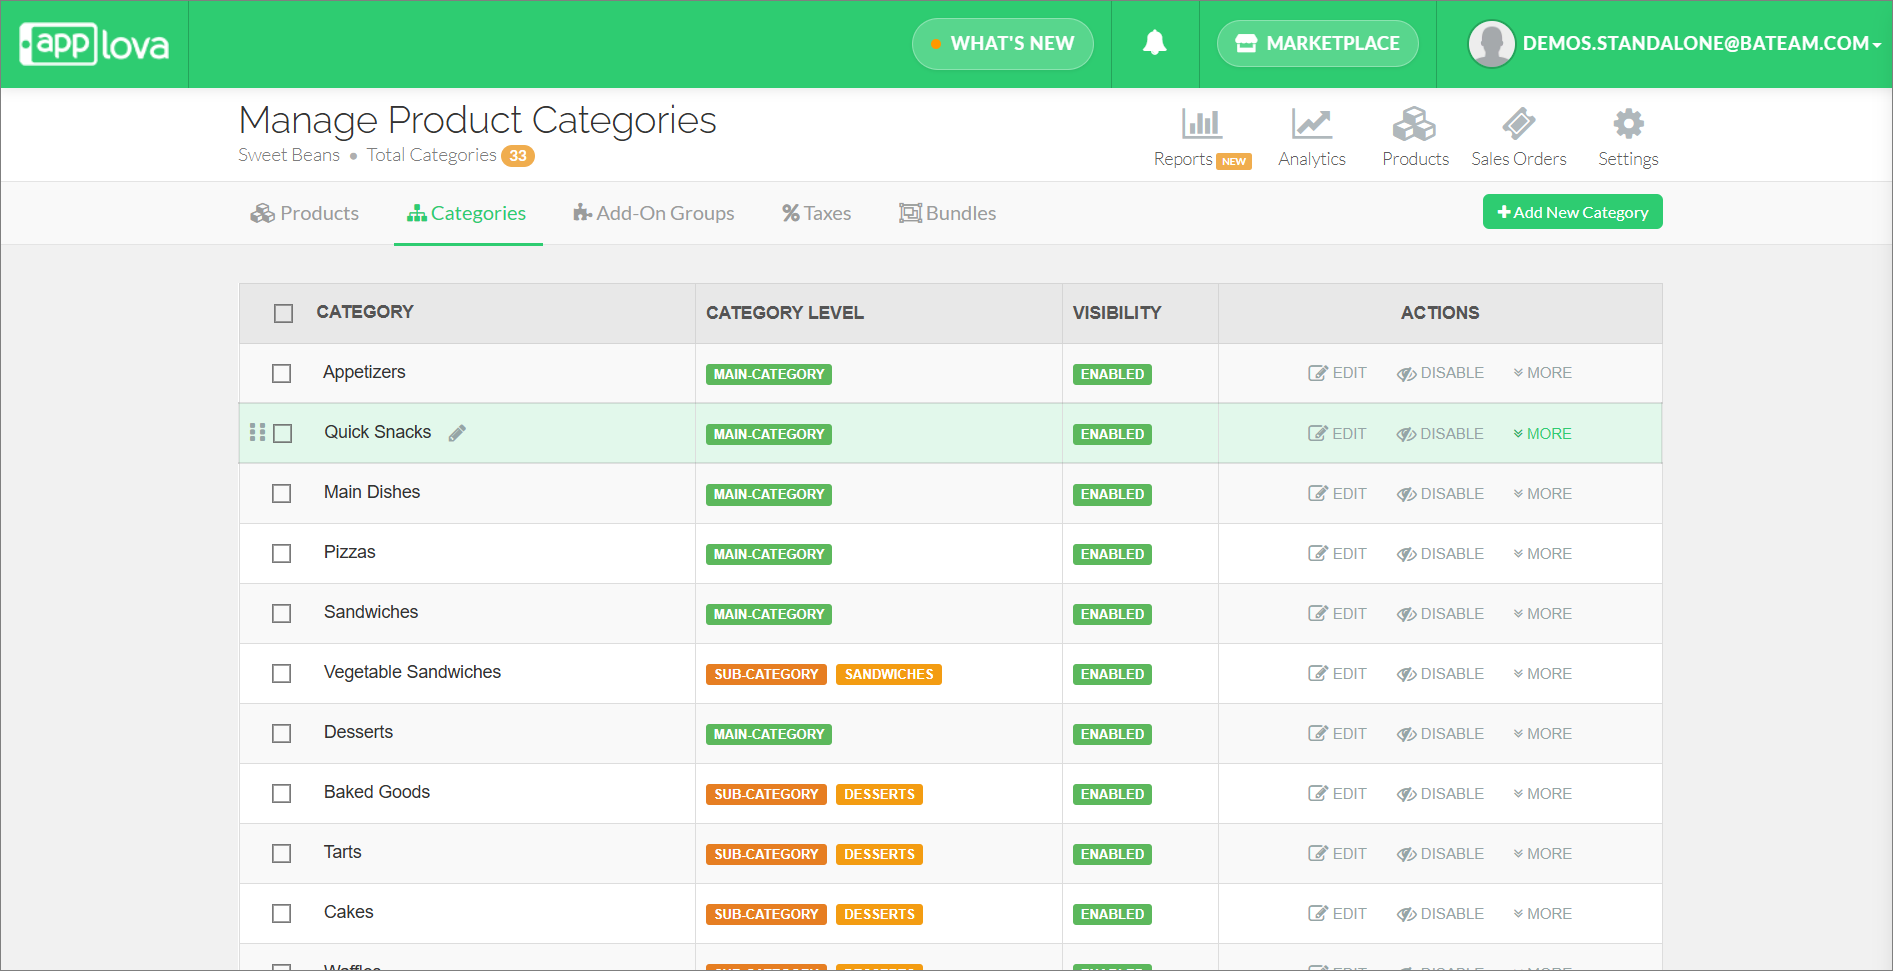
Click "Products" and go to "Categories" tab.


Step 3

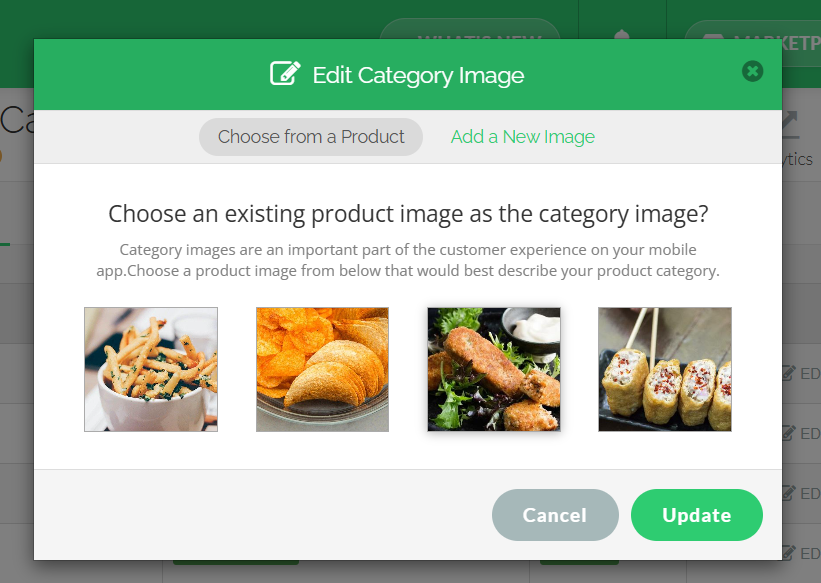
Click "Edit" and select "Edit Category Image".
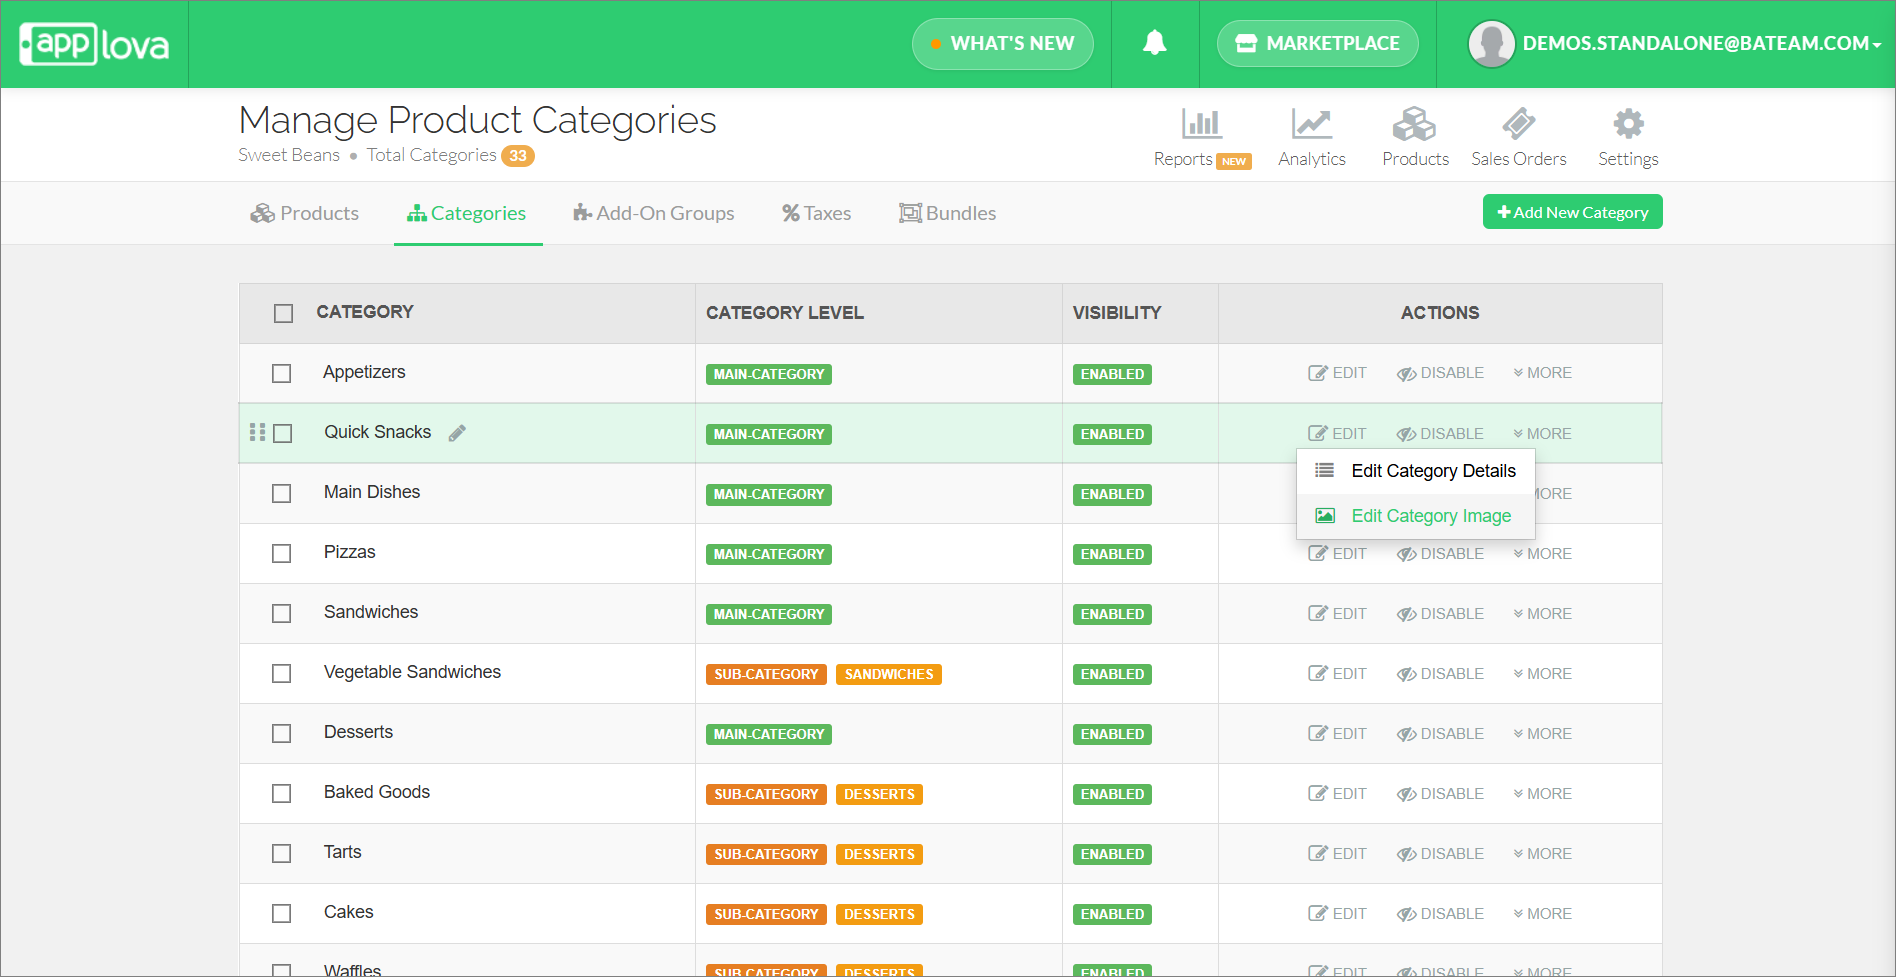


Step 4

Select one of the given options, "Choose from a Product" or "Add a New Image".


Step 5

Click "Update".
How to Delete a Category?
This feature allows the merchant to delete a category.

Step 1
Login to "Applova Merchant Web". 

Step 2
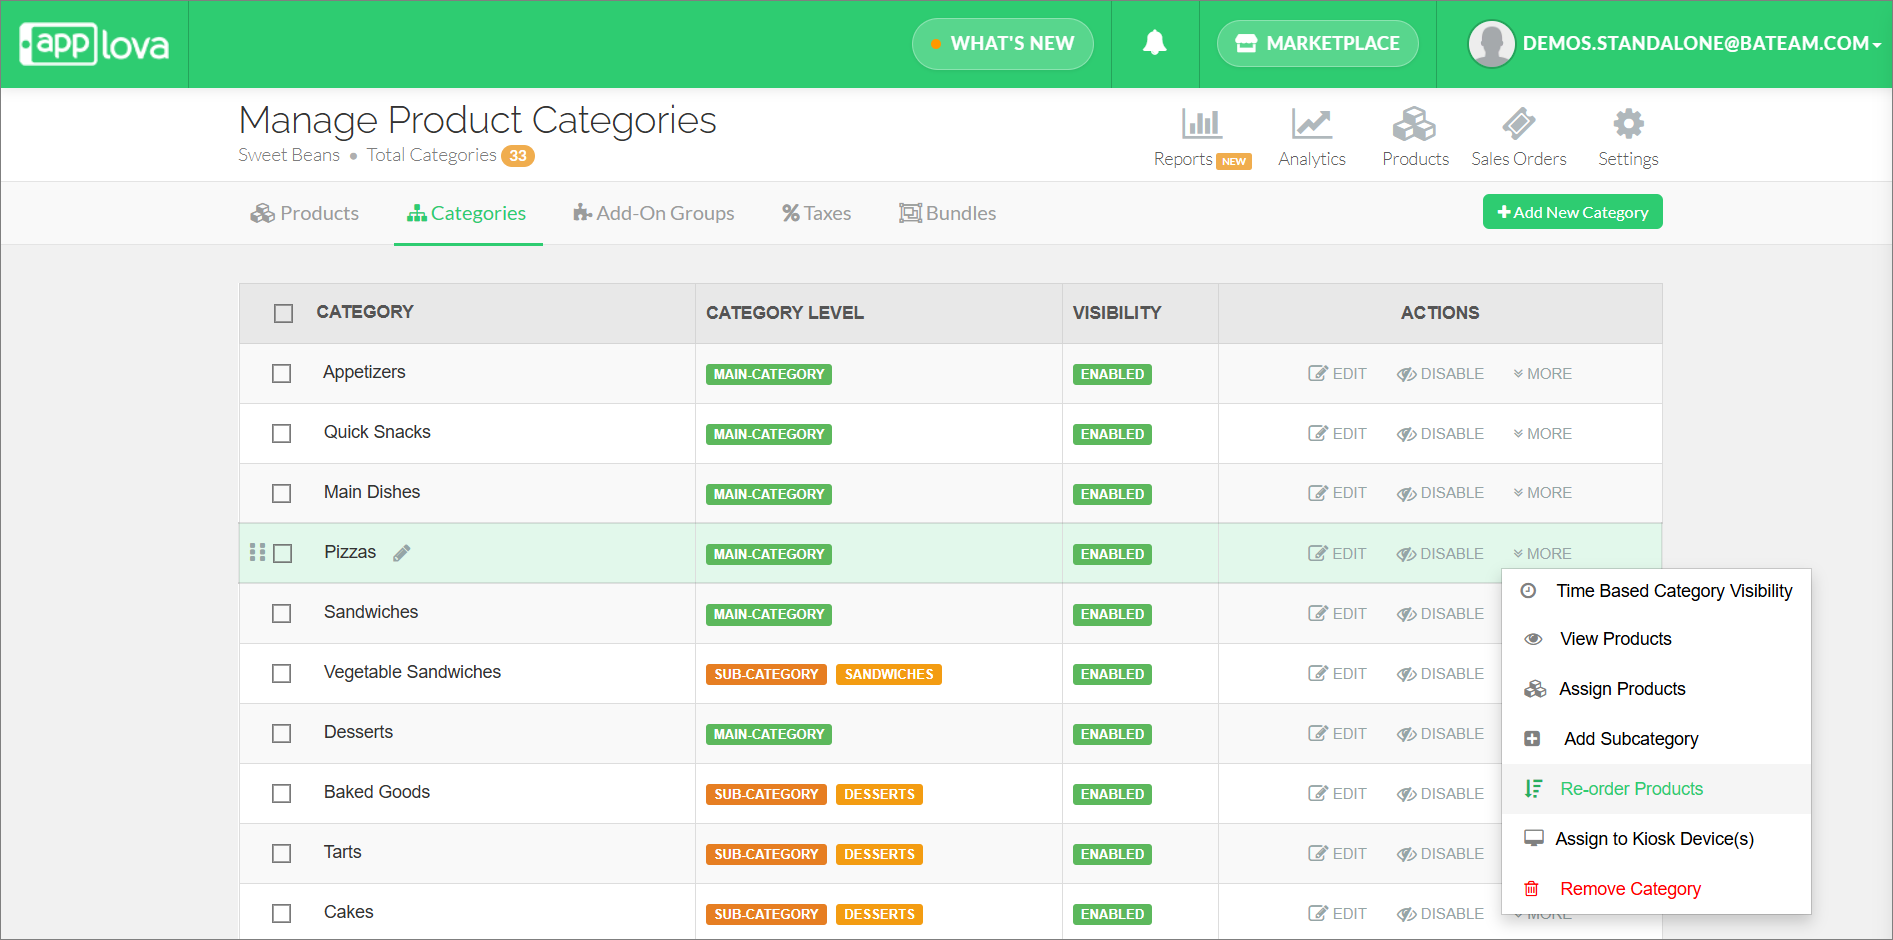
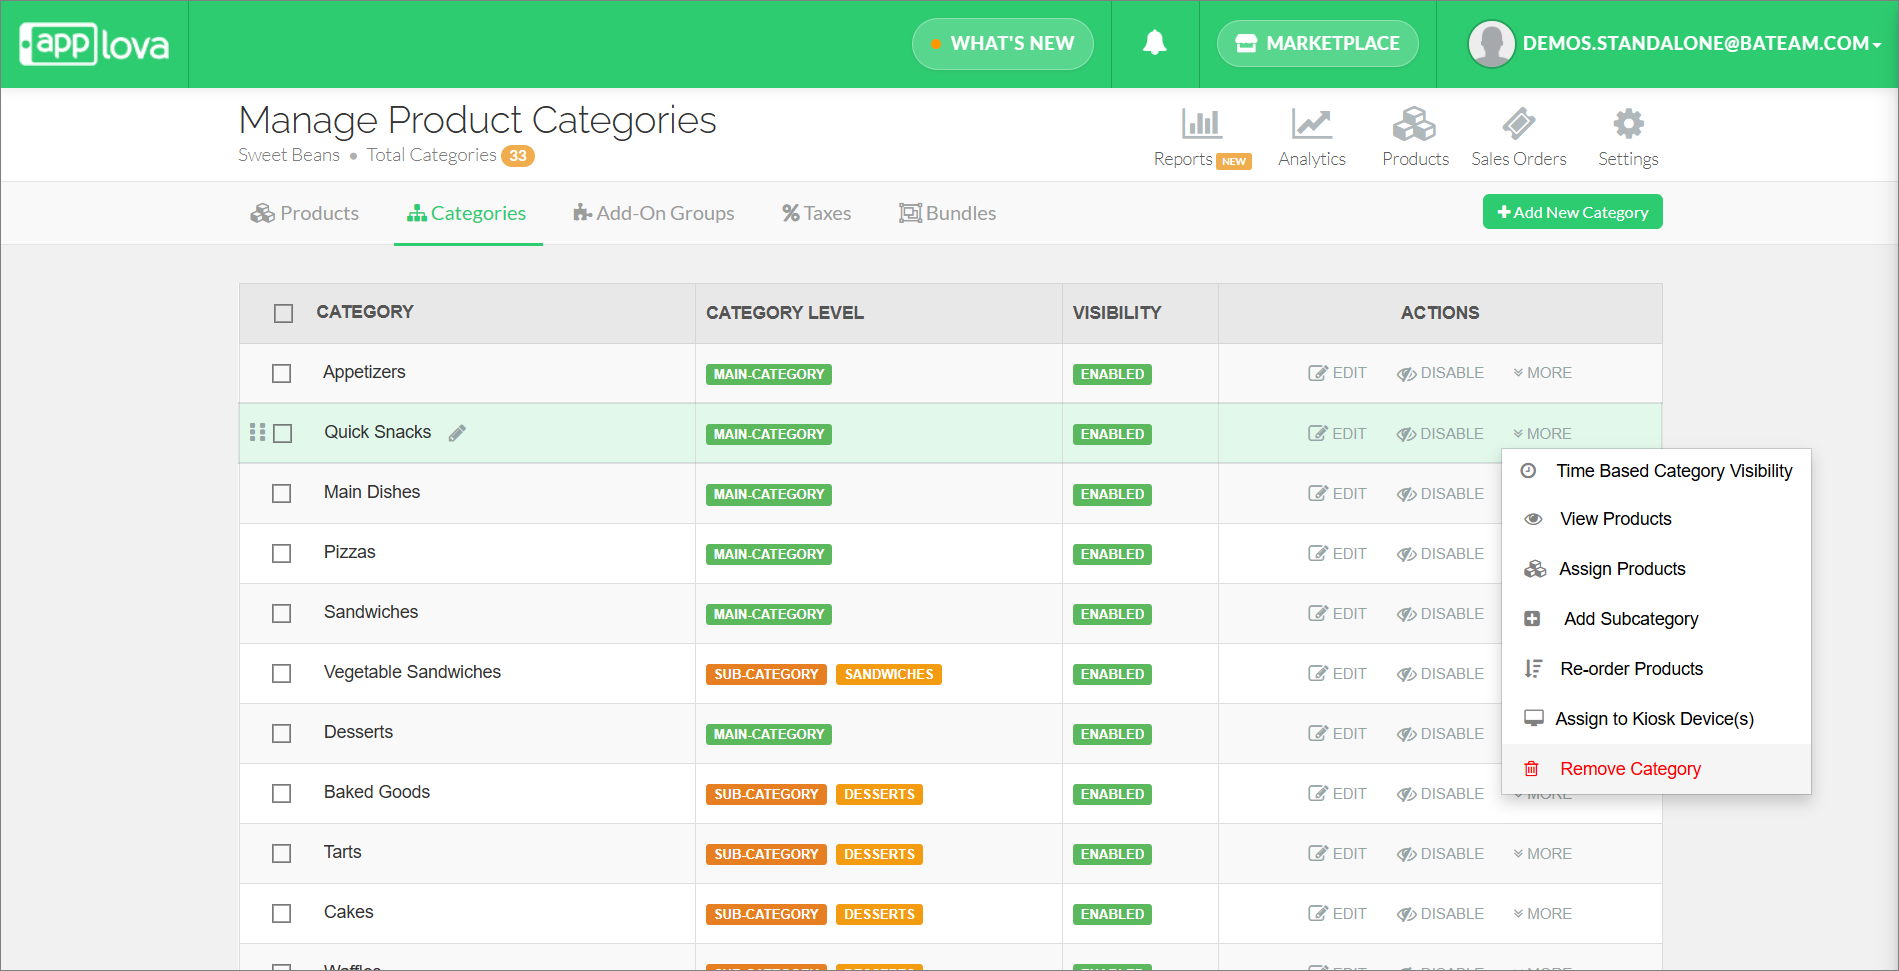
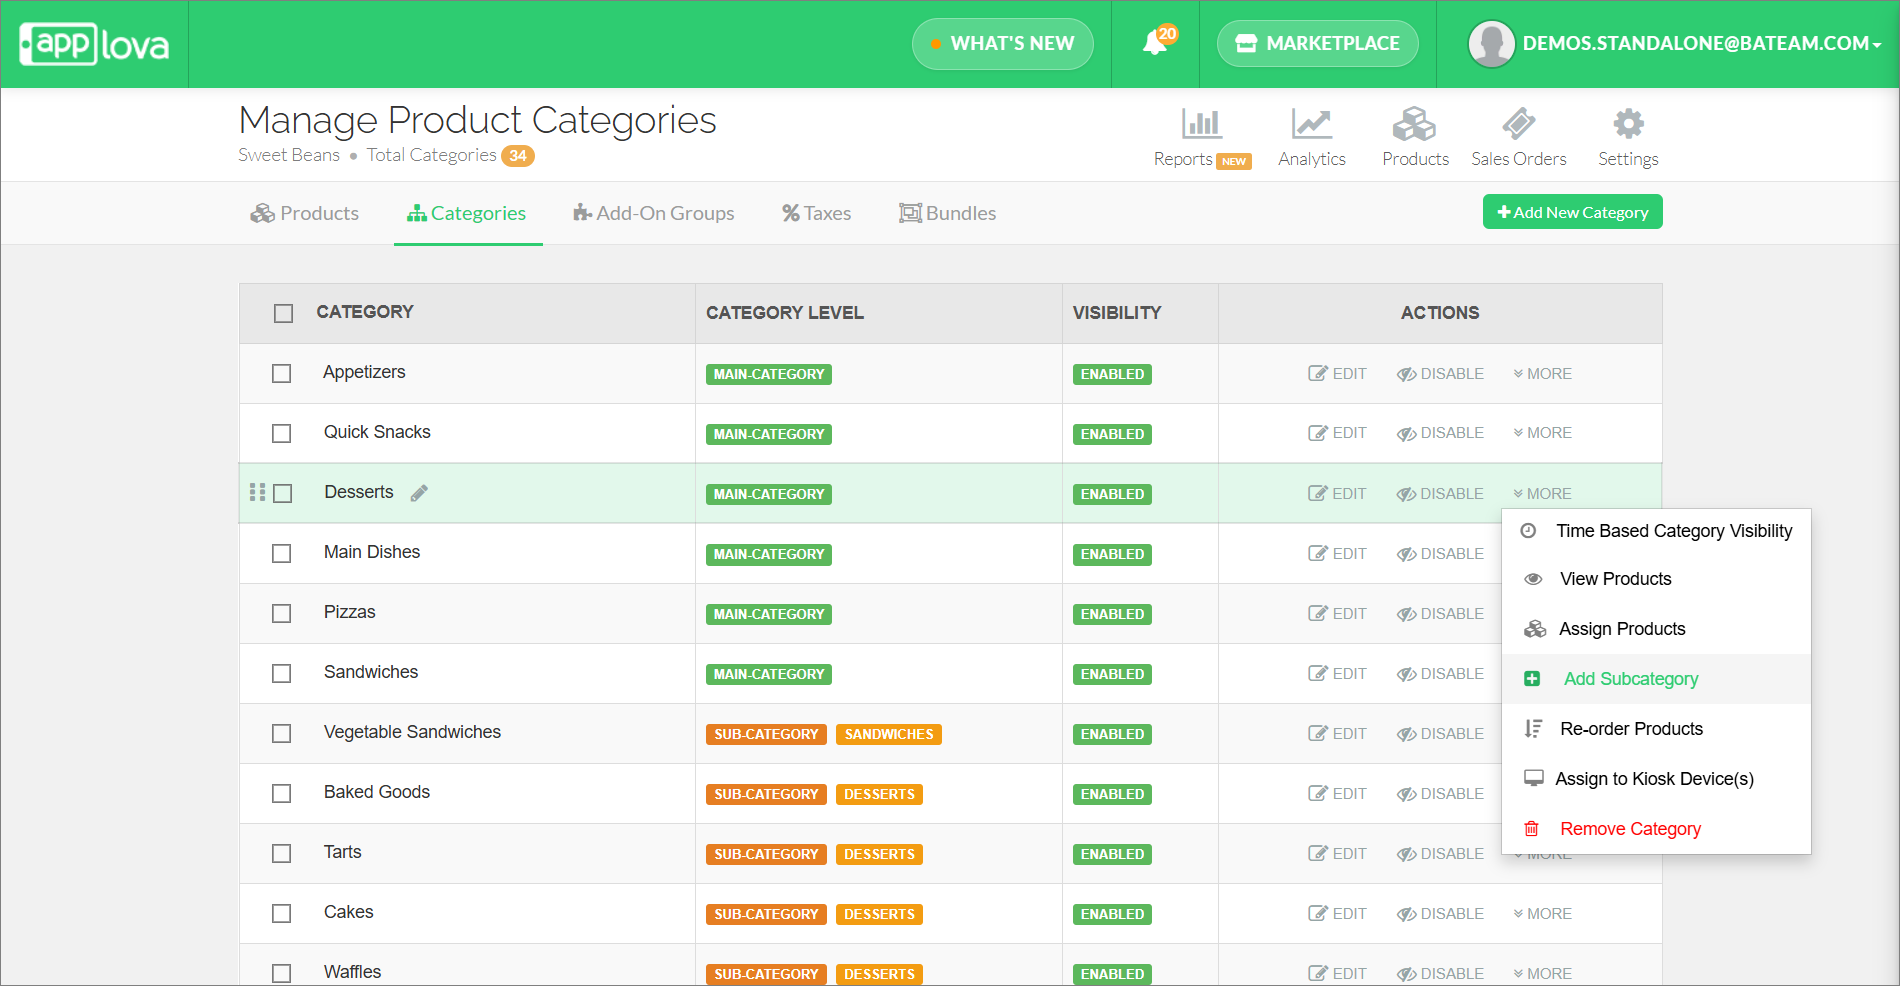
Under the "Categories" tab click "More" on the category you wish to remove.


Step 3
Click "Remove Category".


Step 4
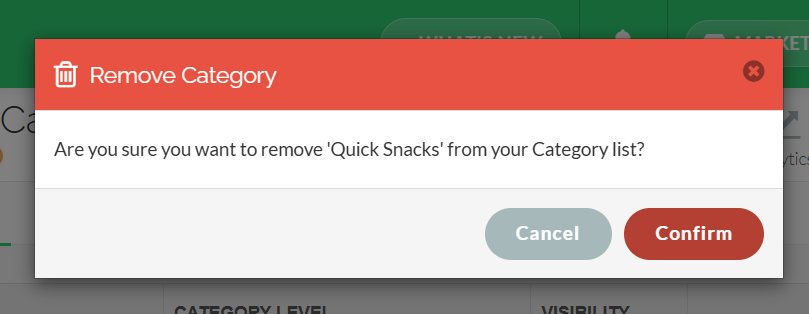
Click "Confirm".

How to Re-order Categories?
This will allow merchants to change the order of categories.

Step 1
Login to "Applova Merchant Web". 

Step 2
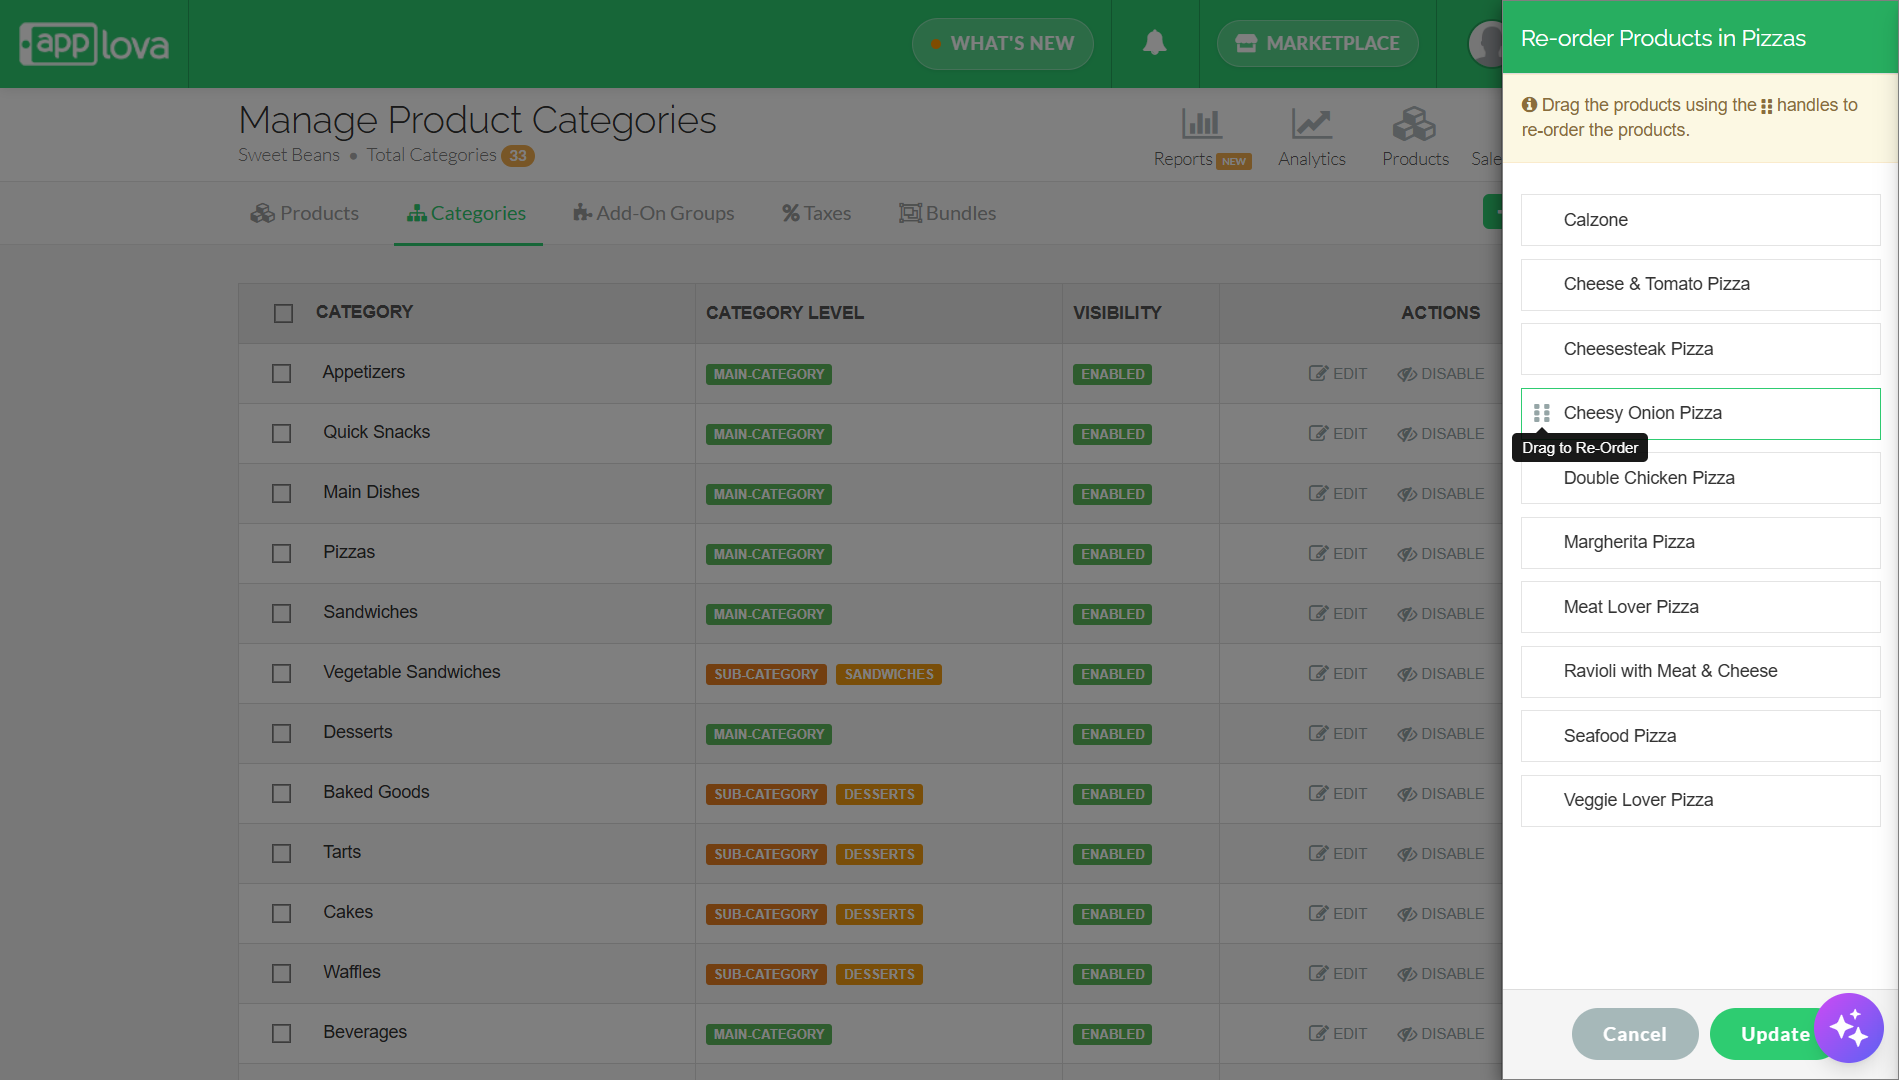
Go to the "Categories" tab.

Step 3
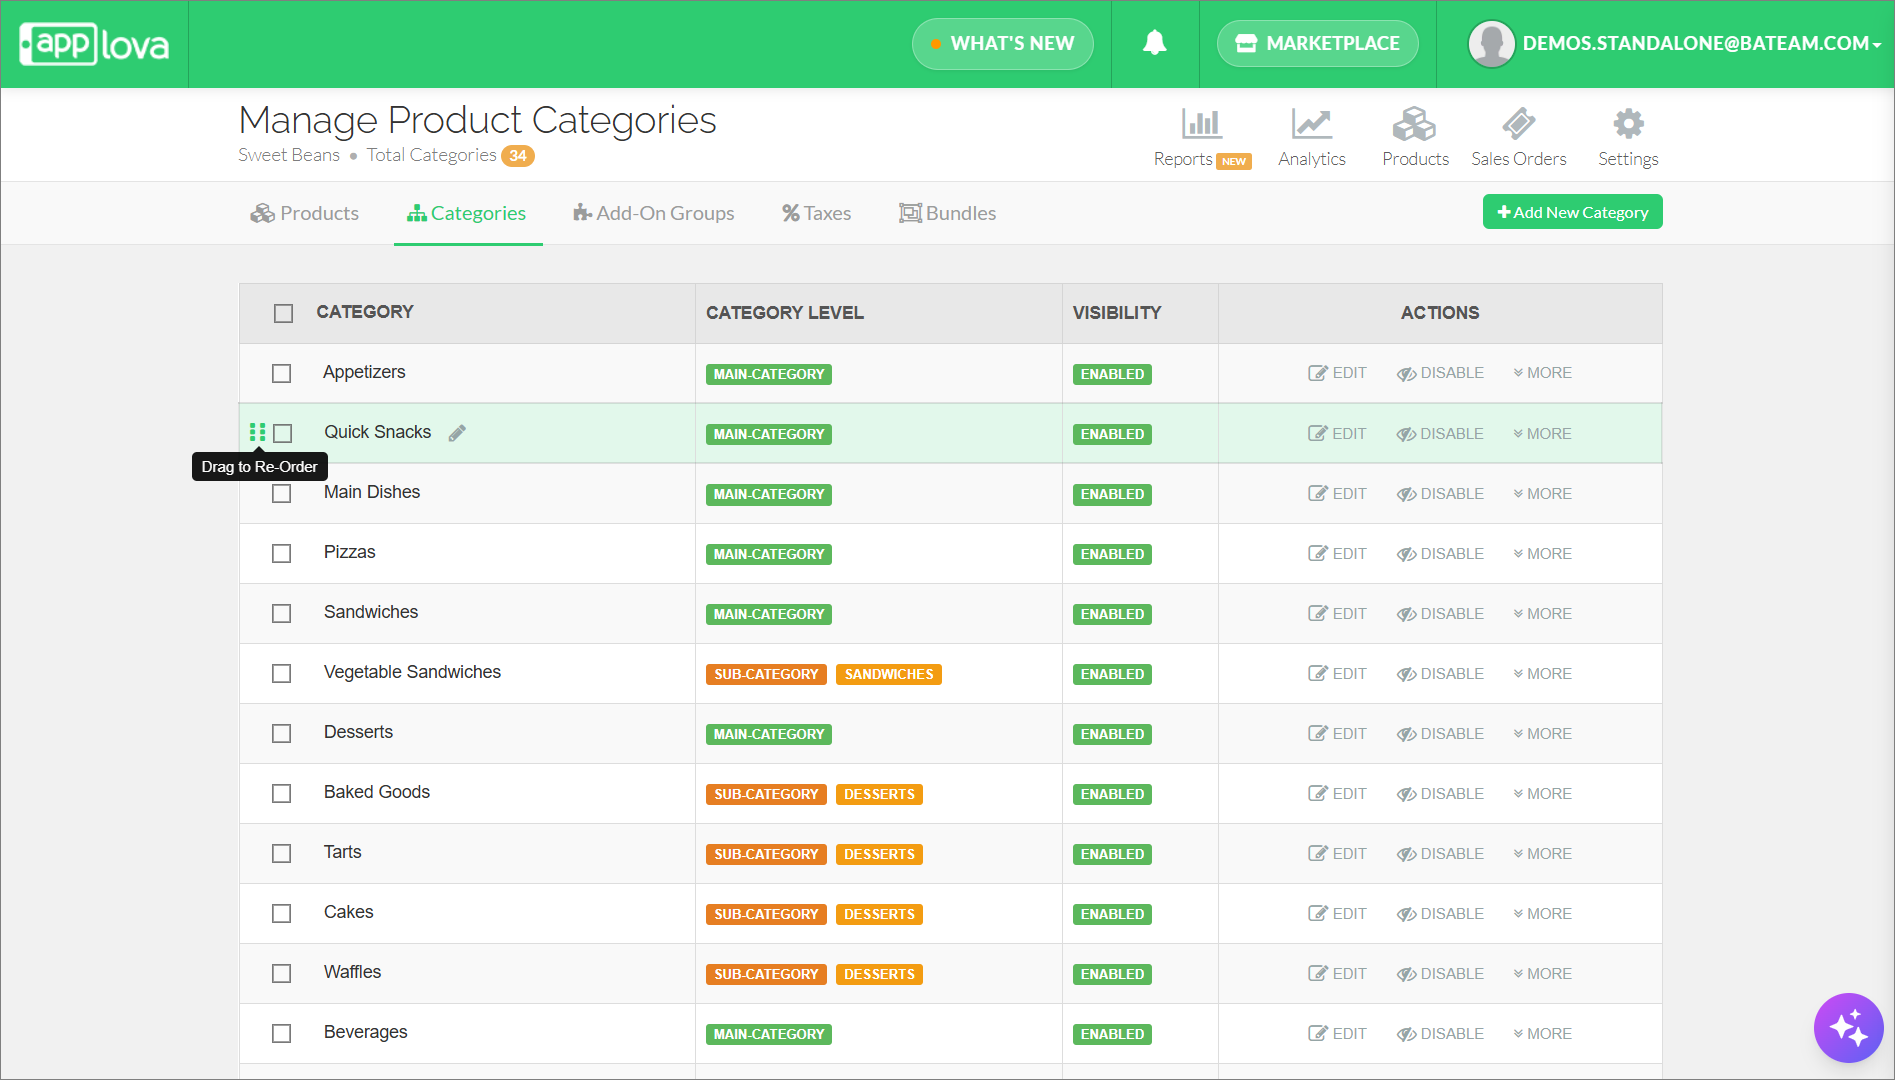
Click on the "⋮⋮" icon of the category you want to reorder, drag and place it where you want it to be.

How to Reorder Products in a Category?
This feature allows merchants

Step 1

Login to "Applova Merchant Web".


Step 2

Click "Products" and go to the "Categories" tab.

Step 3
Click "More" and select "Re-order Products".


Step 4
Drag the products using the  handles to re-order the products.


Step 5
Click "Update".
Feature in Action (Watch Video):

How to Add a Sub-category?
InfoSupported On: Standalone & Clover 
Notes
Subcategories can only be created under a Main Category in Merchant Web. Additionally, a Main Category that already contains subcategories cannot be assigned as a subcategory under another Main Category.

Step 1

Login to "Applova Merchant Web".


Step 2

Click "Products" and go to "Categories" tab.

Step 3

Click "More" and select "Add Subcategory".


Step 4
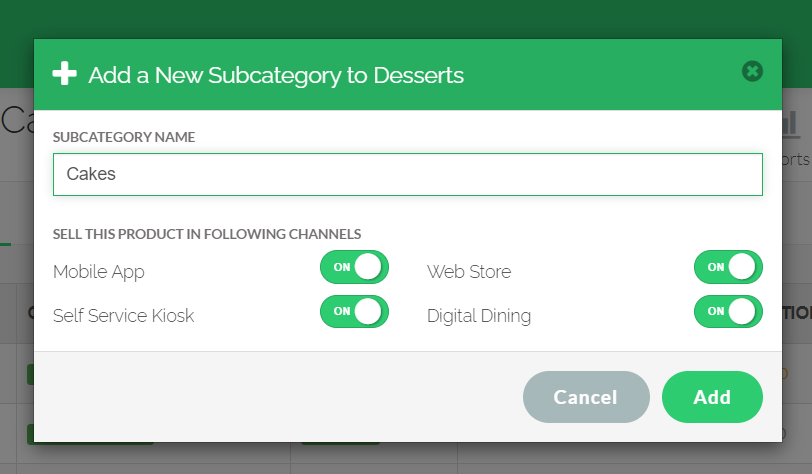
Enter a Subcategory Name and select the preferred channels to display the new subcategory.


Step 5
Click "Add".

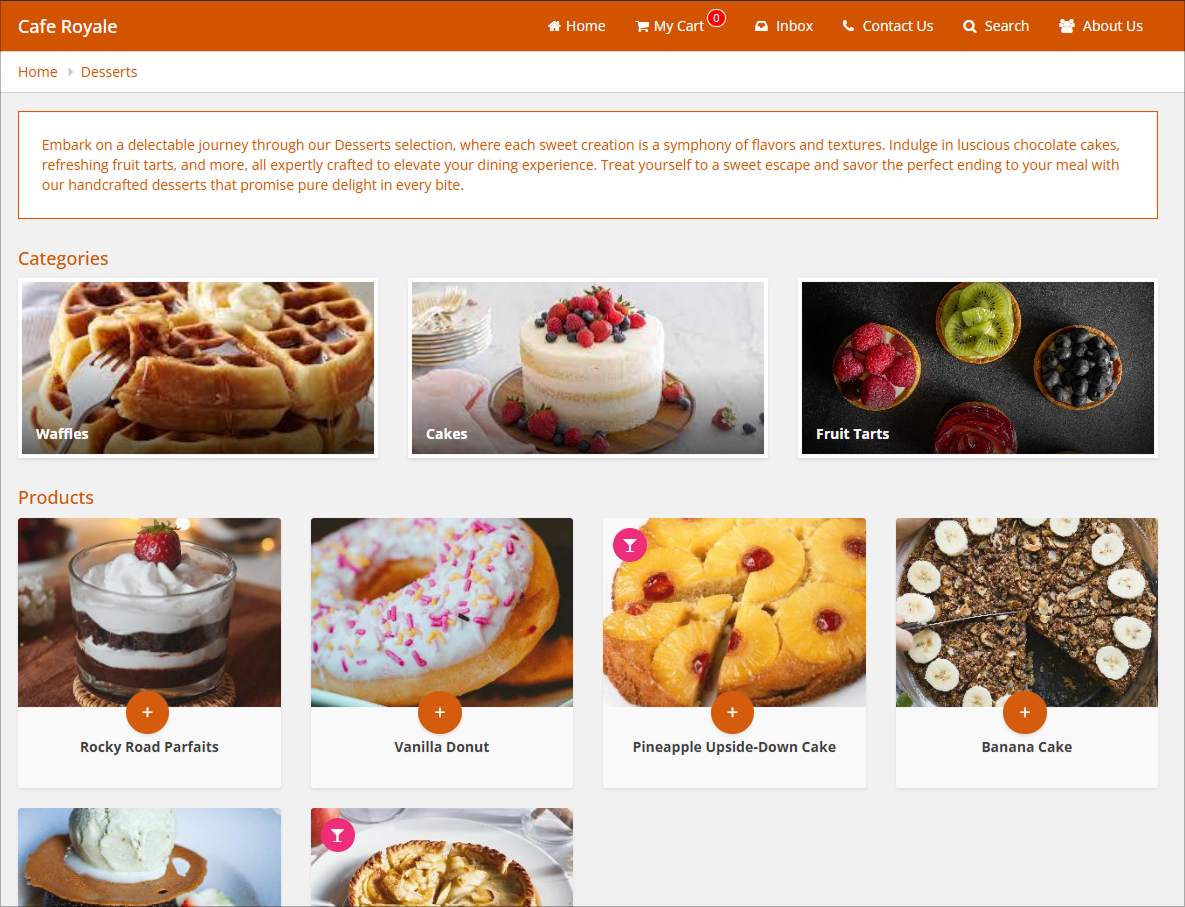
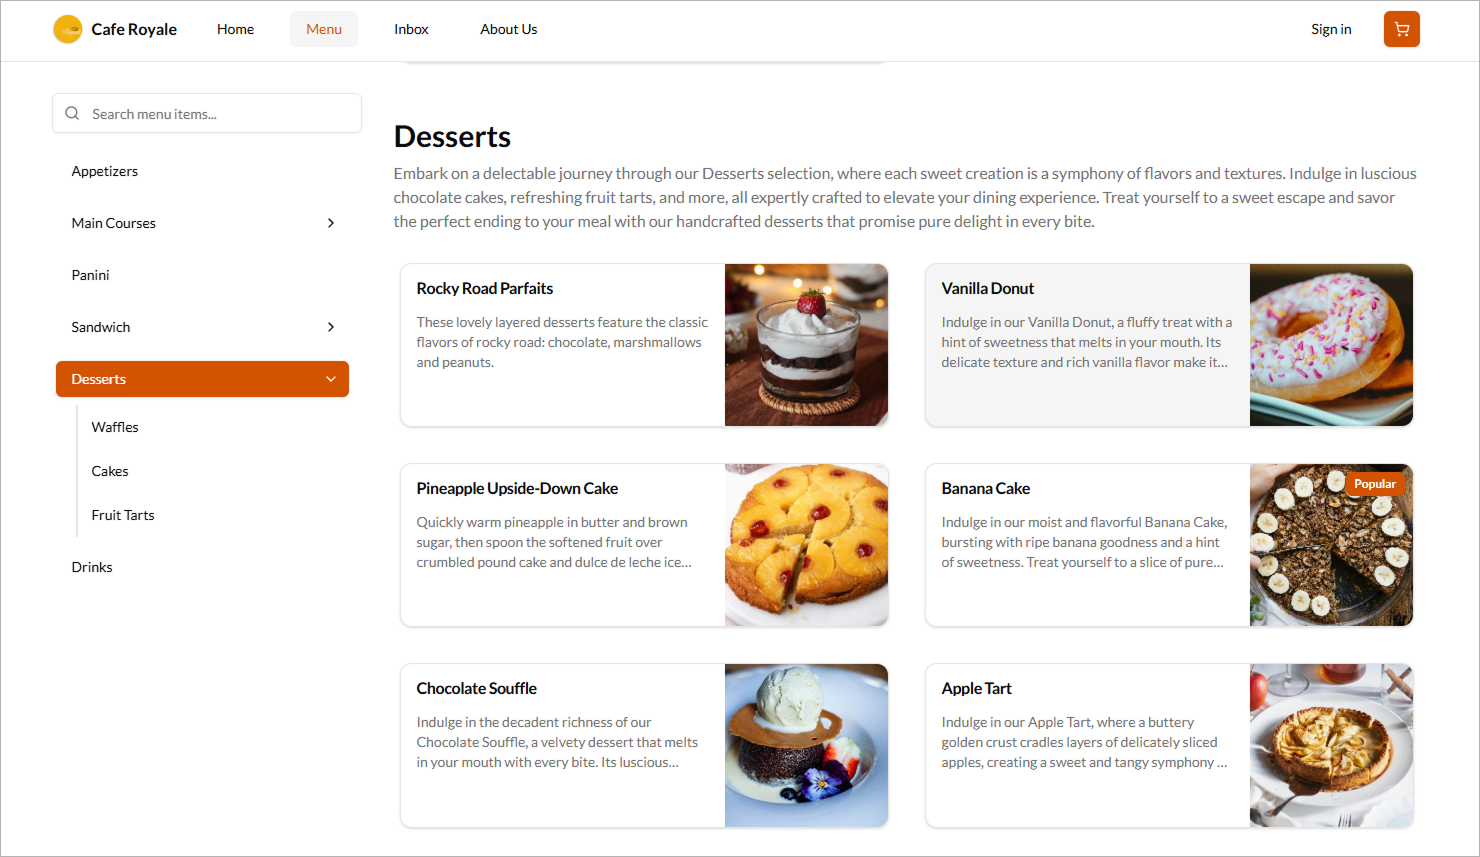
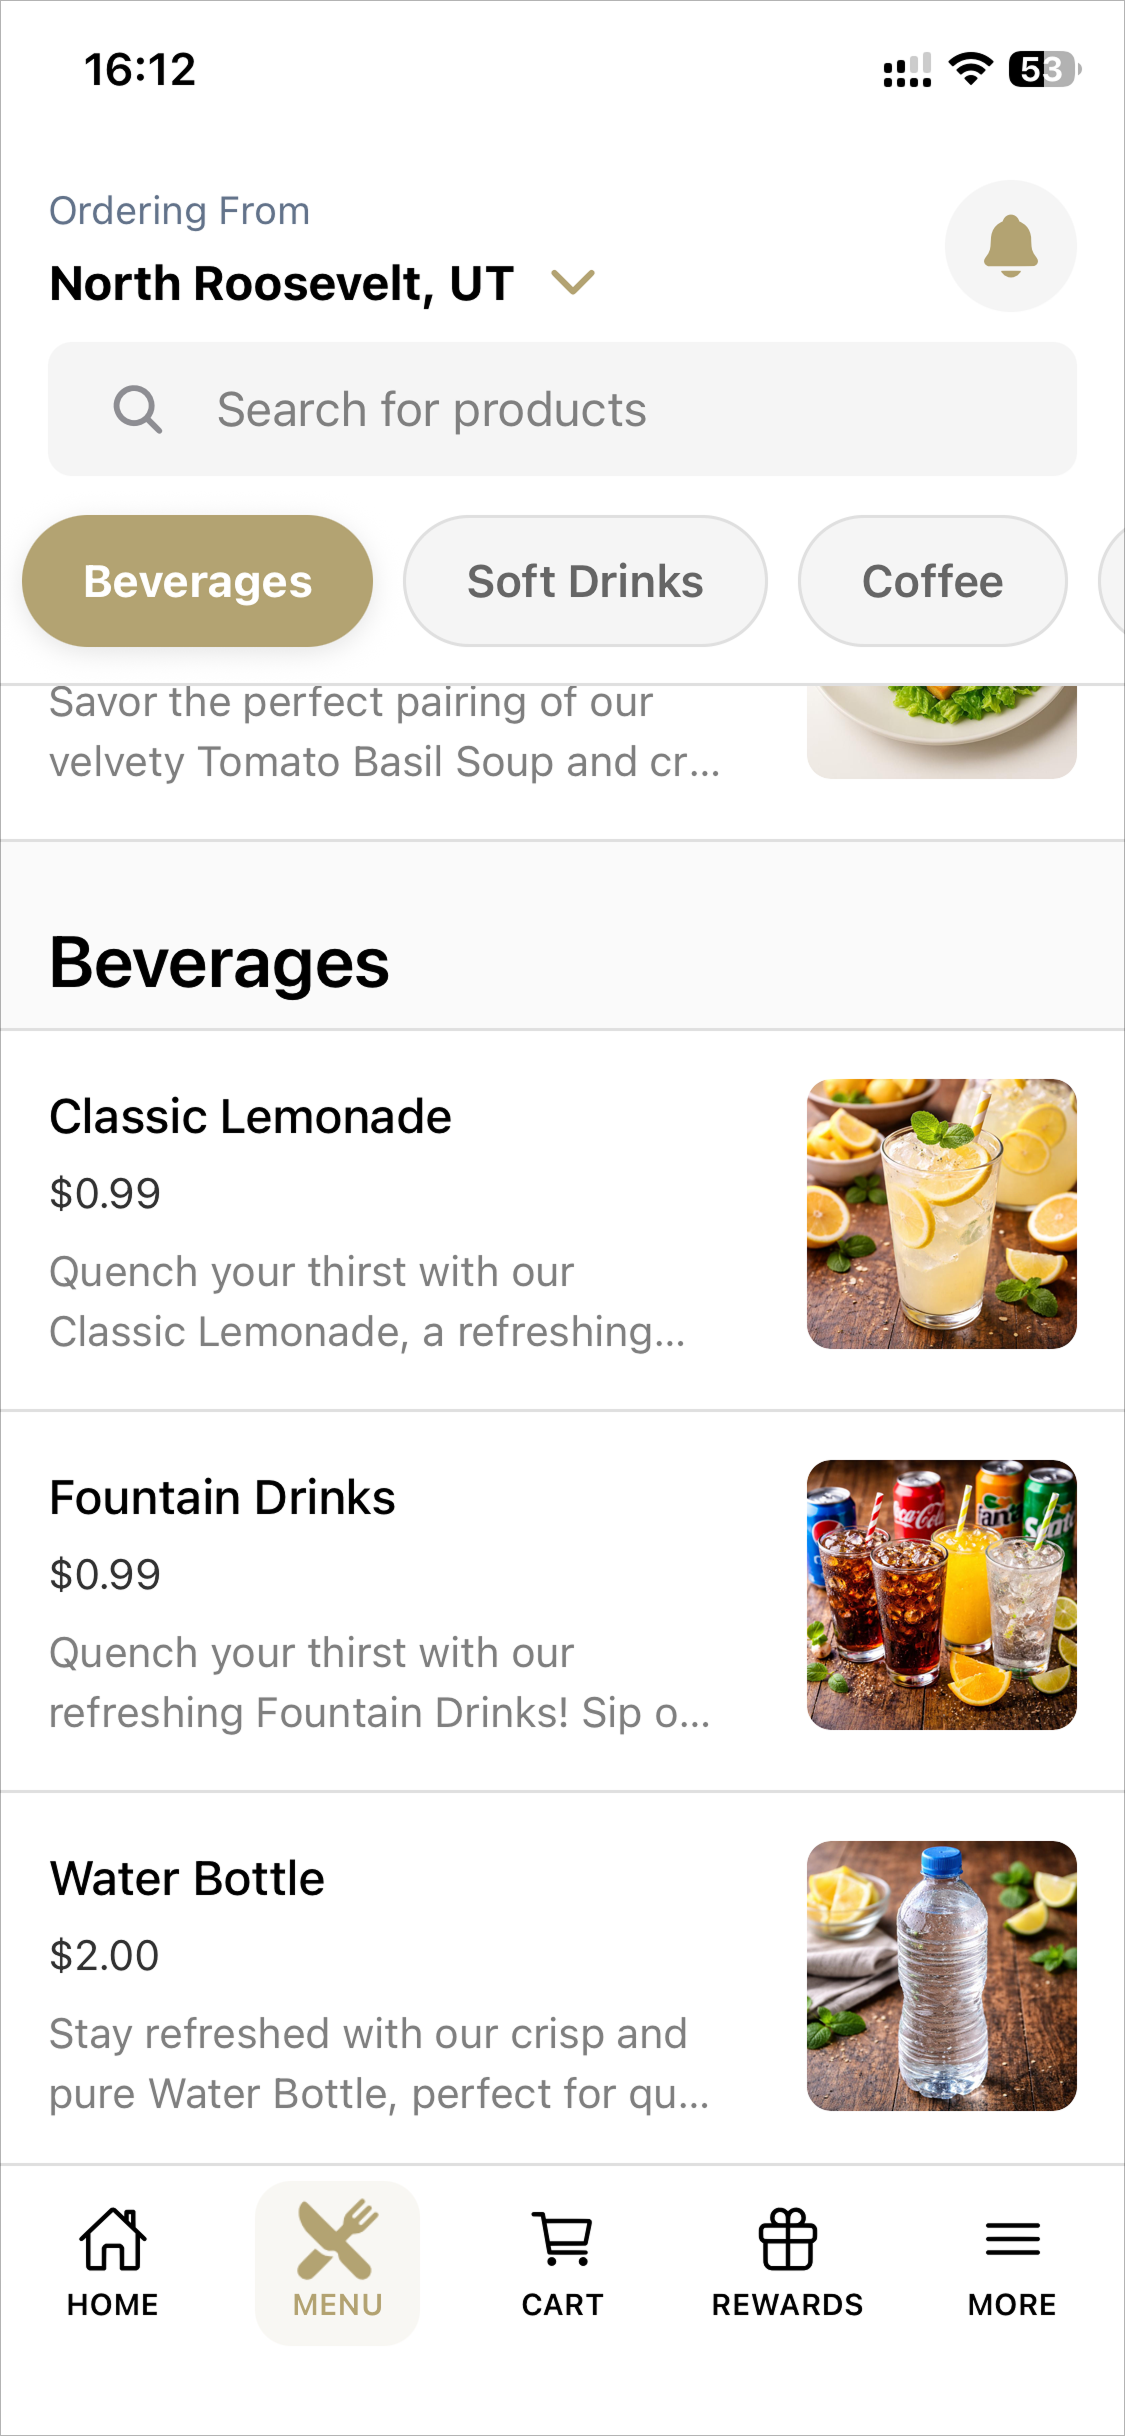
How it Reflects

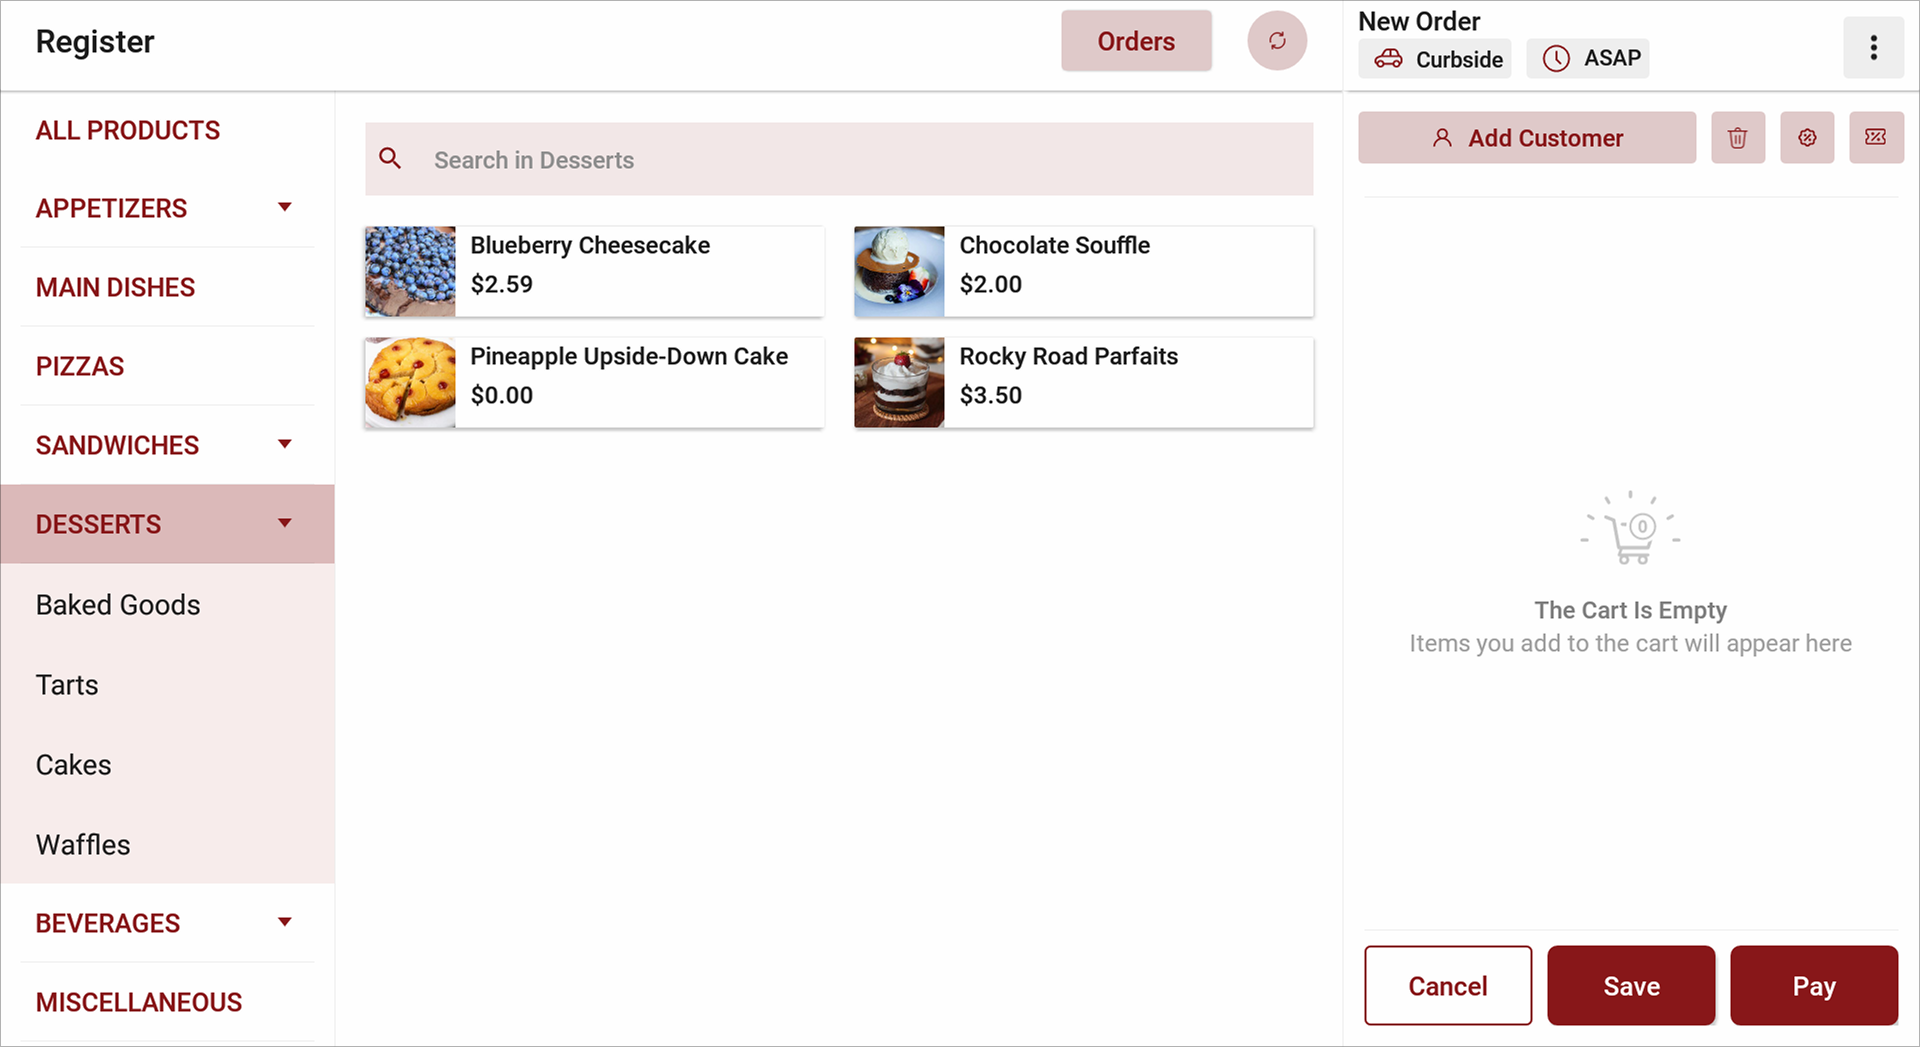
POS


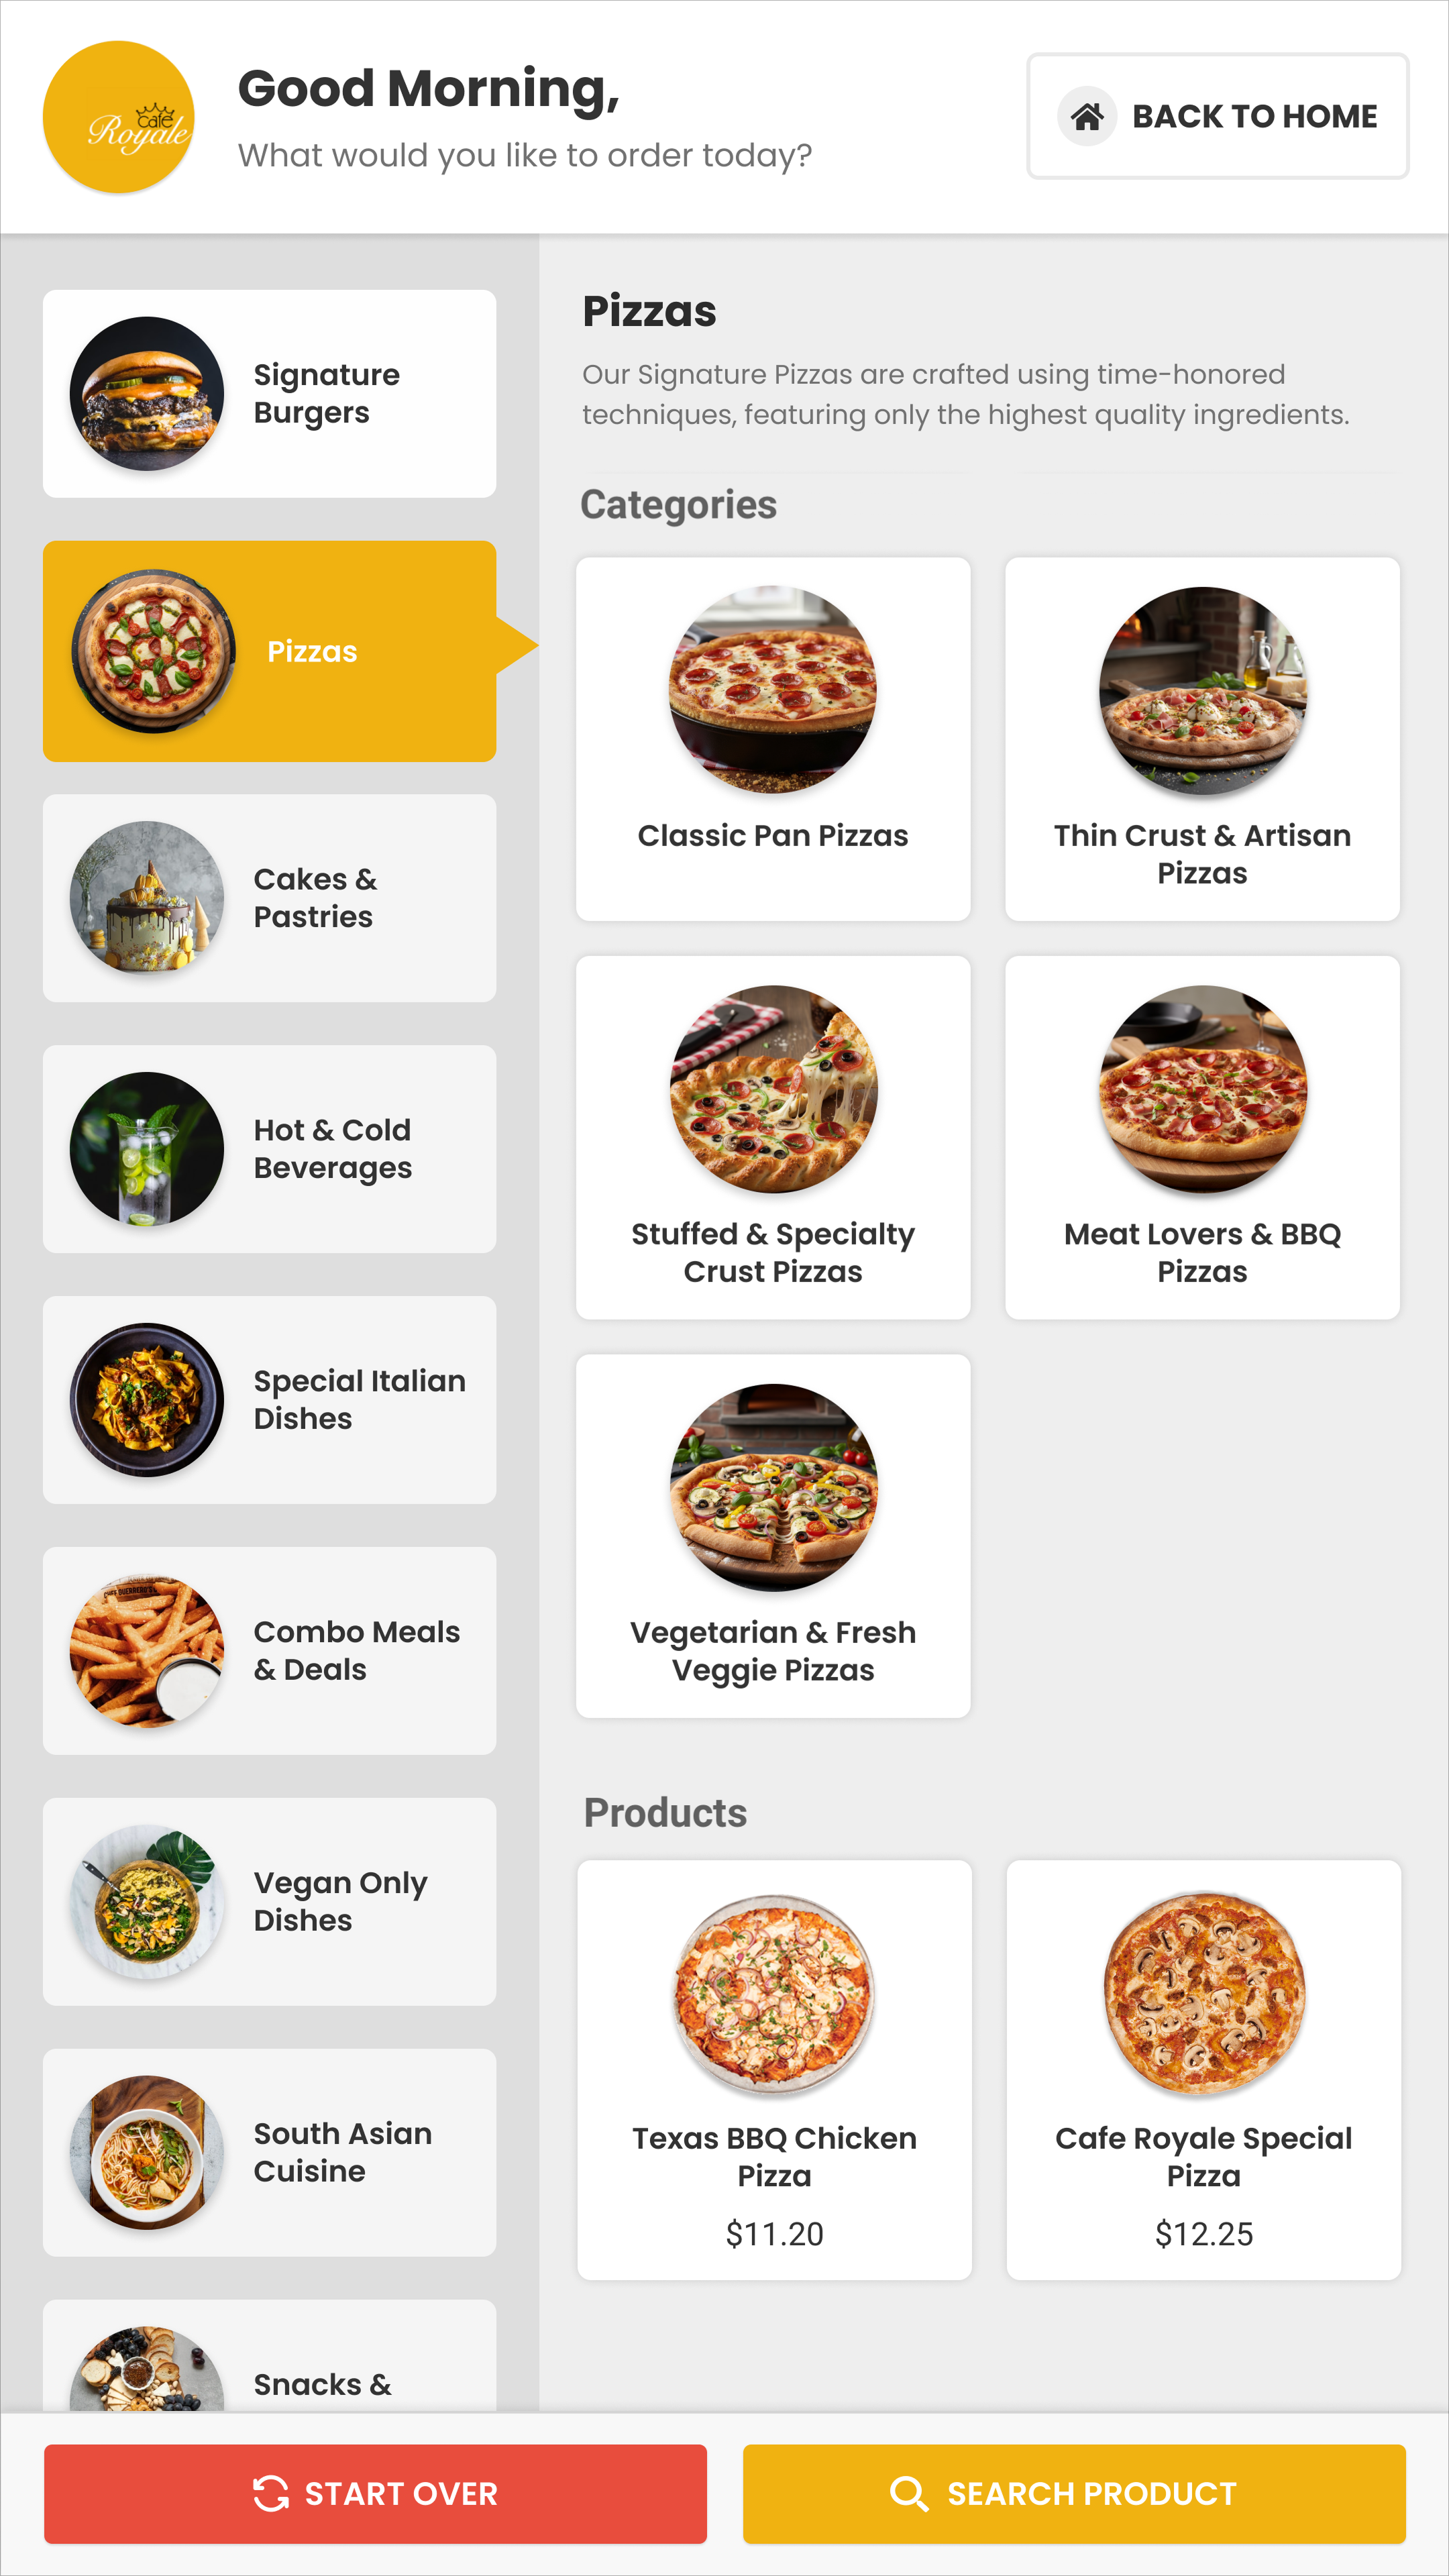
Kiosk

Notes
Only supported on Argon theme

Webstore V1

Webstore V3

Order Ahead App


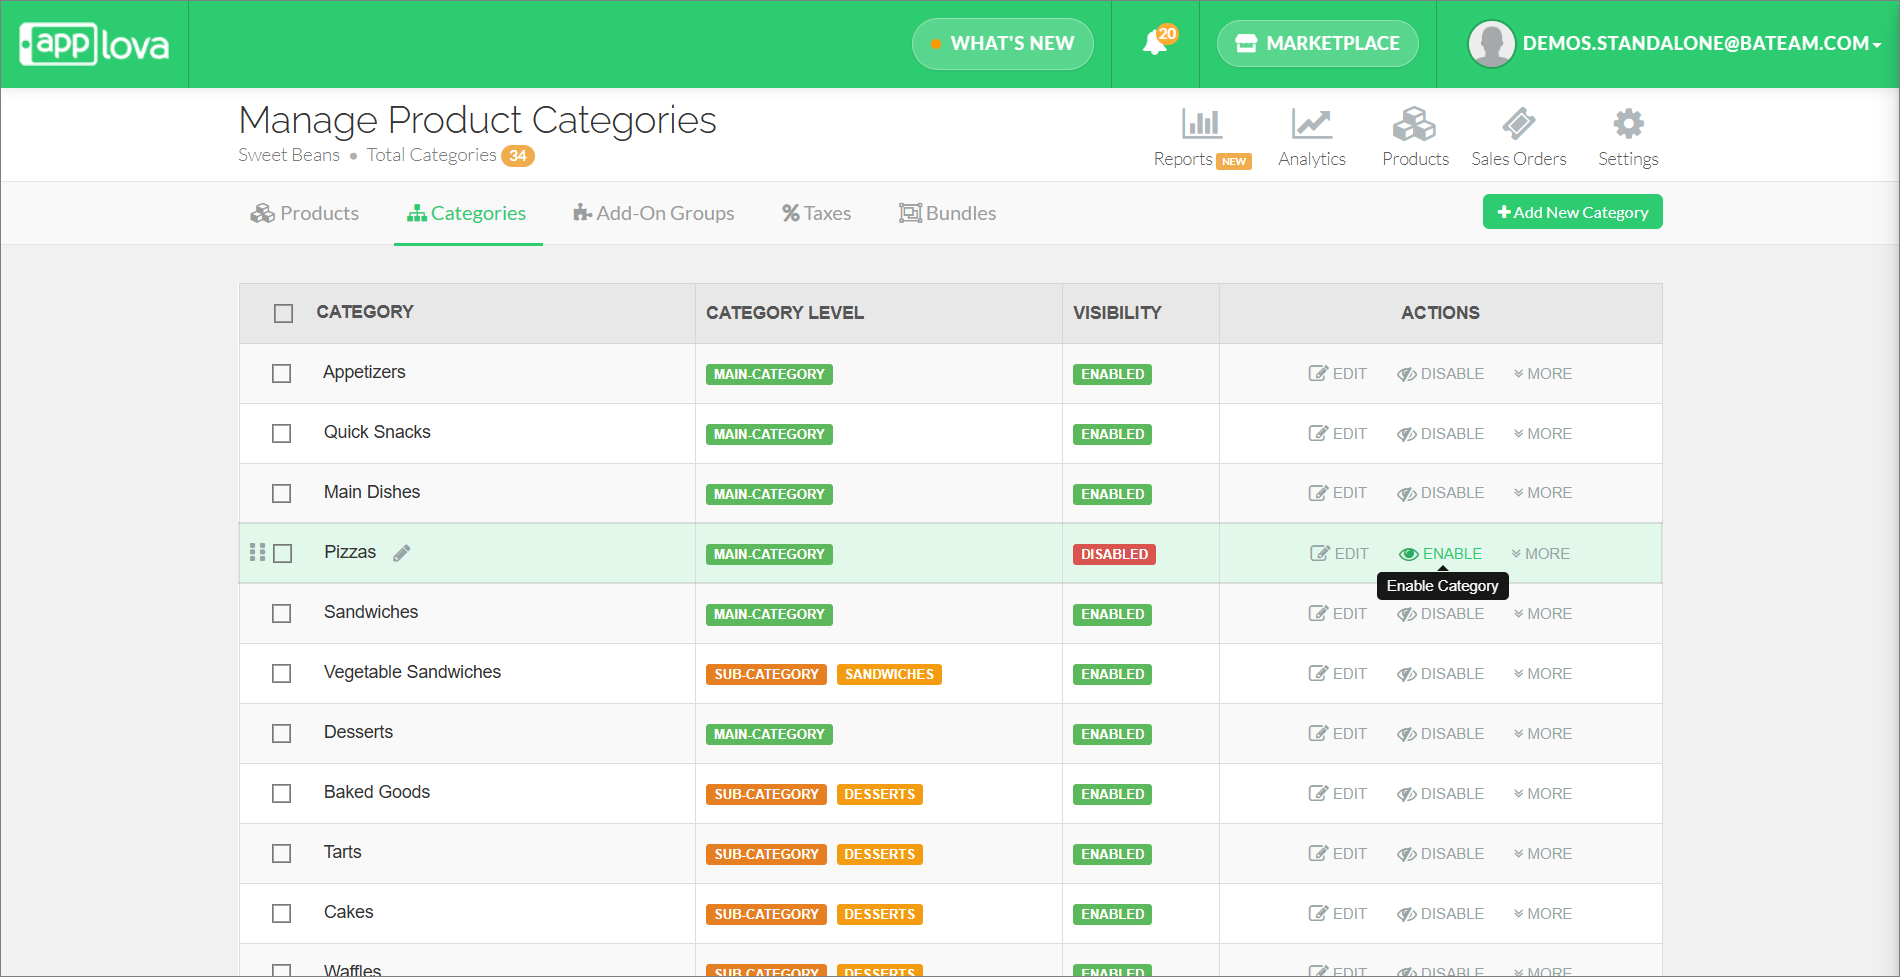
How to Manage Category Visibility?
This feature allows merchants to enable or disable selected categories, helping them manage category visibility more easily.

How to Enable a Category?

Step 1
Login to "Applova Merchant Web".
Step 2
Click "Products" and go to "Categories" tab.
Step 3
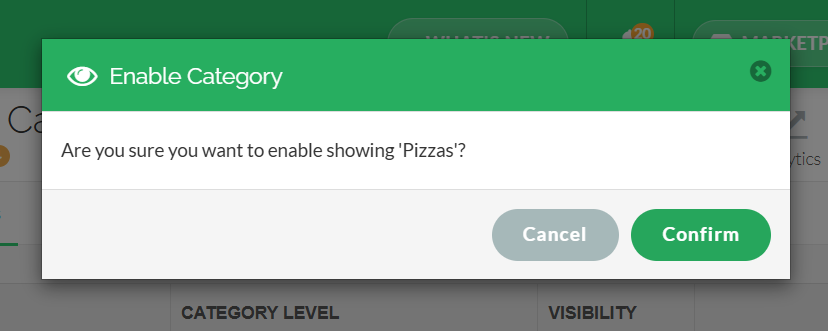
Click "Enable" on the category you wish to display.


Step 4
Click "Confirm".

How to Disable a Category?

Step 1
Login to "Applova Merchant Web".

Step 2
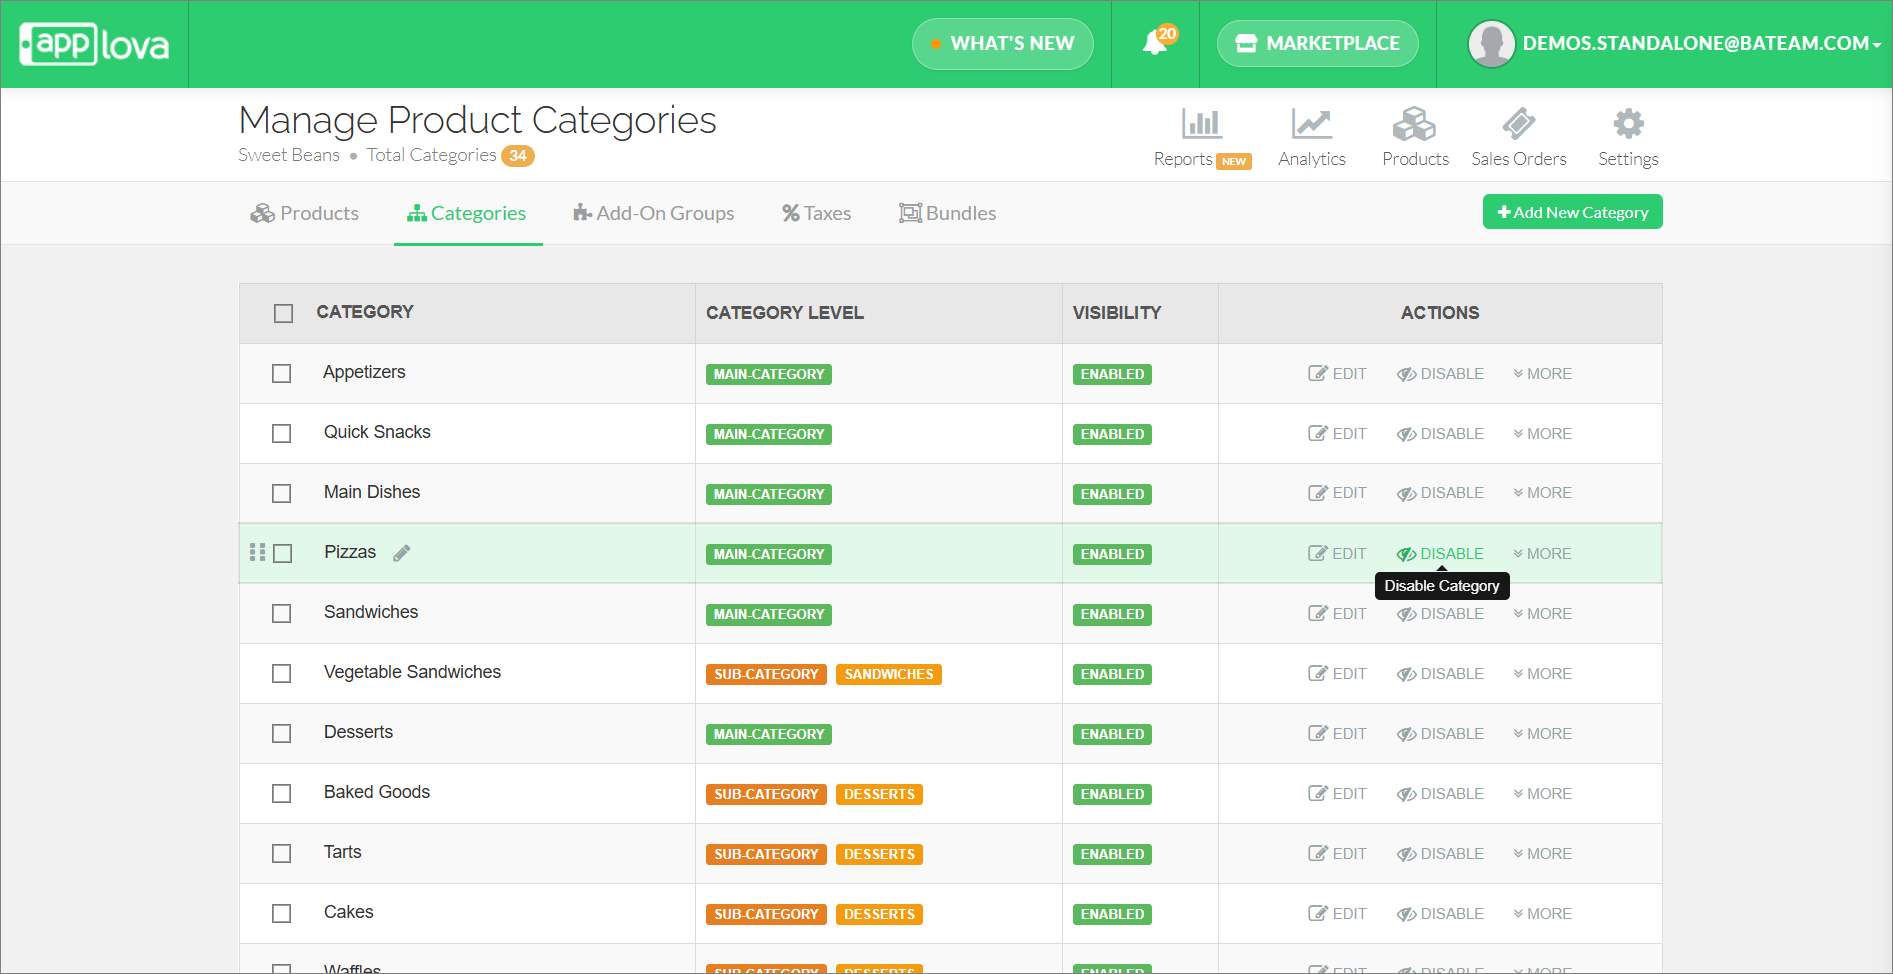
Click "Products" and go to "Categories" tab.

Step 3
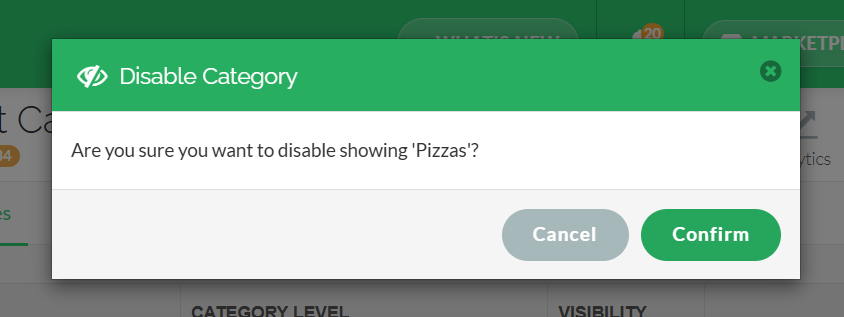
Click "Disable" on the category you wish to disable visibility.


Step 4
Click "Confirm".

How it Reflects on Samsung Kiosk


How to Bulk Assign Products to Categories?

With this feature, merchants can assign categories to products in bulk.


Step 1

Login to the "Merchant Web Portal" and click on "Products".
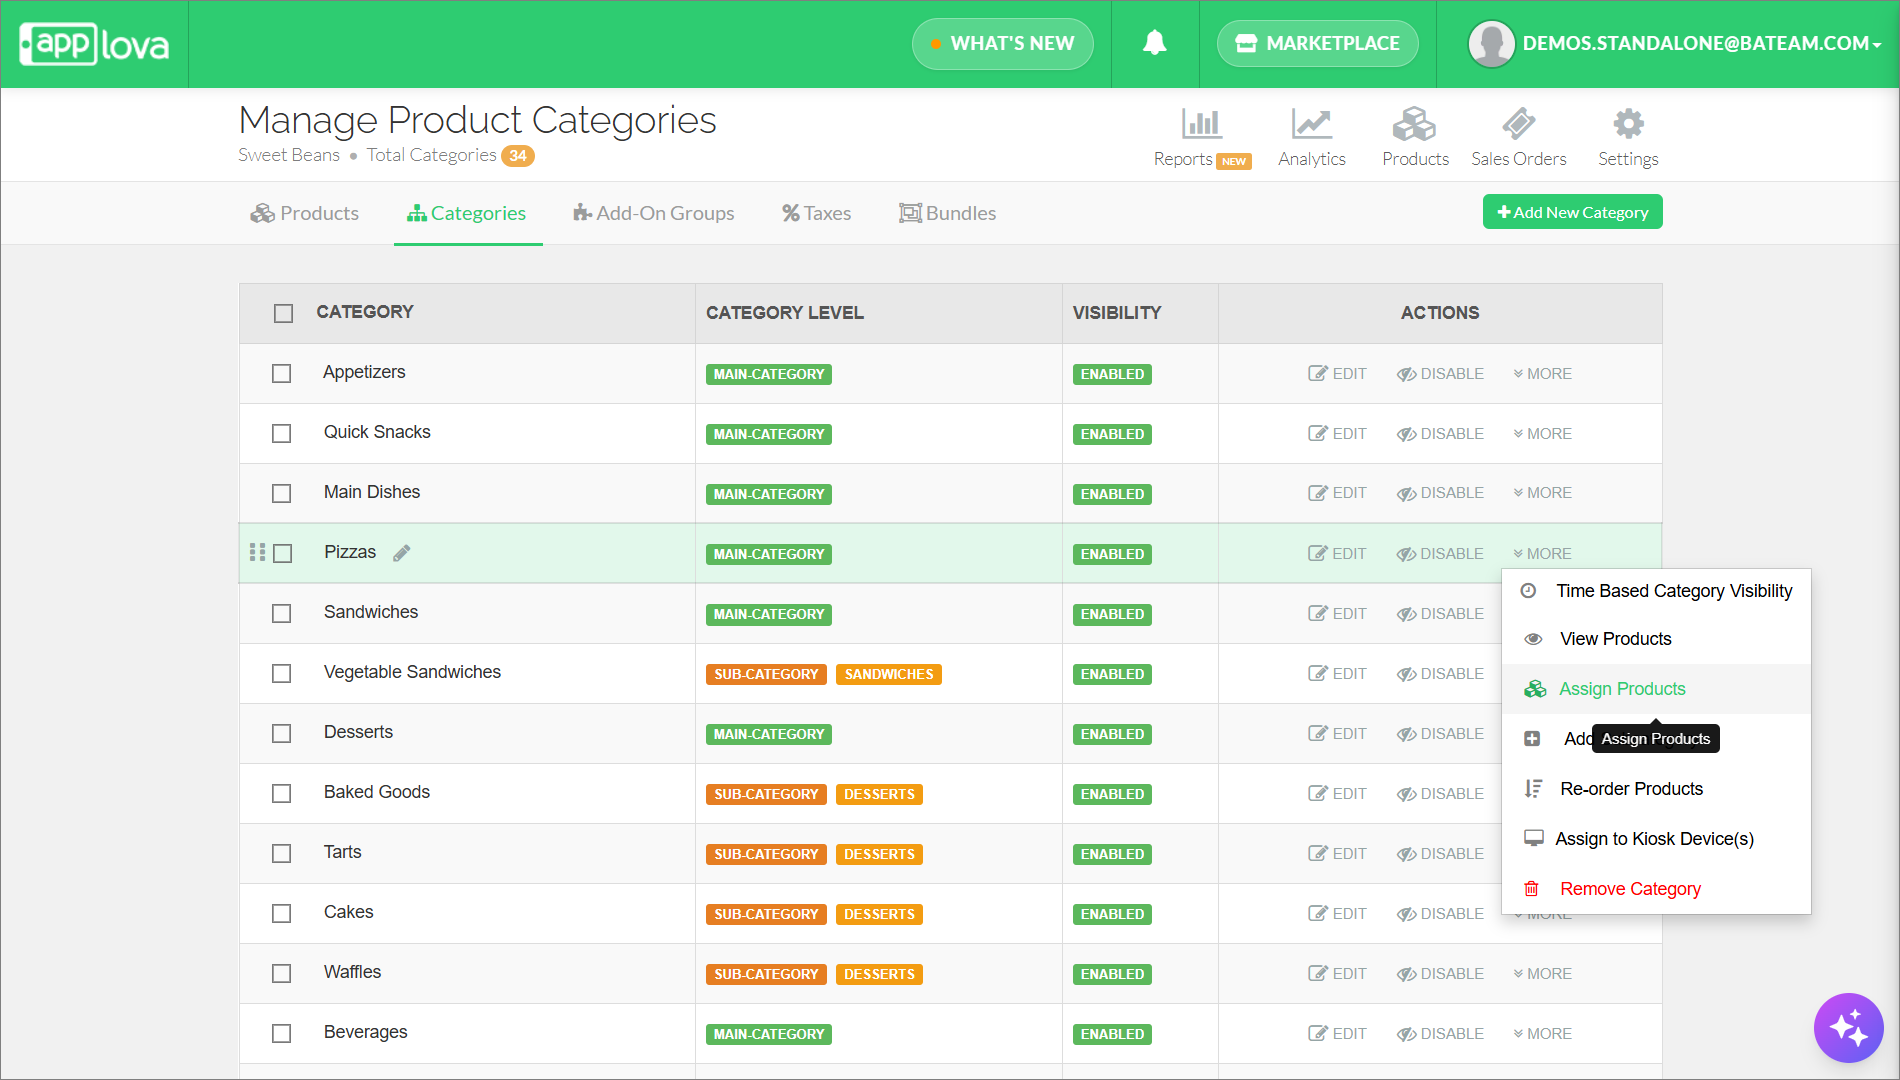

Step 2
Go to "Categories" tab and select a category which needs to be assigned with products in bulk.

Step 3
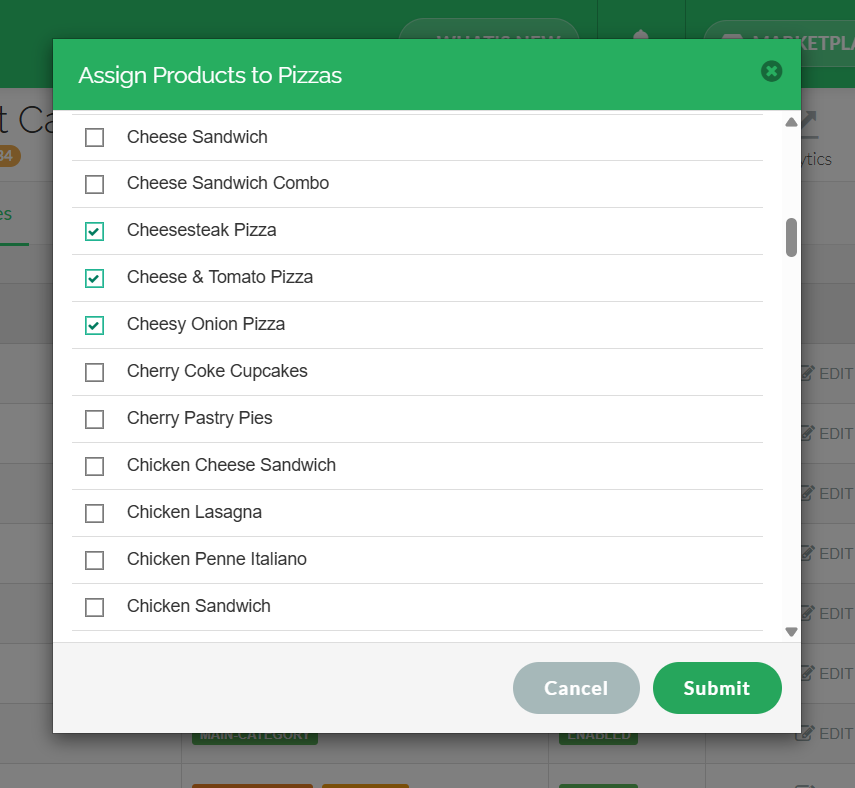
From the "More" option, select "Assign Products".


Step 4
Finally, select the products that needs to be assigned to the selected category and click on "Submit".


    • Related Articles

    • How to Manage Product Add-On(s) via Merchant Web?

      What are Product Add-On(s)? Product Add-Ons are extra customizations that can be added to a product to suit the customers' needs. (i.e., Sugar levels for Coffee, Toppings for a Pizza, Colors for a Shirt). The price of an Add-On product will be an ...
    • How to Manage Add-On Groups?

      Supported Domains: Standalone Available Channels: Webstore v1, Mobile Order Ahead App (iOS & Android) By enabling this feature, merchants are allowed to add additional options or complementary items to a main product item that can be added to a core ...
    • How to Manage Products via Merchant Web?

      This article explains how merchants can add, edit, duplicate, and delete products by following the steps provided. How to Add a Product? Step 1 Login to "Applova Merchant Web". Step 2 Go to "Products" and click on "Add New Product". Step 3 Fill in ...
    • How to Manage Revenue Centers via Merchant Portal?

      What Are Revenue Centers? Revenue Centers allow merchants to group and analyze sales based on the device where the order was placed—such as a POS register or kiosk. This makes it easier to monitor performance by service point within a business. Using ...
    • How to Manage Product Image via Merchant Web?

      This feature allows merchants to manage product images through the Merchant Portal. Merchants can use this feature to add, update, or remove product images, helping keep their online menu visually accurate and appealing to customers. How to Add ...