How to Manage Revenue Centers via Merchant Portal?
What Are Revenue Centers?
Using this feature, merchants can create, view, edit, and remove Revenue Centers directly from the Merchant Portal.
 Use Case Scenario
HarborGrill, a restaurant, operates two distinct service zones—a main indoor dining area and an outdoor patio bar. The indoor area features a POS at the counter and a self-service kiosk. The patio bar, designed for drinks and small bites, operates with a dedicated POS terminal used by bartenders.
To gain better visibility into how each zone performs and optimize service workflows, HarborGrill enables the Revenue Centers feature via the Merchant Portal.
By using this feature, HarborGrill is able to:
Create two revenue centers: Indoor Dining – includes POS 1 and Self-Service Kiosk and Patio Bar – includes POS
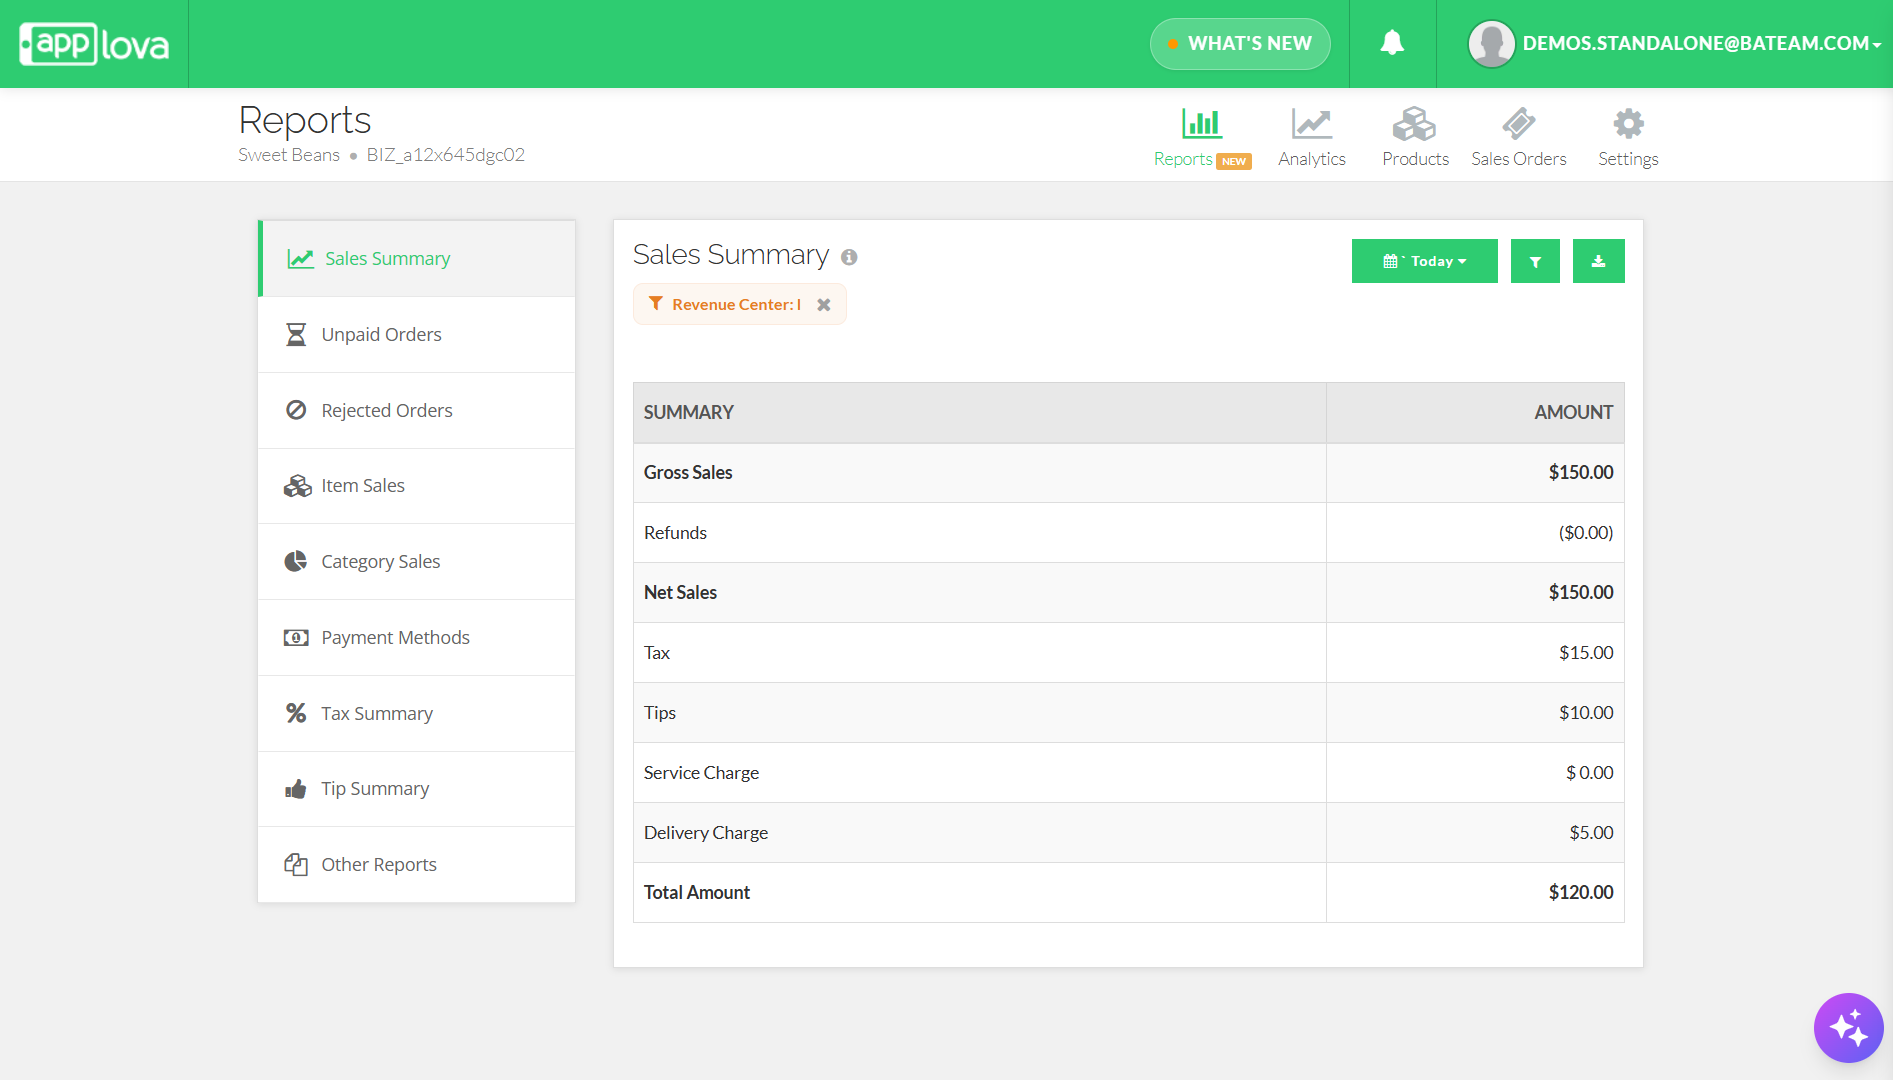
Filter sales reports by revenue center to understand where peak sales occur.
Improve operational insights, enabling the management to monitor and troubleshoot performance per zone without confusion.
Step 1
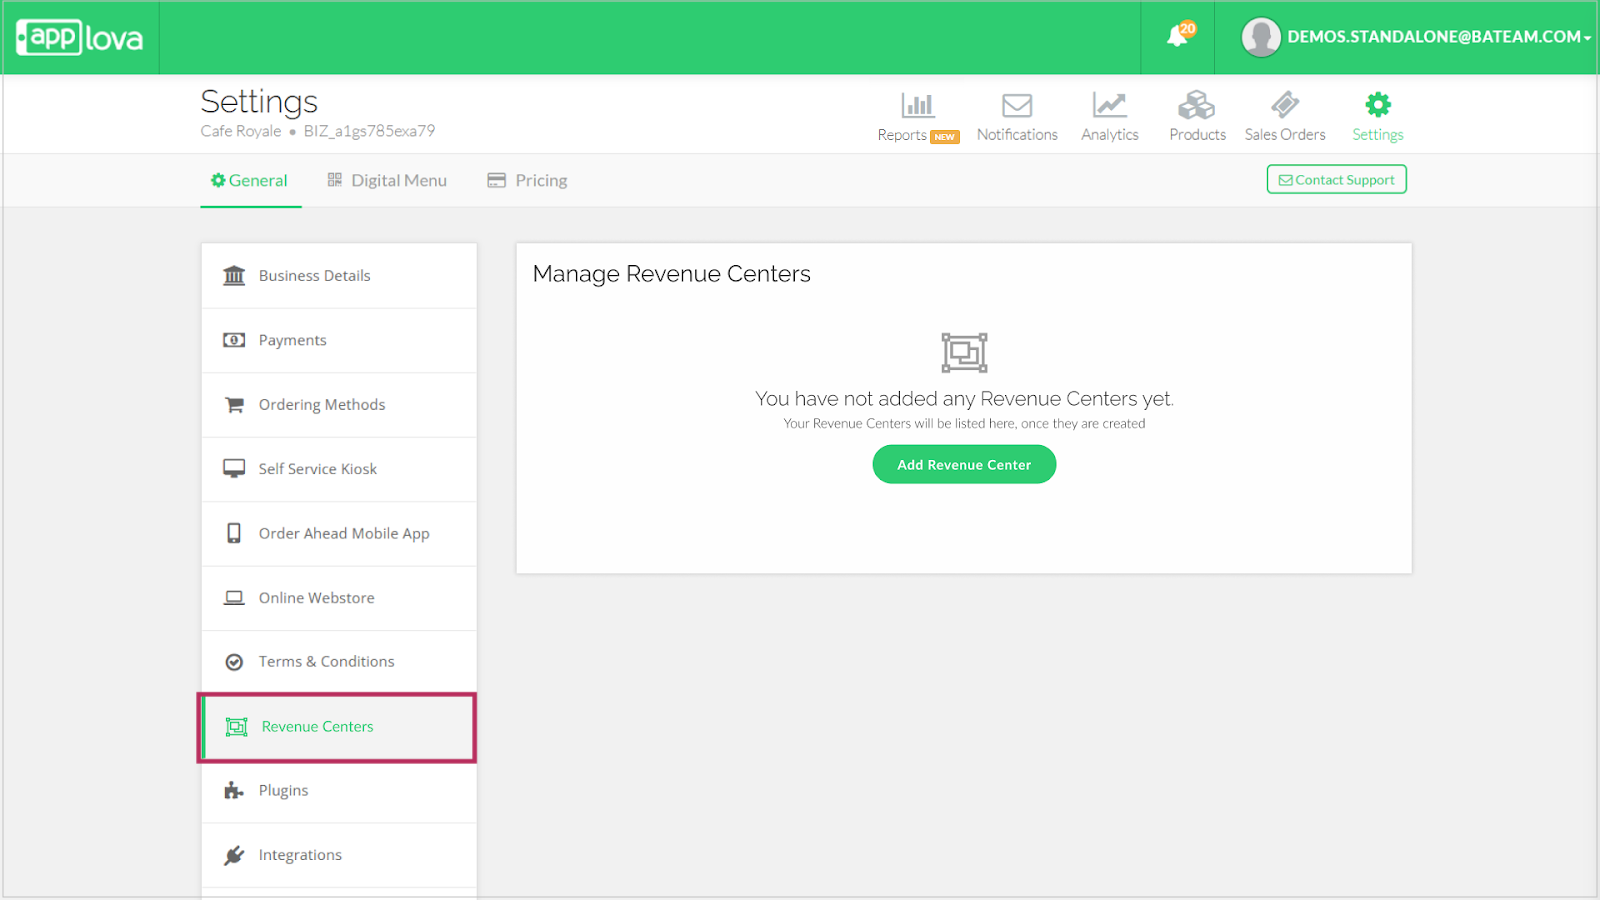
Navigate to the Settings section on the Merchant Portal.
Step 2
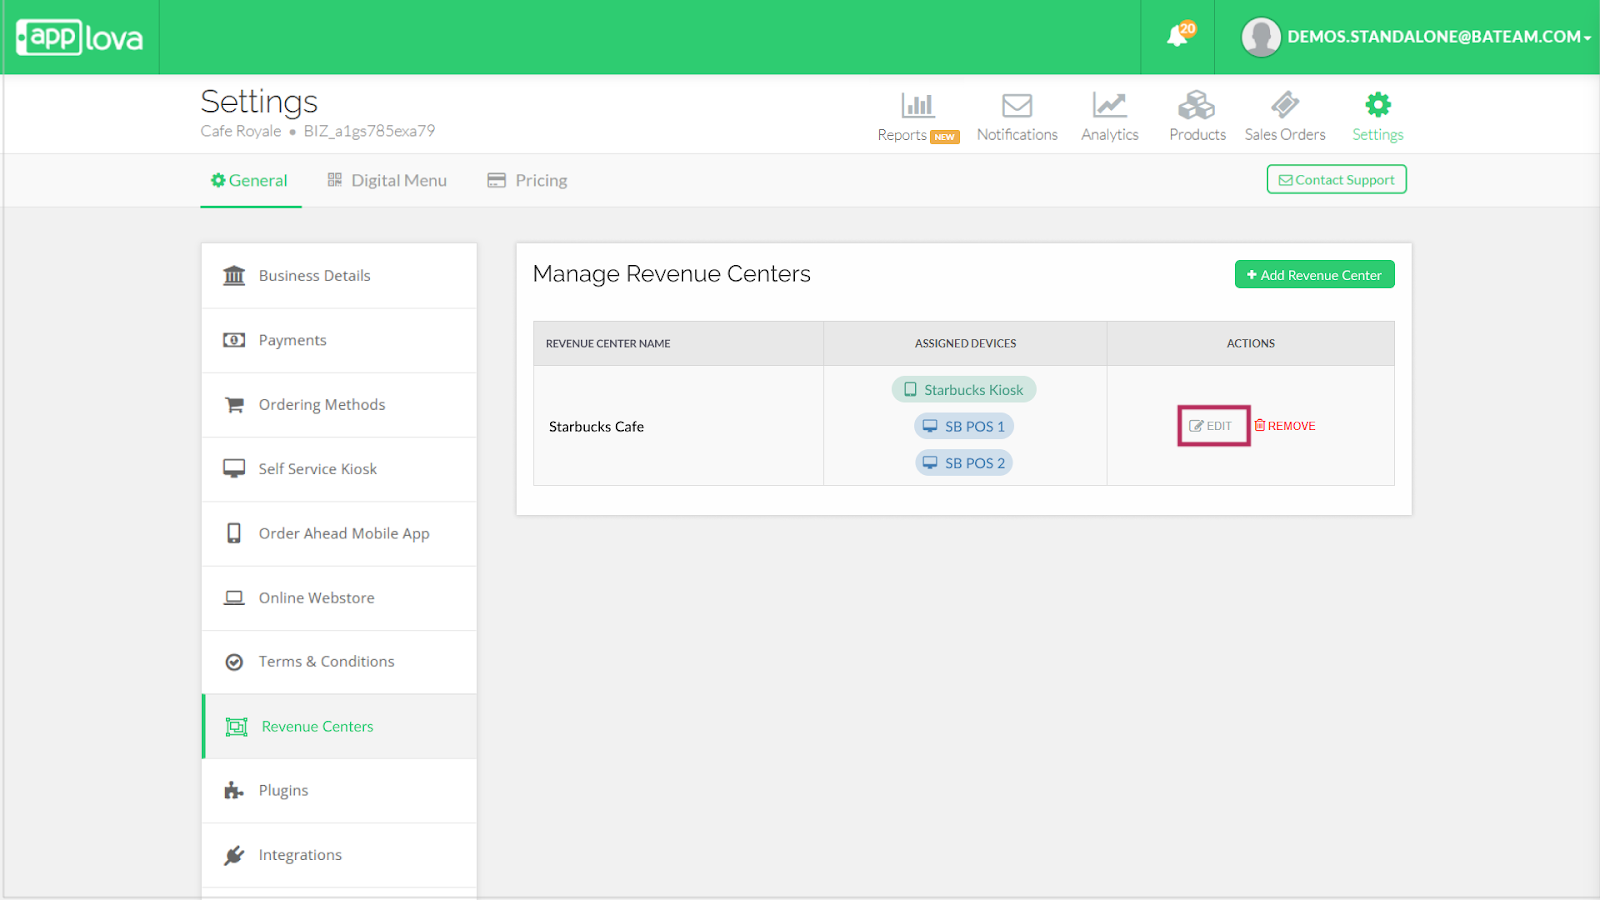
Click on "Revenue Centers".
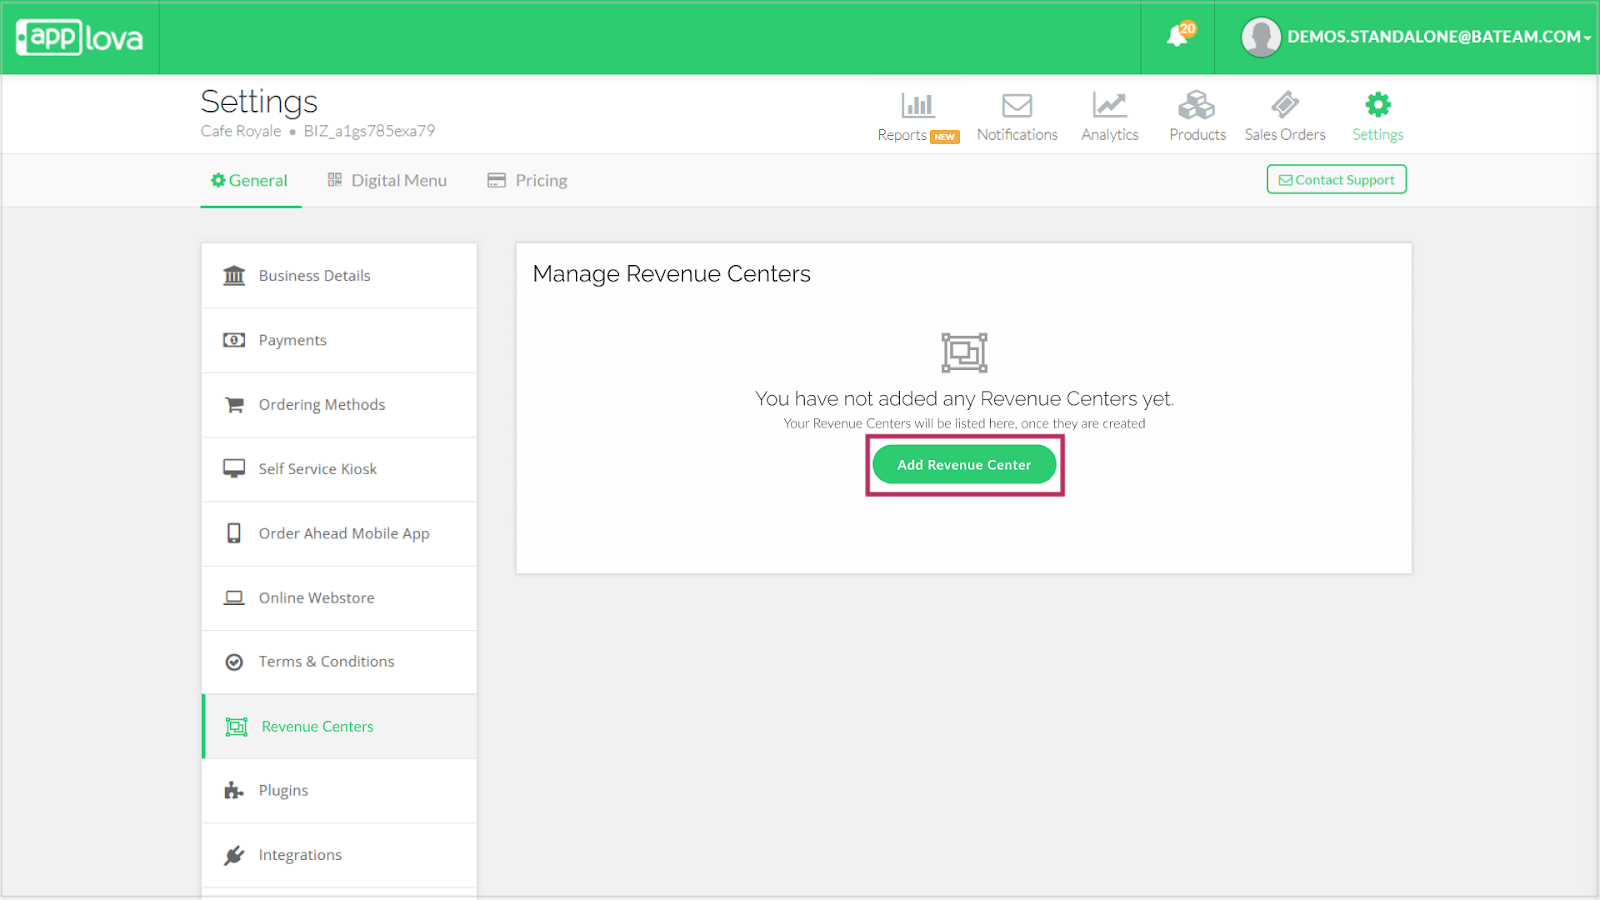
Step 3
Click on "Add Revenue Center" to open the creation popup.
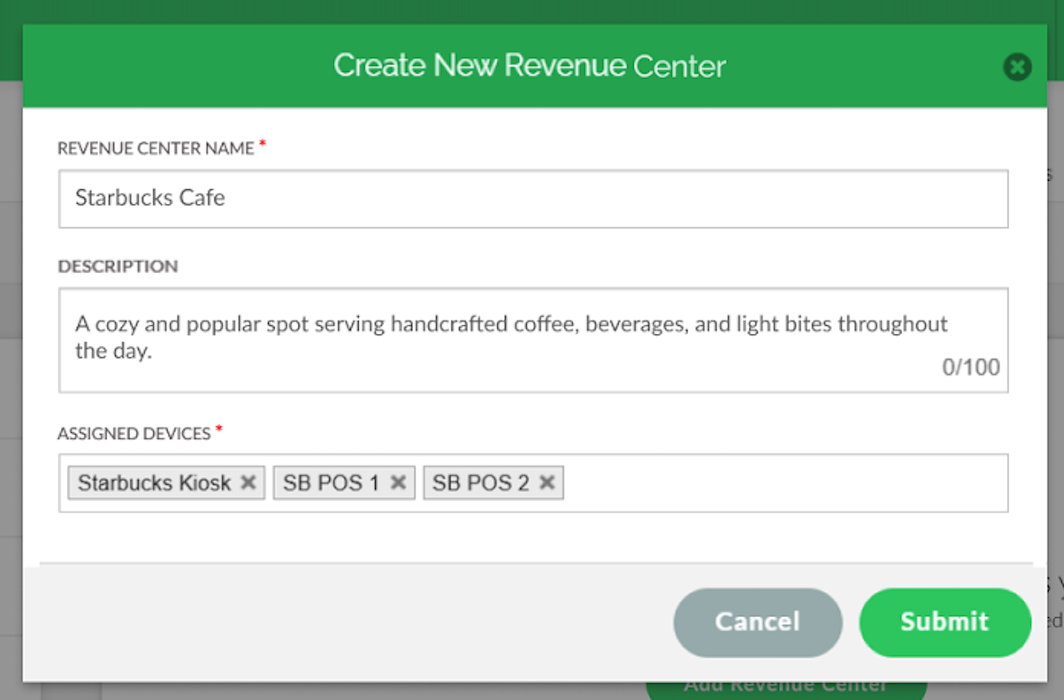
1. A device can be assigned to only one revenue center.
2. Multiple devices can be assigned to a single revenue center.
3. Duplicate names are not allowed.
Step 1
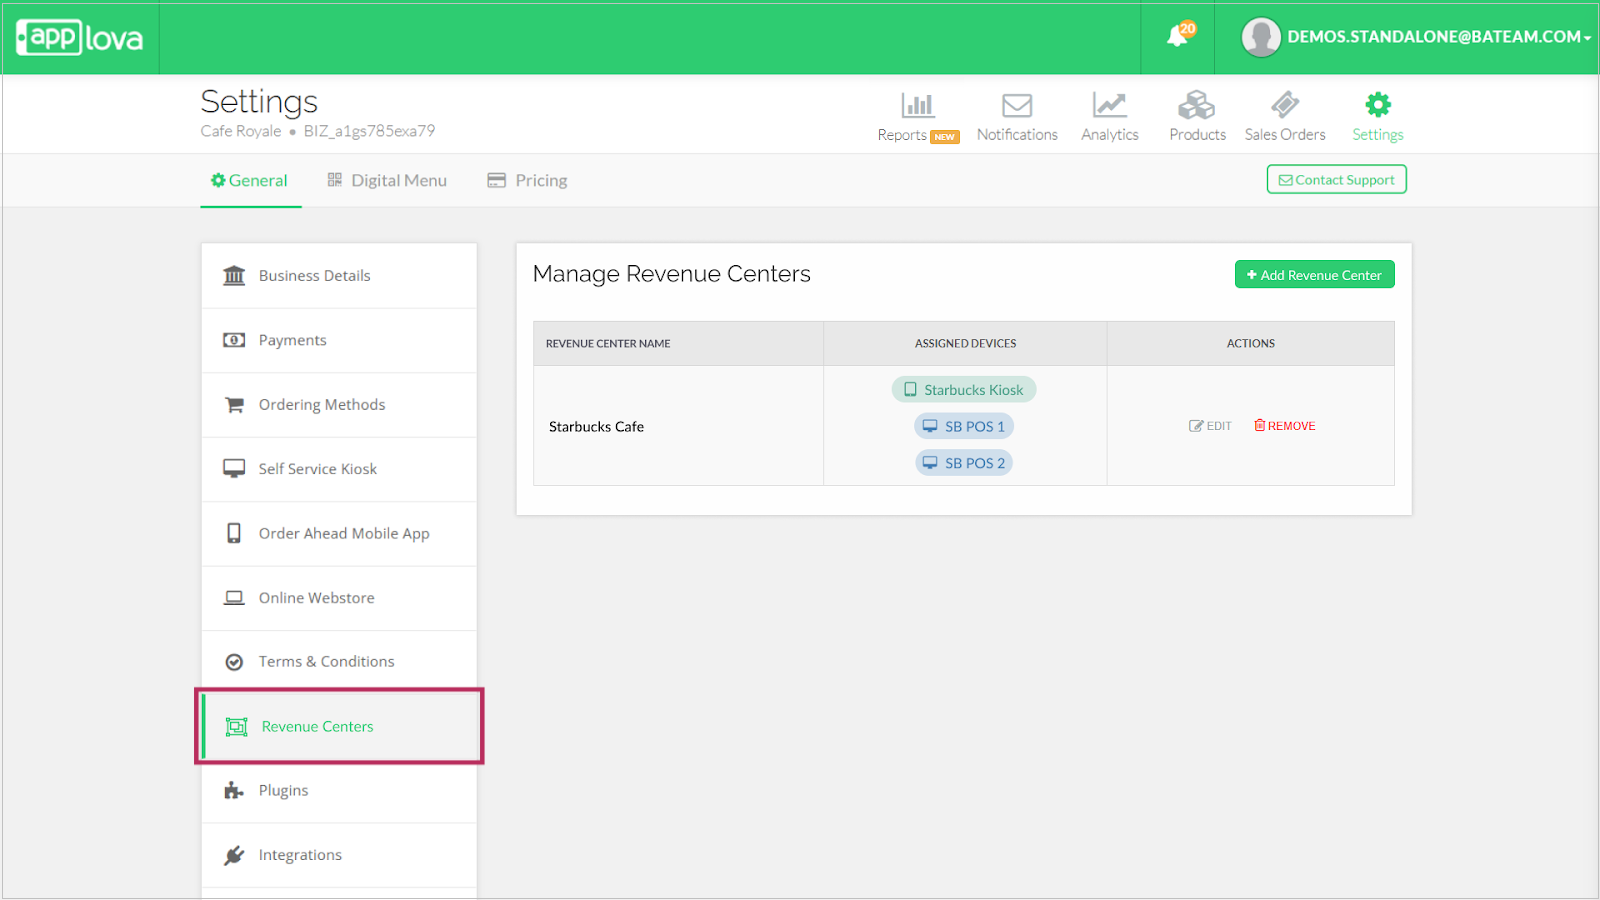
Click on "Edit" in the Actions column of the relevant entry.
Step 2
Alter the form fields as needed.
Step 3
Click on "Submit" and the values will get updated accordingly.
Step 1
Click on "Remove" in the Actions column of the respective entry.
A confirmation prompt will appear. Click on "Confirm" to delete.
How it Reflects
Refer to the following article;
Enhanced Reports on Merchant Web Portal? -> How to Filter Reports by Revenue Centers?
 Feature in Action (Watch Video):
https://youtu.be/A4lbNnGuAEE?feature=shared
Related Articles
How to Manage Product Add-On(s) via Merchant Web?
What are Product Add-On(s)? Product Add-Ons are extra customizations that can be added to a product to suit the customers' needs. (i.e., Sugar levels for Coffee, Toppings for a Pizza, Colors for a Shirt). The price of an Add-On product will be an ...How to Manage Categories on Merchant Portal?
In this article, you will learn how to manage category-related settings in the Merchant Portal to keep products clearly organized and displayed correctly. How to Add Category? This feature allows the merchant to add a new product category. Step 1 ...How to Manage Products via Merchant Web?
This article explains how merchants can add, edit, duplicate, and delete products by following the steps provided. How to Add a Product? Step 1 Login to "Applova Merchant Web". Step 2 Go to "Products" and click on "Add New Product". Step 3 Fill in ...How to Manage Product Image via Merchant Web?
This feature allows merchants to manage product images through the Merchant Portal. Merchants can use this feature to add, update, or remove product images, helping keep their online menu visually accurate and appealing to customers. How to Add ...How to Manage Add-On Groups?
Supported Domains: Standalone Available Channels: Webstore v1, Mobile Order Ahead App (iOS & Android) By enabling this feature, merchants are allowed to add additional options or complementary items to a main product item that can be added to a core ...