How to Manage Add-On Groups?

Supported Domains: Standalone
Available Channels: Webstore v1, Mobile Order Ahead App (iOS & Android)
By enabling this feature, merchants are allowed to add additional options or complementary items to a main product item that can be added to a core food order.
For example: for the product "Burger", add-on groups will be included as "Toppings" (lettuce, tomato, onions), "Cheese"(Mozerella, Parmasan, Cheddar) & "Sauces"(Tomato sauce, Mayo, Chili Sauce).
How to Add an Add-On Group?
Step 1
Login to the "Merchant Web Portal" and click on "Products".
Step 2
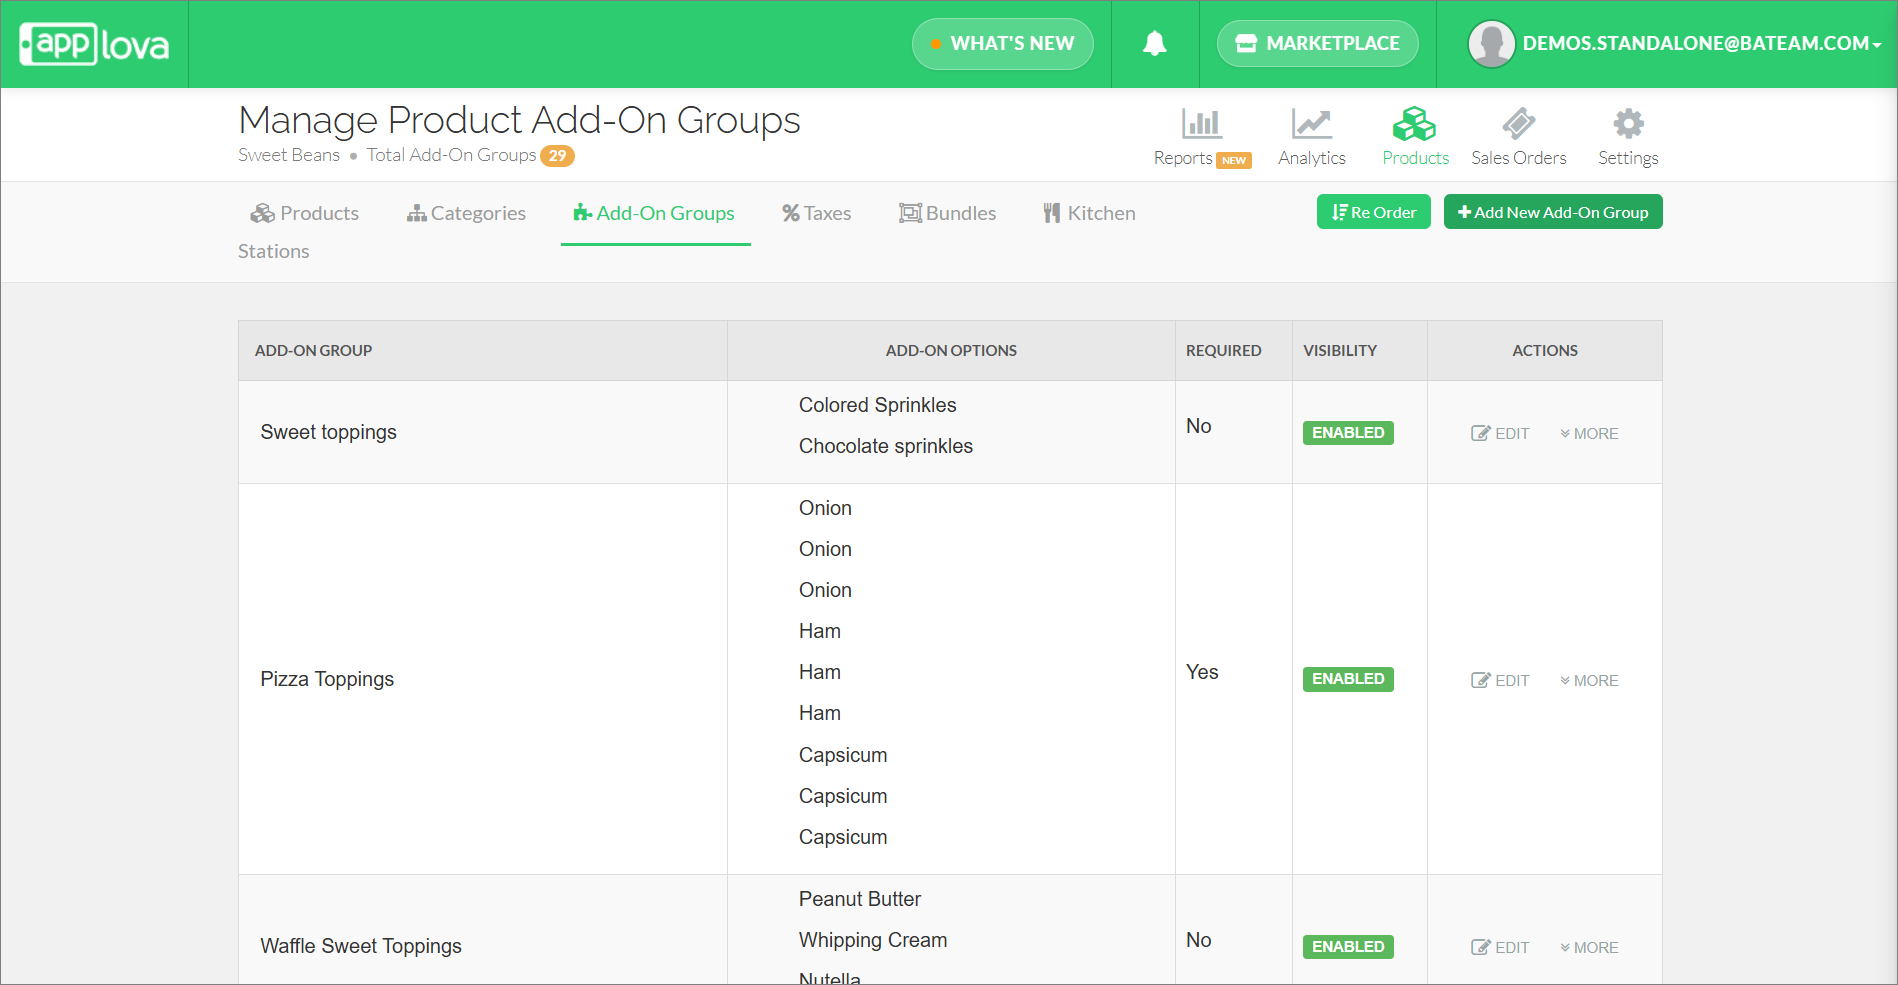
From the "Add-On Groups" tab, click "Add New Add-On Group".
Step 3
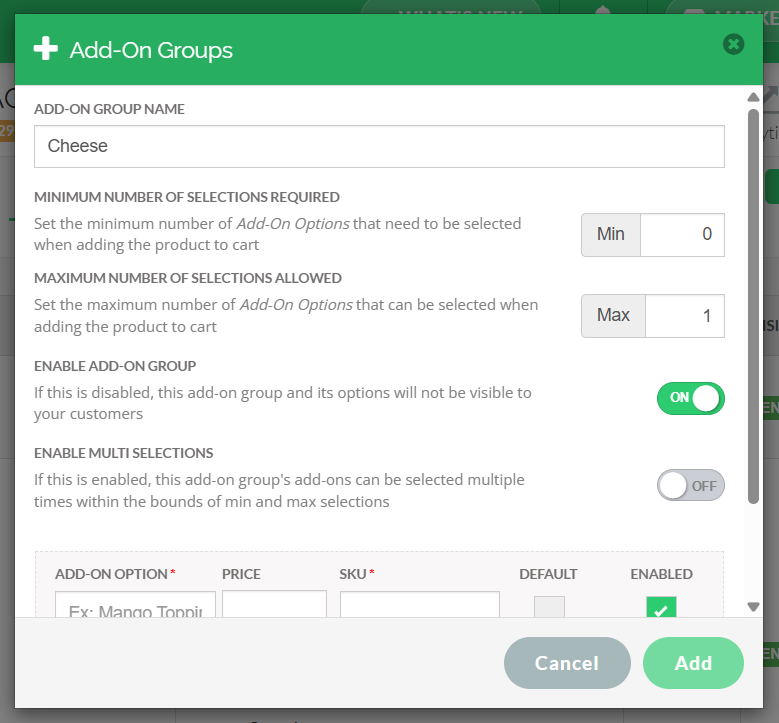
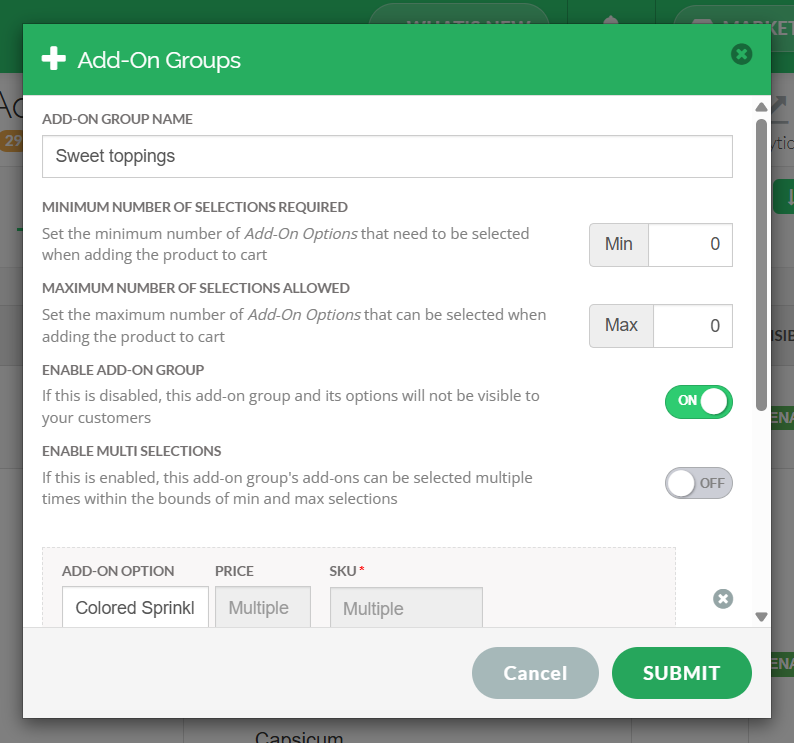
Enter Add-On Group Name, minimum & maximum number of selections allowed, enable add-on group and multi selections(if available).
Step 4
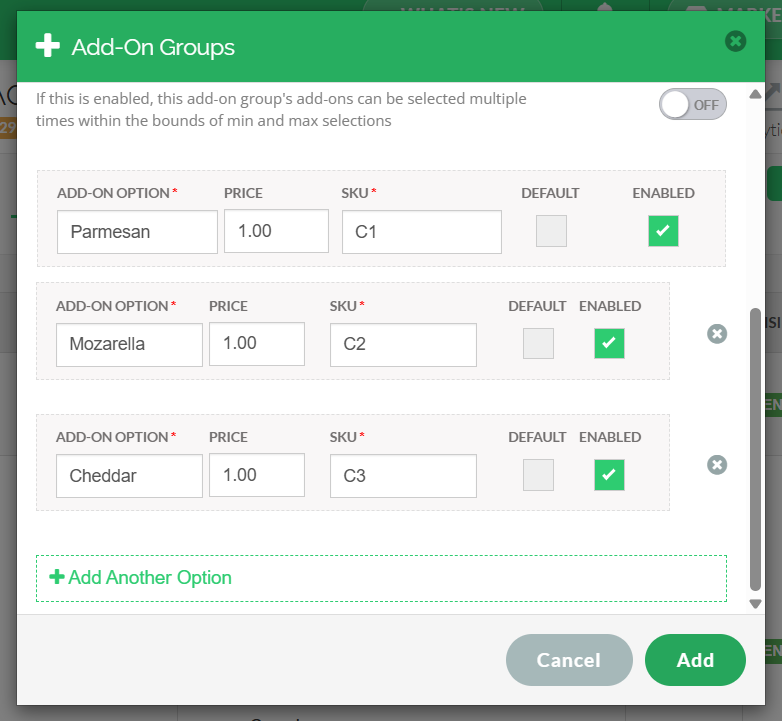
Then add the Add-On Options along with price, SKU, status(enabled,disabled,default) and click "Add".
How to Edit an Add-On Group?
Step 1
Login to the "Merchant Web Portal" and click on "Products".
Step 2
How to Remove an Add-On Group?
Step 1
Login to the "Merchant Web Portal" and click on "Products".
Step 2
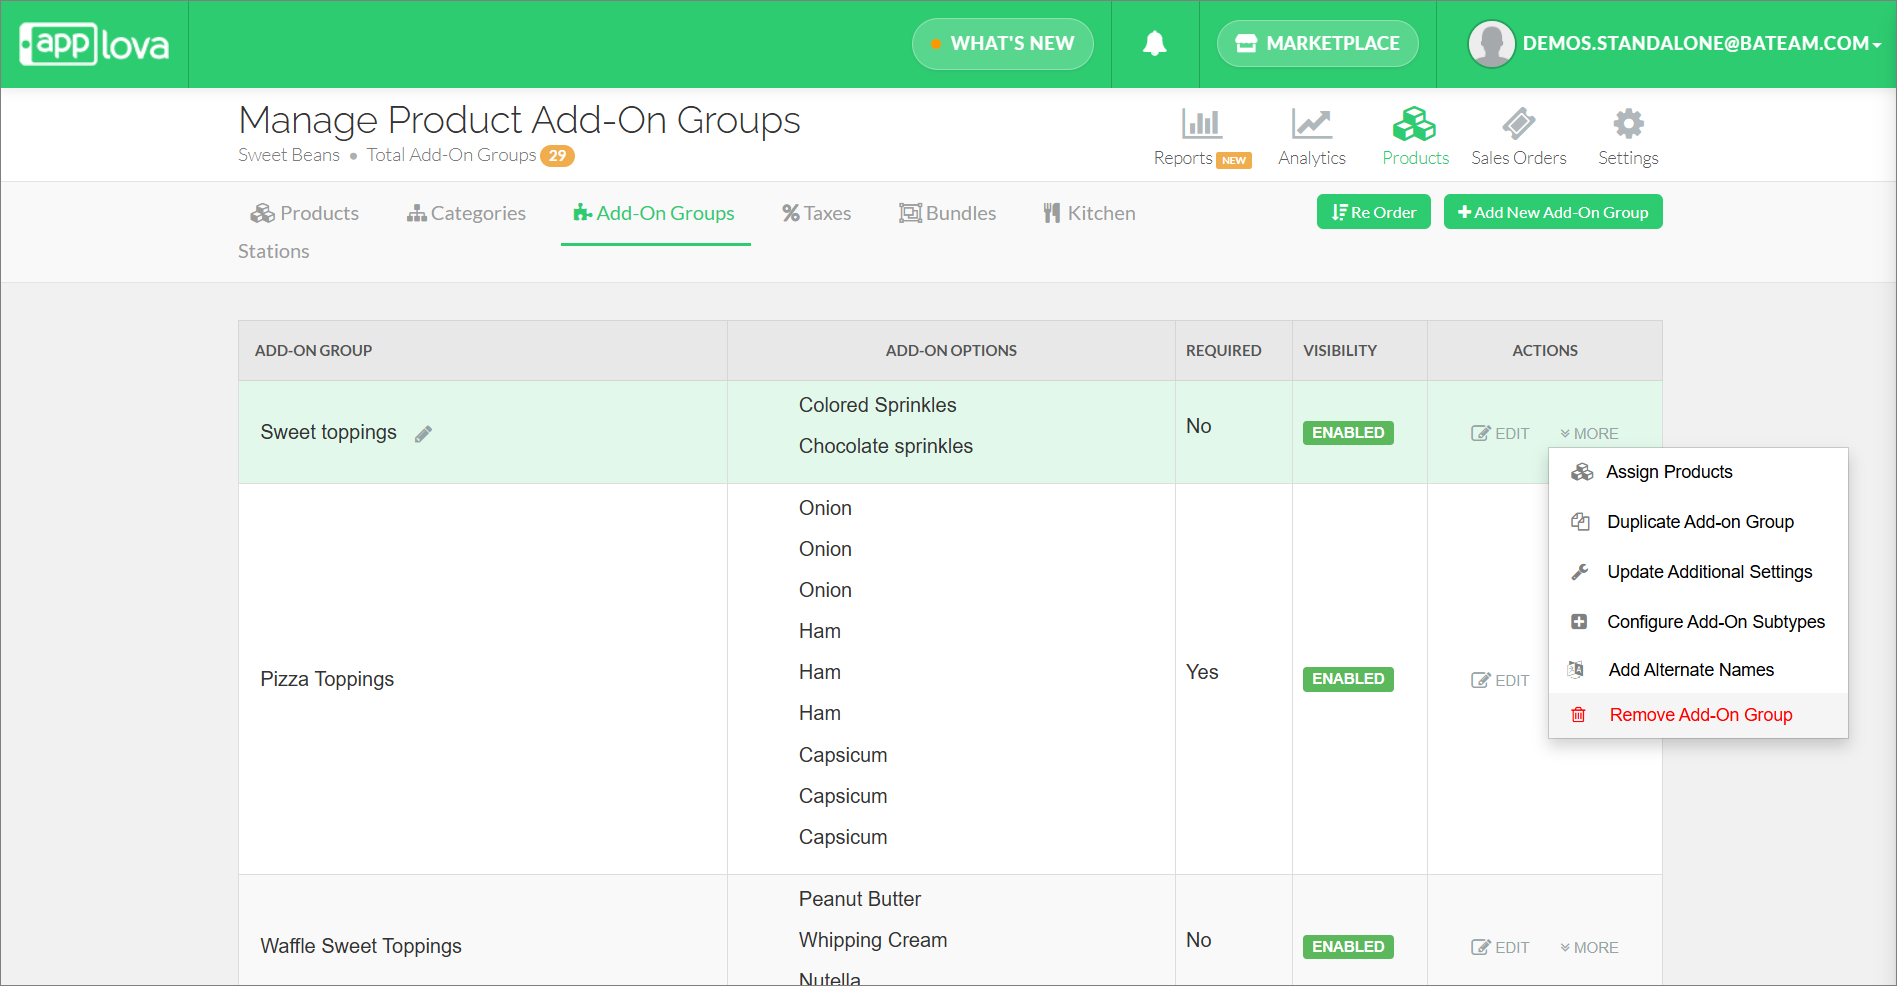
From the "Add-On Groups" tab, select an addon group to be deleted and click "more" and then "Remove Add-On Group" .
Step 3
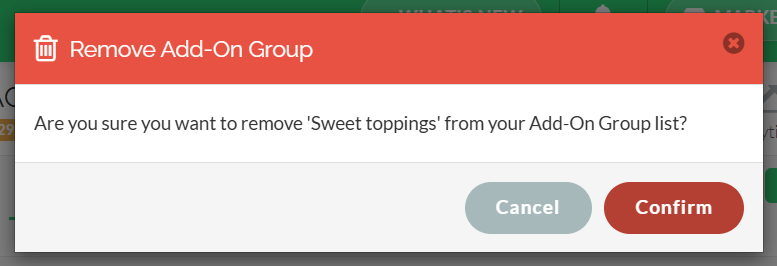
Click "Confirm" to remove.
How to Duplicate an Add-on Group?
This feature allows the merchant to duplicate add-on groups with almost the same addon options as the previous one.
Step 1
Login to "Applova Merchant Web".
Step 2
Click on "Products" and go to the "Add-On Groups" tab.
Step 3
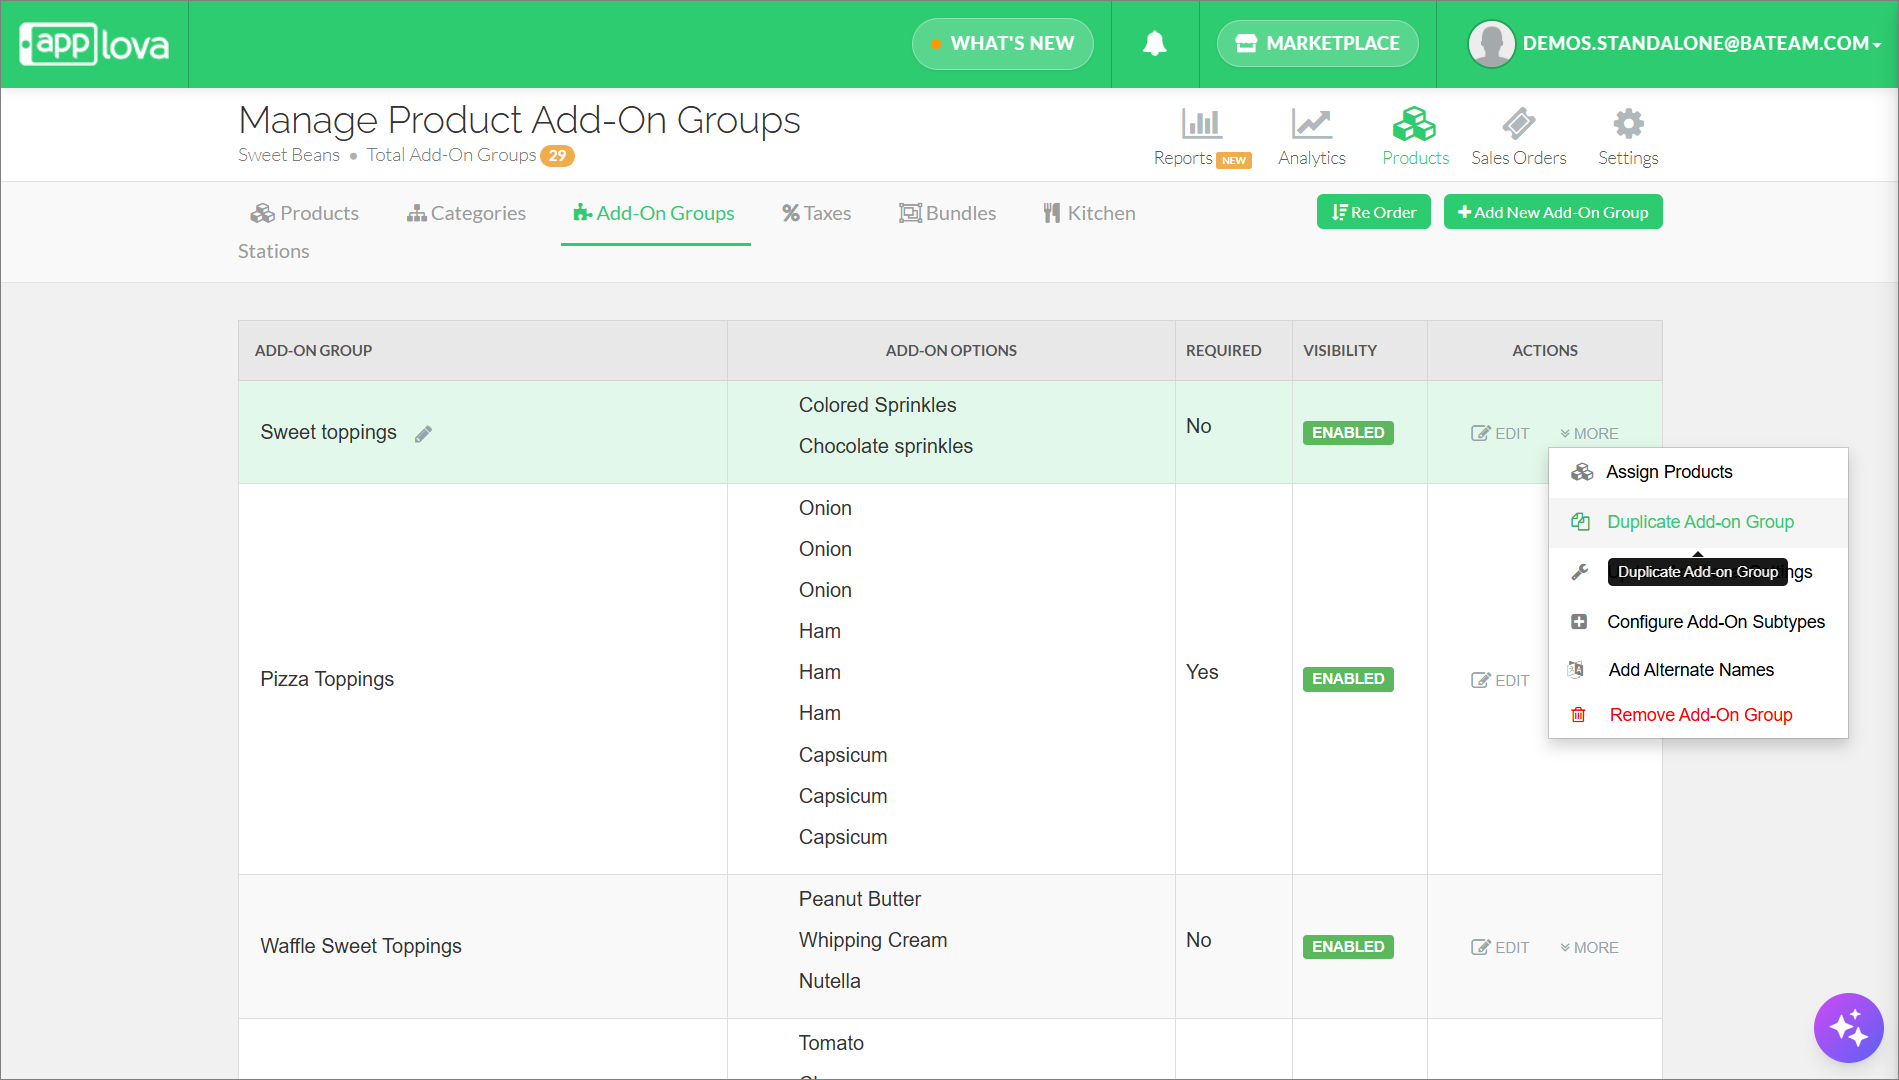
Go to the "Actions" column of any add-on group and click "More".
Step 3
Click on "Duplicate Add-on Group".
Step 4
Make changes to the required fields and click "Submit".
How to Add an Image and Description for an Add-On Group?
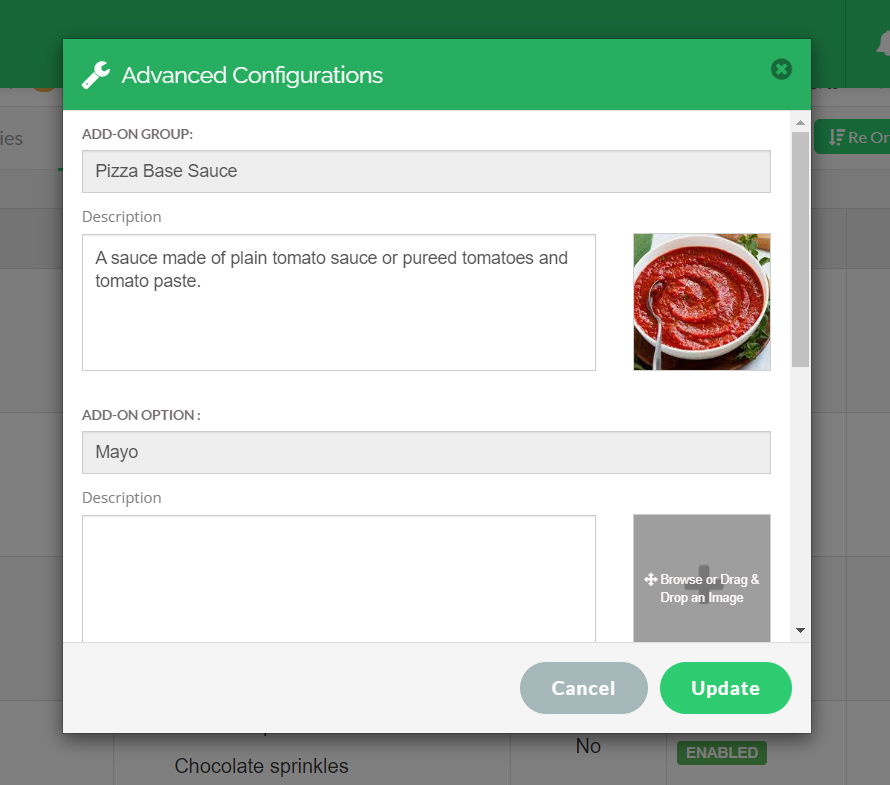
This feature allows the merchant to add an image and a description for an Add-on Group.
Step 1
Login to "Applova Merchant Web".
Step 2
Click on "Products" once you login and go to "Add-On Groups" tab.
Step 3
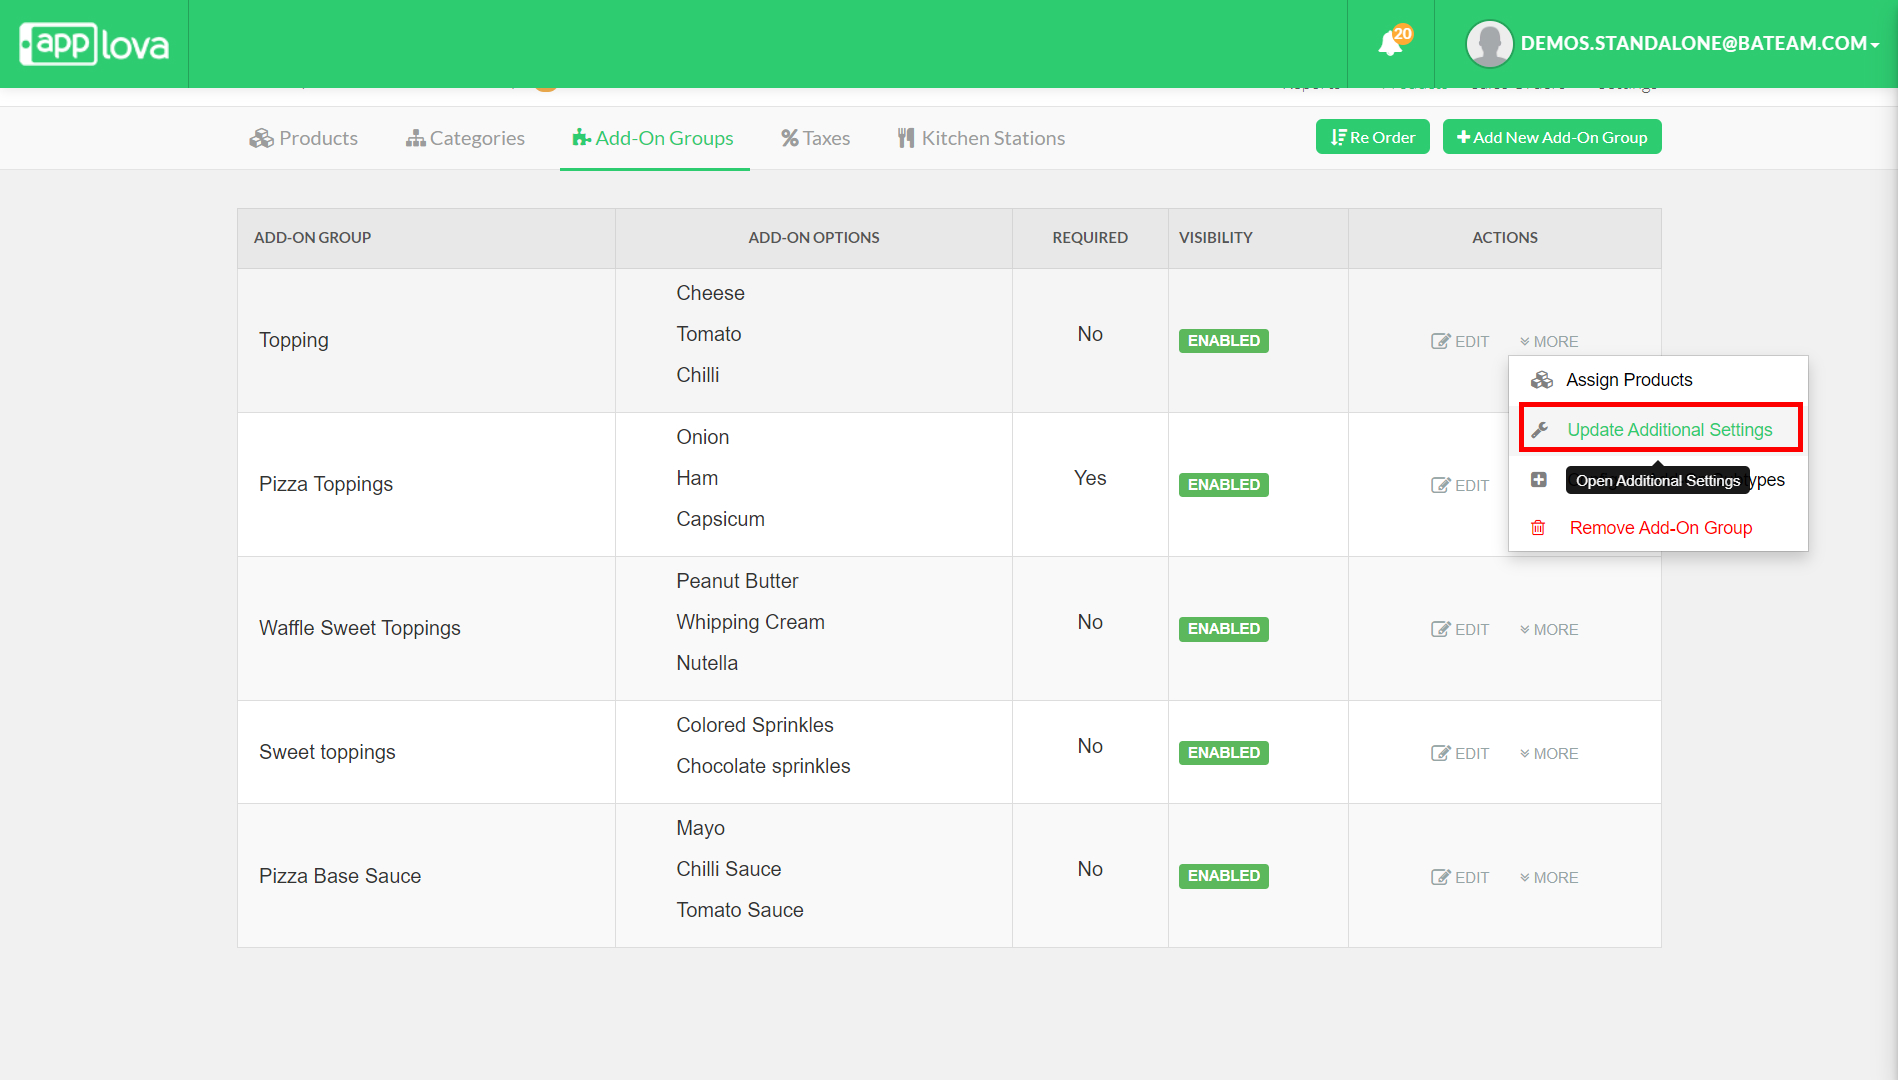
Click "More" under the "Actions" column of the Add-on group you wish to add the image and the description.
Step 4
Click "Update Additional Settings".
How to Remove Add-On Image
Step 1
Login to "Applova Merchant Web".
Step 2
Click on "Products" once you login and go to "Add-On Groups" tab.
Step 3
Click "More" under the "Actions" column of the Add-on group you wish to delete the image.
Step 4
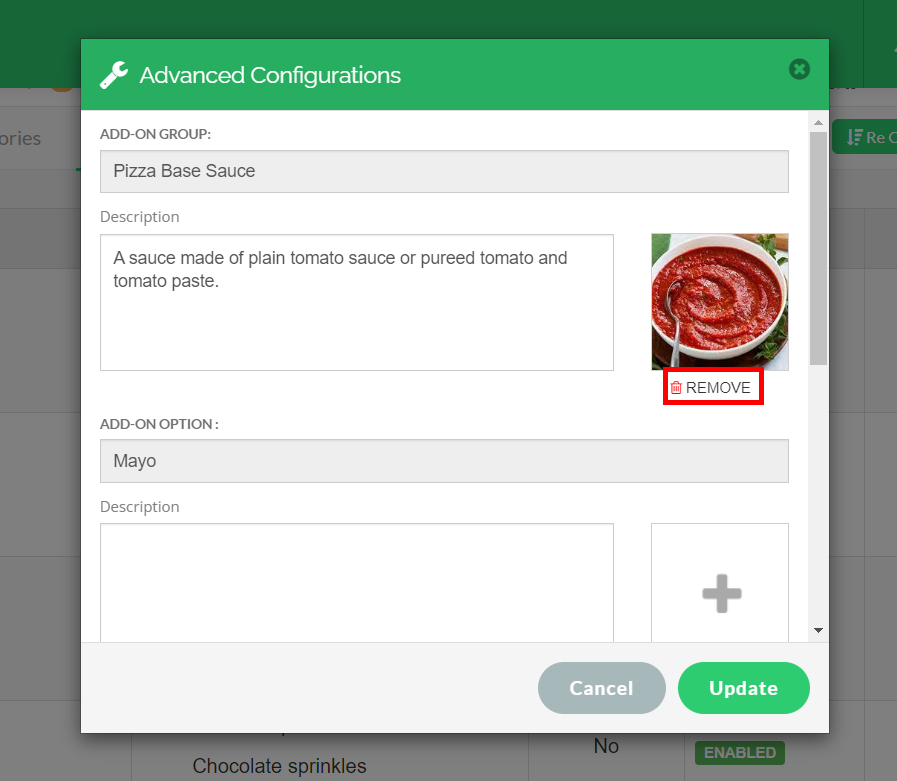
Click "Update Additional Settings".
Step 5
Click on "Remove" to delete the image.
How to Manage Add-On Group Subtypes?
With this feature, merchants are allowed to configure a second level (subtype) of add-on groups.

Usecase Scenario
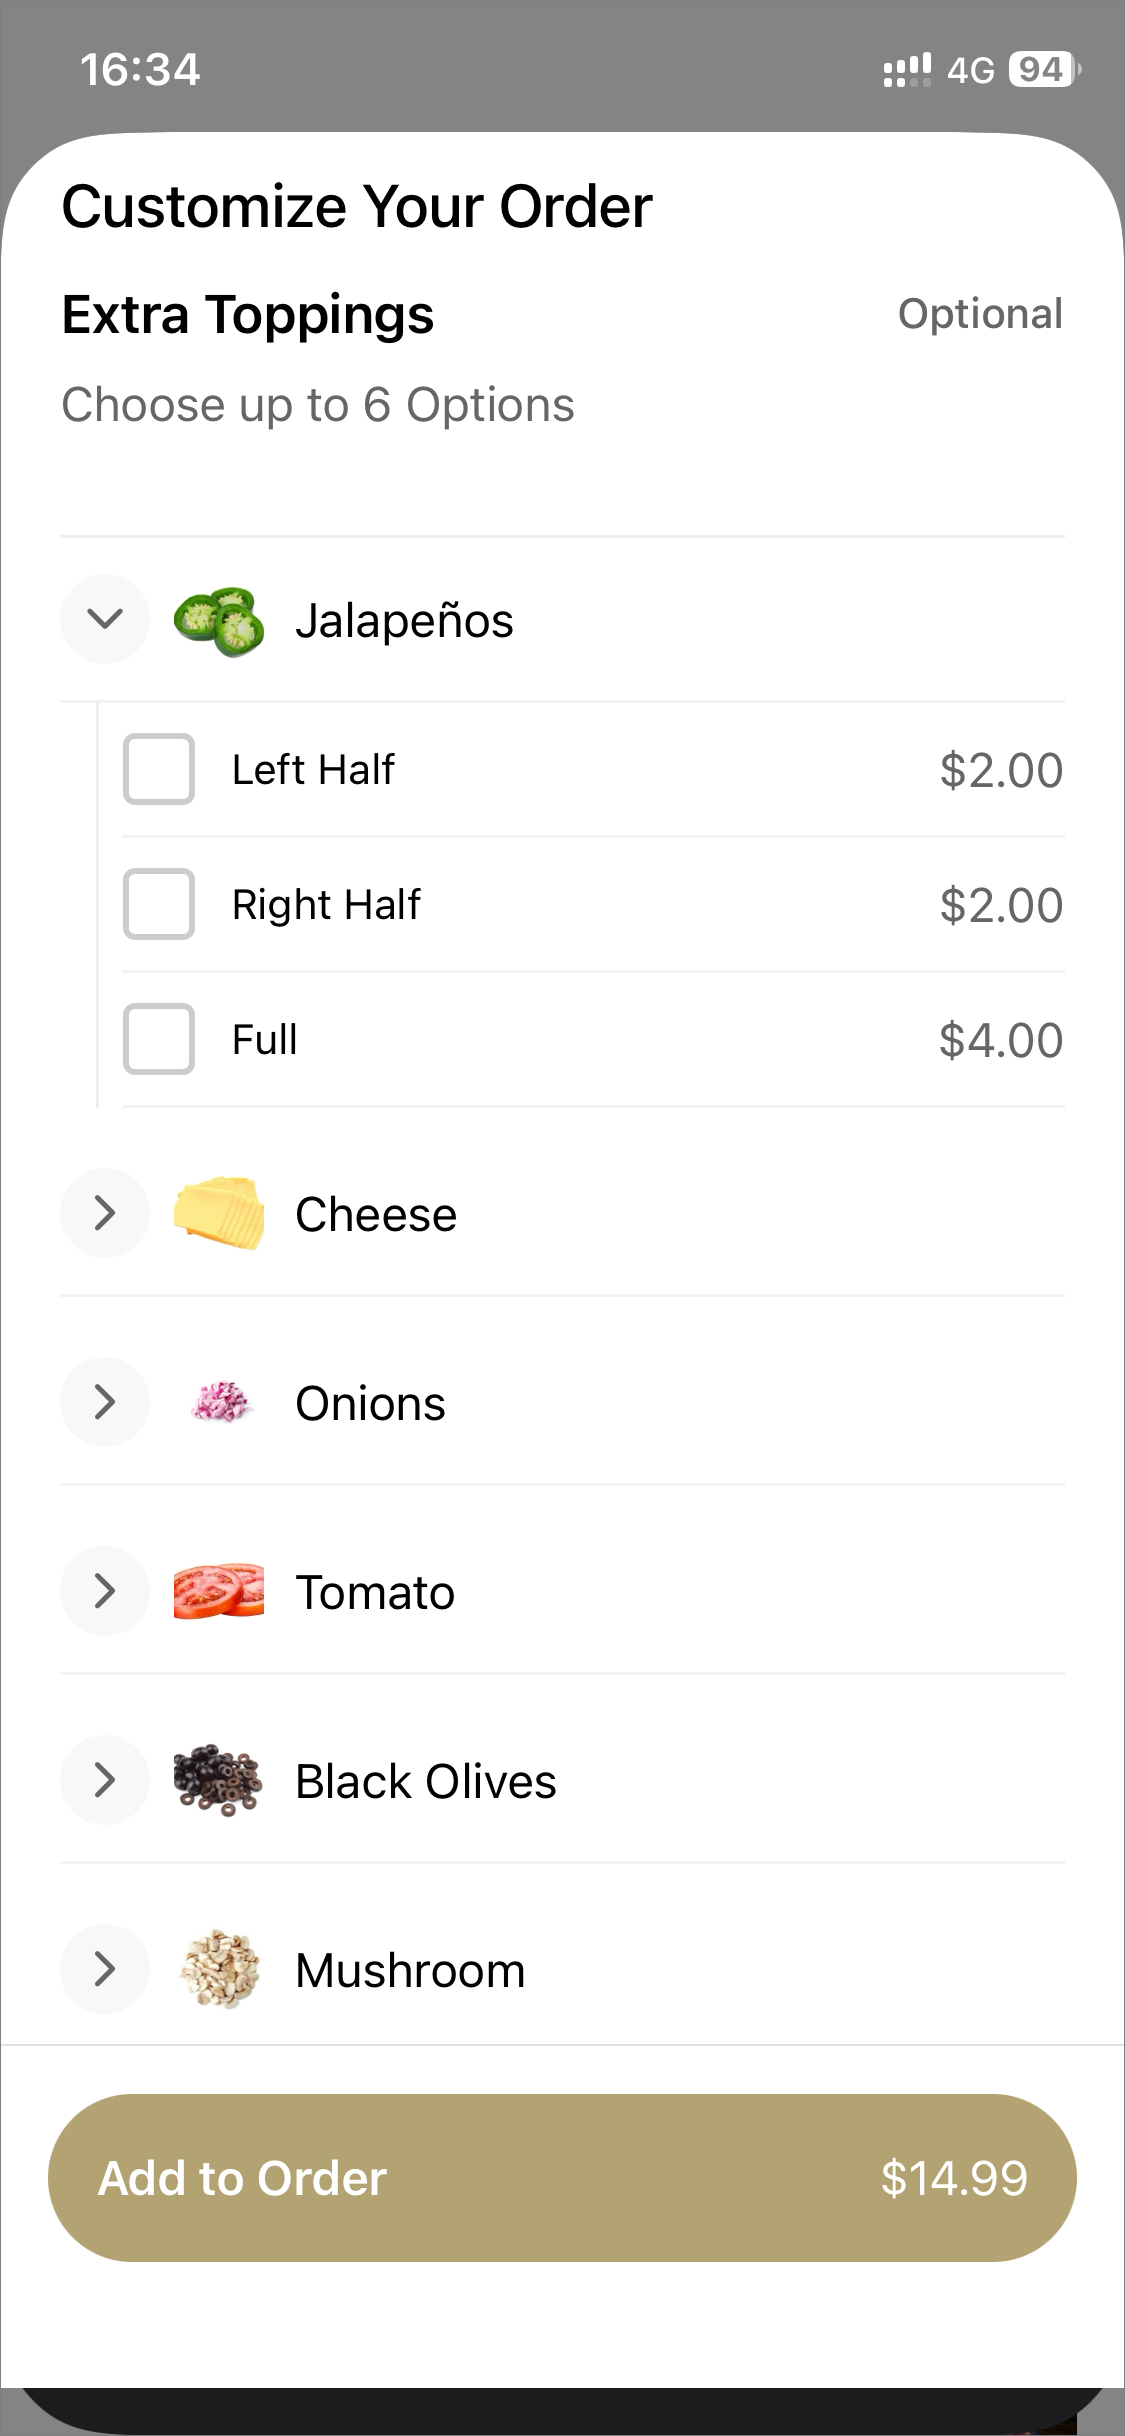
An add-on group “Pizza Toppings” could have options such as “Pepperoni, Black Olives and Bacon”. Once enabled, the merchant will be able to create subtypes for the add-on options such as “Left Half, Right Half and Whole Pizza.”
How to Configure via Merchant Web?
Step 1
Login to the "Merchant Web Portal" and click on "Products".
Step 2
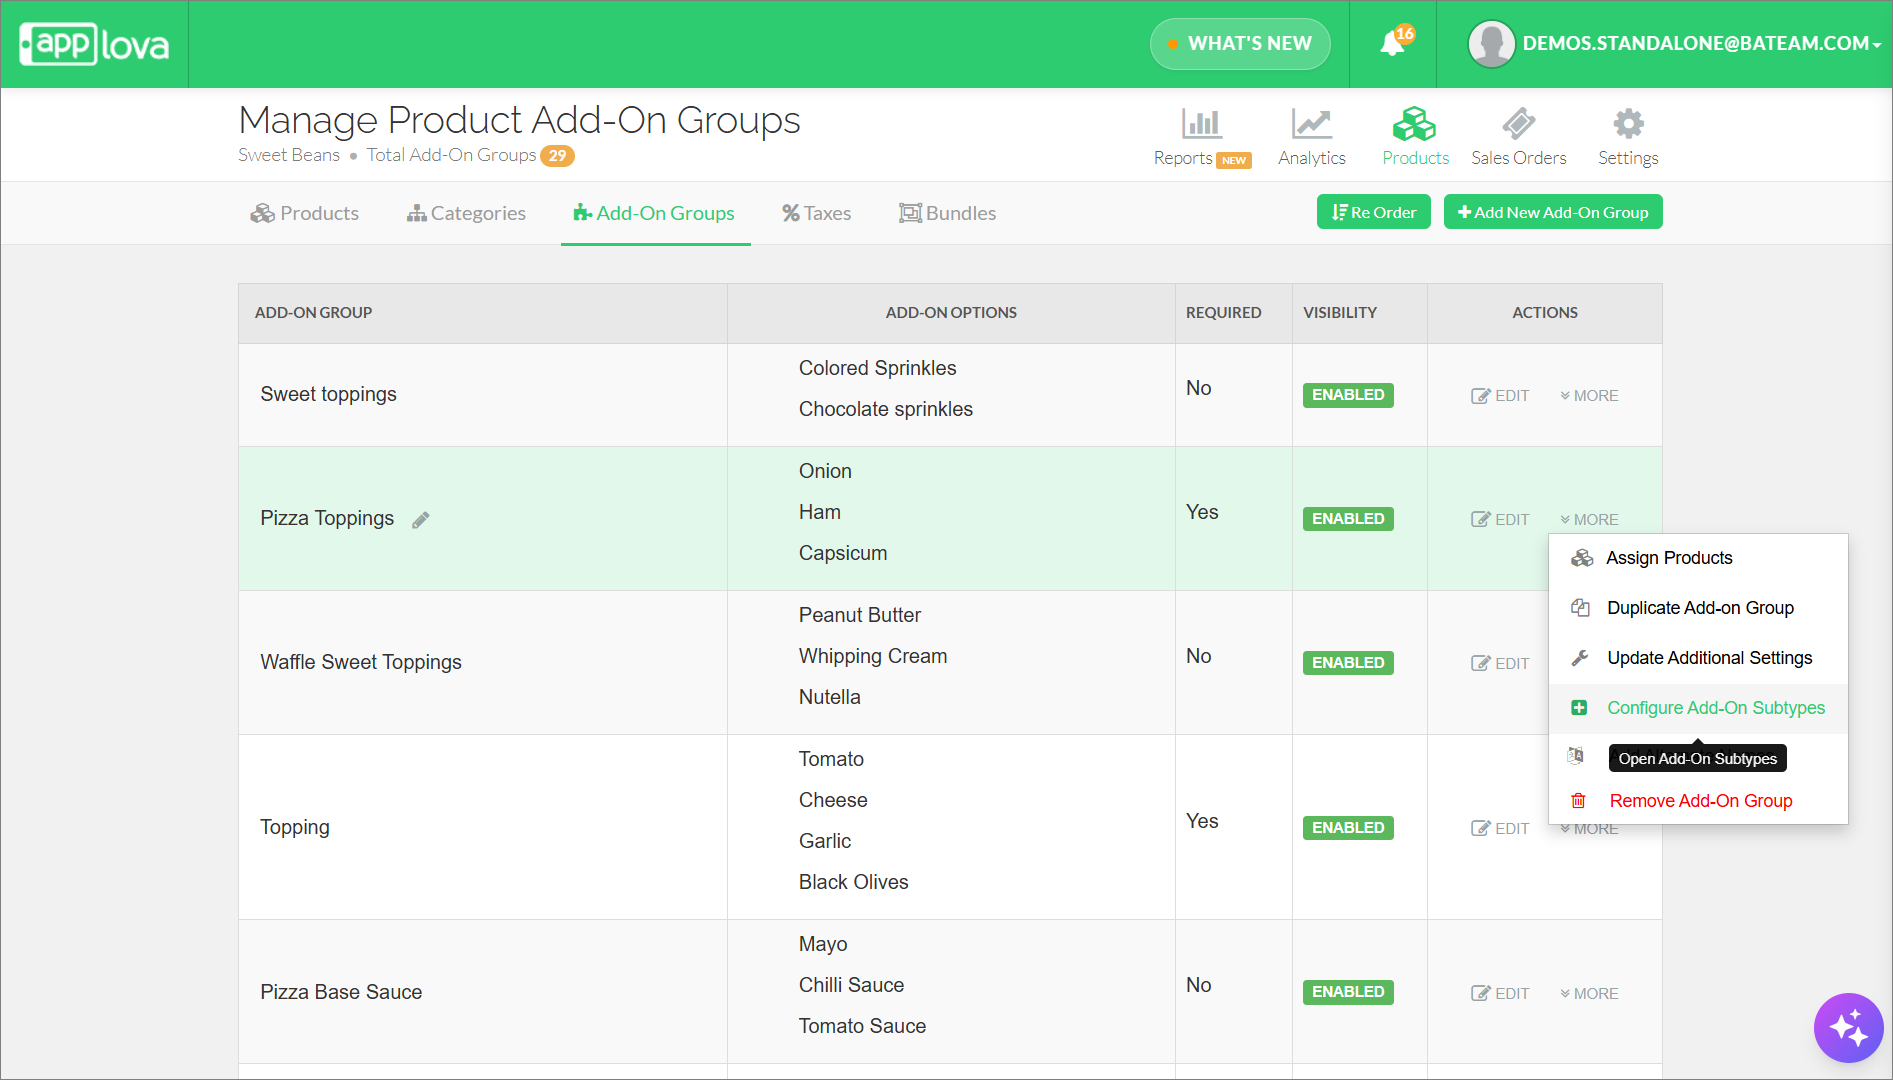
From the "Add-On Groups" tab, click on "More" within the Actions column, and then select "Configure Add-On Subtypes" for the selected add-on group.
Step 3
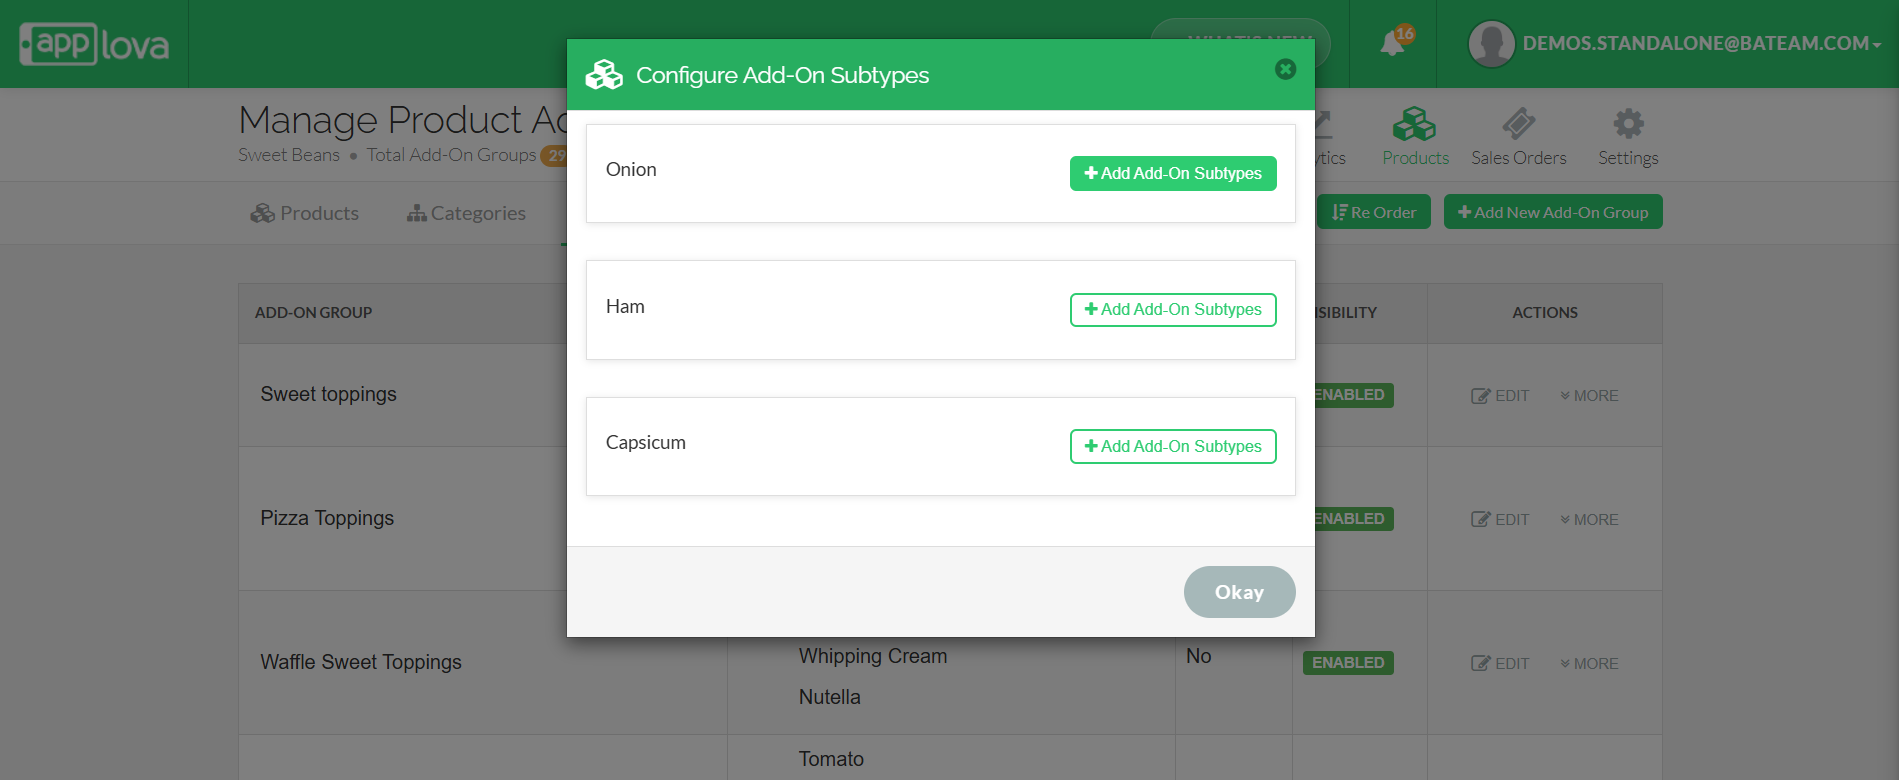
Click on "Add Add-On Subtypes" option next to the preferred Add-On group option.
Step 4
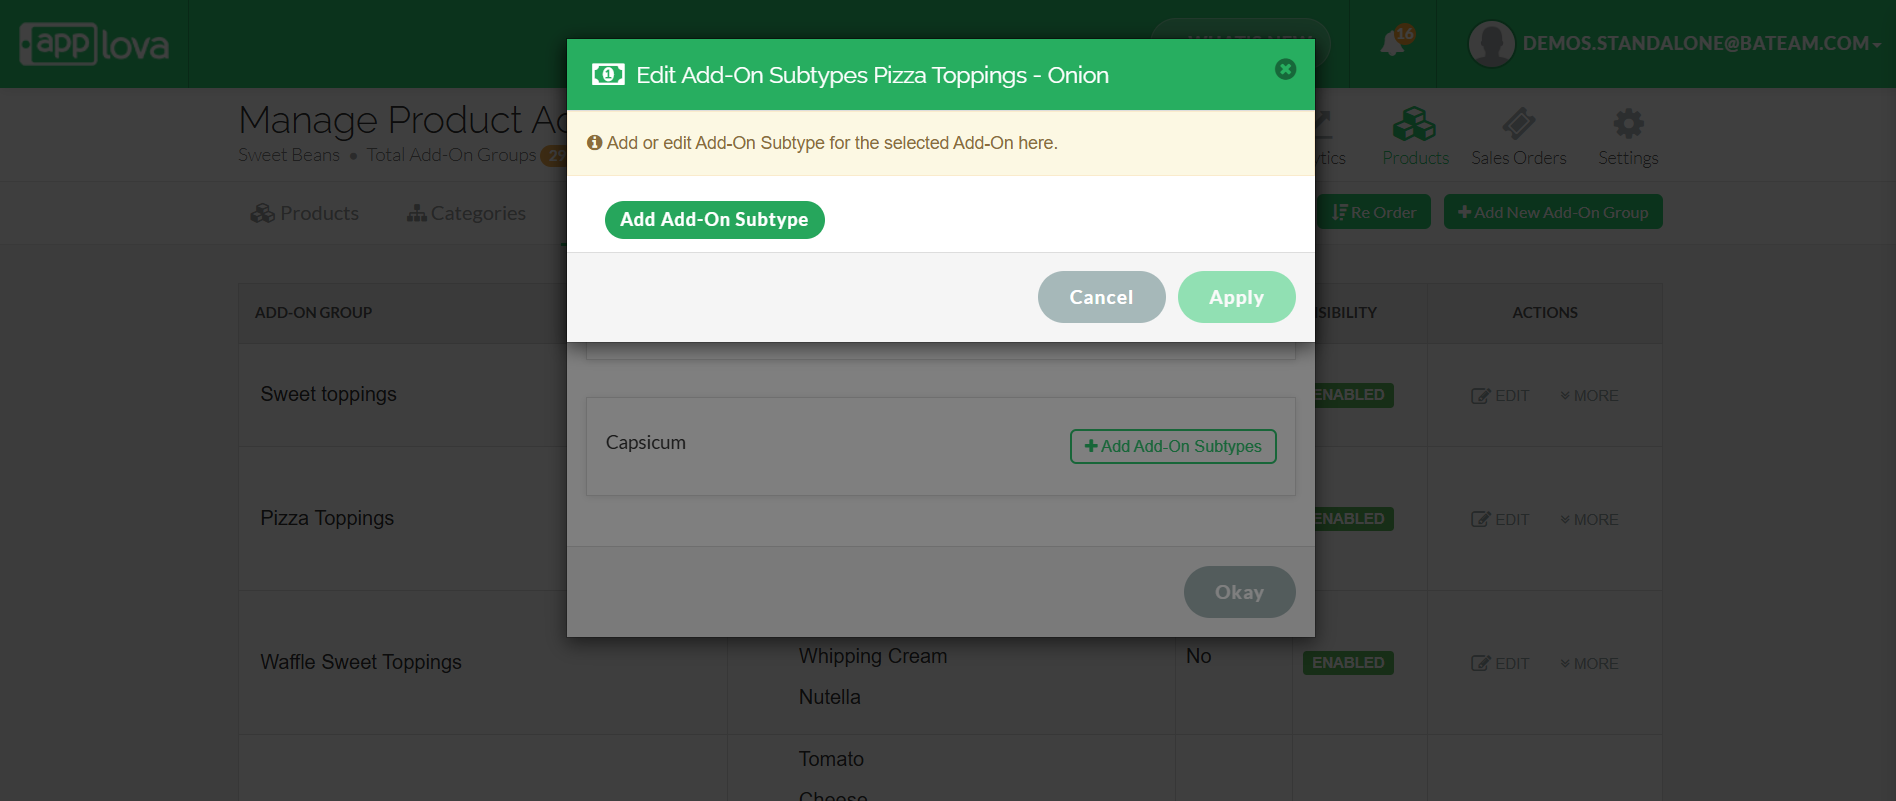
Click the "Add Add-On Subtypes" option.
Step 5
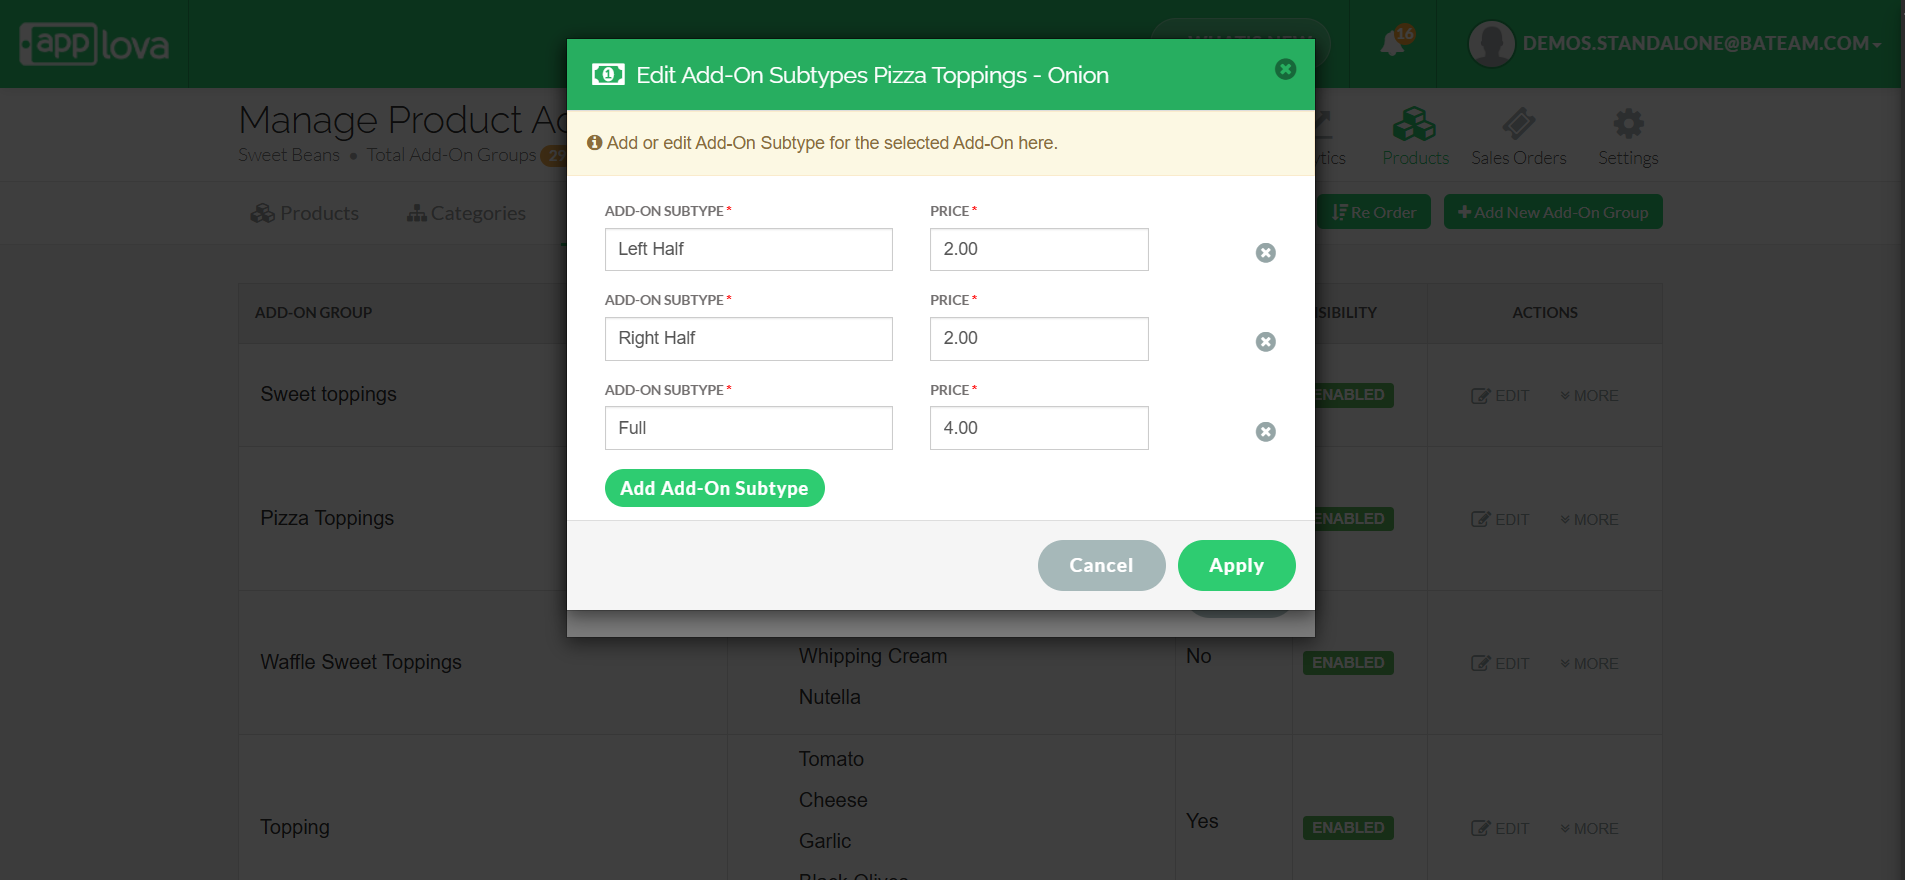
Add the preferred Add-On group subtypes and their respective prices and click "Apply".
How it Reflects?
Feature in Action (Watch Video):
How to Re-Order Add-On Groups?
This feature allows the merchant to change the order listing of the Add-On Groups.
Step 1
Login to "Applova Merchant Web".
Step 2
Click on "Products" once you login and go to "Add-On Groups" tab.
Step 3
Click on the "Re Order" button.
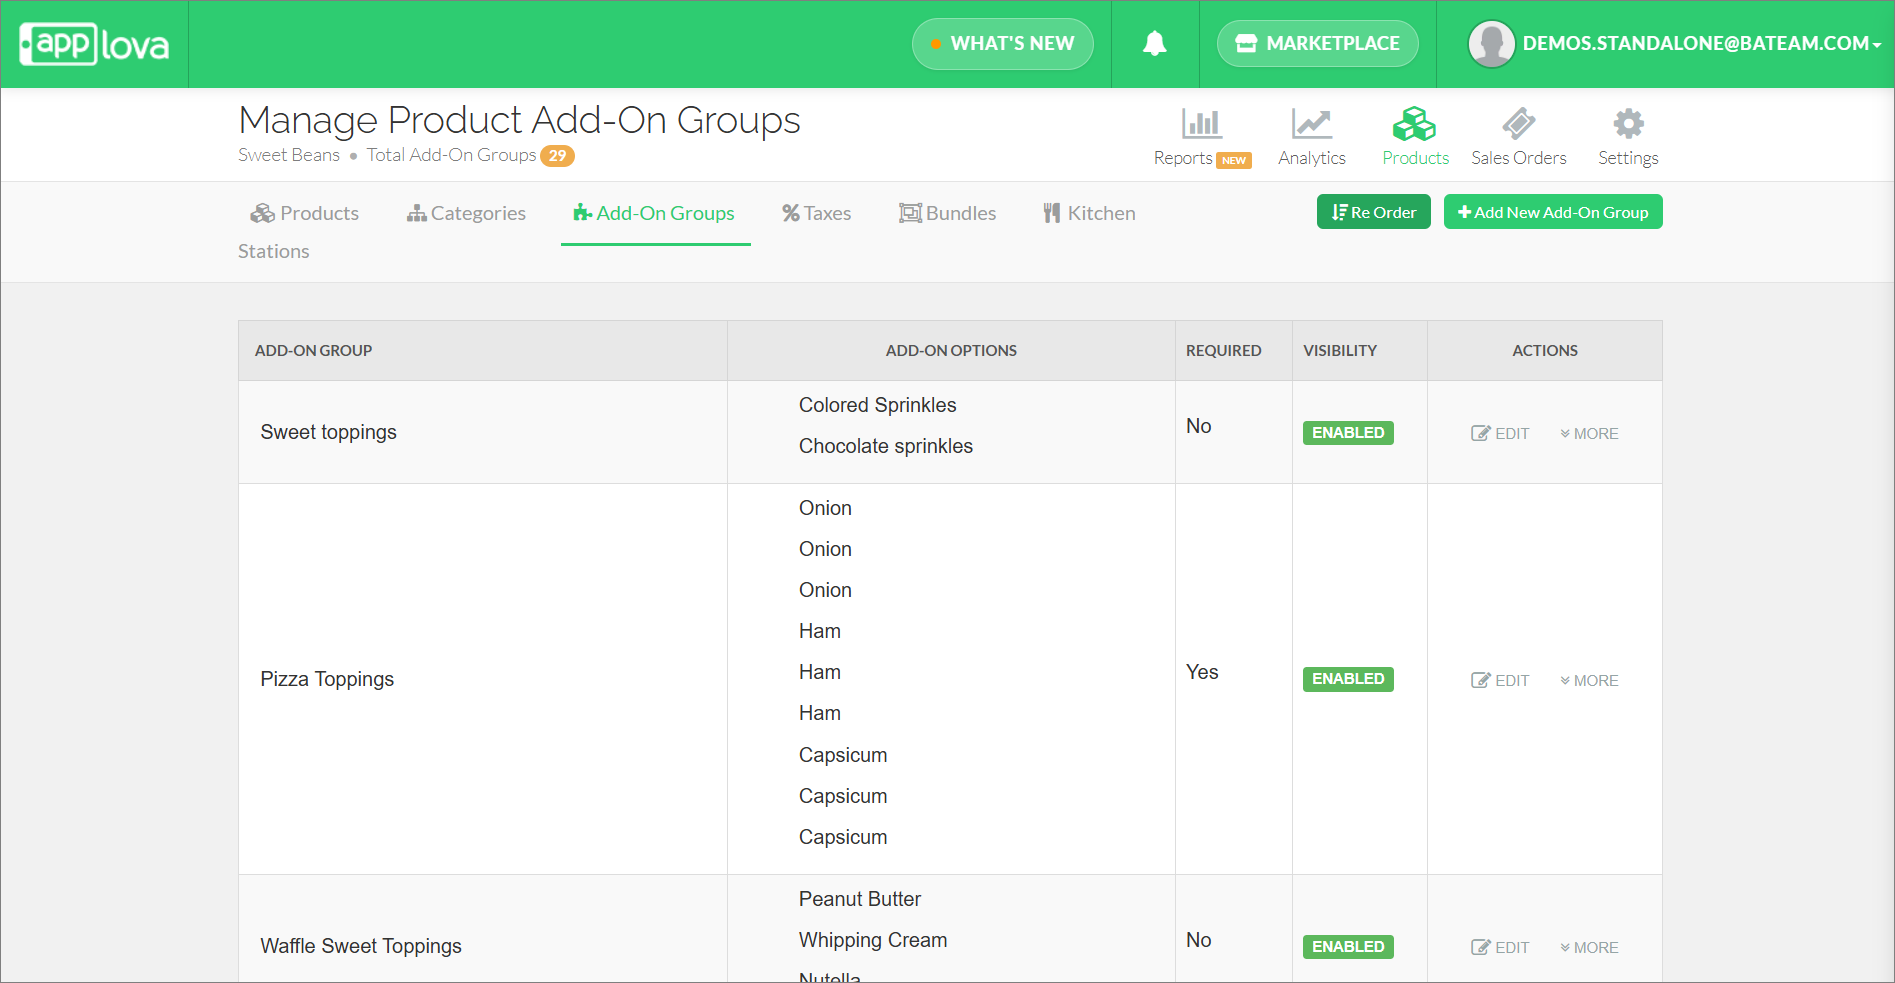
Step 4
Click on the ⋮⋮ icon and drag and drop to change the position of the Add-On Groups.
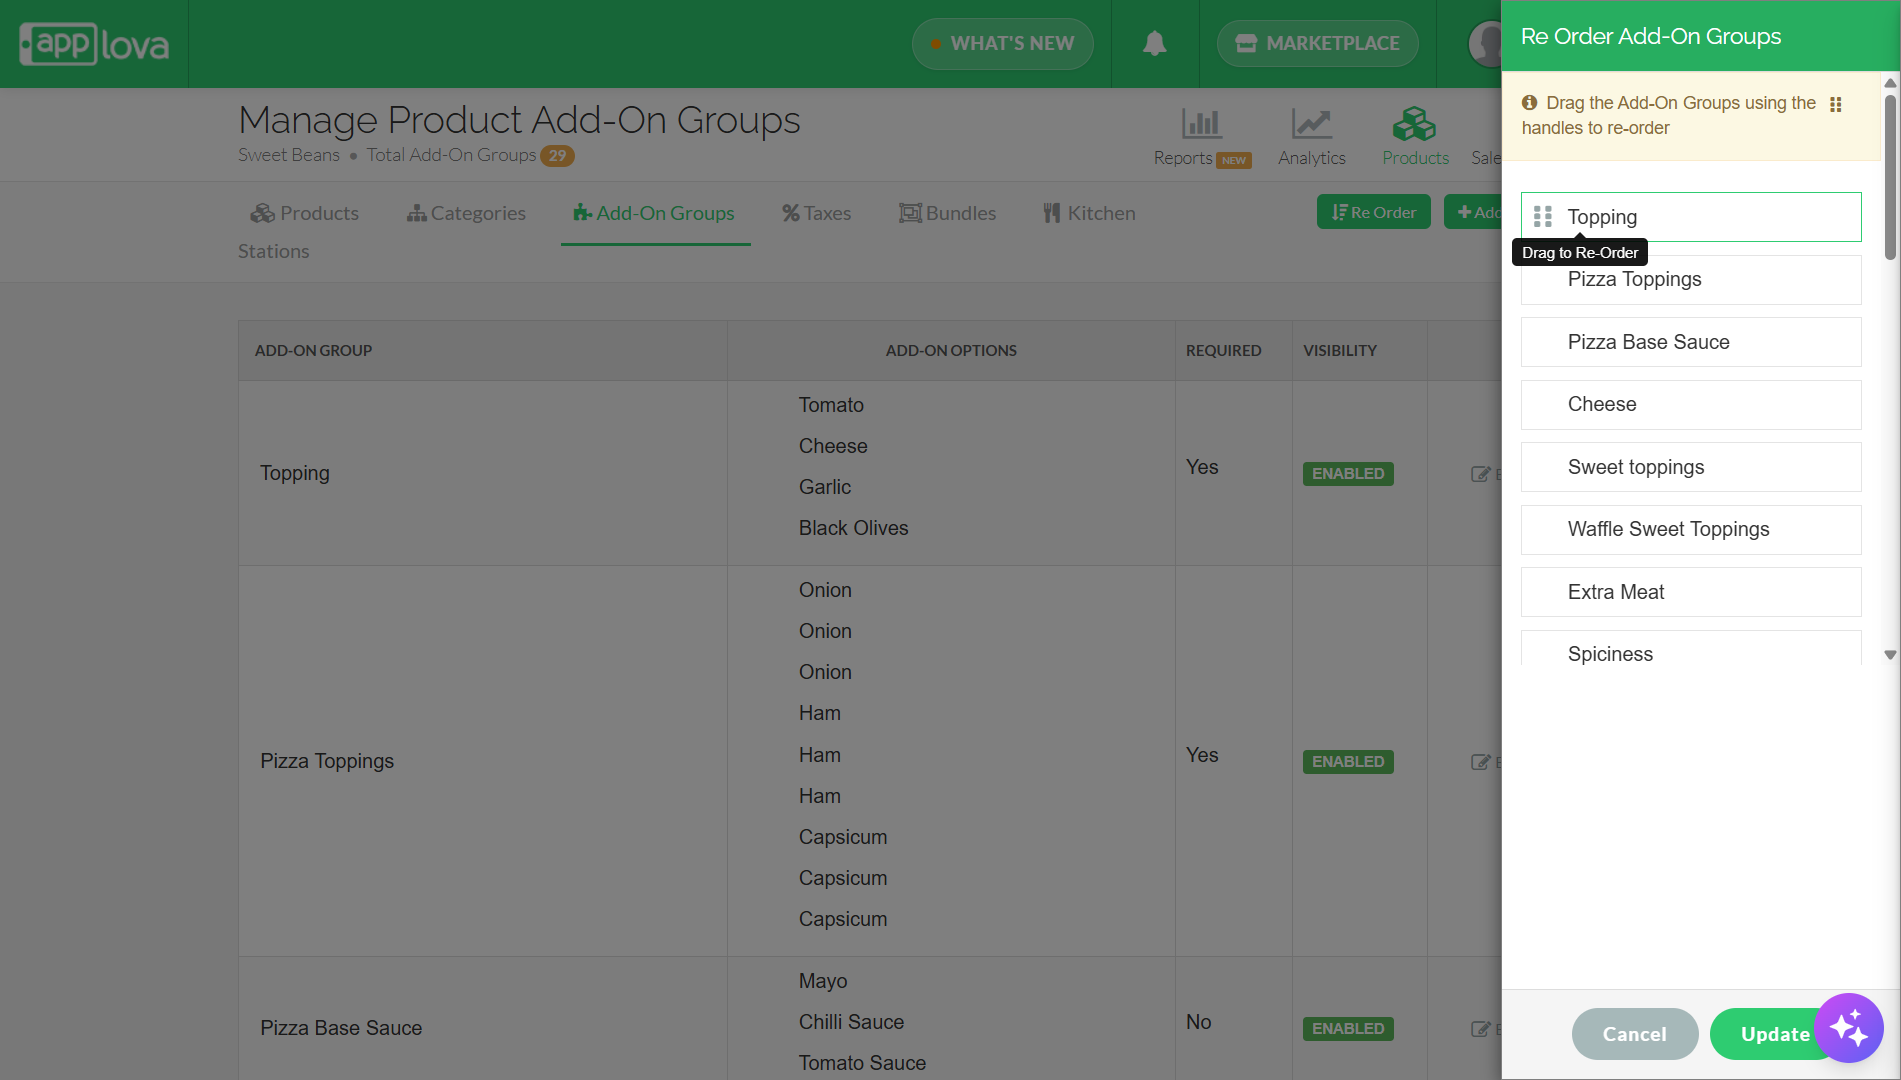
Step 5
Click "Update".
How to Enable Multi-Selections for Add-on Groups?
You will then be able to configure new minimum and maximum modifier selection values on the Applova Merchant Web, which will be reflected on the Applova products.

For Clover merchants, once this feature is configured, the minimum and maximum modifier group values configured in Clover will no longer sync to Applova.
Please request the Applova Support team to enable the minimum and maximum modifier selection feature for your business.
Step 1
Login to the "Merchant Web Portal" and click on "Products".
Step 2
Click on "Add-On Groups" tab.
Step 3
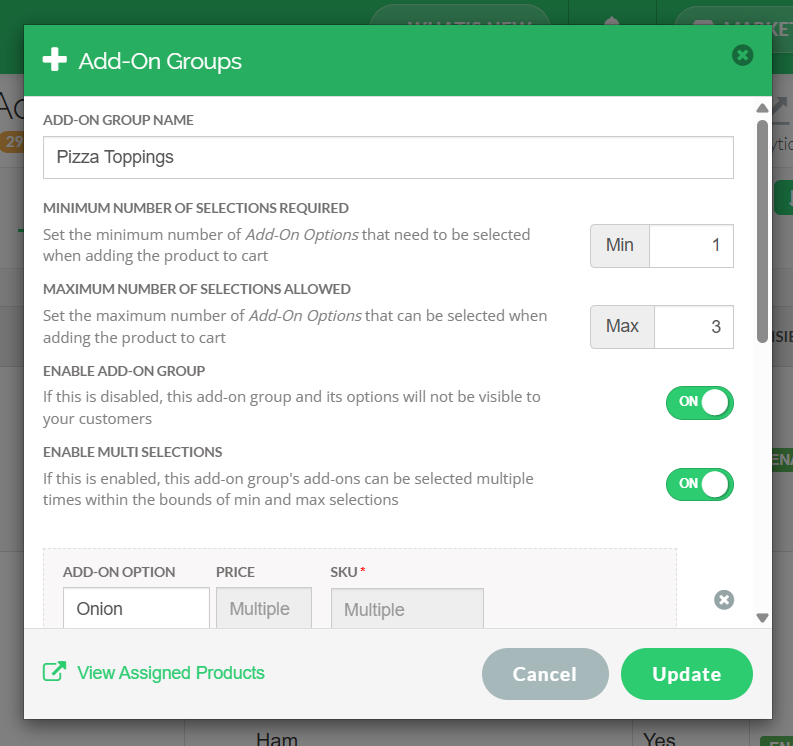
Click "Edit" on the Add-On group that needs to enable Multi Selections and on the "Enable Multi Selections" toggle.
Step 4
Simultaneously, set a minimum and a maximum number of add-ons required when adding a product.
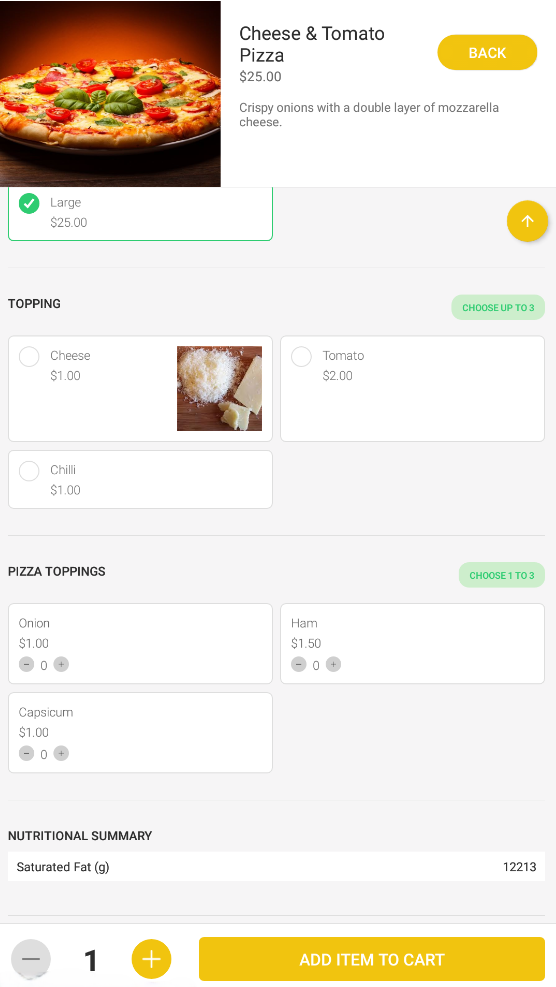
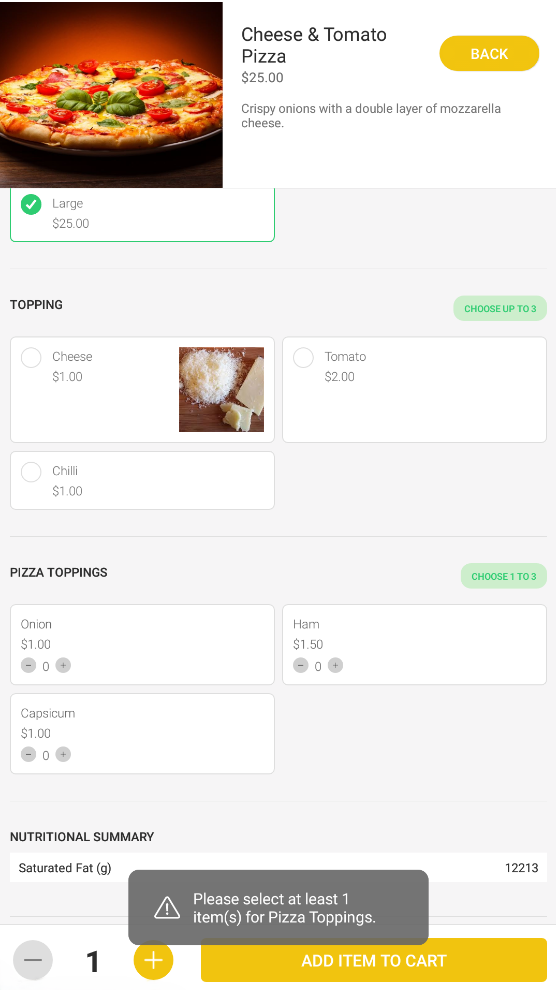
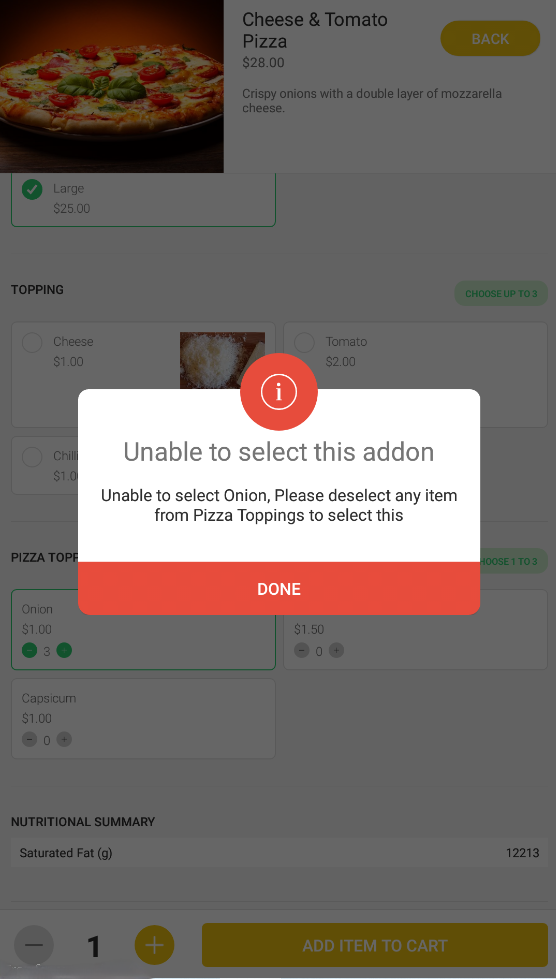
How it Reflects on Webstore V1
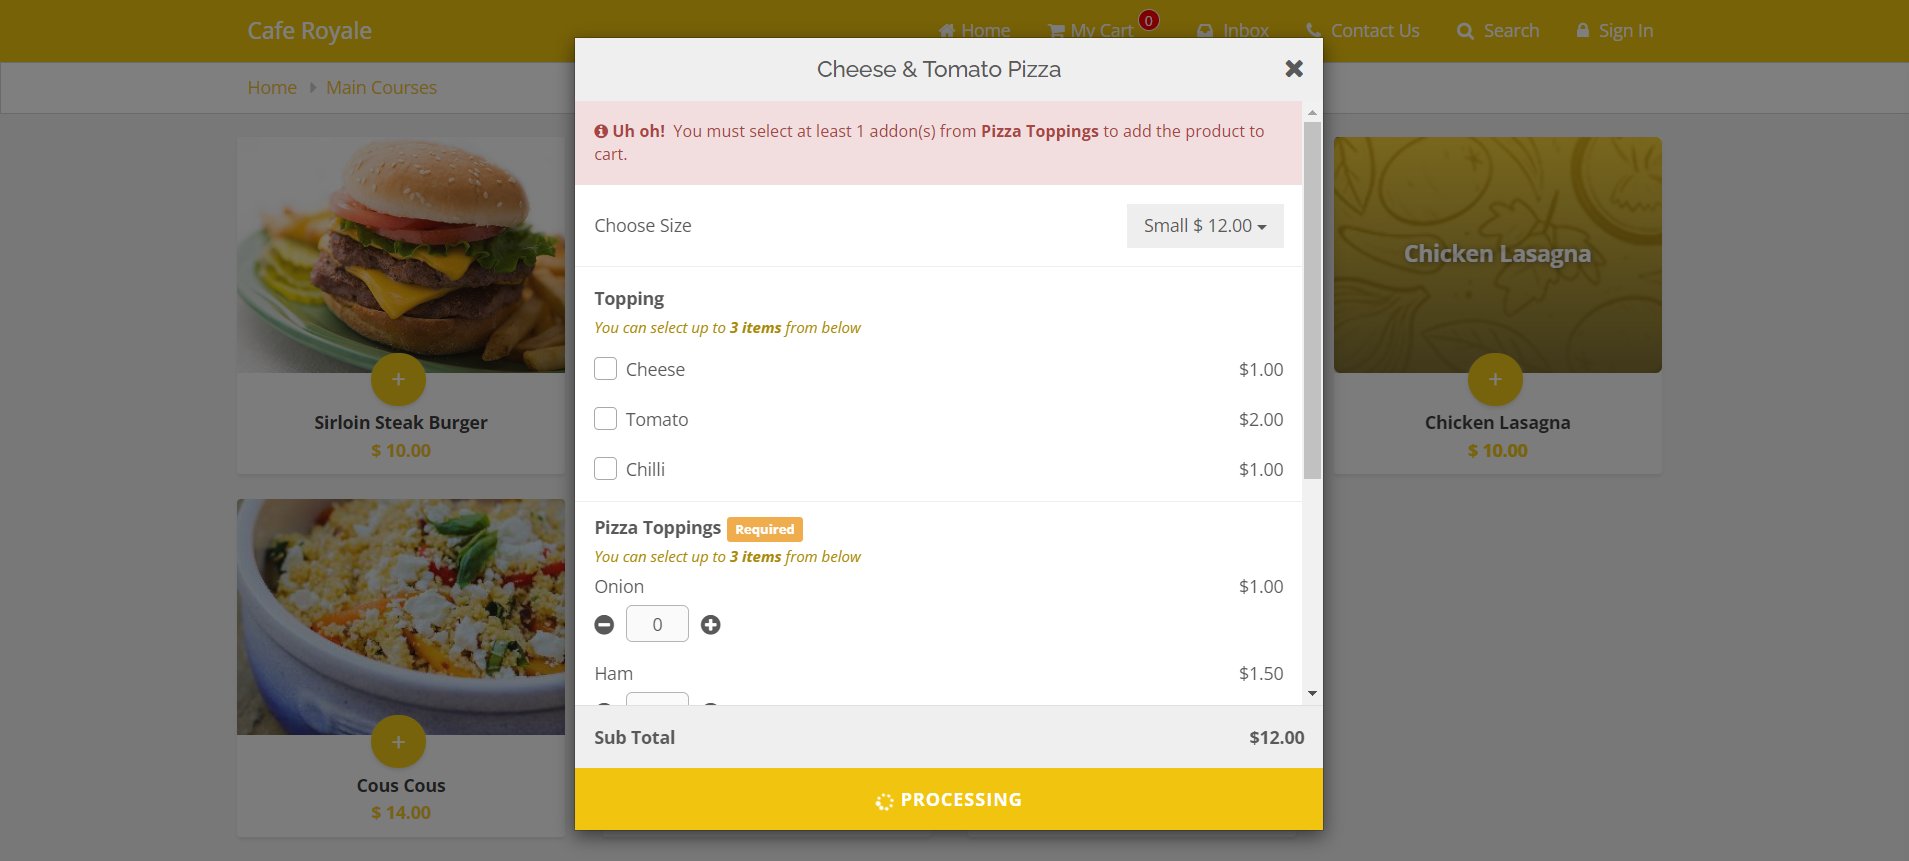
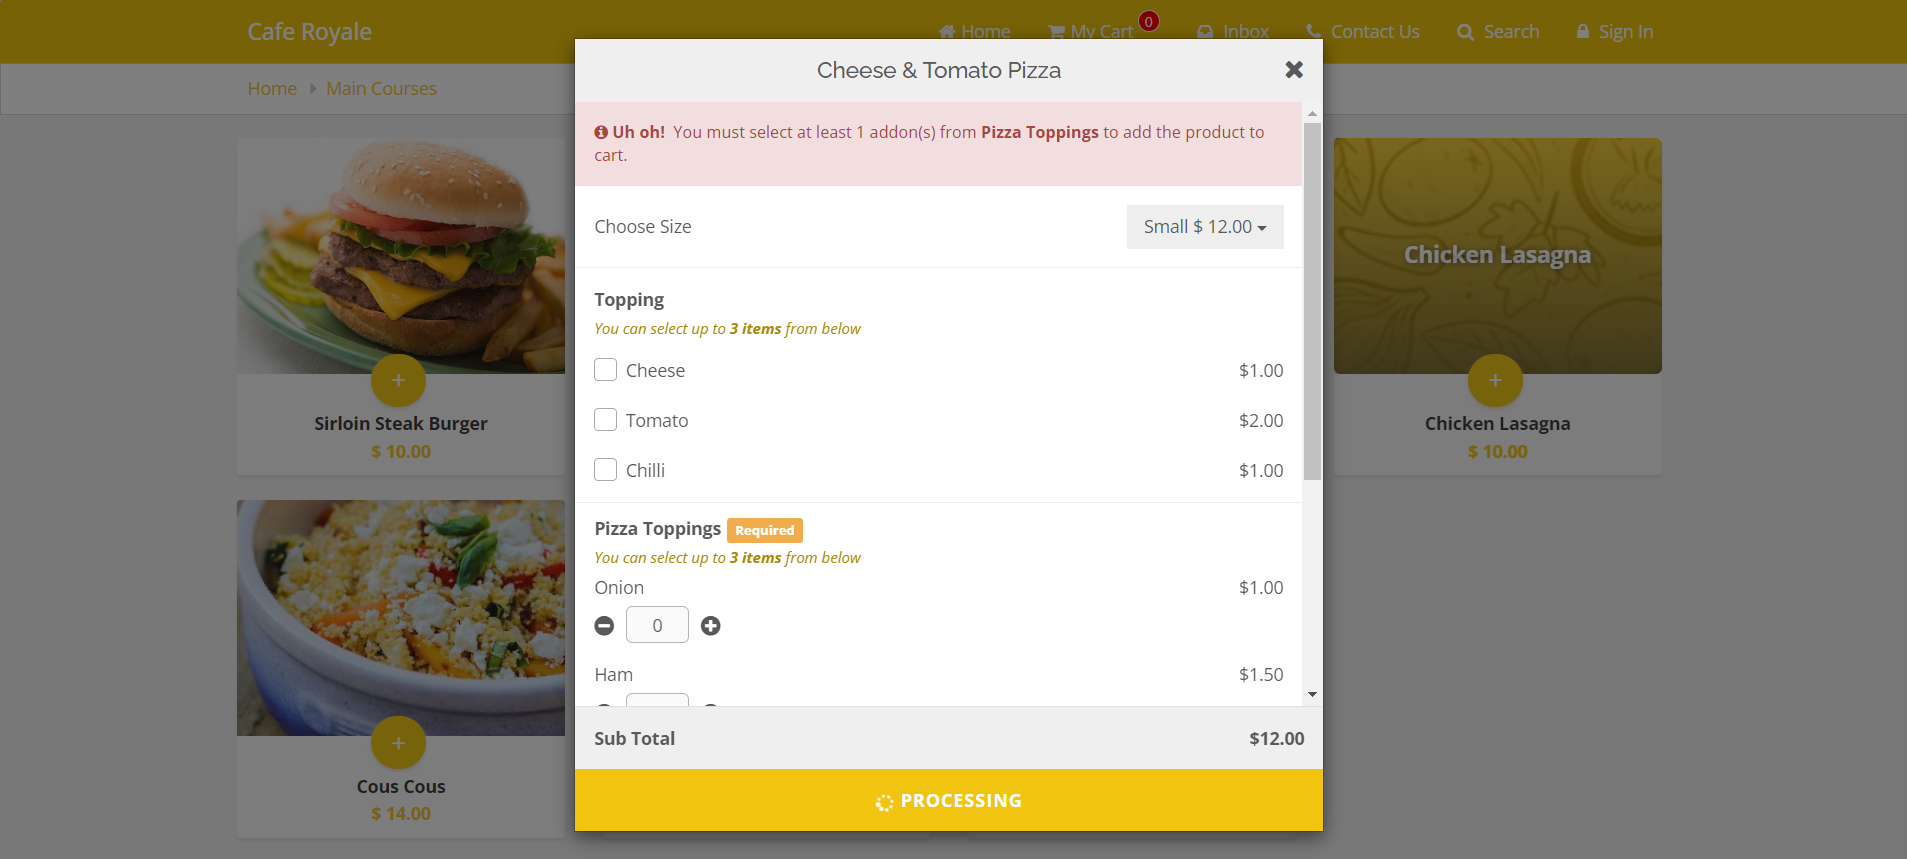
How to Bulk Assign Products to Add-On Groups?
With this feature, merchants can assign add-on groups to products in bulk.
Step 1
Login to the "Merchant Web Portal" and click on "Products".
Step 2
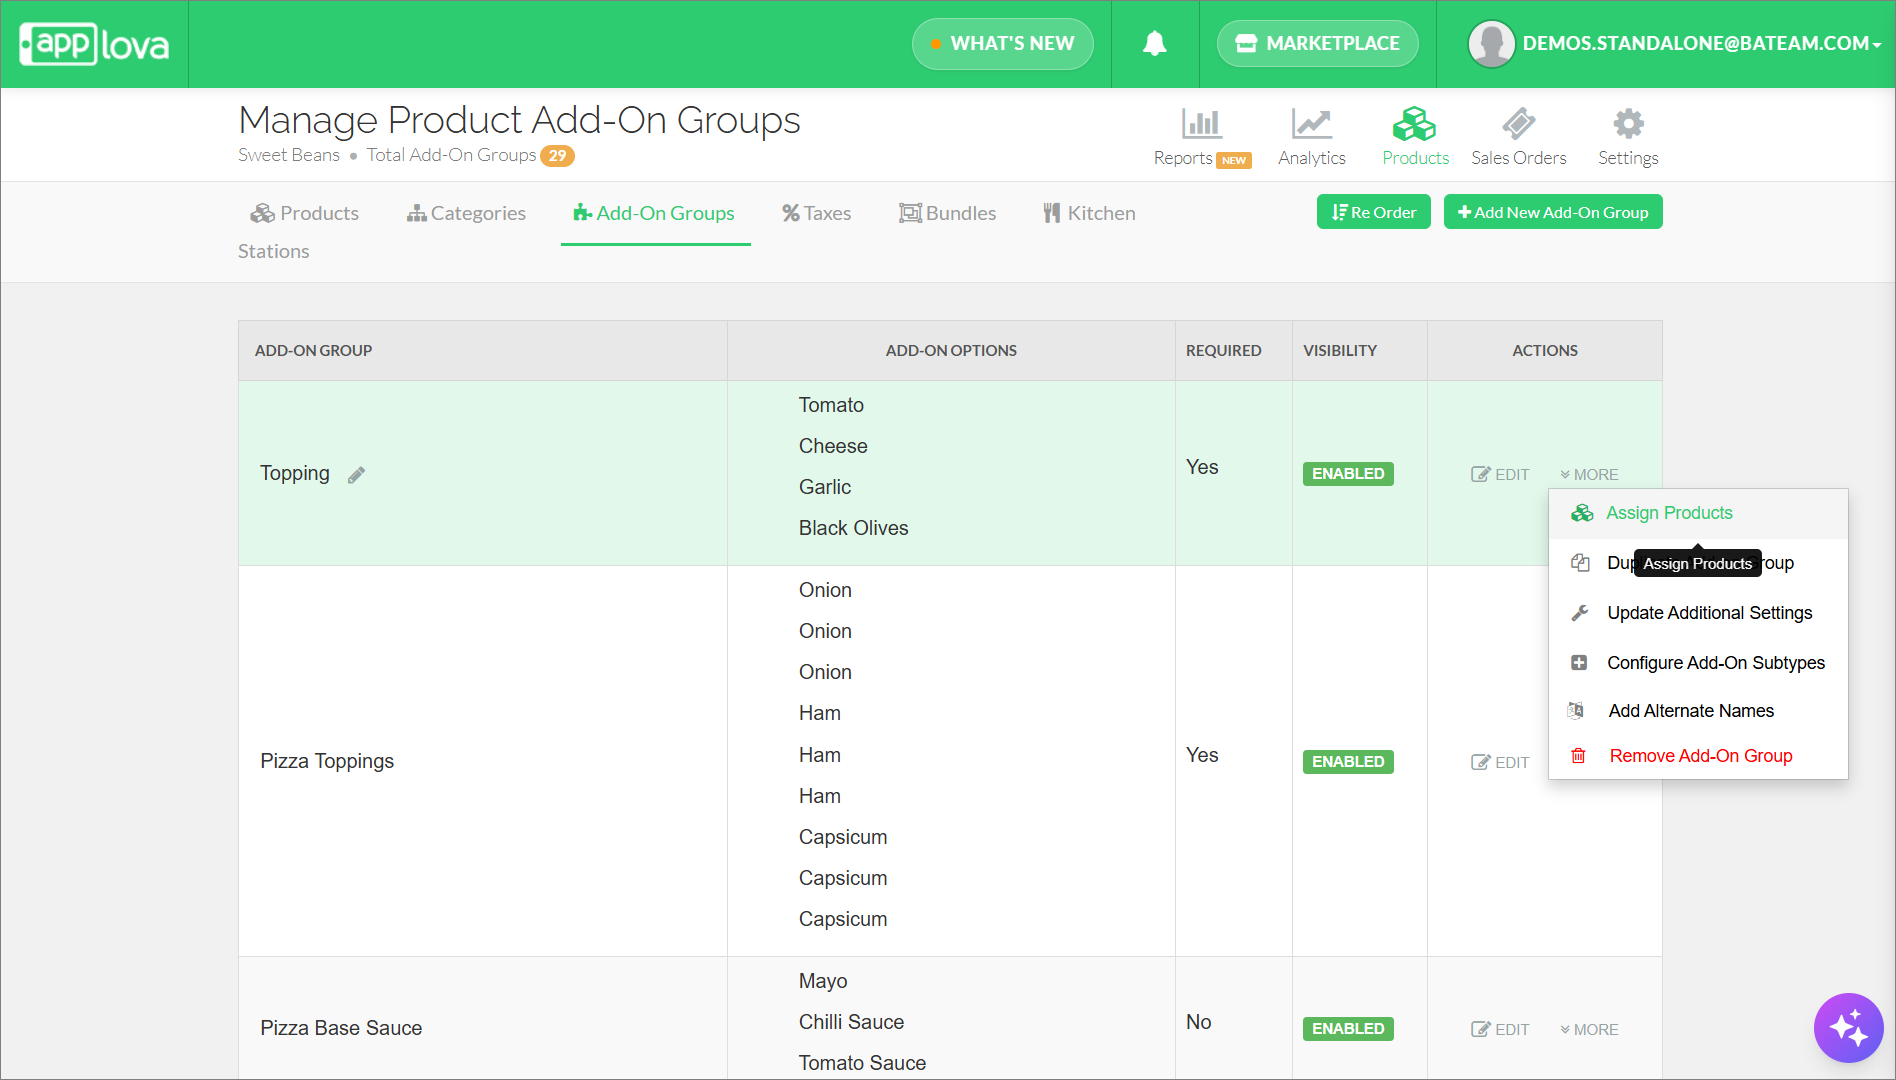
Go to "Add-On Groups" tab and select an add-on group which needs to be assigned with products in bulk.
Step 3
From the "More" option, select "Assign Products".
Step 4
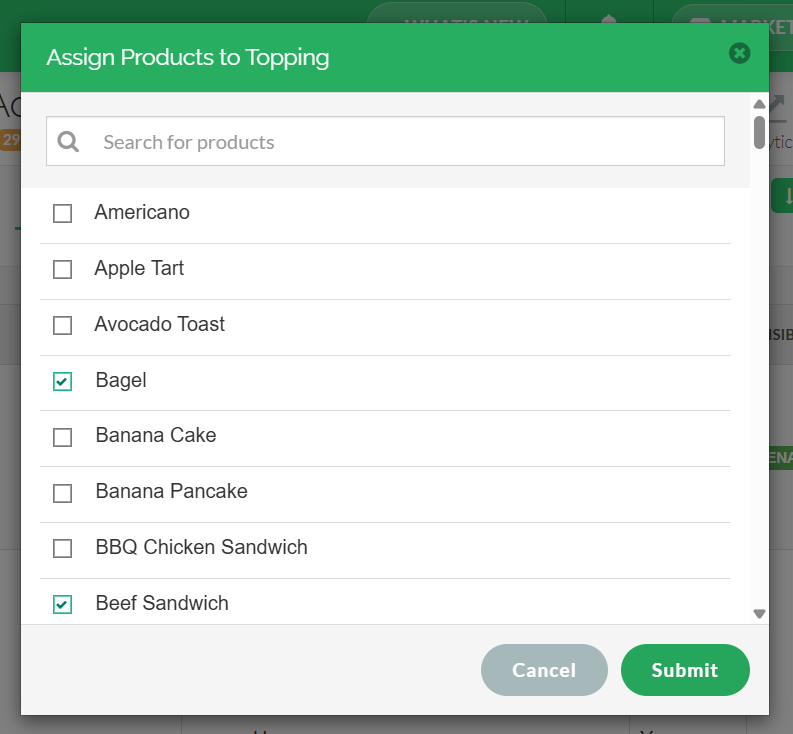
Finally, select the products that needs to be assigned to the selected add-on group and click on "Submit".
Related Articles
Related Articles
Related Articles
How to Add Alternative Names for Products, Variants, and Add-Ons via Merchant Web
This feature allows to add alternate names for products, variants, variant types, group add-ons and product specific add-ons. Objectives of setting alternative names are; To shorten the Kitchen Receipt For the kitchen staff to identify the products ...How to Manage Product Add-On(s) via Merchant Web?
What are Product Add-On(s)? Product Add-Ons are extra customizations that can be added to a product to suit the customers' needs. (i.e., Sugar levels for Coffee, Toppings for a Pizza, Colors for a Shirt). The price of an Add-On product will be an ...How to Manage Categories on Merchant Portal?
In this article, you will learn how to manage category-related settings in the Merchant Portal to keep products clearly organized and displayed correctly. How to Add Category? This feature allows the merchant to add a new product category. Step 1 ...How to Manage Product Specific Add-Ons as a Stock Controller User on Merchant Web?
The Stock Controller User, a merchant role with limited privileges solely for stock management, now has the capability to enable or disable the display of product add-ons via the Merchant Web. Step 1 Login to the "Merchant Web Portal" and click on ...How to Manage Taxes via Merchant Portal?
This feature allows merchants to create and manage tax rates based on their business requirements. Once created, the applicable tax rates can be assigned to specific products to ensure the correct tax is applied during checkout. How to Add a Tax ...