How to Configure Order Pick Up Via Merchant Web?
Merchants can configure order pickup settings through Merchant Web. These settings allow merchants to manage pickup related details, and ensure customers can place pickup orders based on the business’s preferred setup.
How to Enable Pick Up Option?
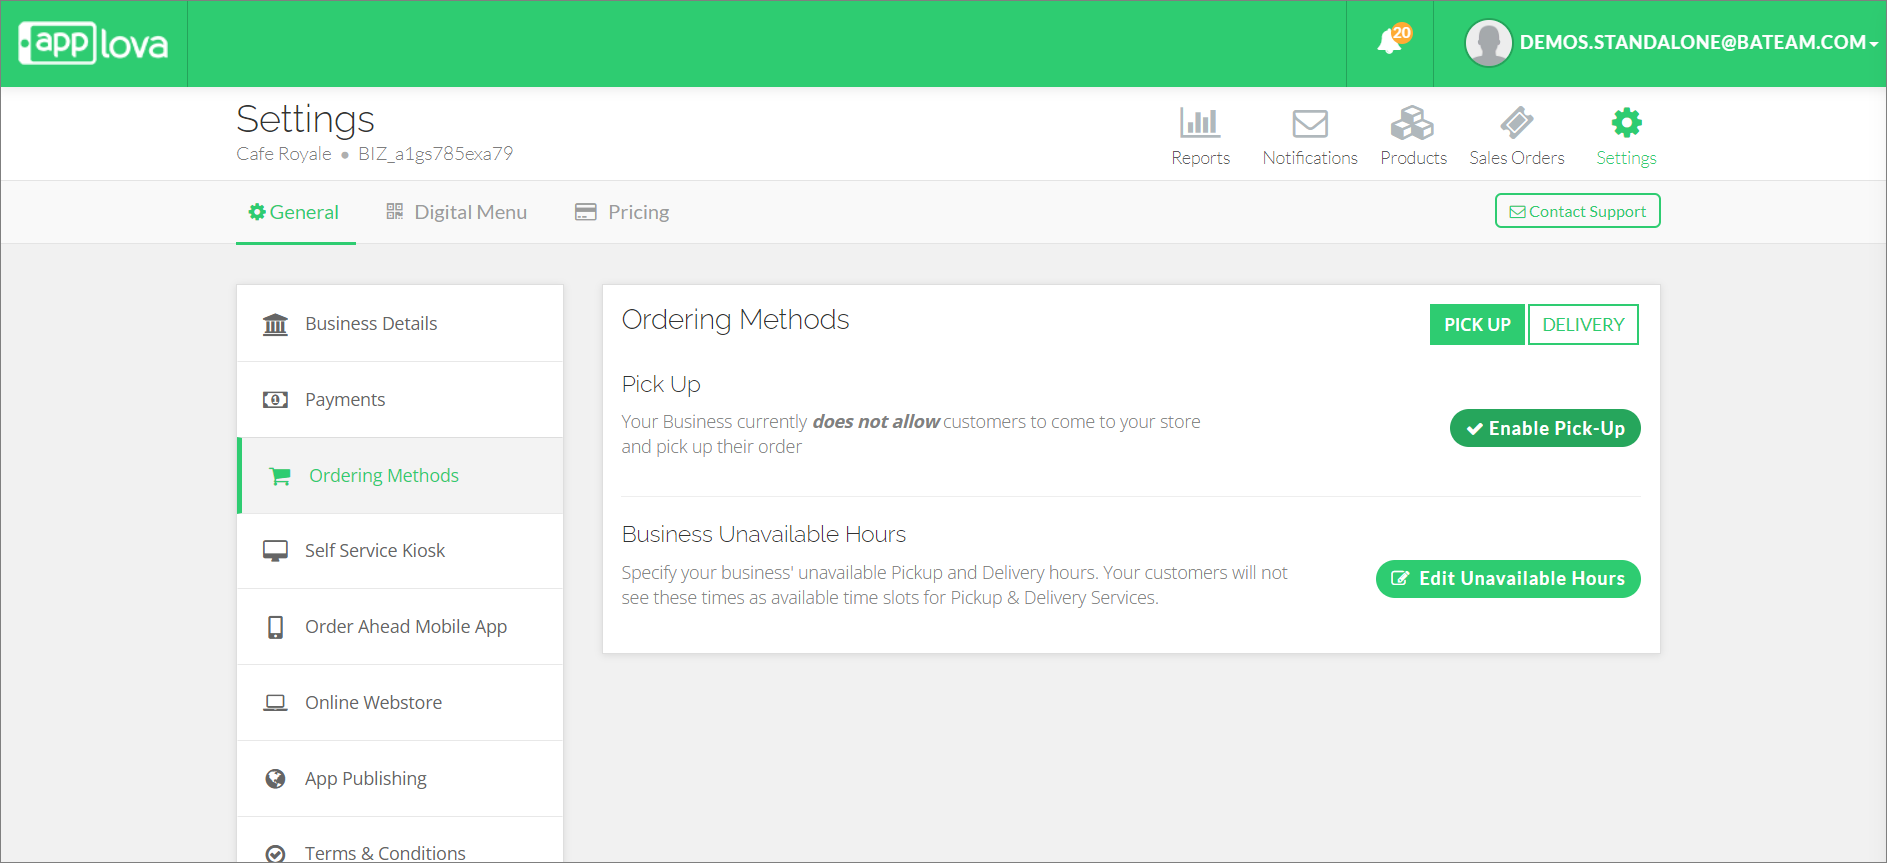
With the Pick Up option, the business allows customers to come to the store and pick up their order.
Step 1
Login to the "Merchant Web Portal" and click on "Settings".
Step 2
From the "General" settings, click on "Ordering Methods" from the side navigation bar.
How to Change the Order Preparation Time?
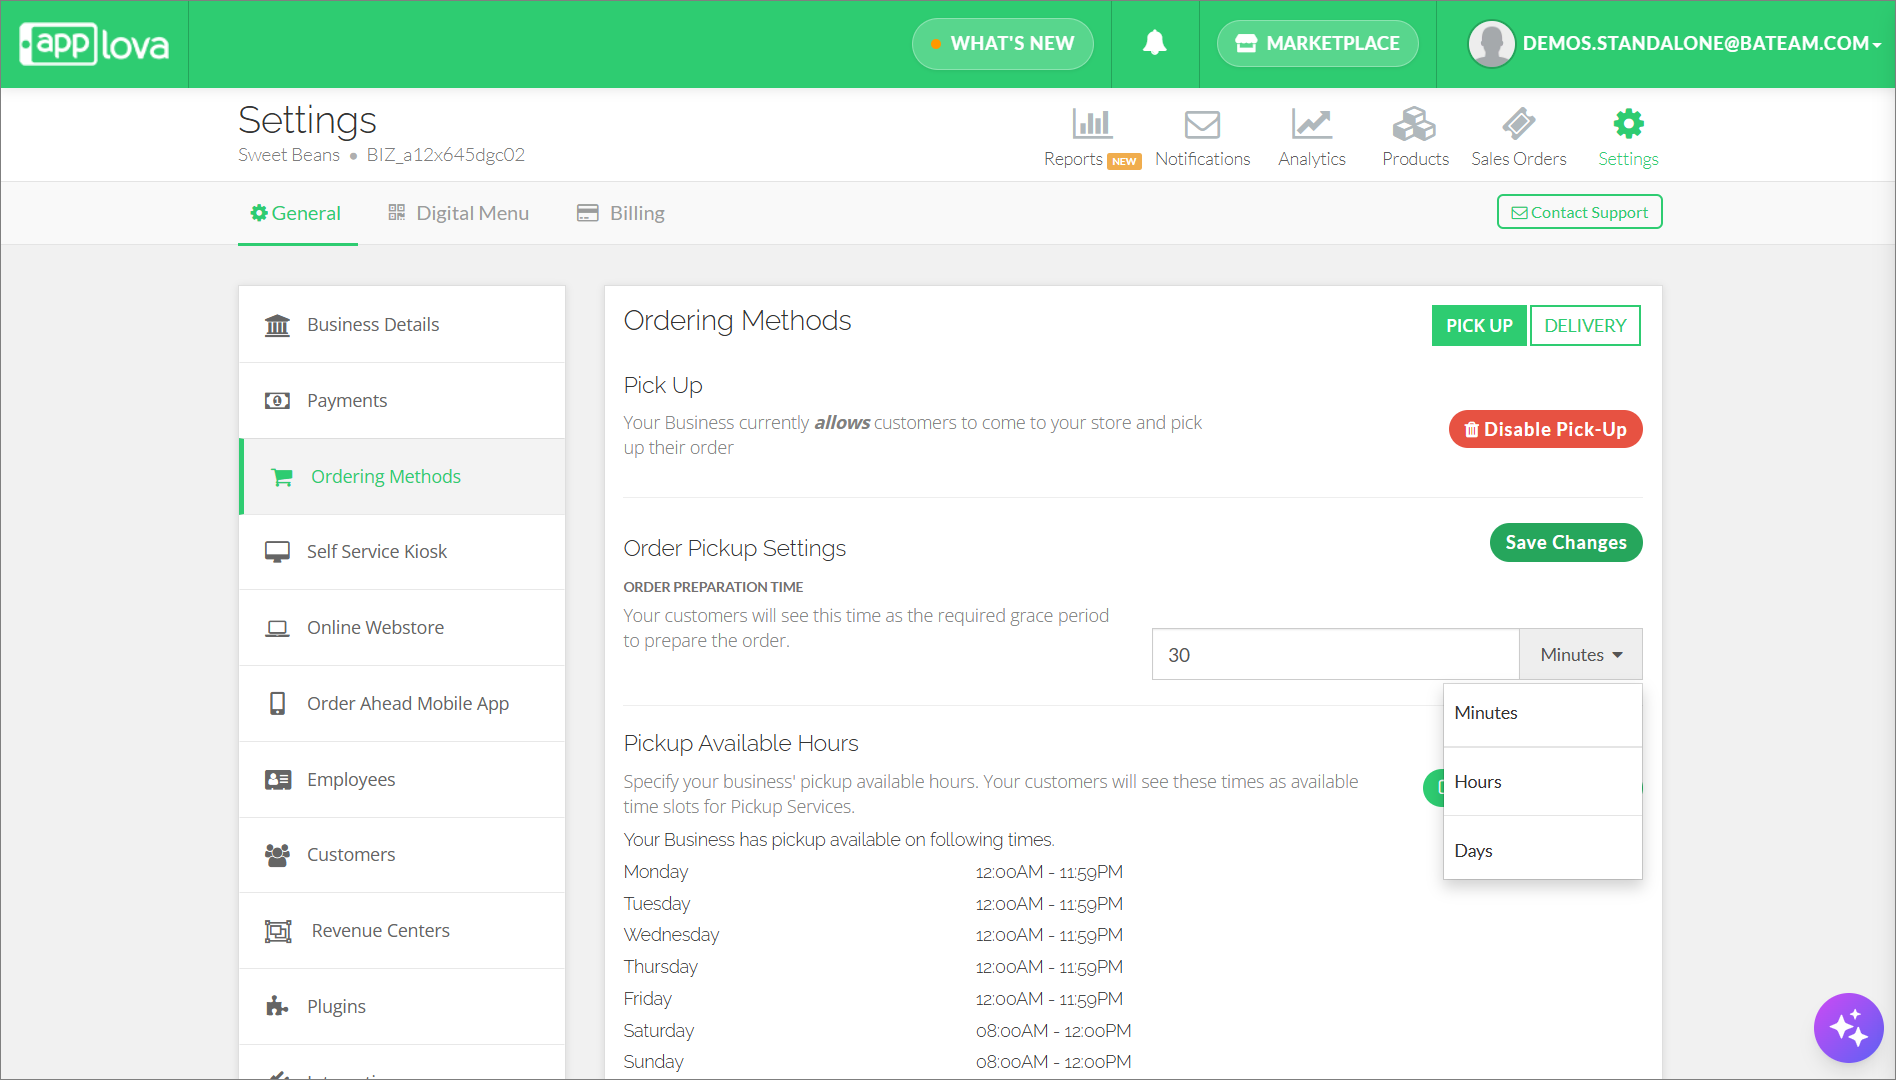
With this feature, customers will be able to see the time required to prepare a particular order.
Step 1
Select the time unit from the drop down and, enter the time needed in the space given.
- Minutes
- Hours
- Days
Step 2
Click "Save Changes".
How to Change Pick Up Available Hours?
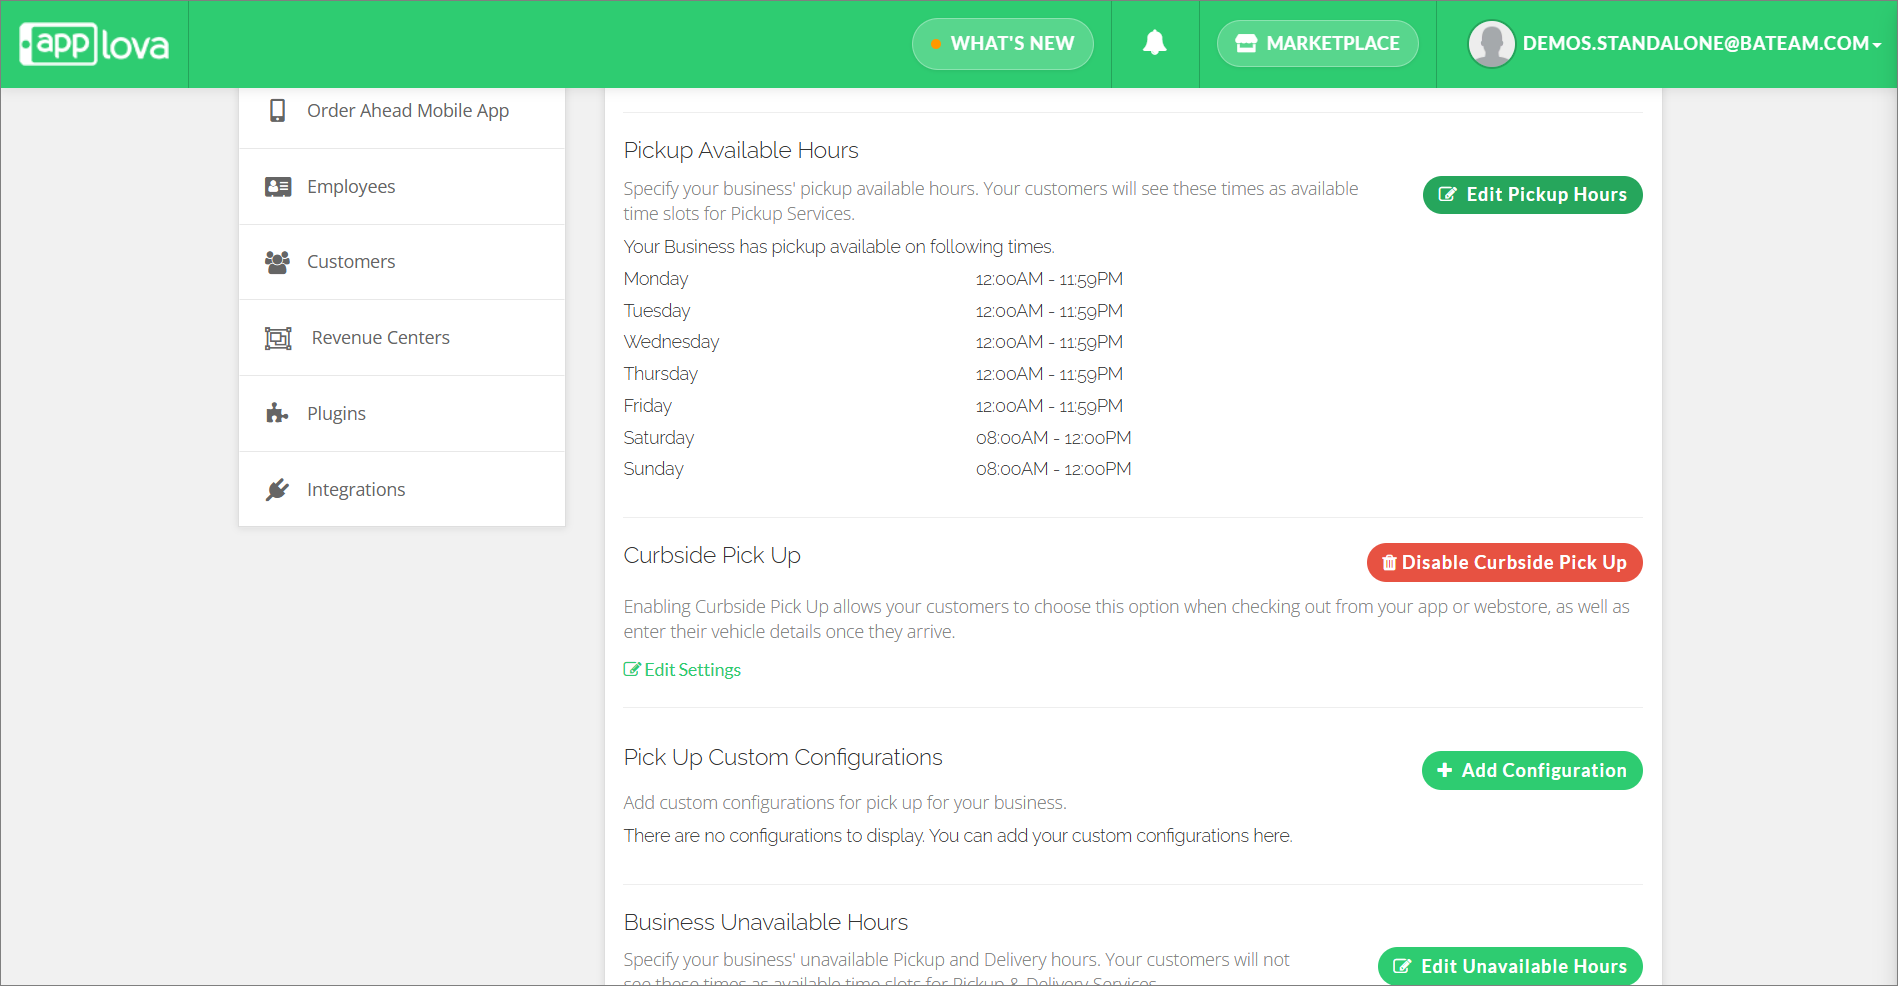
With this feature, business hours available for pickup will be displayed. Customers will see the timeslots when placing an order.
Step 1
Click on "Edit Pickup Hours" button.
Step 2
Click/Long Press and Drag to select the time slots for the business to be open and click on "Submit".
 It is possible to have multiple time slots per day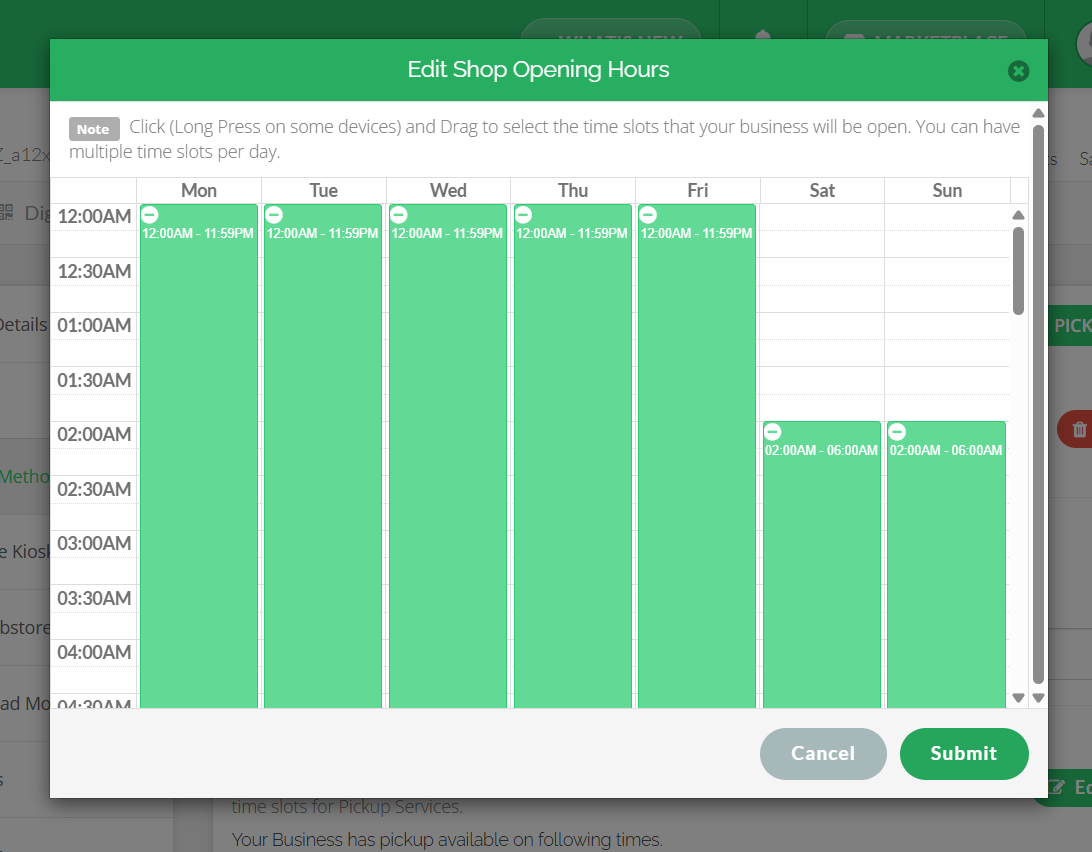
How to Enable Curbside Pick Up for a business?
This feature allows the customers to choose this option when checking out from the app or webstore, as well as enter their vehicle details once they arrive.
Step 1
Click on "Enable Curbside Pick Up".
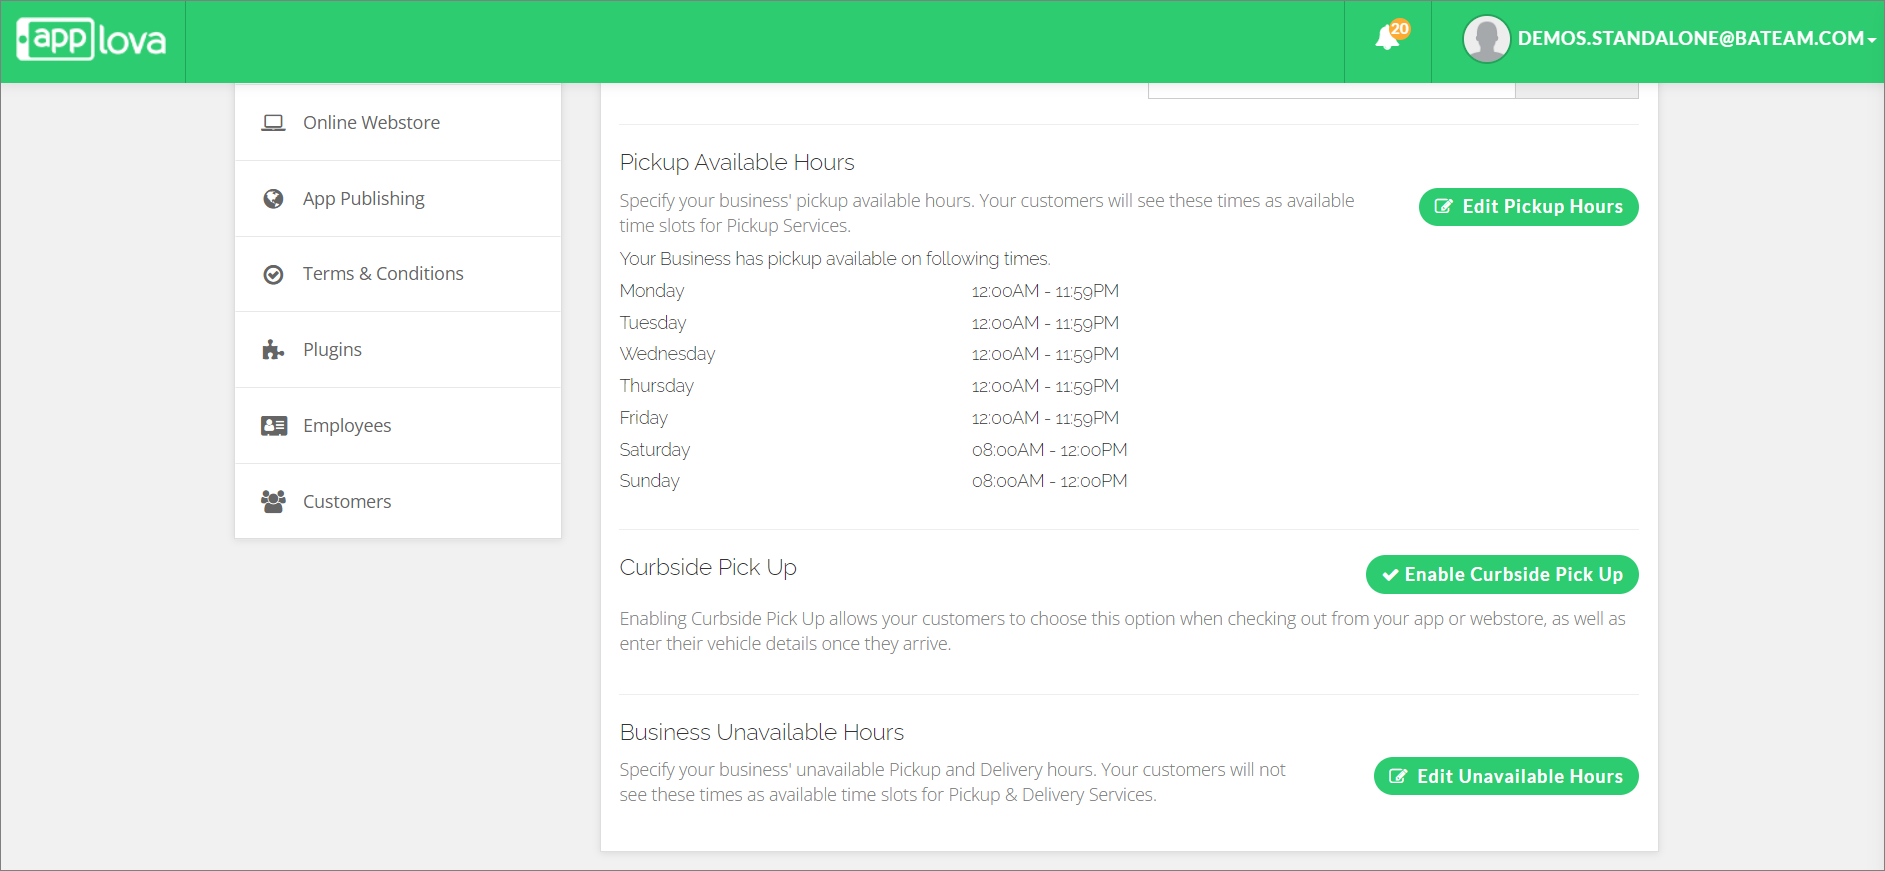
Step 2
Enter the instructions to be shown after customer checkout, select the option on how a customer can contact once they are at curbside and on which channels the curbside pickup should be available on.
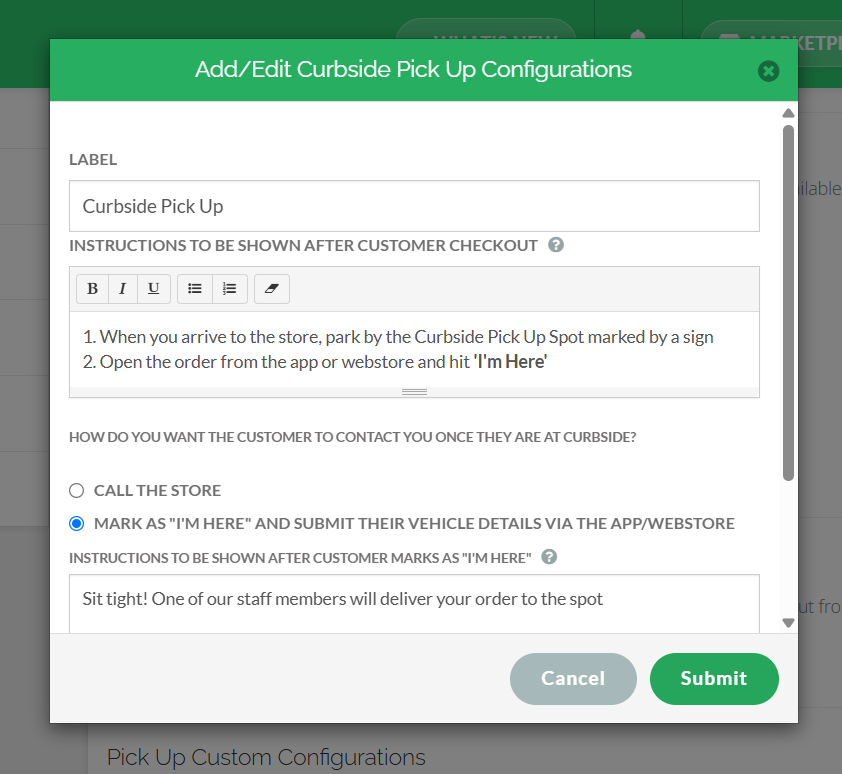
Step 3
Click on "Submit".
How to Manage Business Unavailable Hours?
Step 1
Login to the "Merchant Web Portal" and click on "Settings".
Step 2
From the "General" settings, click on "Ordering Methods" from the side navigation bar.
Step 3
From the "PickUp" tab, click on "Edit Unavailable Hours".
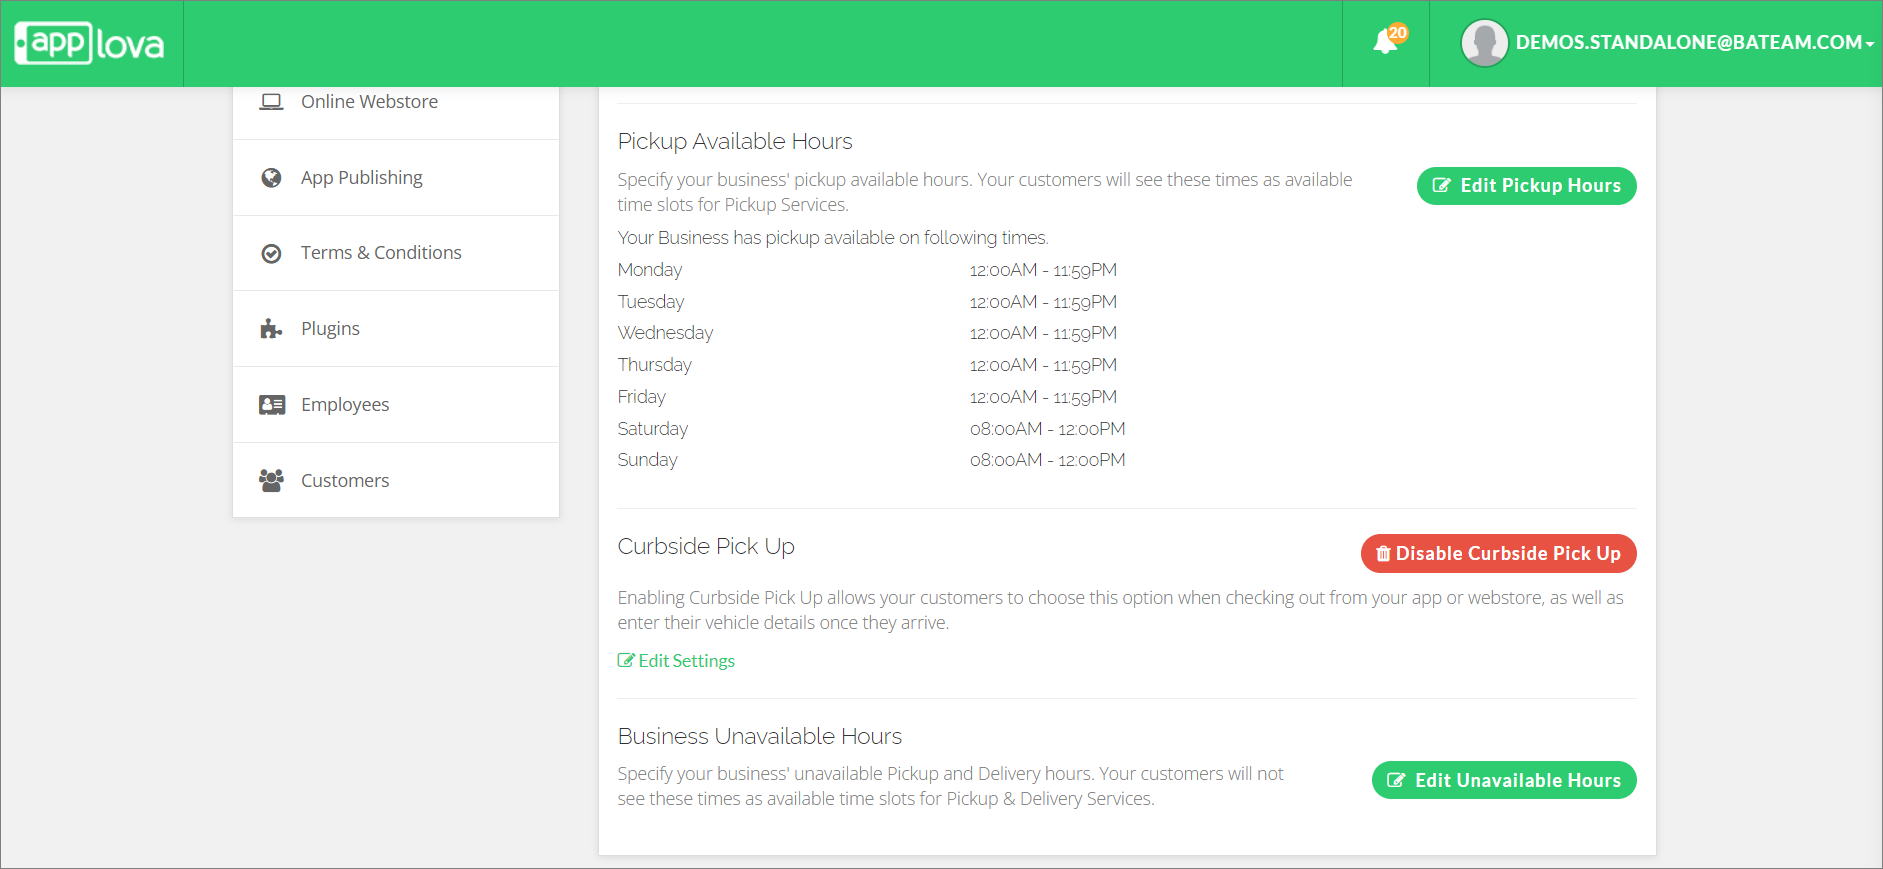
Step 4
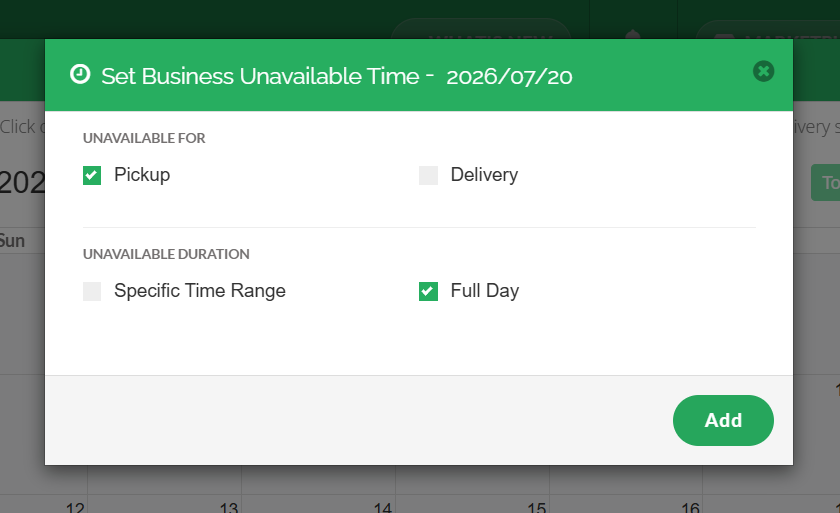
Select a date.
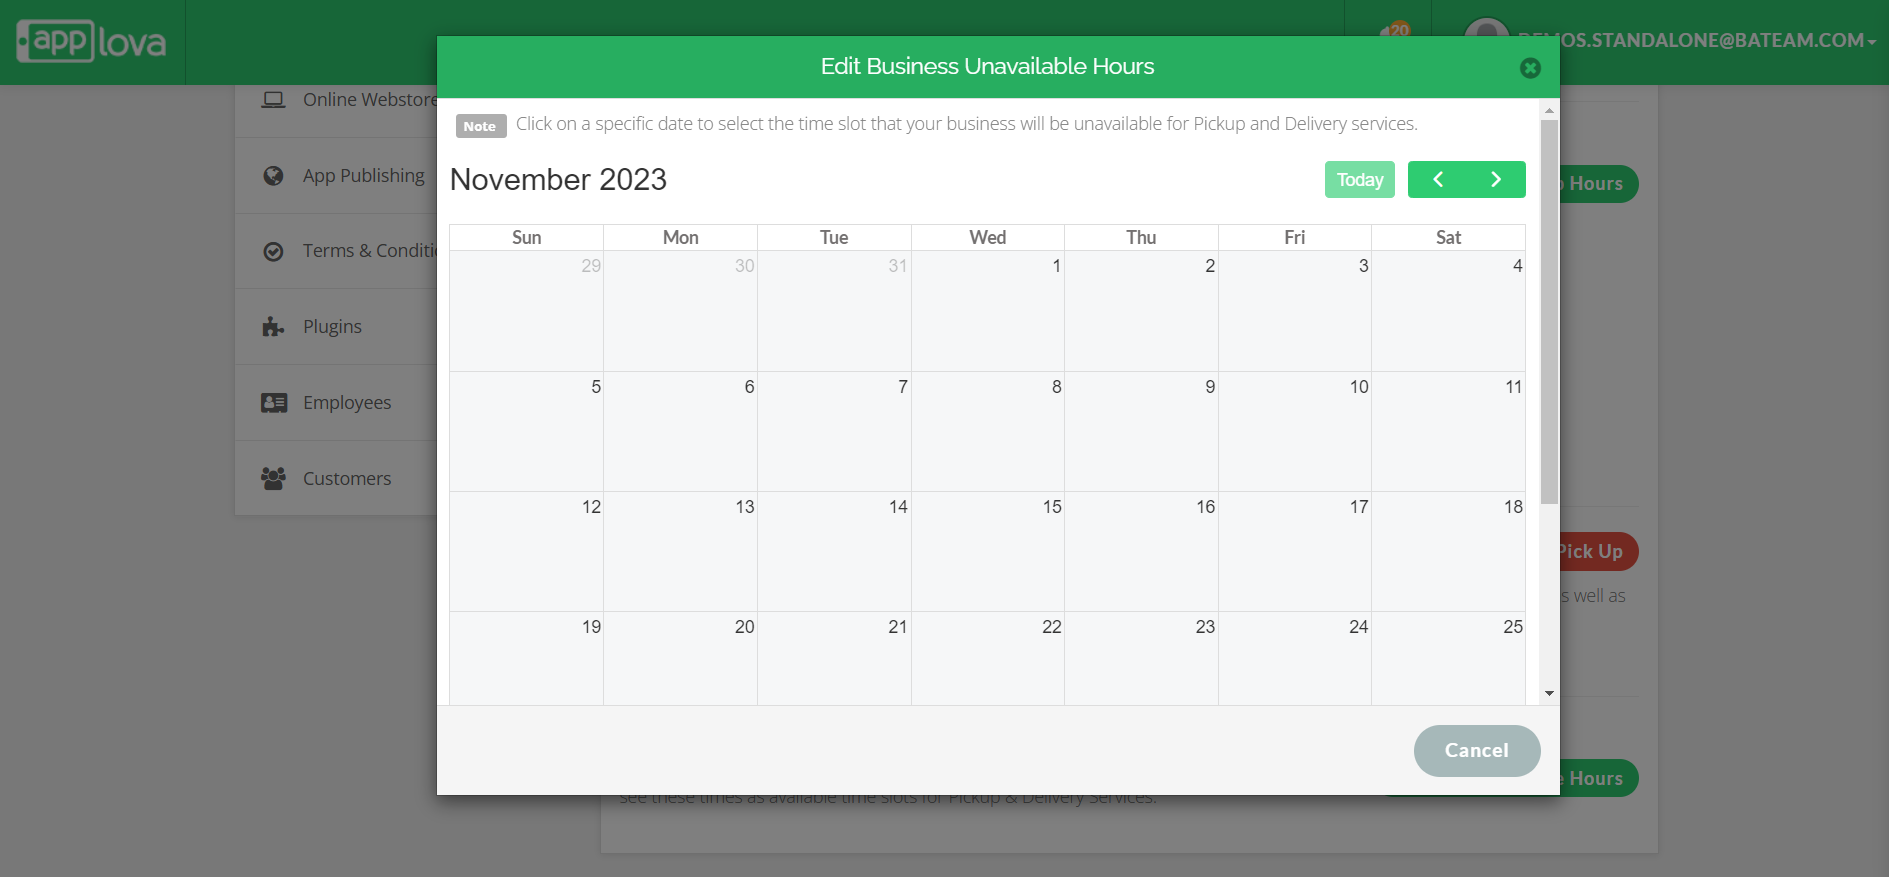
Adding Dynamic Fields for Pickup Orders?
 Supported Domains: Standalone, Clover, Square
 Please request the Applova Support team to enable the dynamic fields feature for your business.
Dynamic fields can be used to capture any specific details from your customers regarding their orders. These dynamic fields can be added for the pickup orders of your business.
Step 1
Sign in to the Merchant web portal with your business credentials.
Step 2
Go to General tab in the Settings section.
Step 3
Click the Ordering Methods option.
Step 4
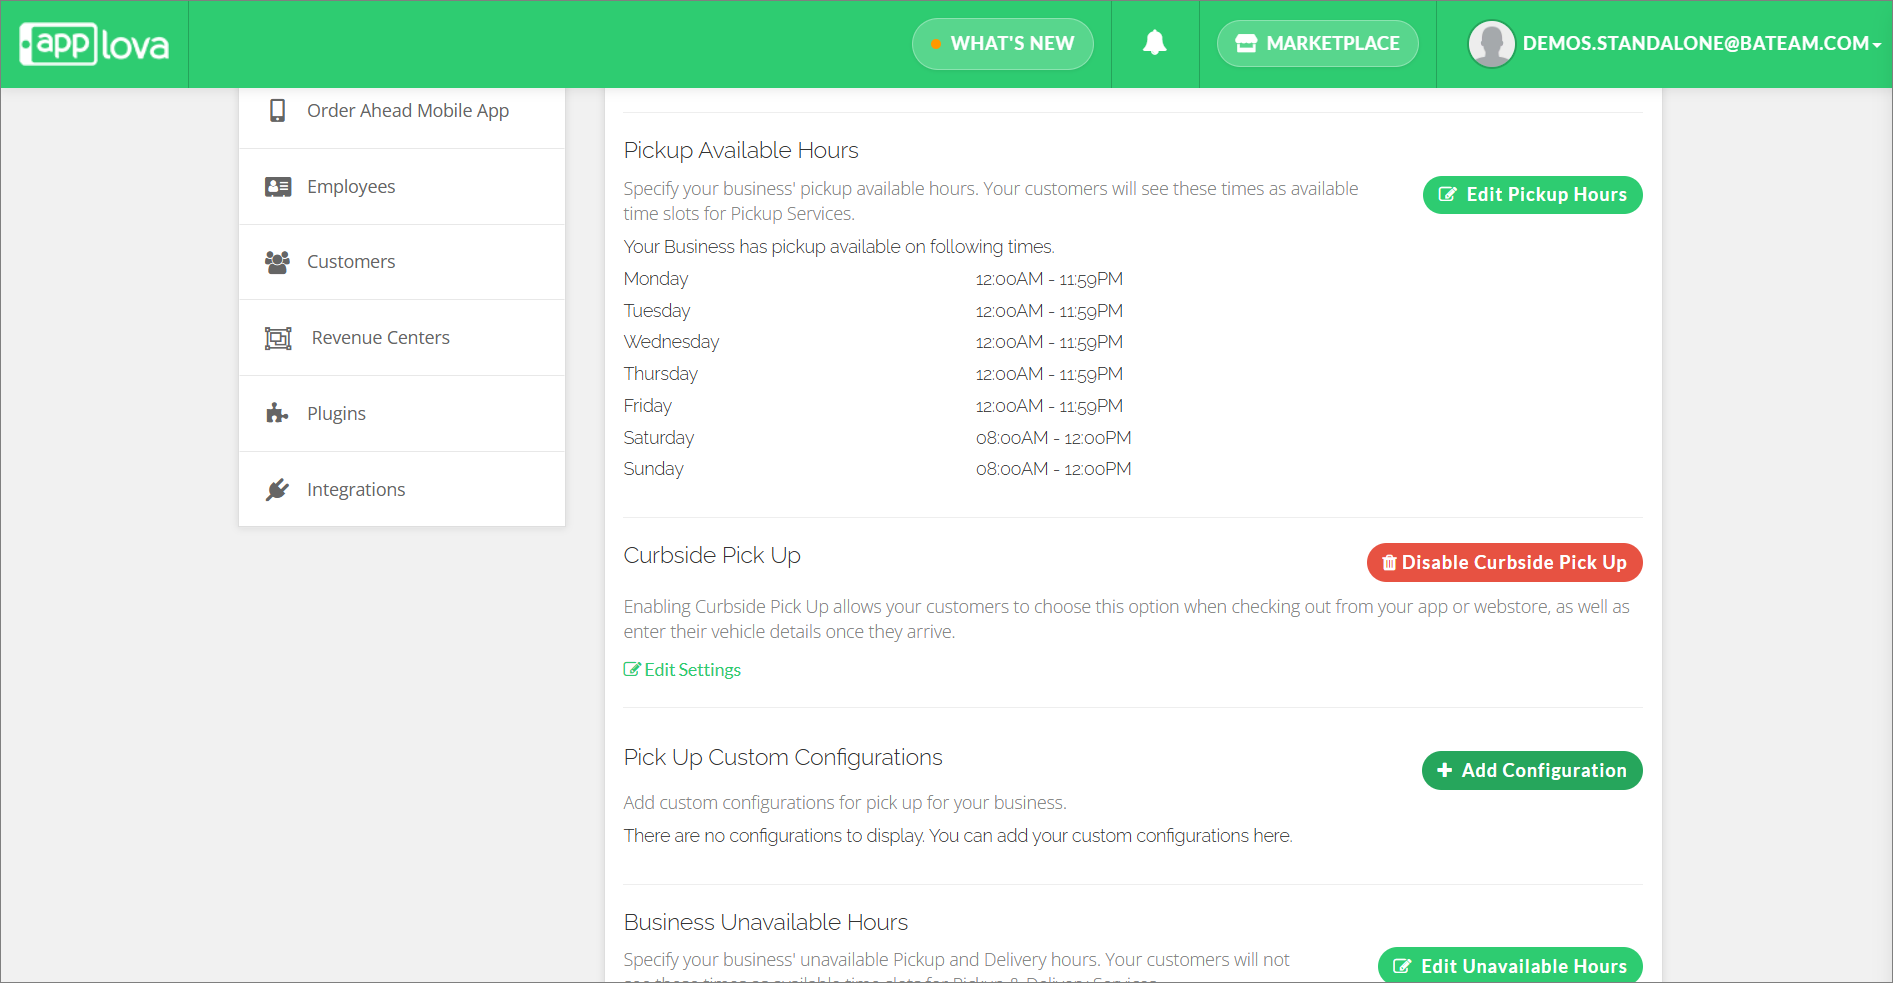
In the Pick Up Custom Configurations section, click the Add Configuration button.
Step 5
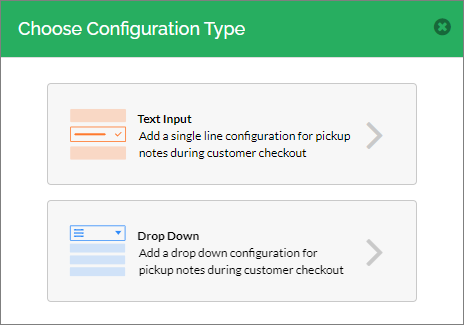
In the pop-up displayed, select the type of field (text input or dropdown) you wish to add.
Step 6
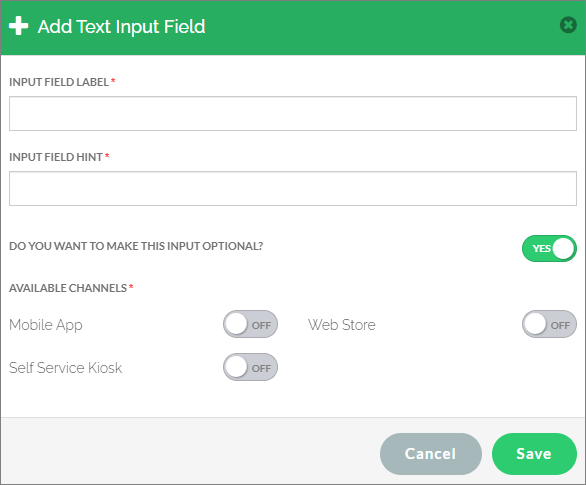
if the text input option is selected, then fill out the fields in the pop-up displayed and click Save.
- Input Field Label - Label to be shown on top of the input field
- Input Field Hint - The placeholder text to be shown inside the input field
- Mark the input field as optional or mandatory.
- Select the channels in which you wish to display the input field.
Step 7
if the dropdown option is selected, then fill out the fields in the pop-up displayed and click Save.
- Dropdown Field Label - Label to be shown on top of the dropdown field
- Dropdown Field Options - The options to be shown in the dropdown
- Mark the dropdown field as optional or mandatory.
- Select the channels in which you wish to display the dropdown field.

Related Articles
How to Configure Order Delivery Via Merchant Web?
Merchants can configure order delivery settings through Merchant Web. These settings allow merchants to manage delivery related details, and ensure customers can place delivery orders based on the business’s preferred setup. How to Enable the ...How to Configure Alcohol Warning Message via Merchant Portal?
Supported on: Clover & Standalone Kiosks This capability enables the display of an alcohol warning message on the cart screen when alcoholic products are added to the cart. You can customize both the message's content and the text on the associated ...How to Change Order Statuses via Merchant Portal?
This feature allows merchants to update an order’s status throughout the order lifecycle, such as New, Accepted, Ready, Completed, Void, or Rejected. This helps merchants clearly track order progress and manage each order based on its current stage. ...How to Manage Self-Service Kiosk via Merchant Portal?
With this feature merchants can manage their Self-Service Kiosk settings through the Merchant Portal. These settings help merchants configure kiosk-related options and control how the kiosk is displayed or used by customers. How to View Activated ...Altering Business Details via Merchant Portal
This guide explains how to update your business information and manage the terms and conditions displayed to customers through Applova Merchant Portal. How to Update Business Details? Step 1 Login to "Applova Merchant Web". Step 2 Click "Settings" ...