Enhanced Reports on Merchant Web Portal?
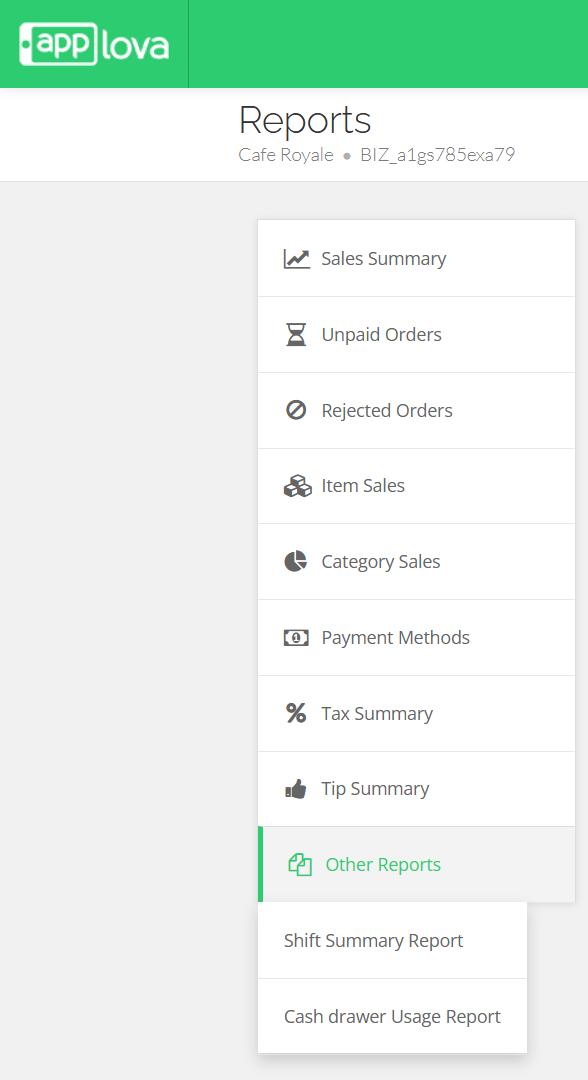
- Sales Summary - Provides an overview of total sales, order count, discounts, refunds, taxes, tips, and net sales for the selected time period.
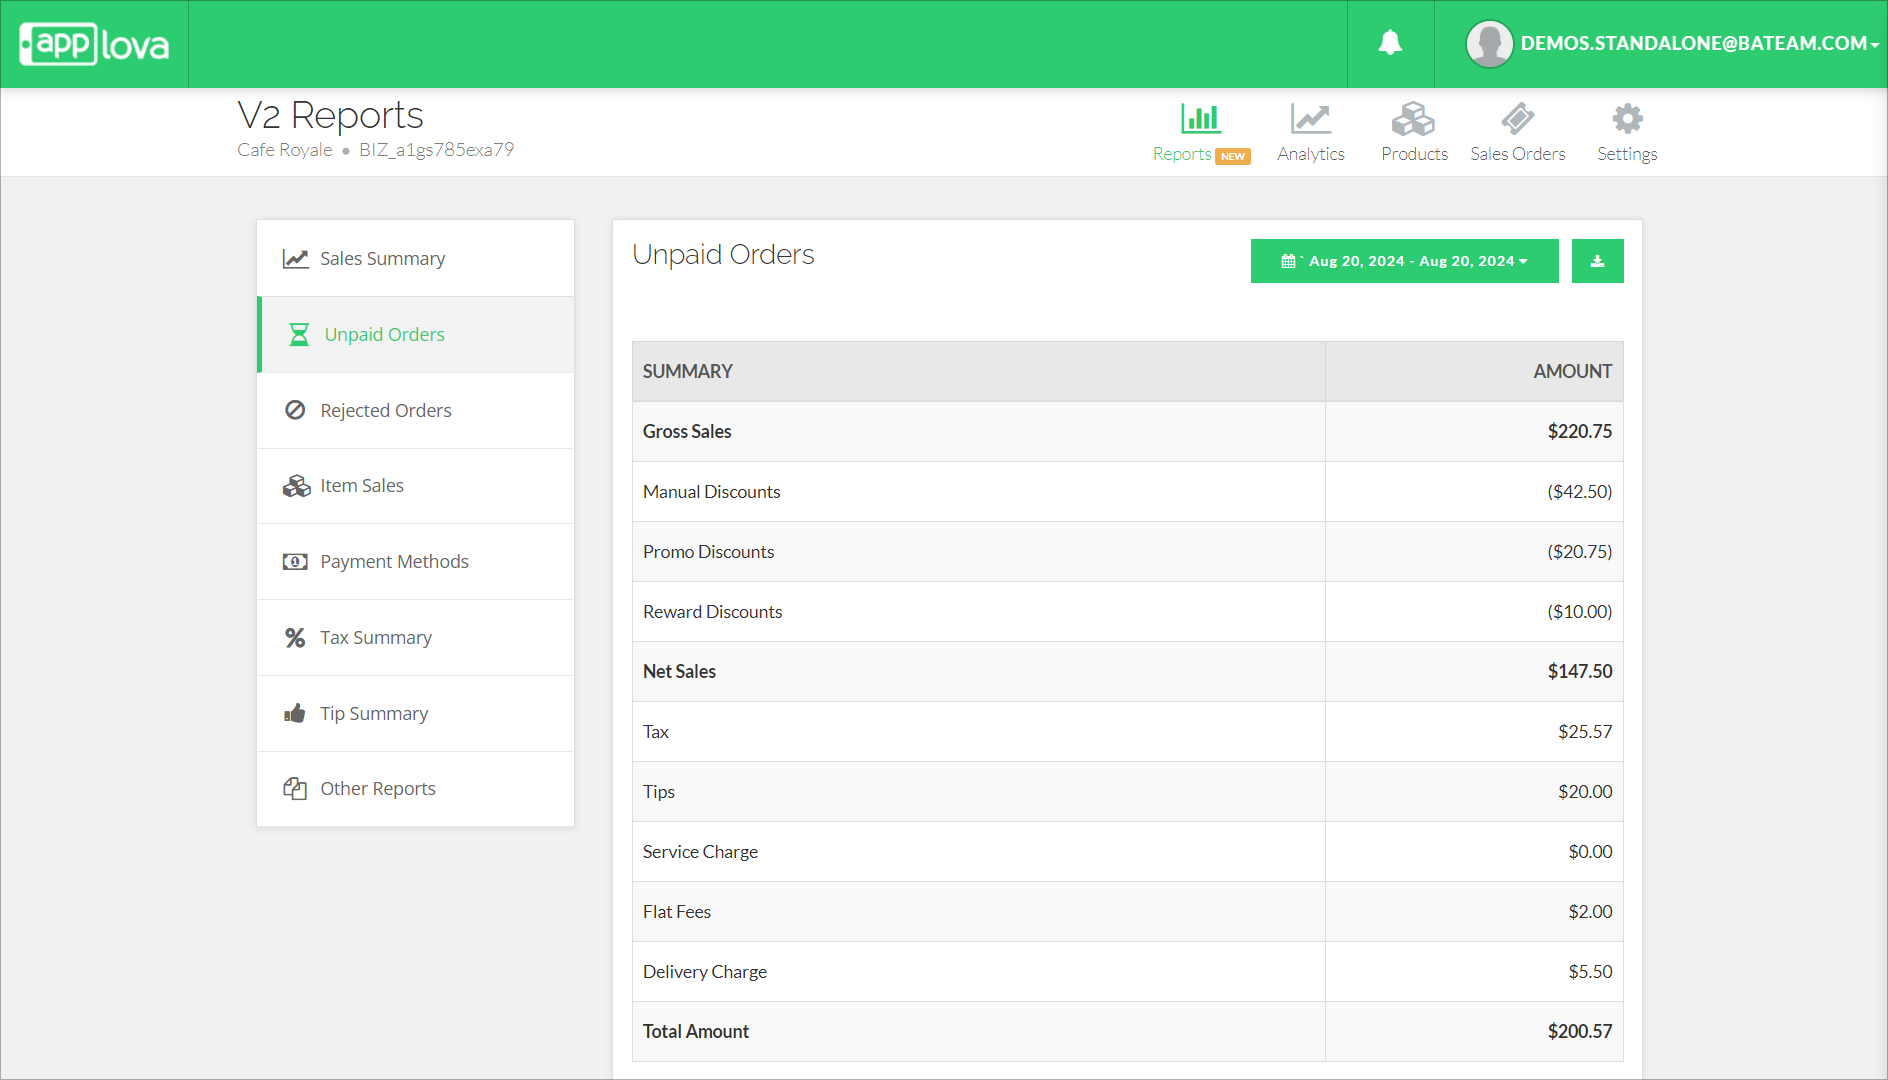
- Unpaid Orders - Displays a list of orders that have not been paid, helping merchants track pending payments.
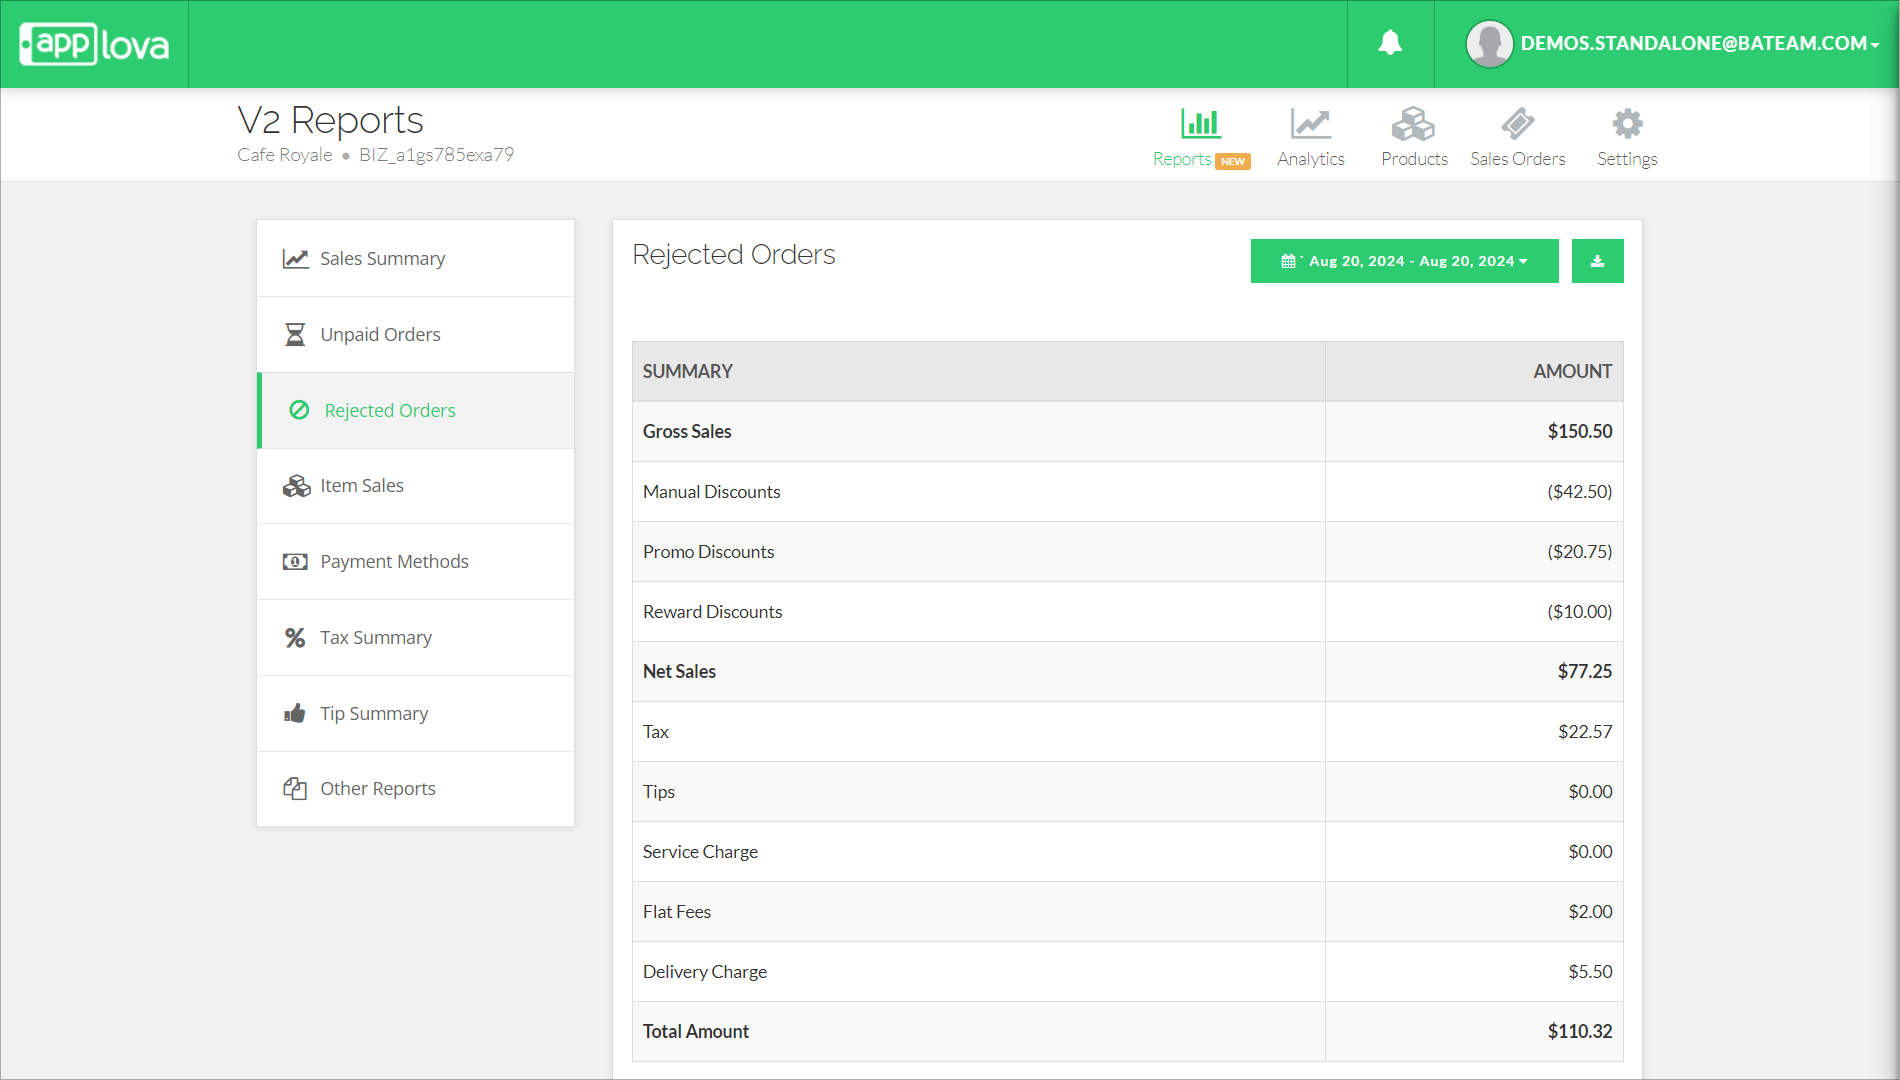
- Rejected Orders - Provides a summary of orders that were rejected, including order details and rejection information.
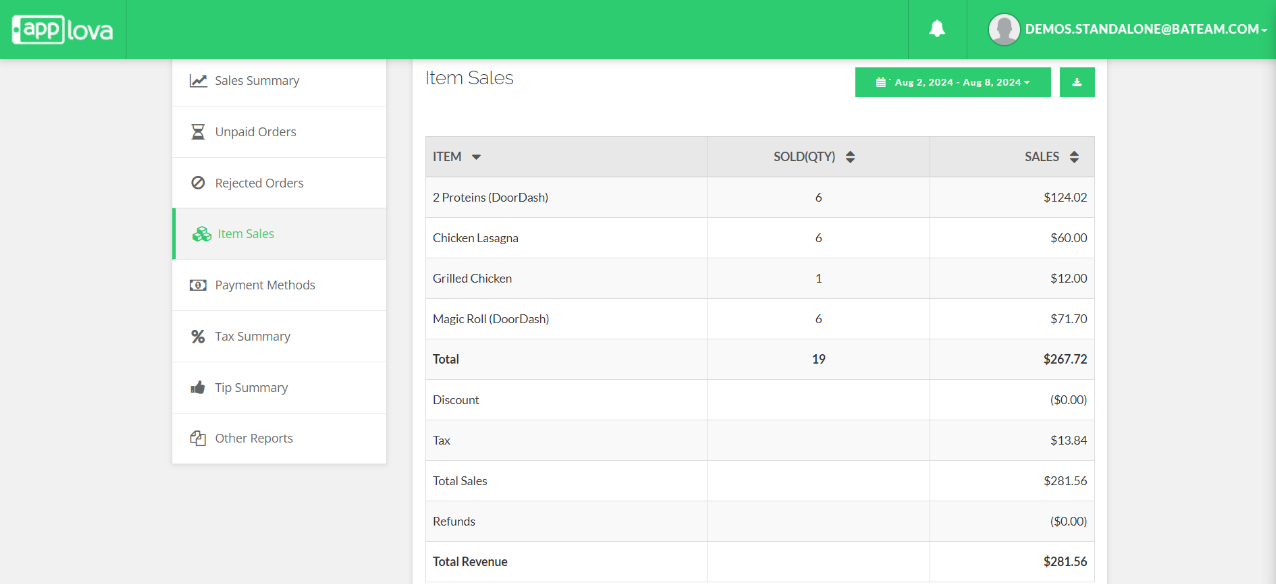
- Item Sales - Summarizes sales based on individual items sold during the selected time period.
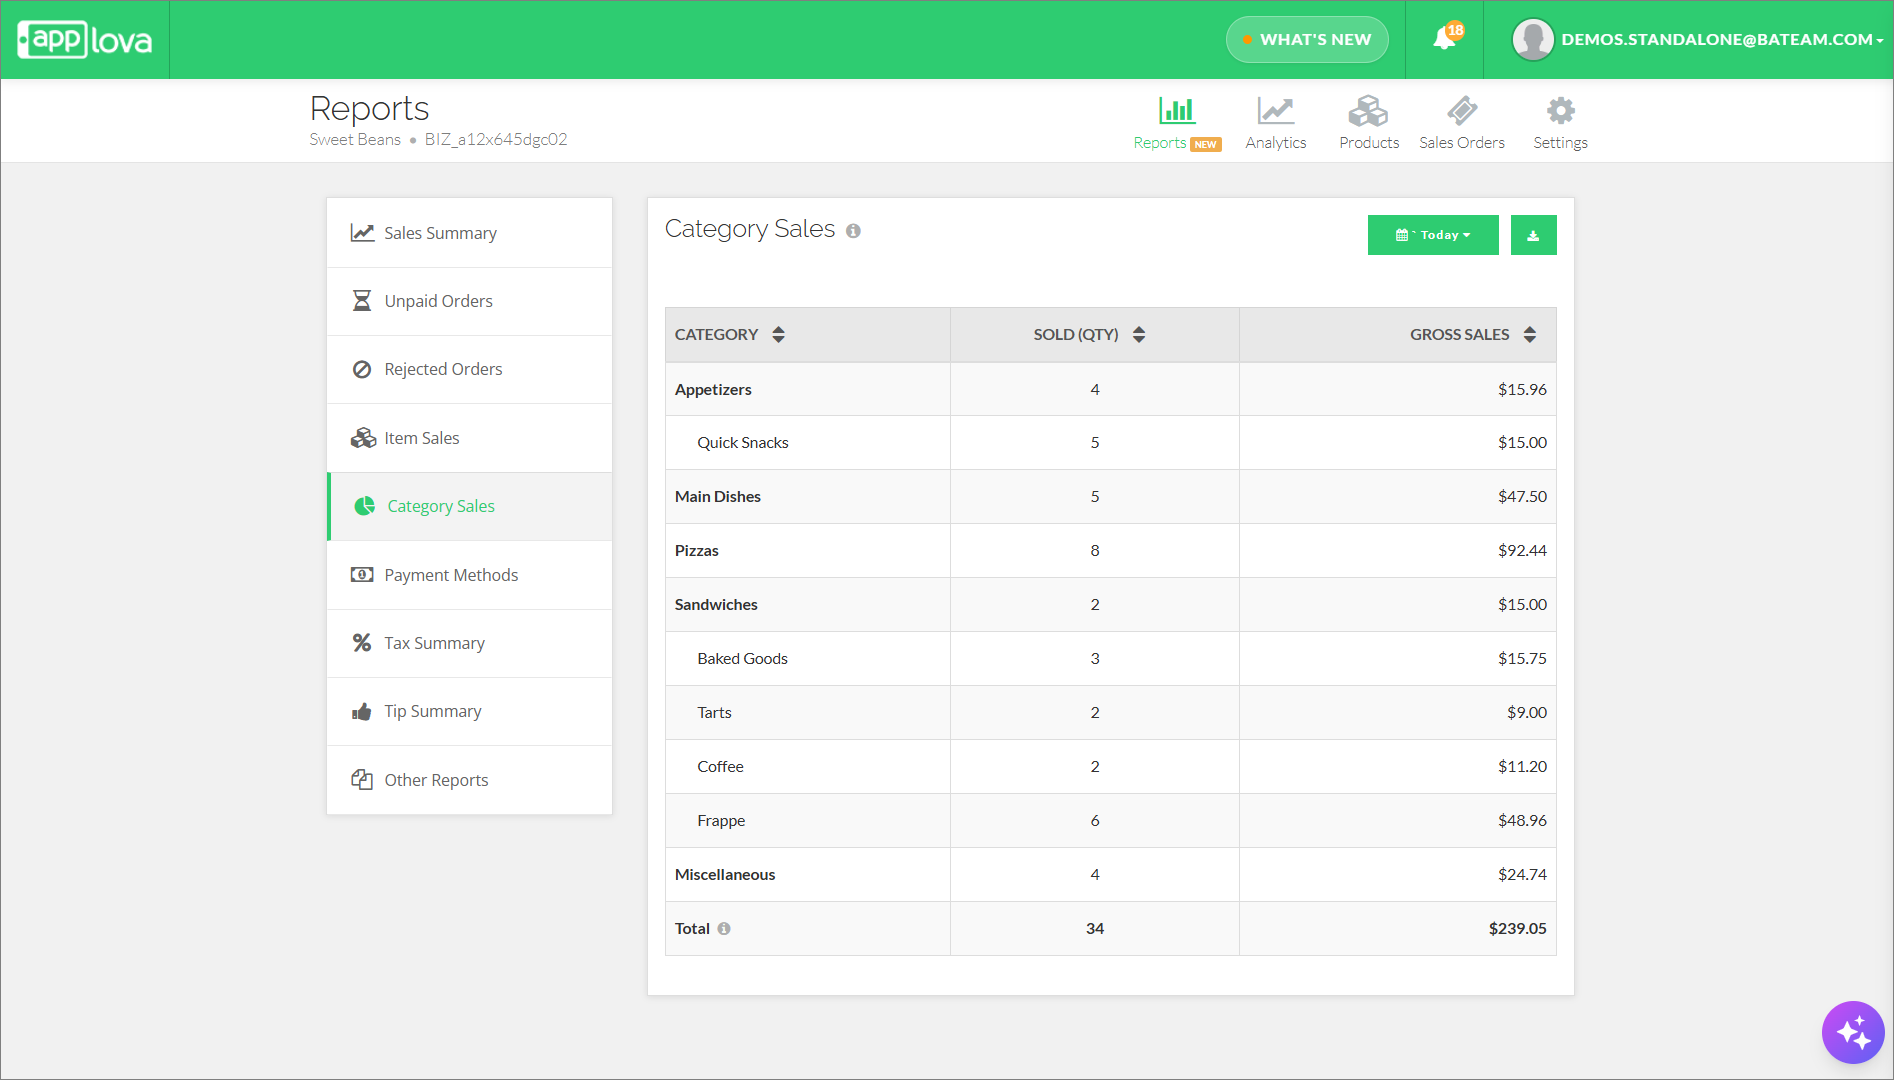
- Category Sales - Summarizes sales based on product categories, helping merchants understand which categories generate the most sales.
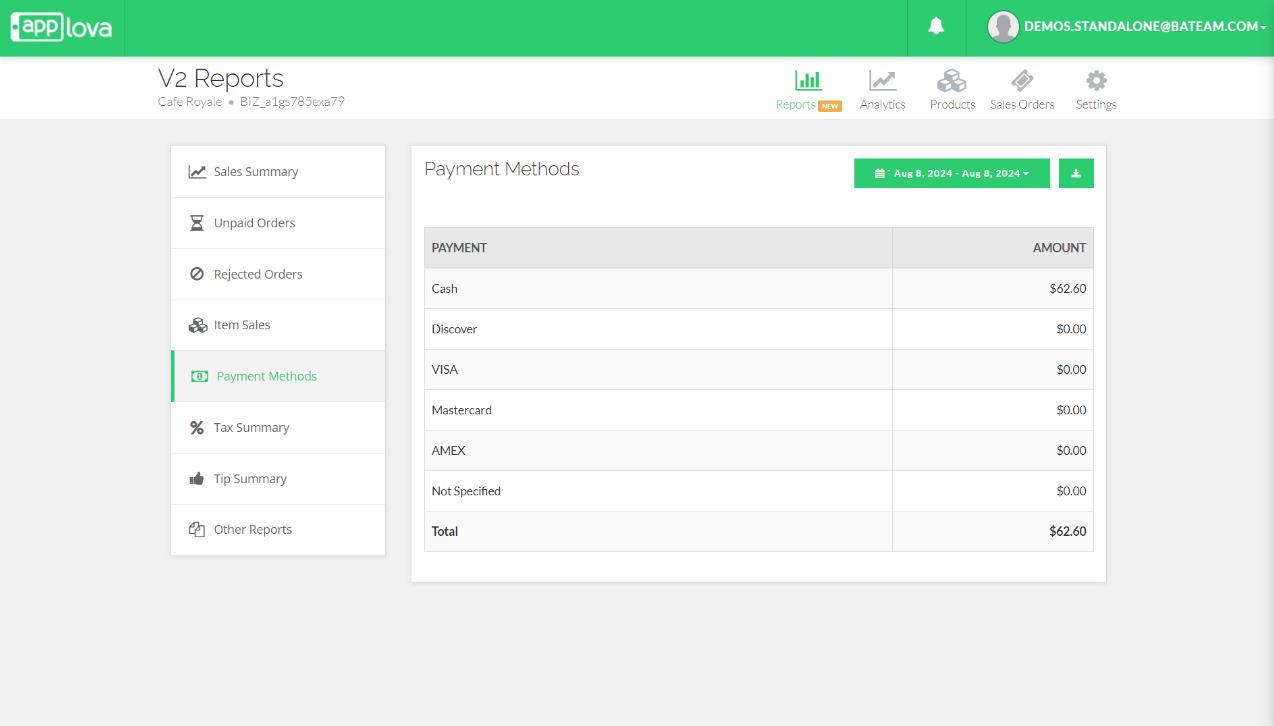
- Payment Methods - Provides a breakdown of sales by payment method, such as cash, card, and other tender types.
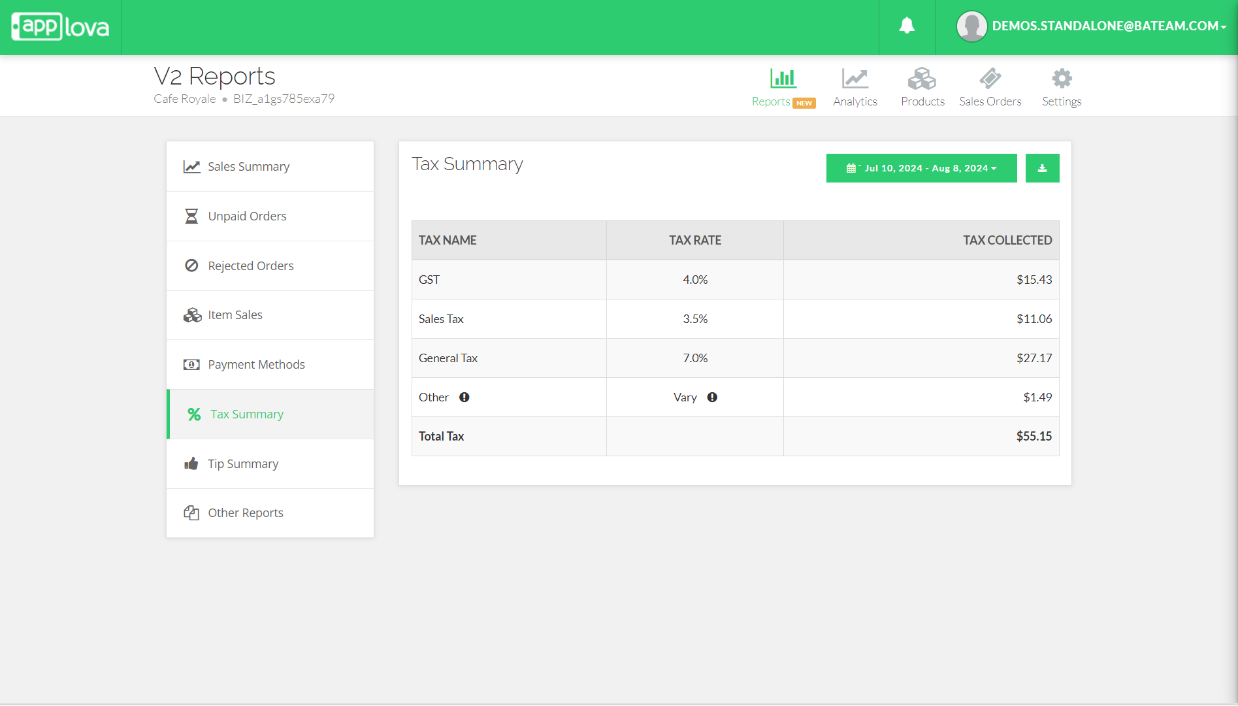
- Tax Summary - Summarizes the tax collected for orders during the selected time period.
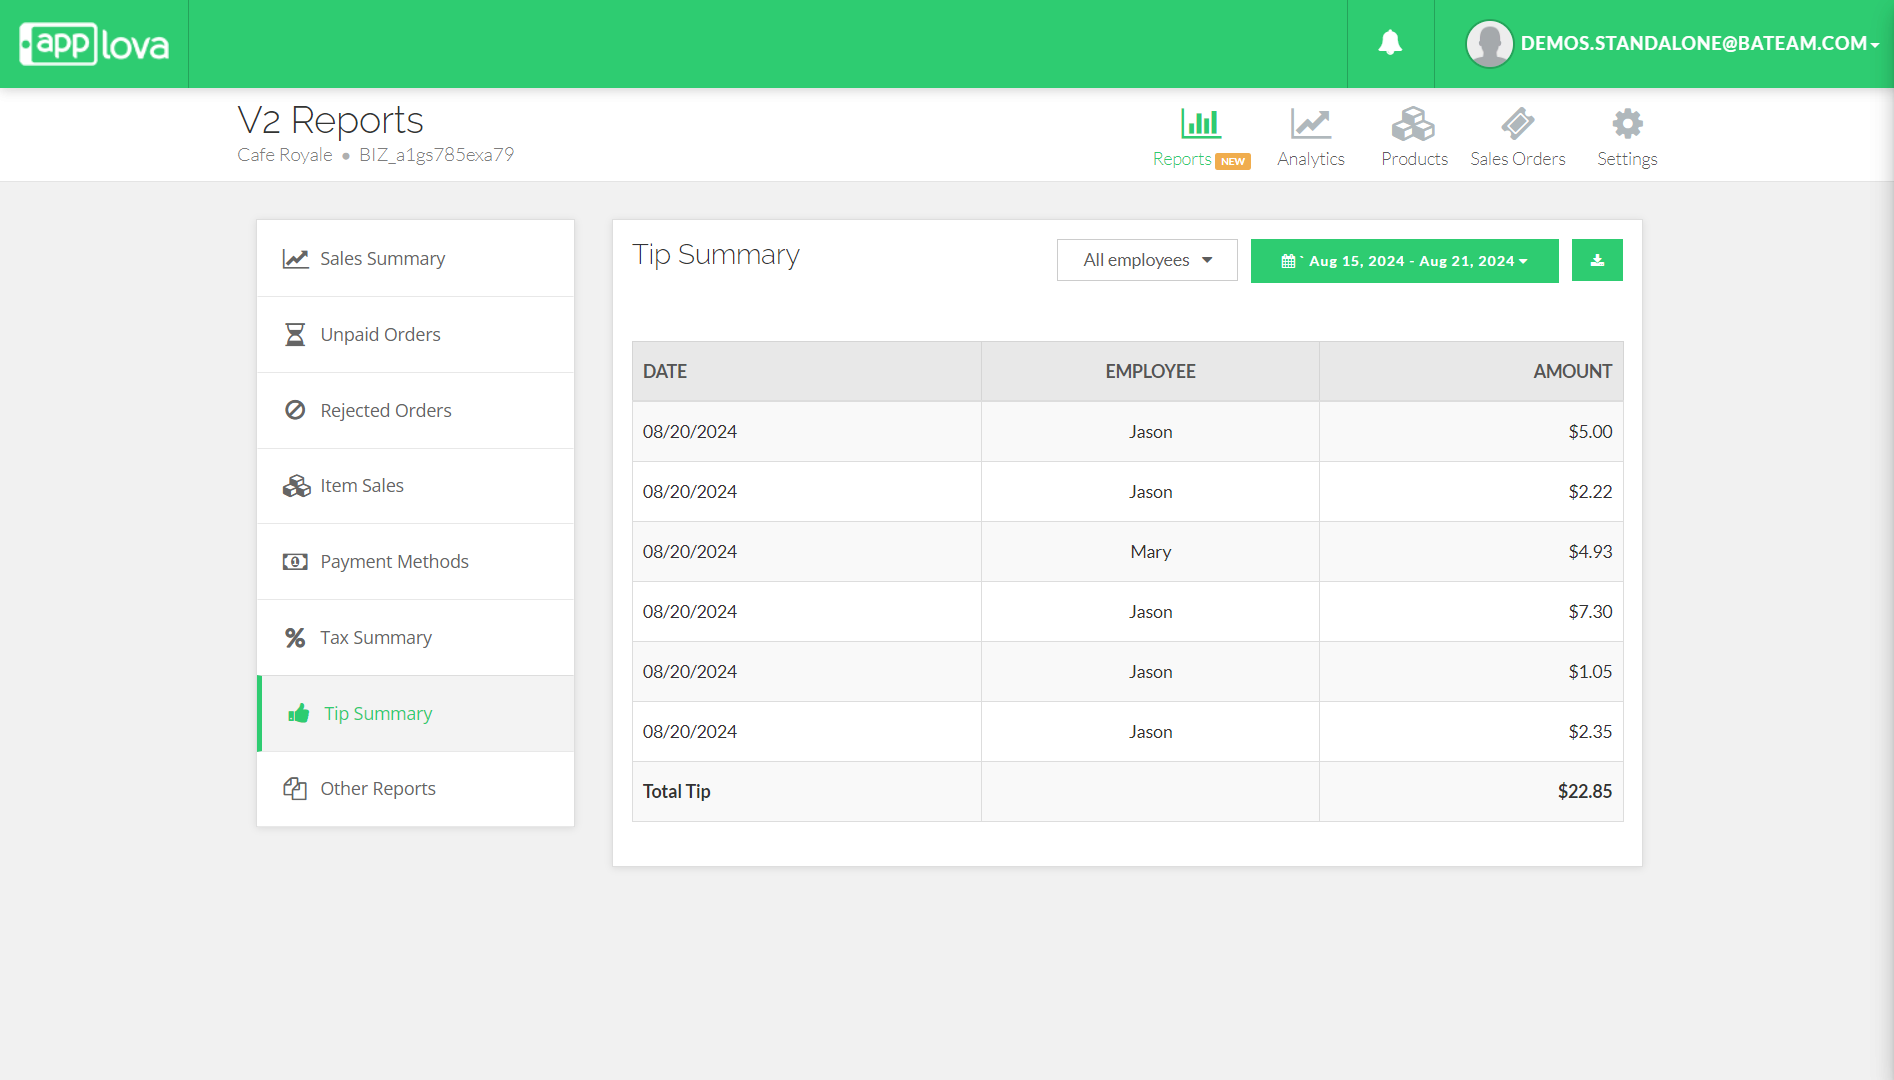
- Tip Summary - Provides a summary of tips earned during the selected time period.
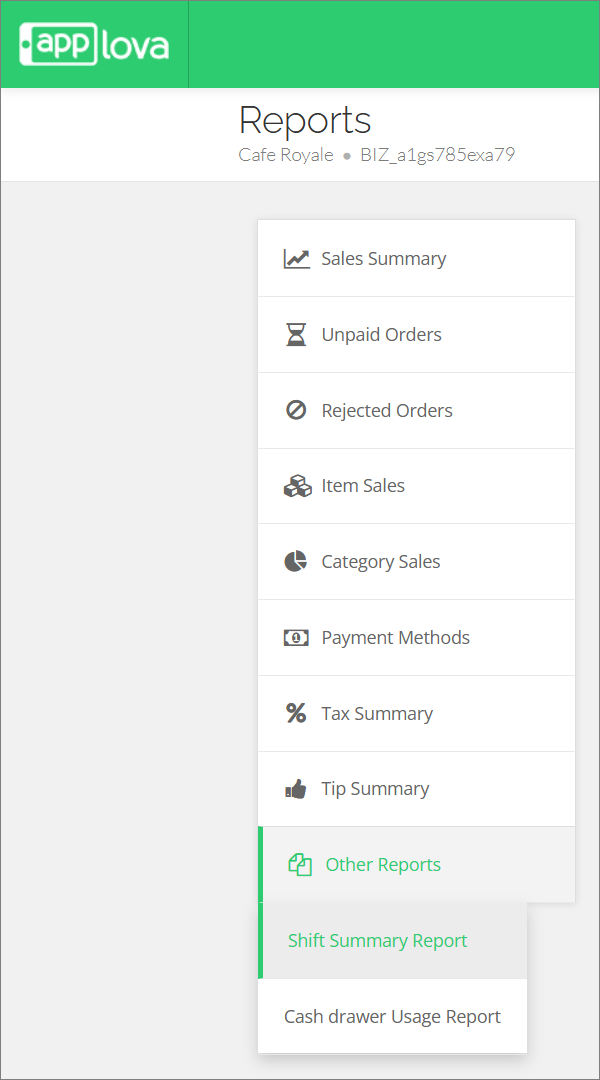
- Other Reports
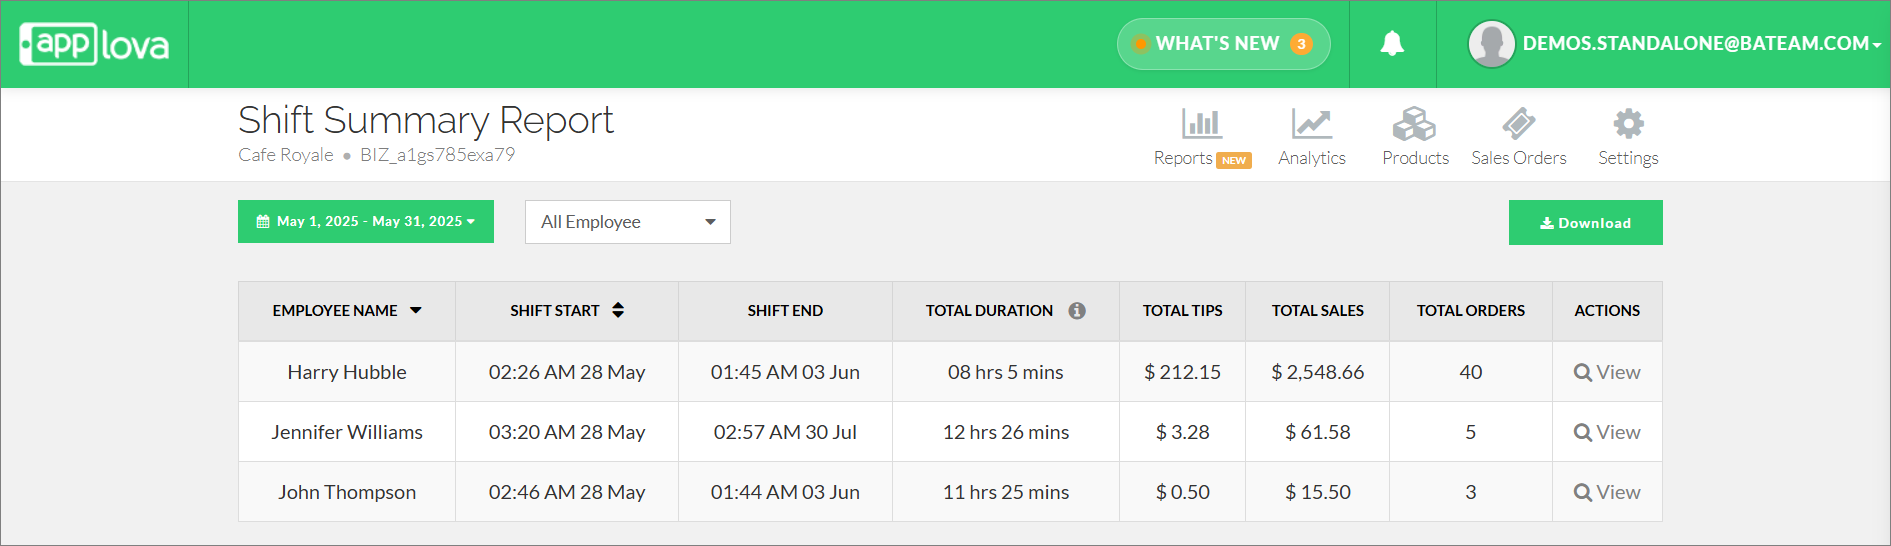
- Shift Summary Report - Provides a summary of employee shifts, including shift duration, total sales, total tips, and order count.
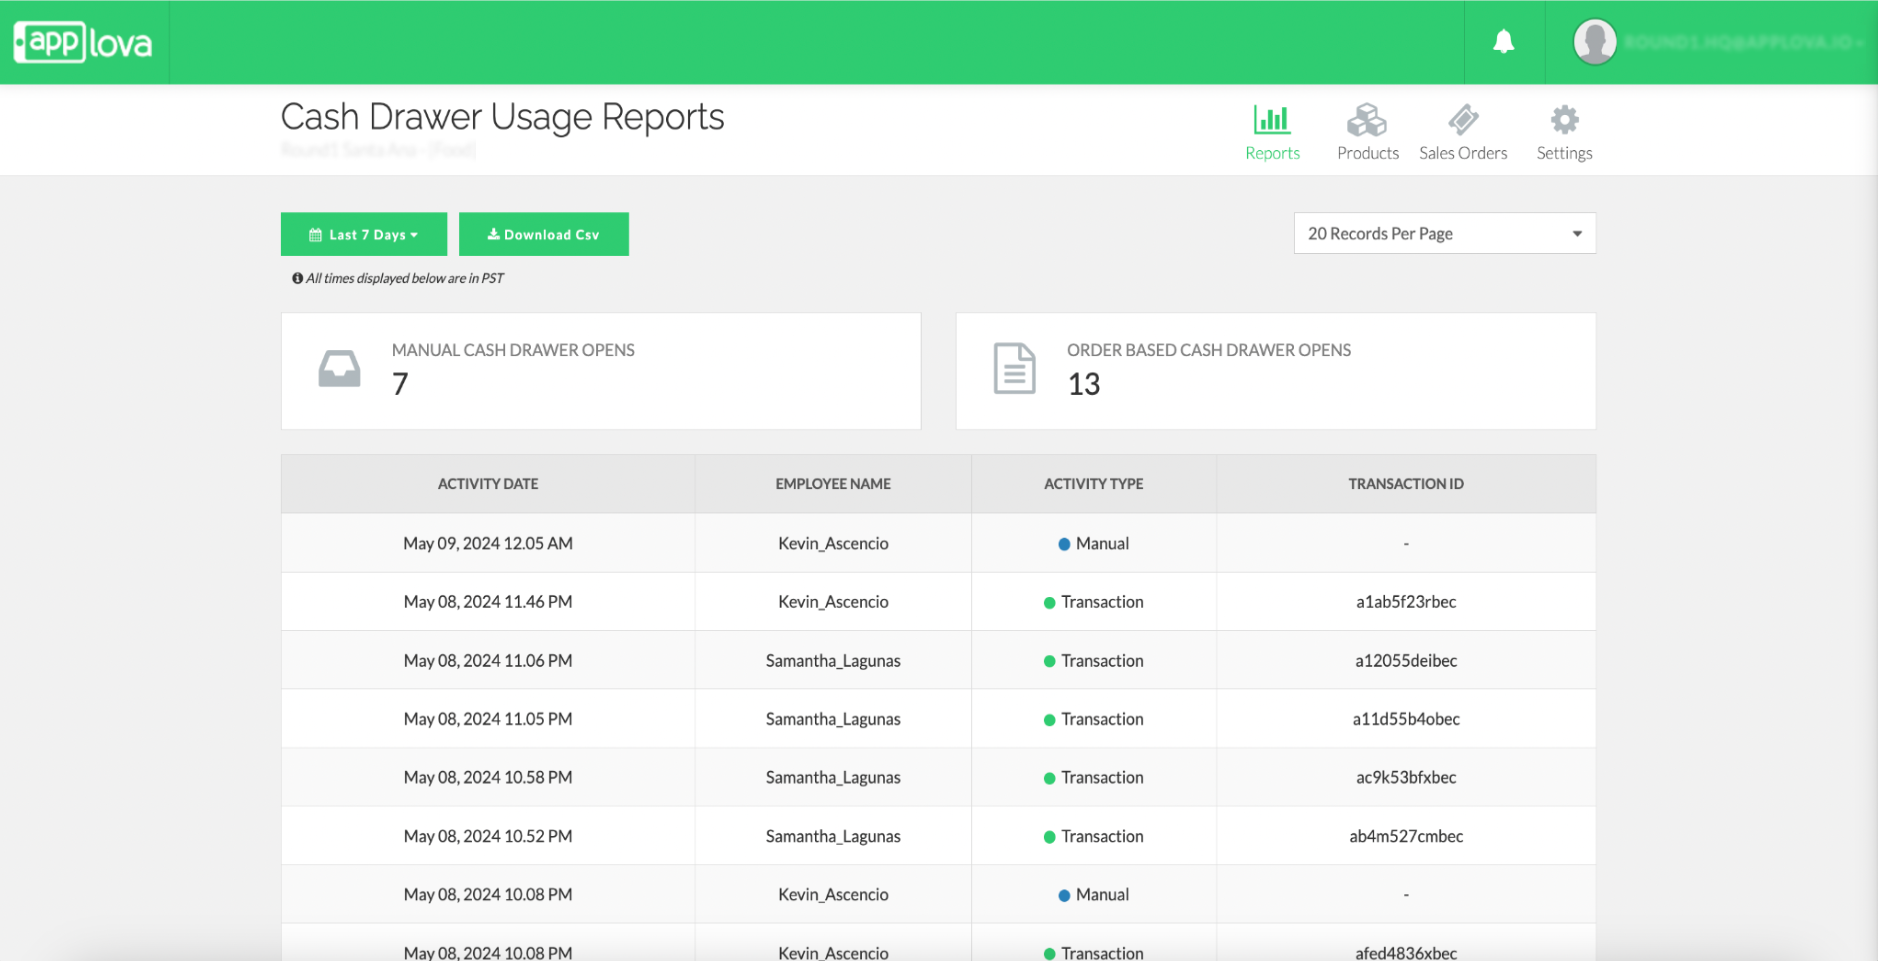
- Cash Drawer Usage Report - Provides a summary of cash drawer activity, including transactions and manual cash drawer events.
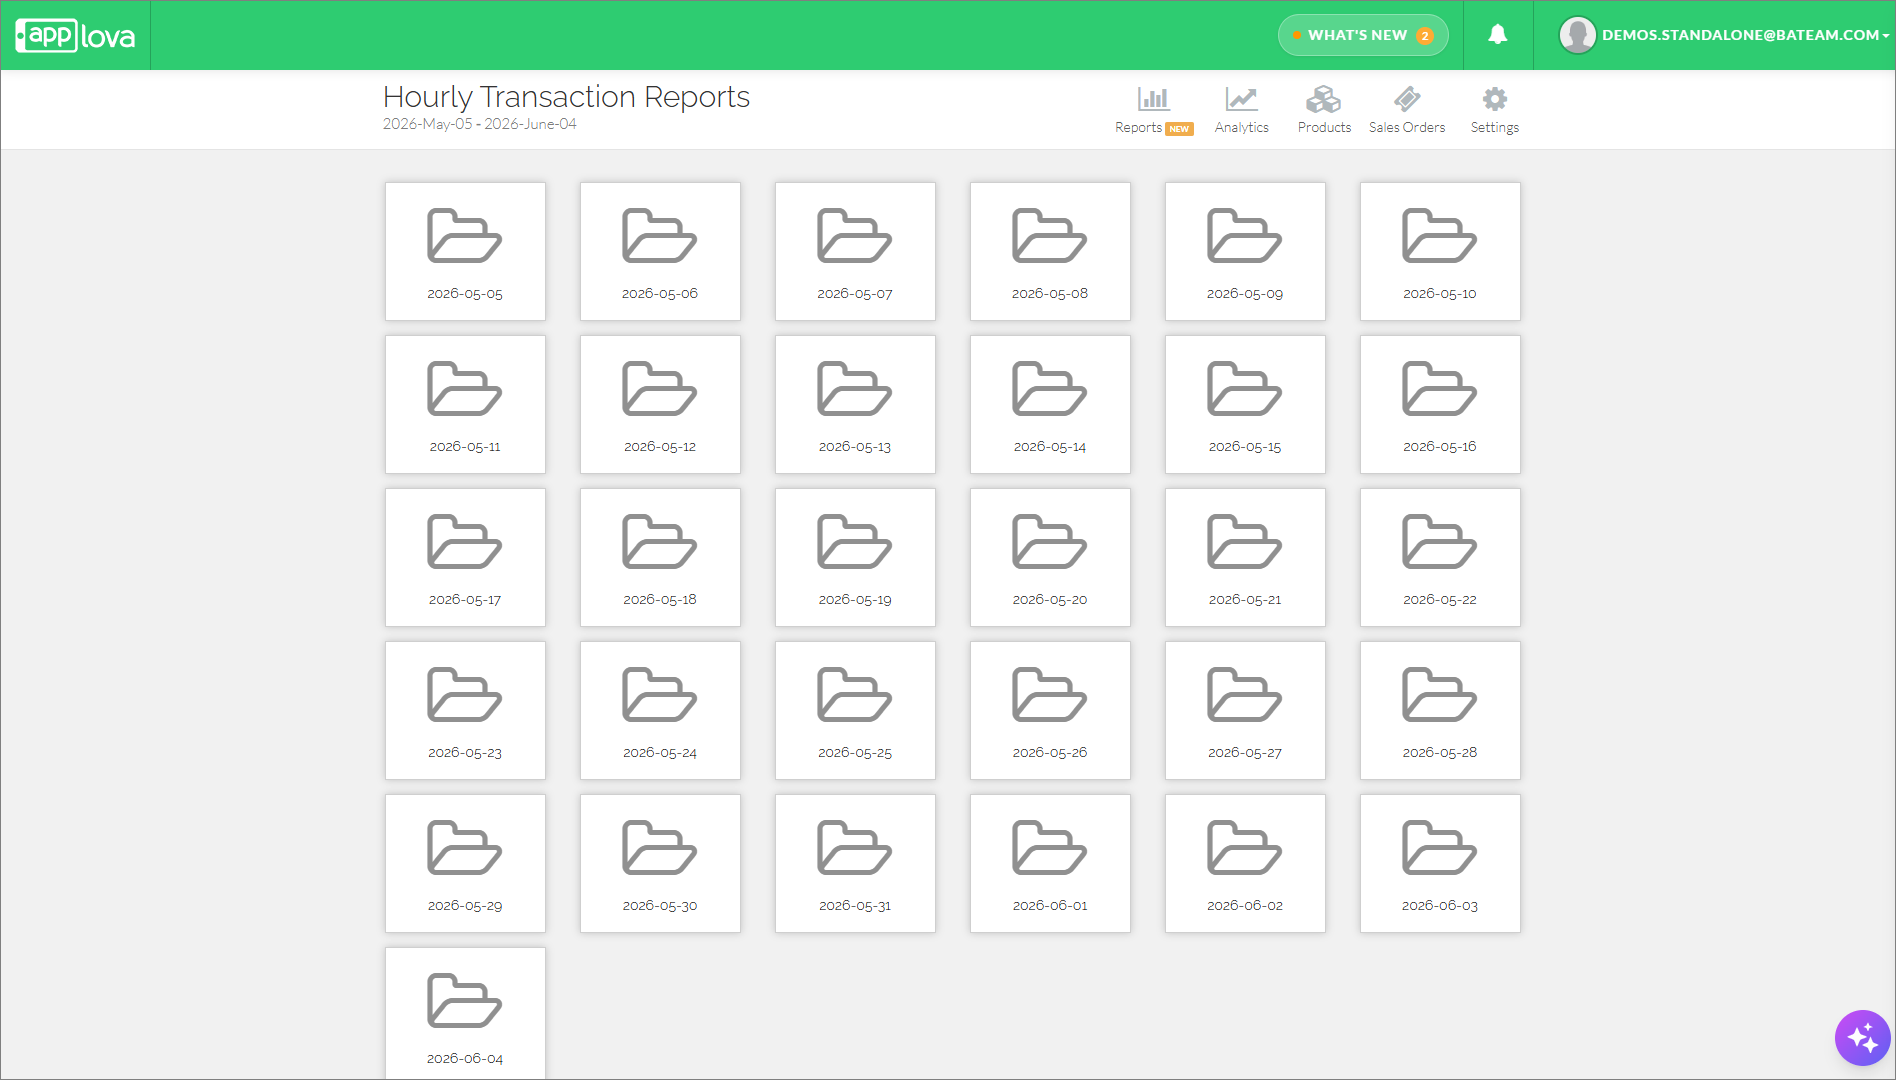
- Hourly Transaction Report - Provides a summary of hourly sales transactions for the selected date or time period.

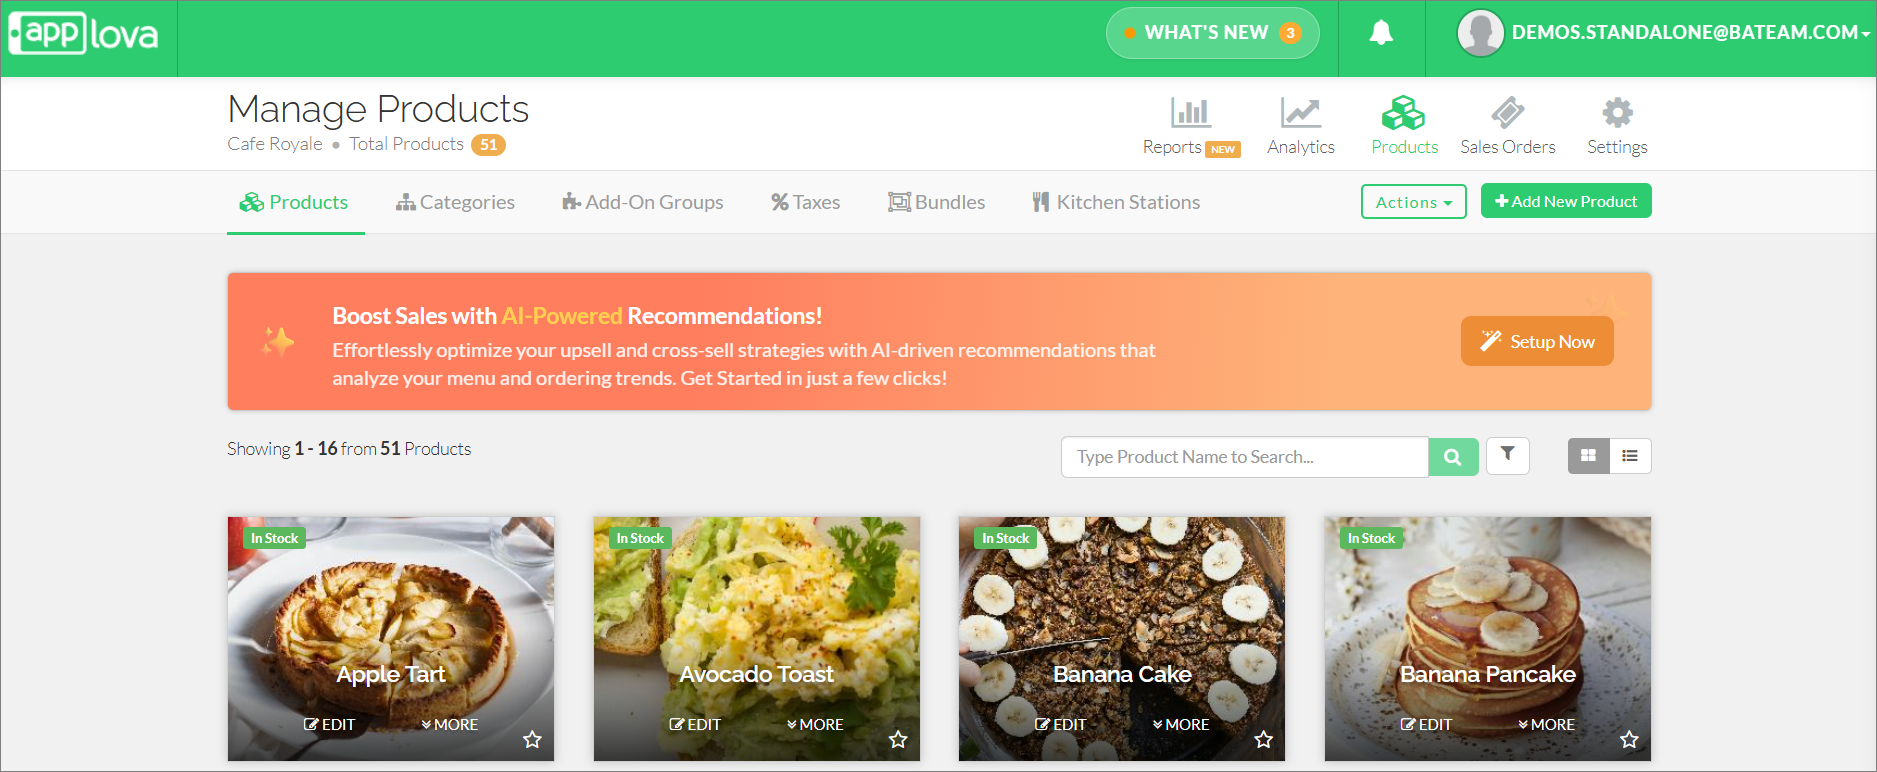
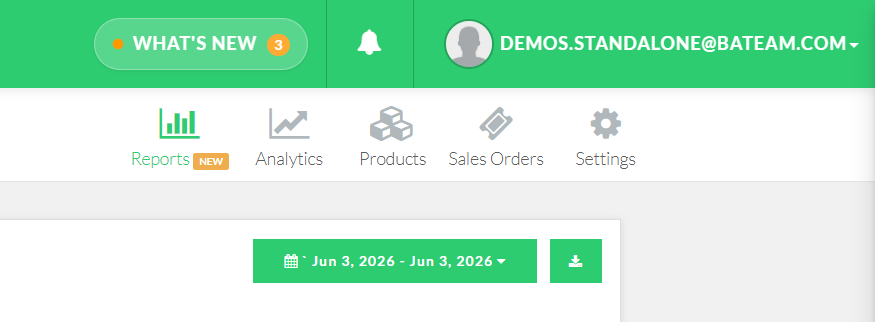
How to View Reports via Merchant Web?
Login to the "Merchant Web Portal".
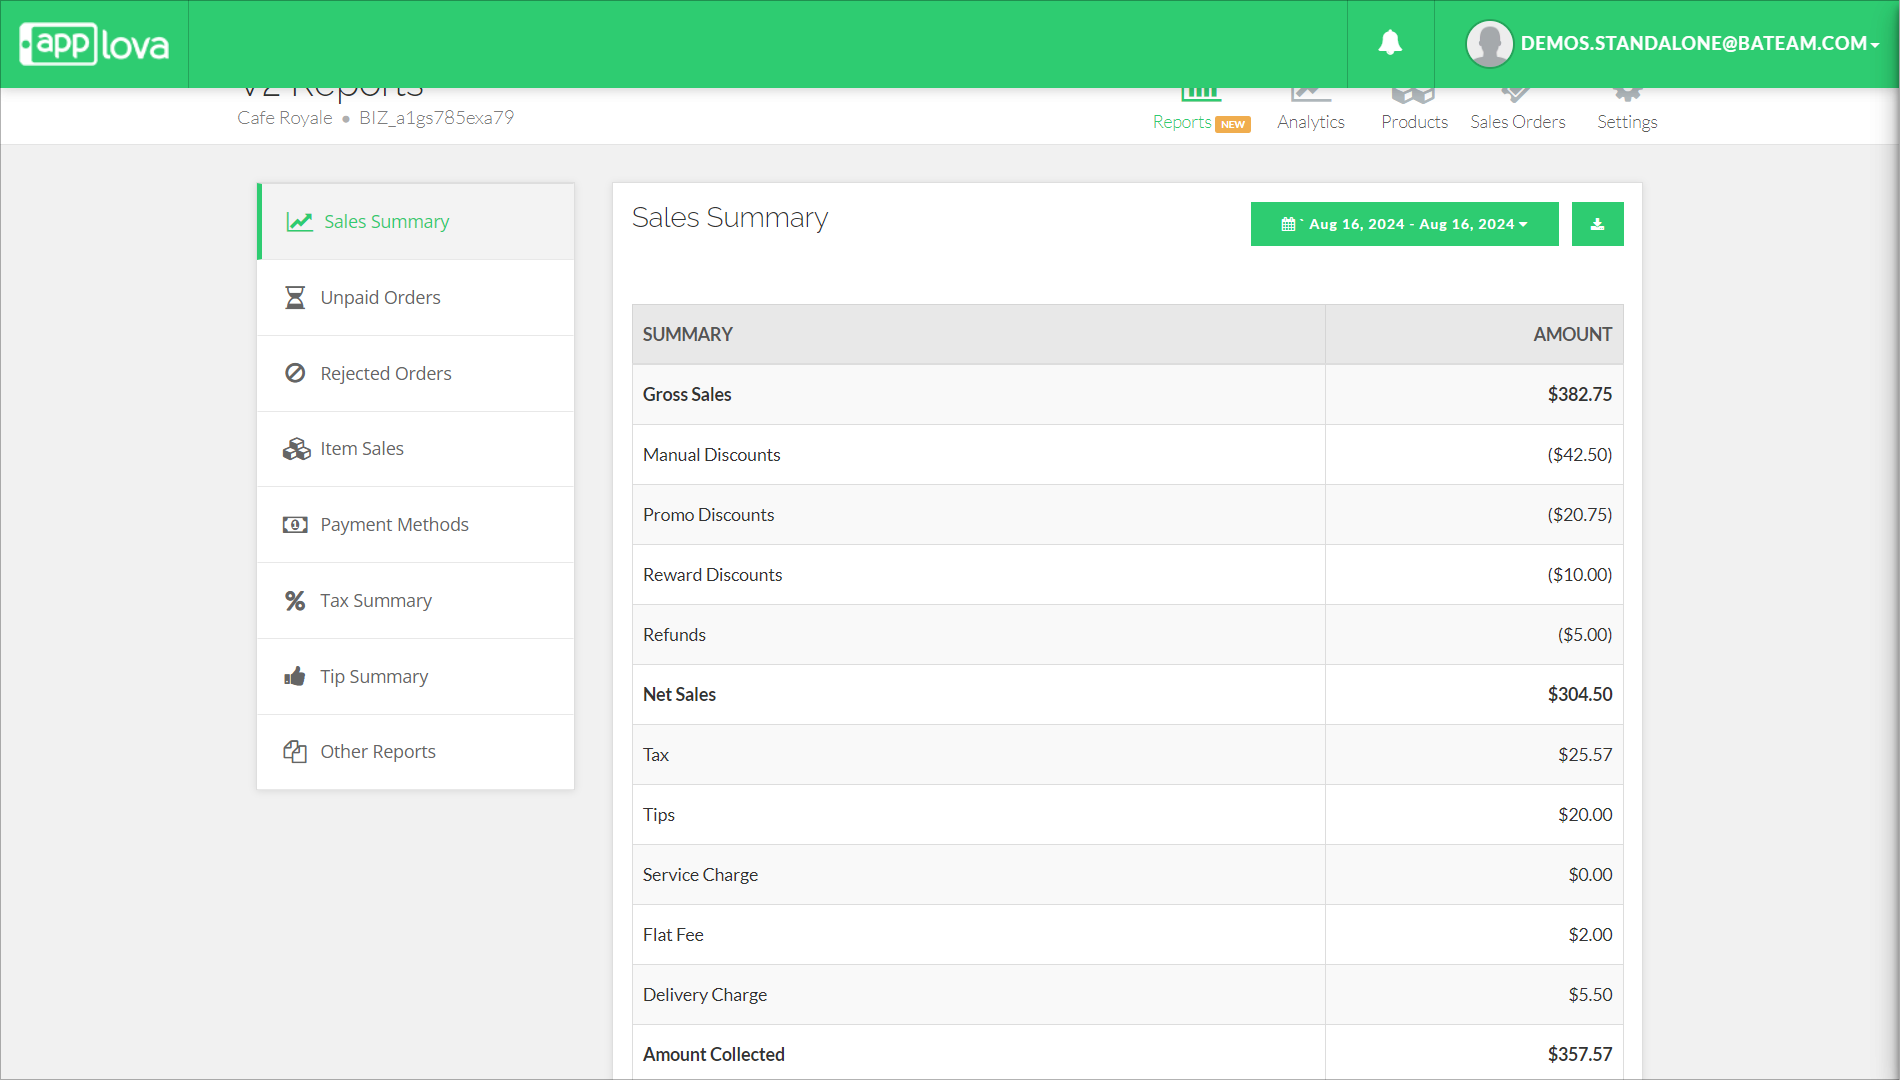
This report displays a sales summary for paid orders within the selected date range. Merchants can use this report to review completed sales activity and understand revenue collected during a specific period.
The summary includes gross sales, discounts, refunds, net sales, tax, tips, service charges, flat fees, and delivery charges.
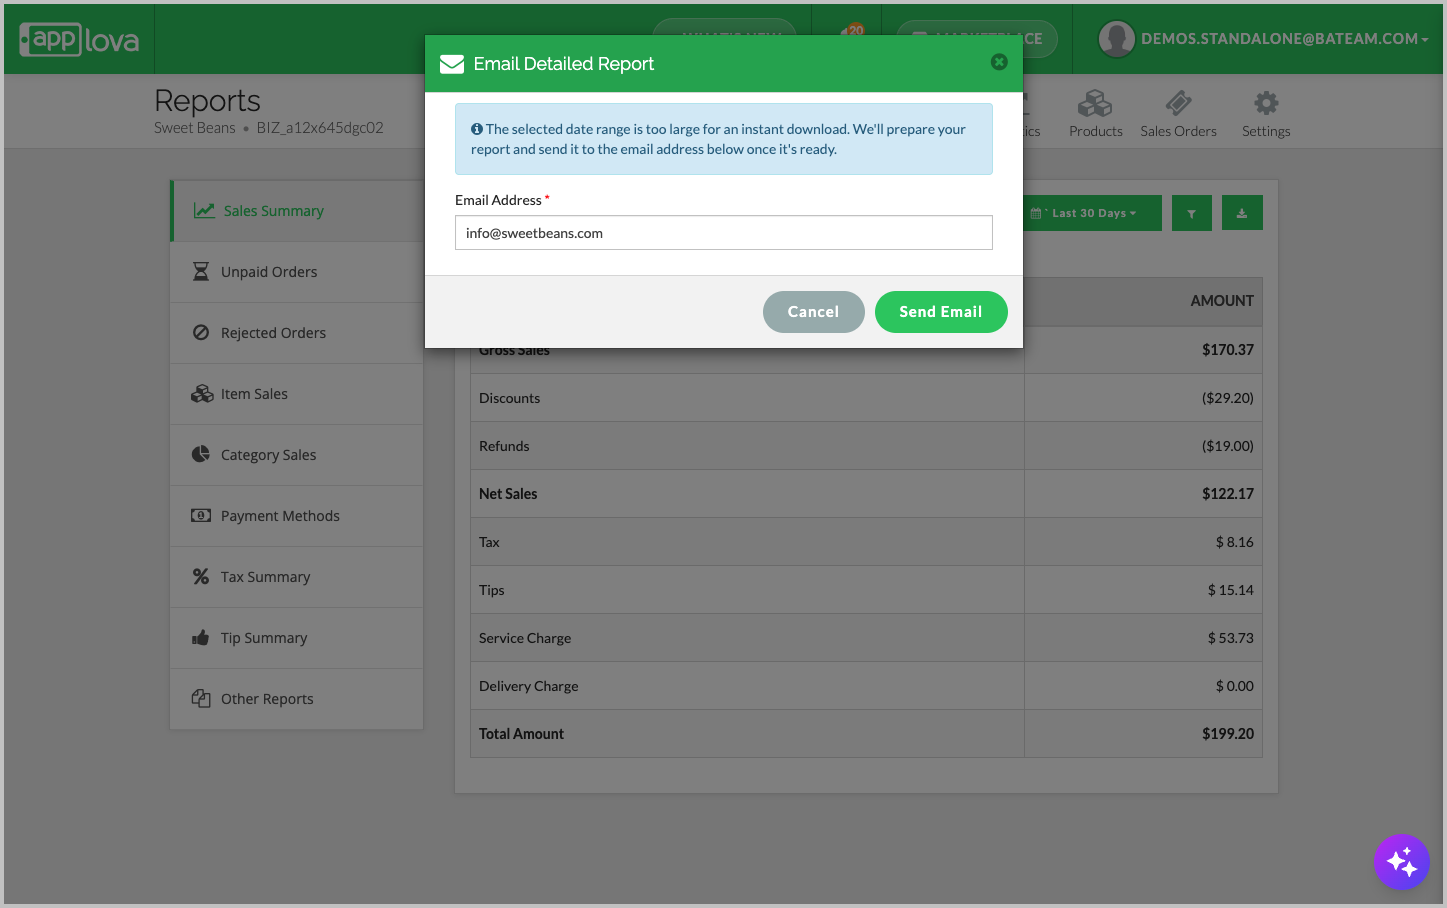
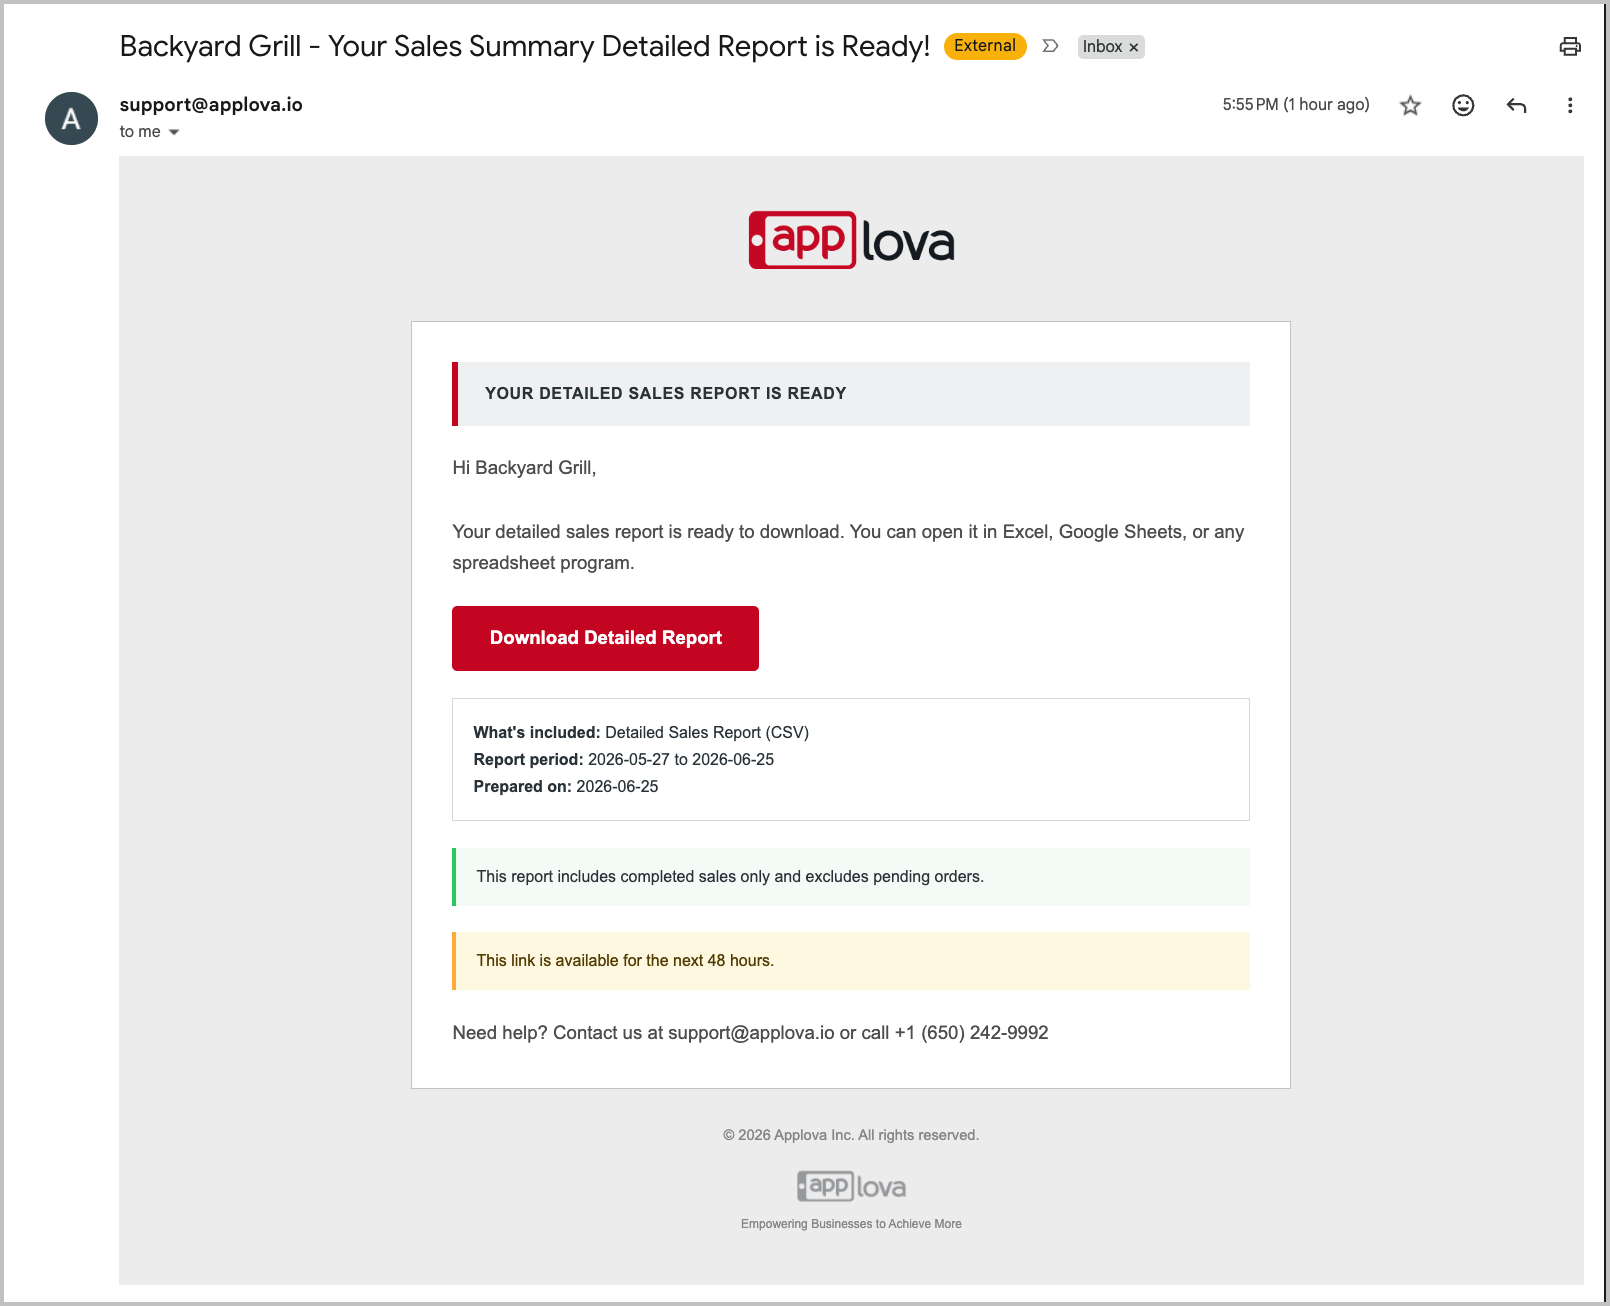
How to Download a Sales Summary Report?

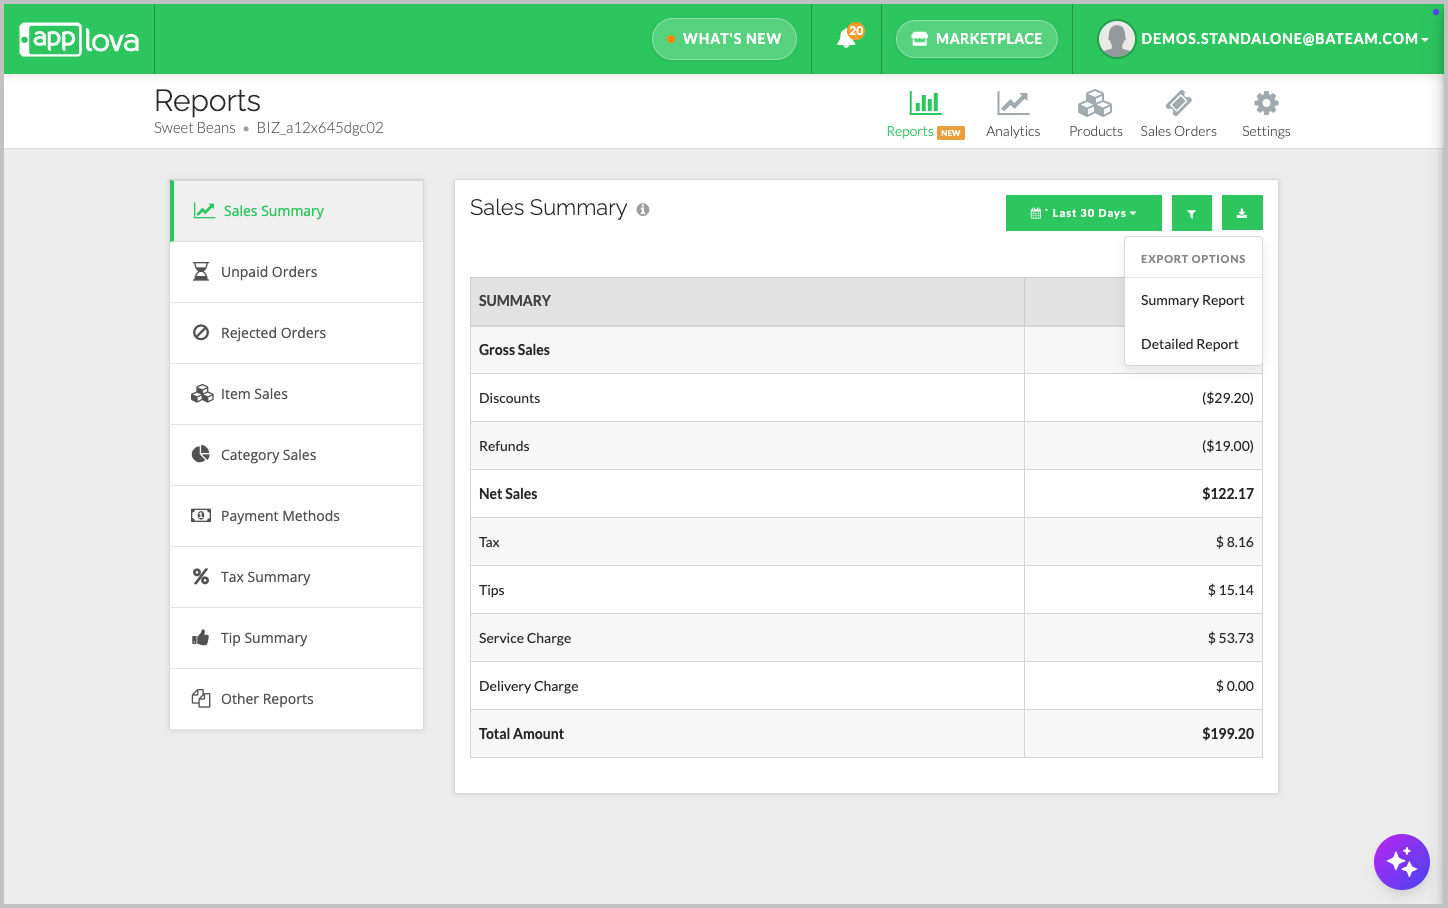
| Report Type | When to Use | What It Includes |
|---|---|---|
| Summary Report | Use this to download the sales summary shown on the screen. | Summary-level sales values for the selected date range. |
| Detailed Report | Use this for order-level review and revenue reconciliation. |
|
Step 3

This report displays a sales summary for unpaid or pending orders within the selected date range. Merchants can use this report to track orders that have not yet been paid and review pending sales activity.
The summary includes gross sales, discounts, net sales, tax, tips, delivery charges, service charges, and flat fees.
How to Download a Report?
This report displays a sales summary for rejected orders within the selected date range. Merchants can use this report to review orders that were rejected and understand the related sales values.
The summary includes gross sales, discounts, net sales, tax, tips, service charges, delivery charges, and flat fees.
How to Download a Report?
- Alphabetically
- Based on the number of items sold
- Based on sales
How it Reflects on Merchant Web
How to Download a Report
- Hidden
- Renamed
How to Download a Report
How to Download a Report
How to Download a Report
How to Download a Report
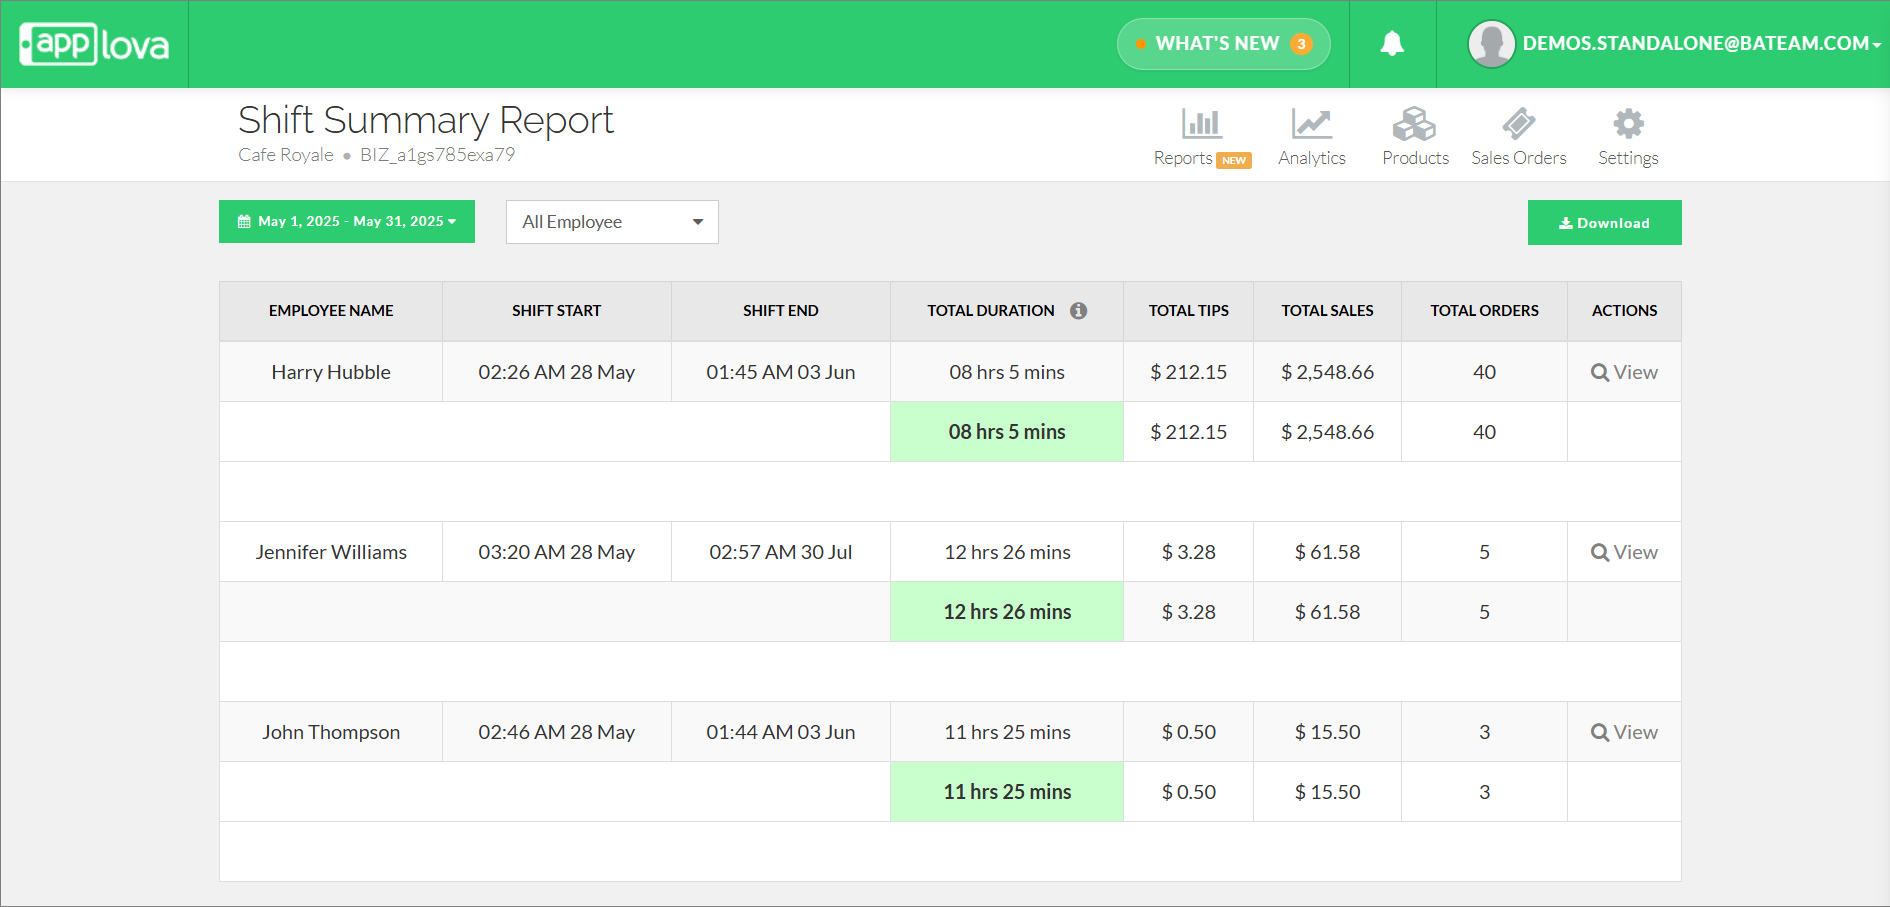
- In Individual shifts
- Grouped By Employee
Click on "Other Reports", then select "Shift Summary Report" from the dropdown menu.
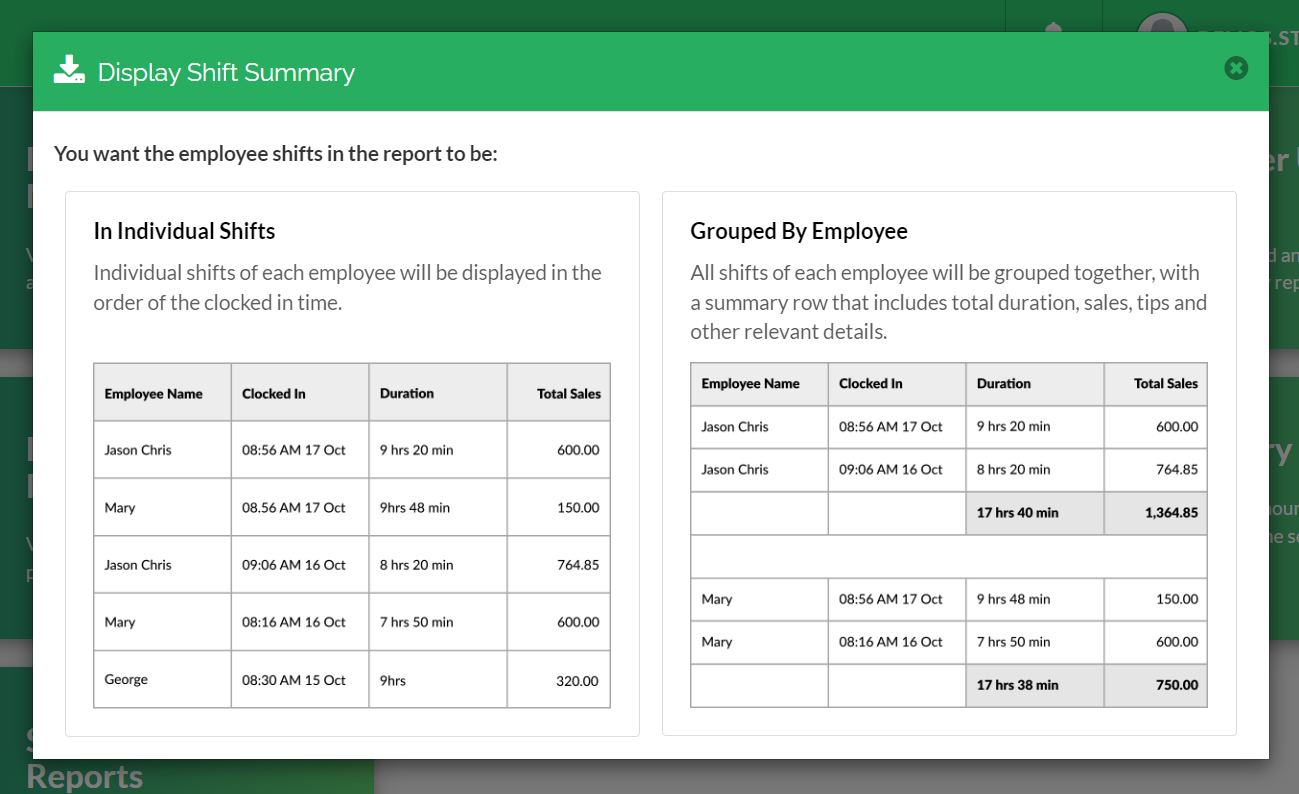
- In Individual Shifts : Capable of viewing shifts of each employee by the Clocked In order
2. Grouped by Employee : Able to view an employee's shifts grouped together
How to Download a Report
Transaction: When the cash drawer is opened as part of a cash payment transaction.
Click on "Other Reports", then select "Cash drawer Usage Report" from the dropdown menu.
How to Download a Report
Click on "Other Reports", then select "Hourly Transaction Report" from the dropdown menu.
How to Download a Report
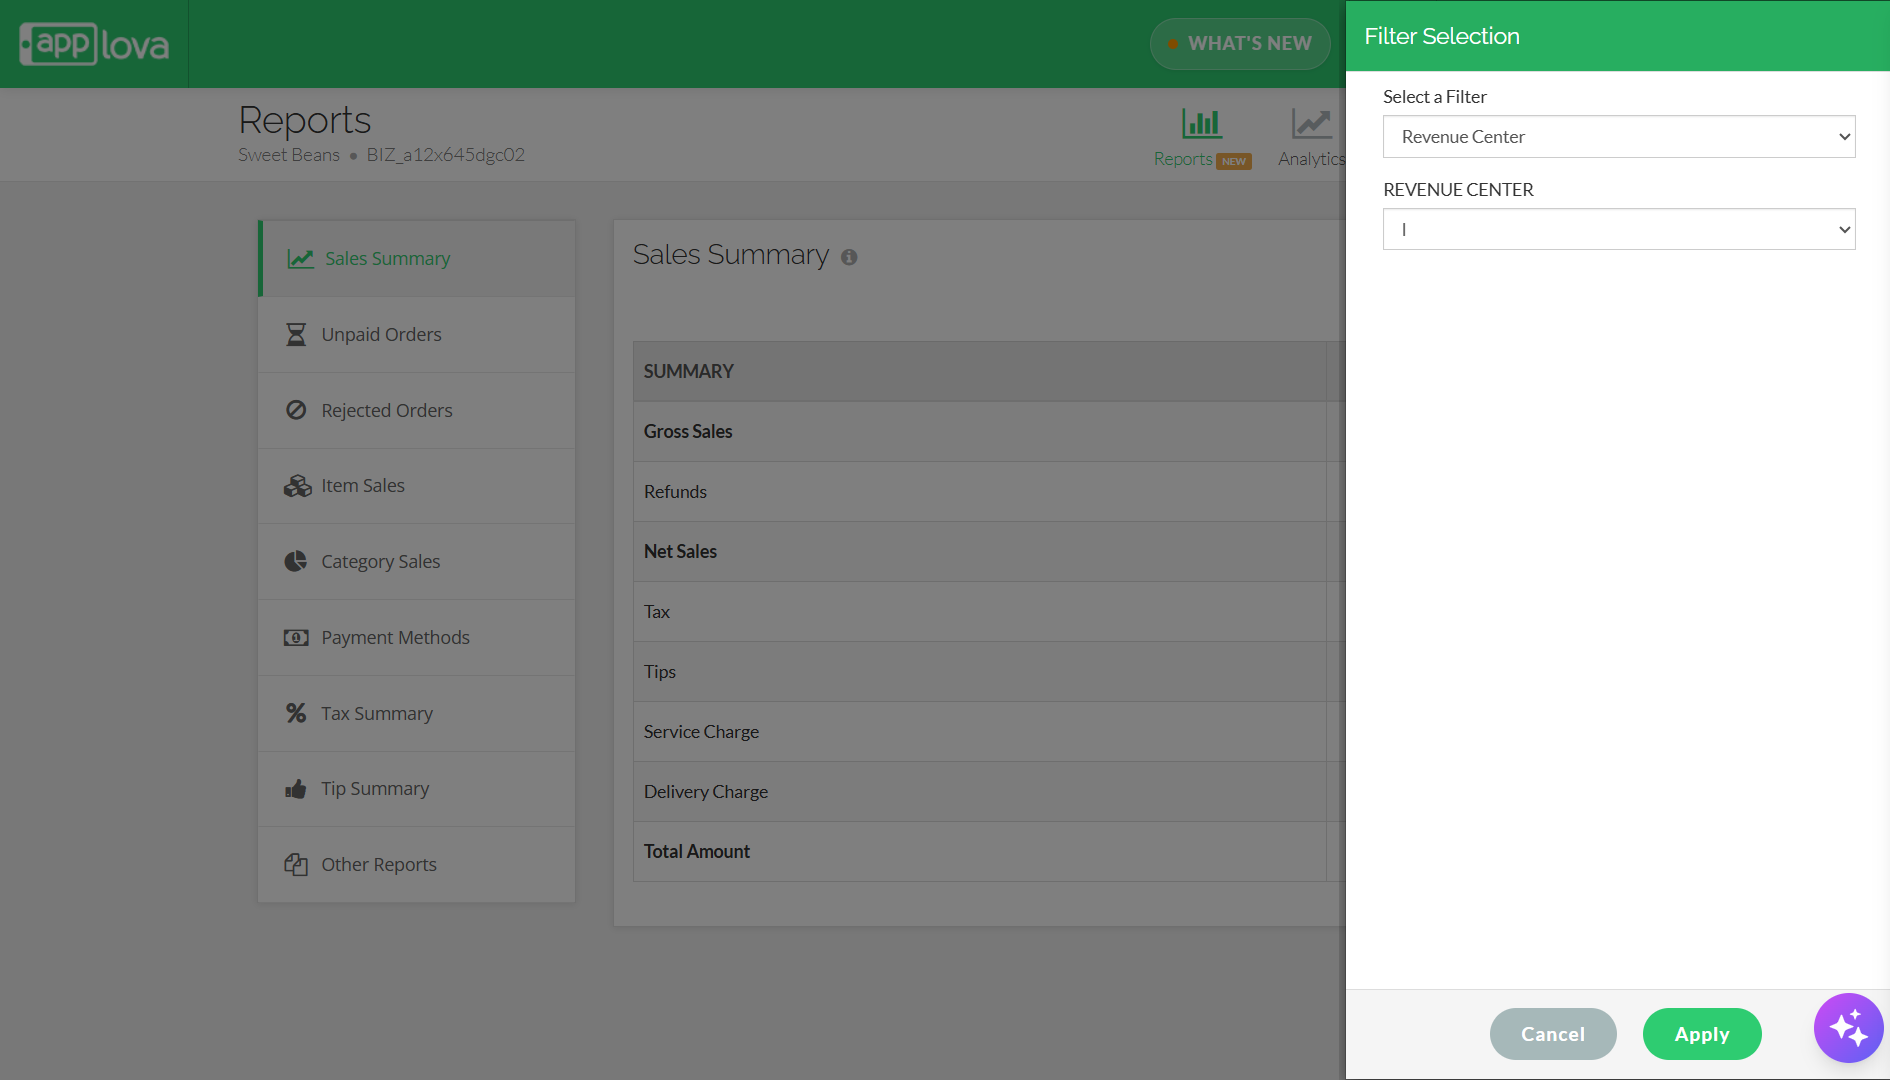
How to Manage Revenue Centers via Merchant Portal?
Navigate to the Reports section.
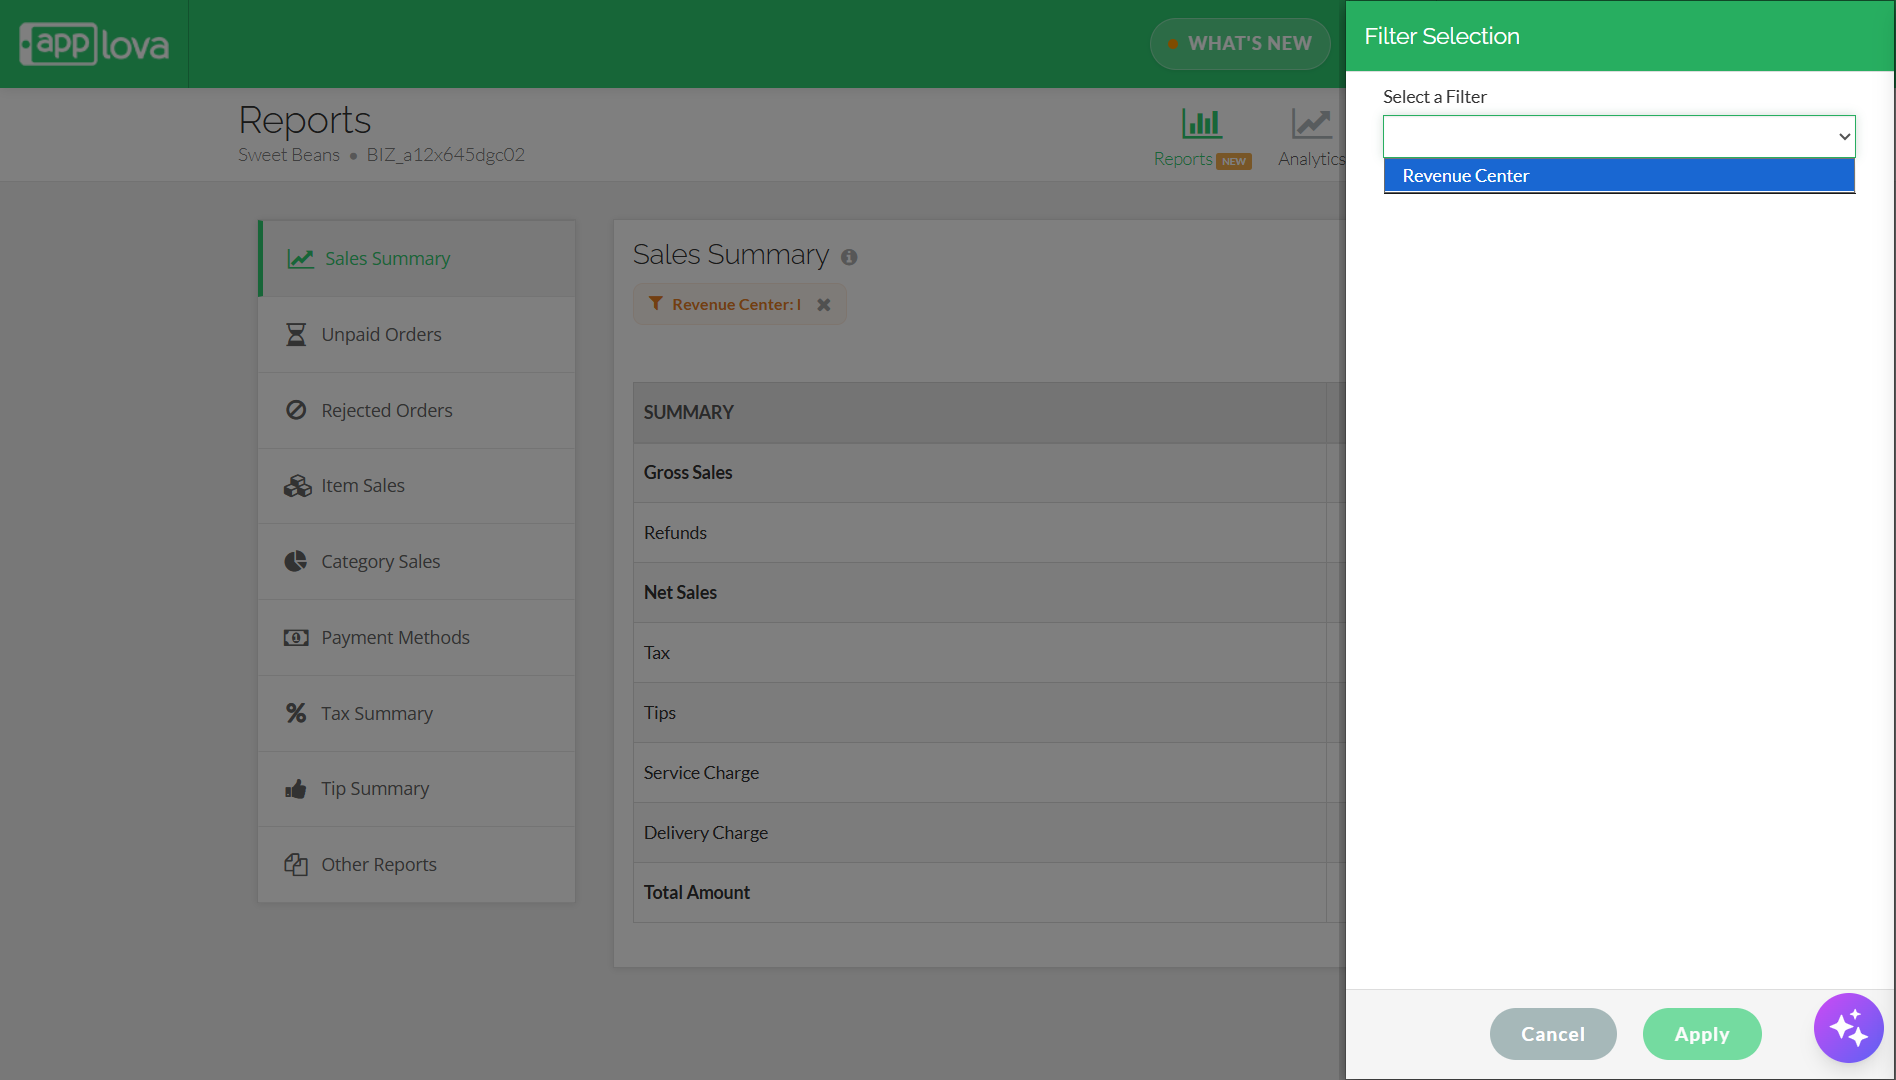
Image Link
Step 6
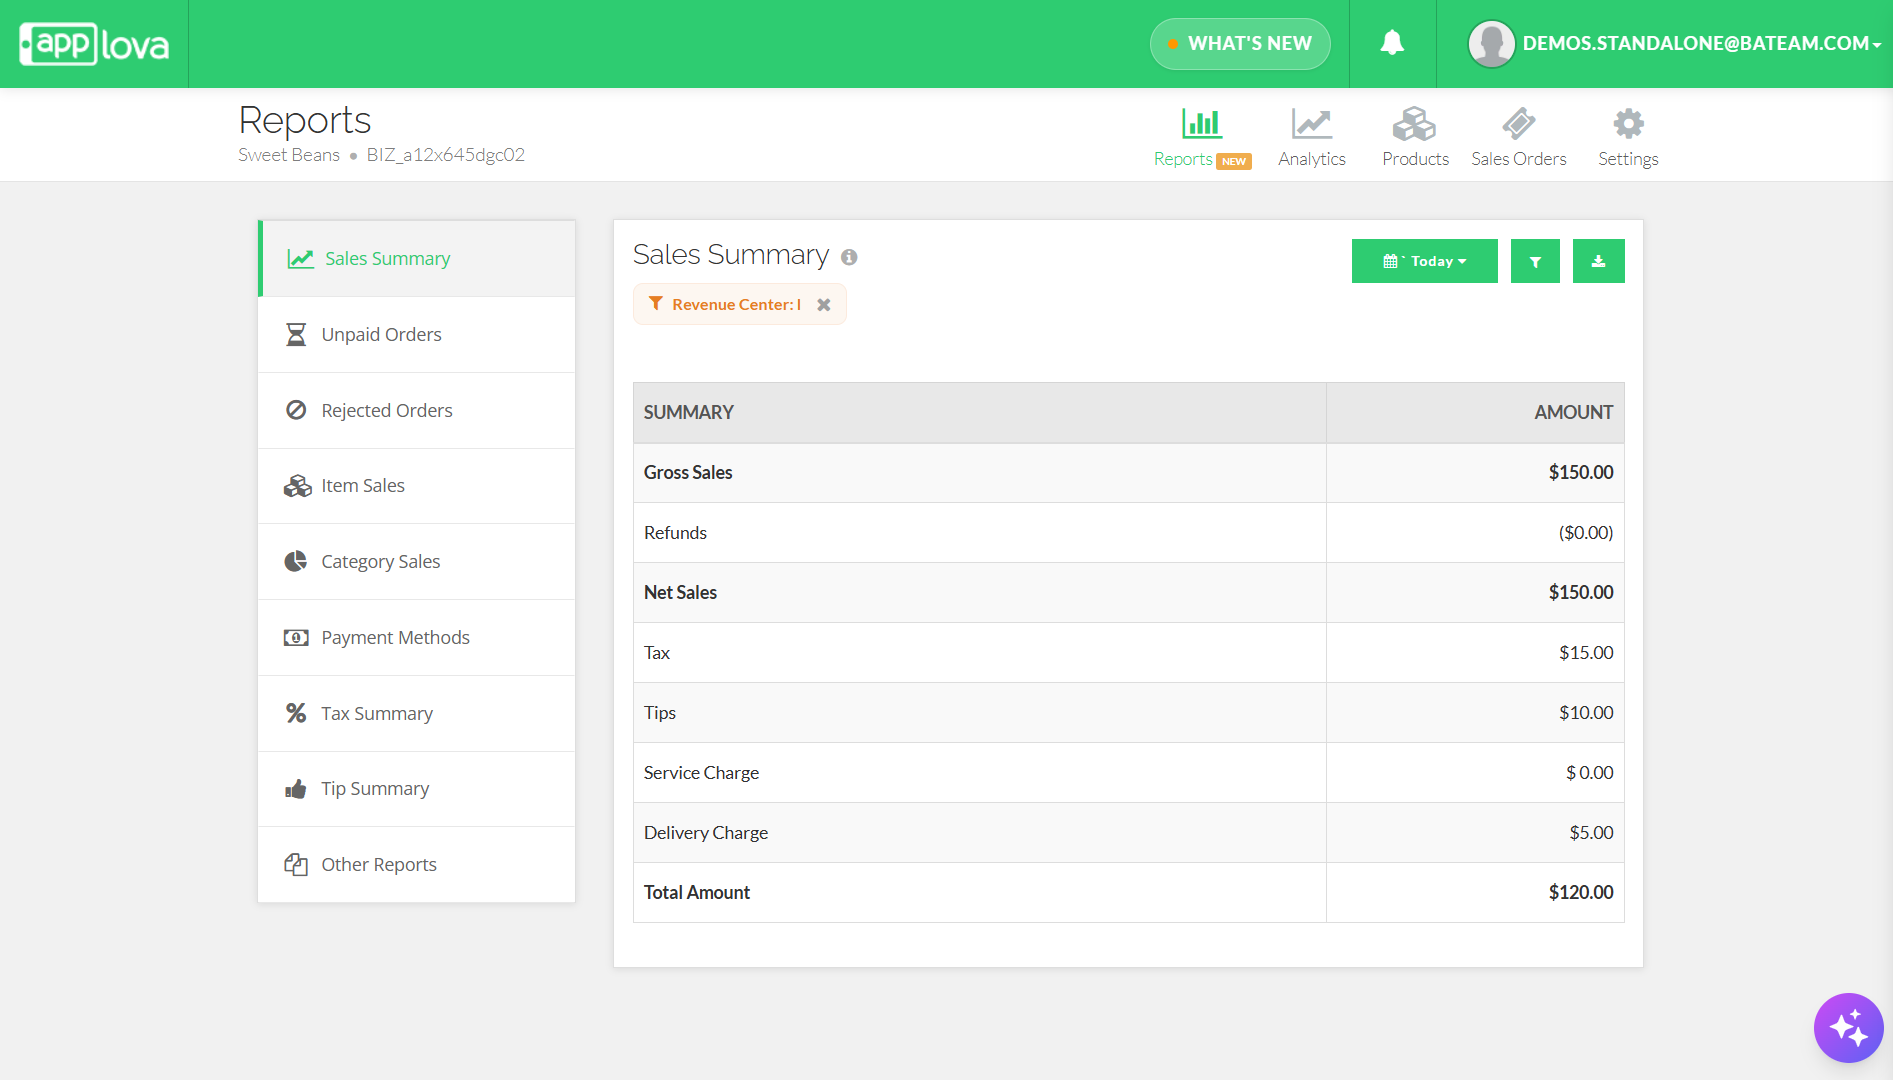
Image Link
Related Articles
How to View Summary Reports via Merchant Web Portal?
This feature is currently available only for Round1 merchants. This feature allows merchants to view summary reports. There are two categories of summary reports that can be viewed via the Merchant Web Portal. Real-Time Reports Daily Payment Method ...Download an Enhanced Sales Order CSV with Gross and Net Sales Columns
Supported Domains: Standalone This feature enhances the Sales Order CSV Export by introducing an additional checkbox that allows merchants to include detailed financial insights such as Gross Sales, Net Sales, and Refunds breakdown. With this update, ...How to Disable Pay on Collect Method on Merchant Web Portal?
Supported Domains: Standalone With this feature, merchants can disable the option given to customers to pay for the order at order collection. Step 1 Login to the "Merchant Web Portal" and click on "Settings". Step 2 From the "General" settings, ...How to Change Order Statuses via Merchant Portal?
This feature allows merchants to update an order’s status throughout the order lifecycle, such as New, Accepted, Ready, Completed, Void, or Rejected. This helps merchants clearly track order progress and manage each order based on its current stage. ...How to Manage Taxes via Merchant Portal?
This feature allows merchants to create and manage tax rates based on their business requirements. Once created, the applicable tax rates can be assigned to specific products to ensure the correct tax is applied during checkout. How to Add a Tax ...