How to Integrate Mailchimp for Marketing Automation?
What is Mailchimp?
Mailchimp is a marketing platform that helps businesses send emails, run campaigns, and connect with customers. With the Mailchimp Integration, Applova merchants can link their business to their Mailchimp account. Once connected, Applova automatically syncs the products, customers, and orders to Mailchimp. This enables to;
Quickly create targeted email campaigns based on what customers buy.
Save time while improving customer engagement and repeat sales.

Brew & Bite Café uses Applova for in-store and online ordering. They want to launch a seasonal email campaign targeting only customers who have purchased drinks.
By integrating with Mailchimp through the Merchant Portal:
All new and existing customers are synced to their Mailchimp audience.
Order history allows them to filter customers based on drink purchases.
The merchant can create and send a custom email campaign—such as promoting new drink offerings or offering discounts on existing favorites—only to those customers.
This targeted approach makes the campaign more relevant, efficient, and likely to generate repeat sales.
How to Integrate with Mailchimp Via the Merchant Portal?
Step 1
Log in to the Applova Merchant Portal using your business credentials.
Step 2
Navigate to "Settings", then select the Integrations tab.
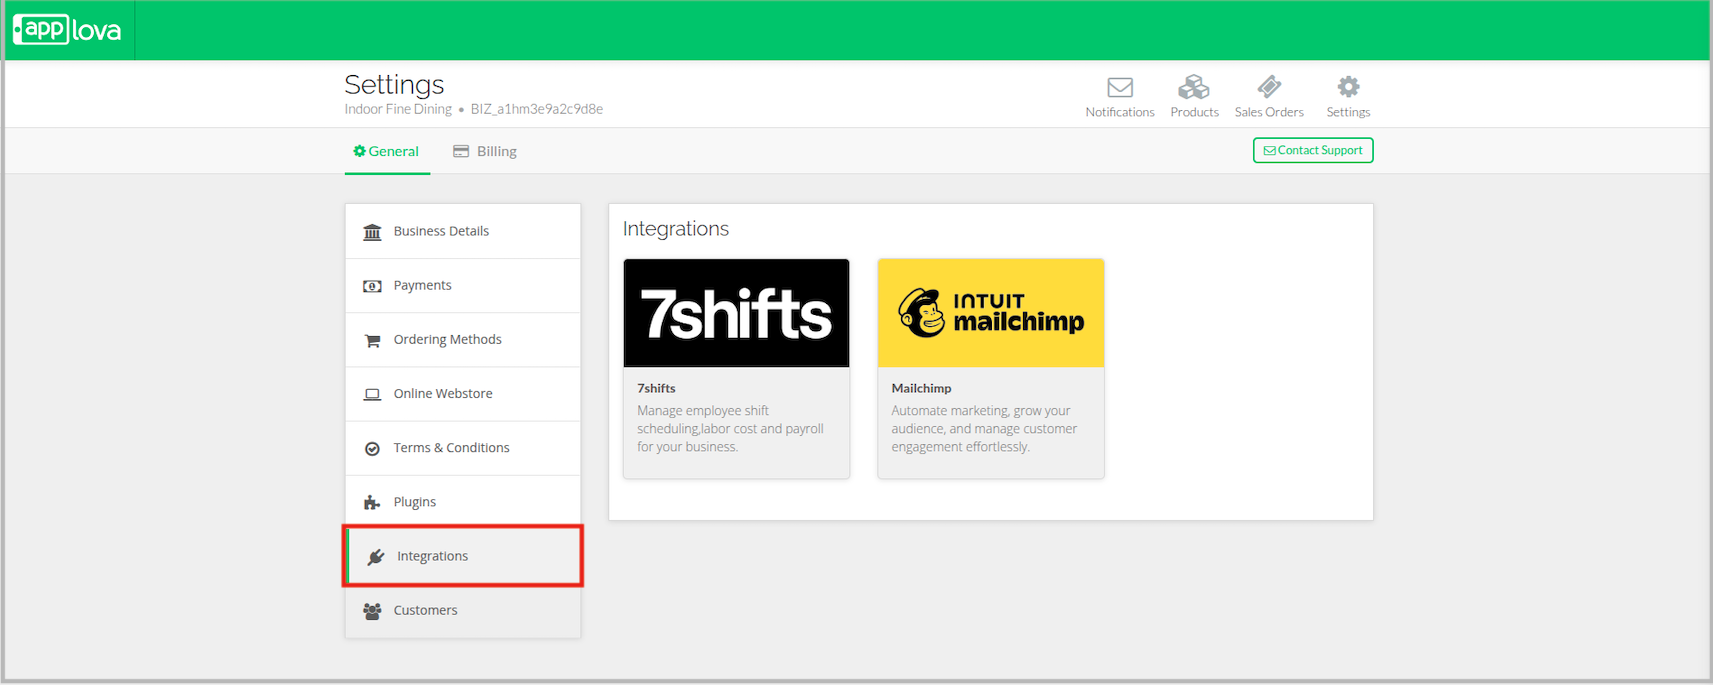
Step 3
Click on "Mailchimp".
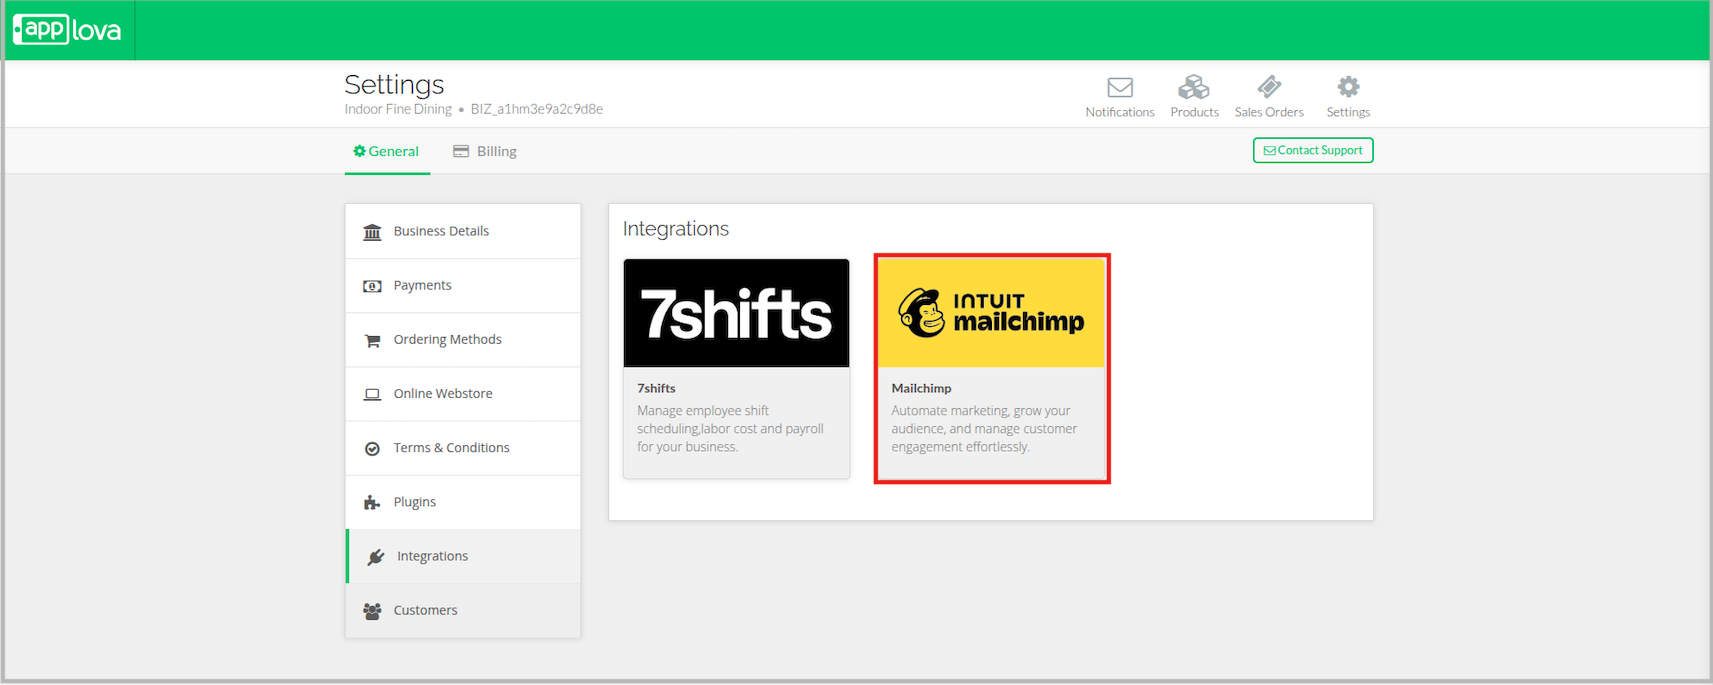
Step 4
Then click on "Connect with Mailchimp".
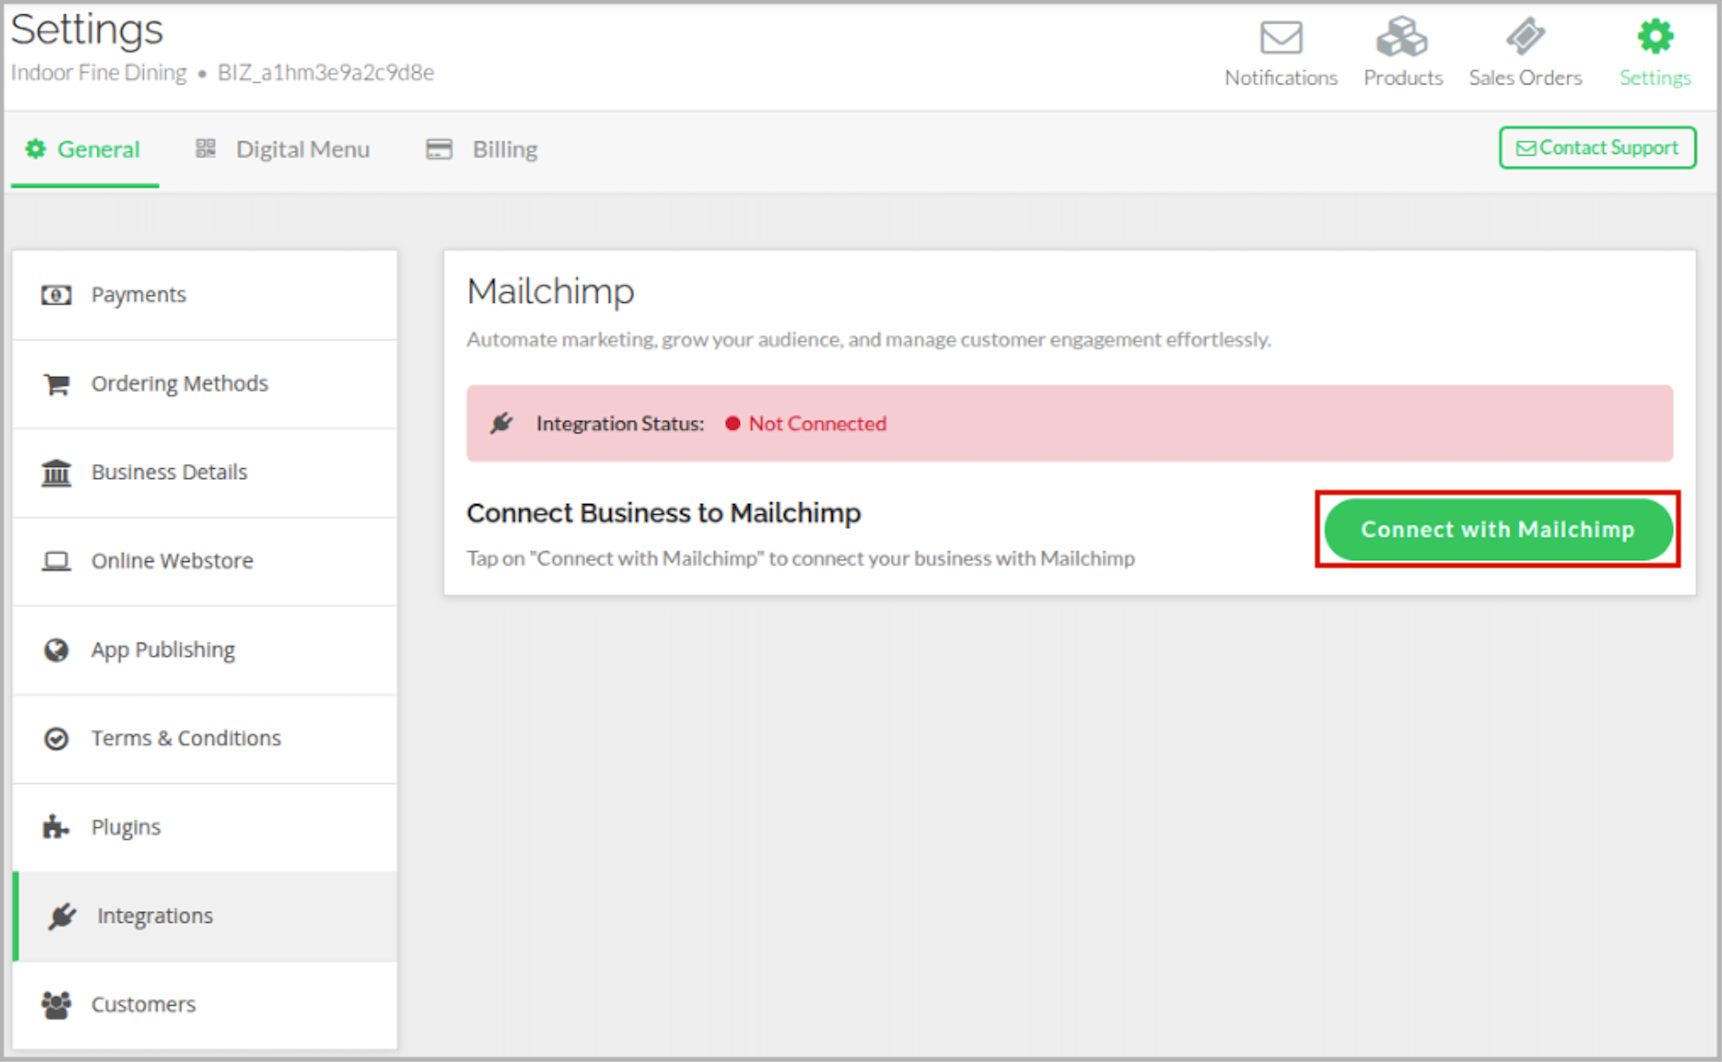
Step 5
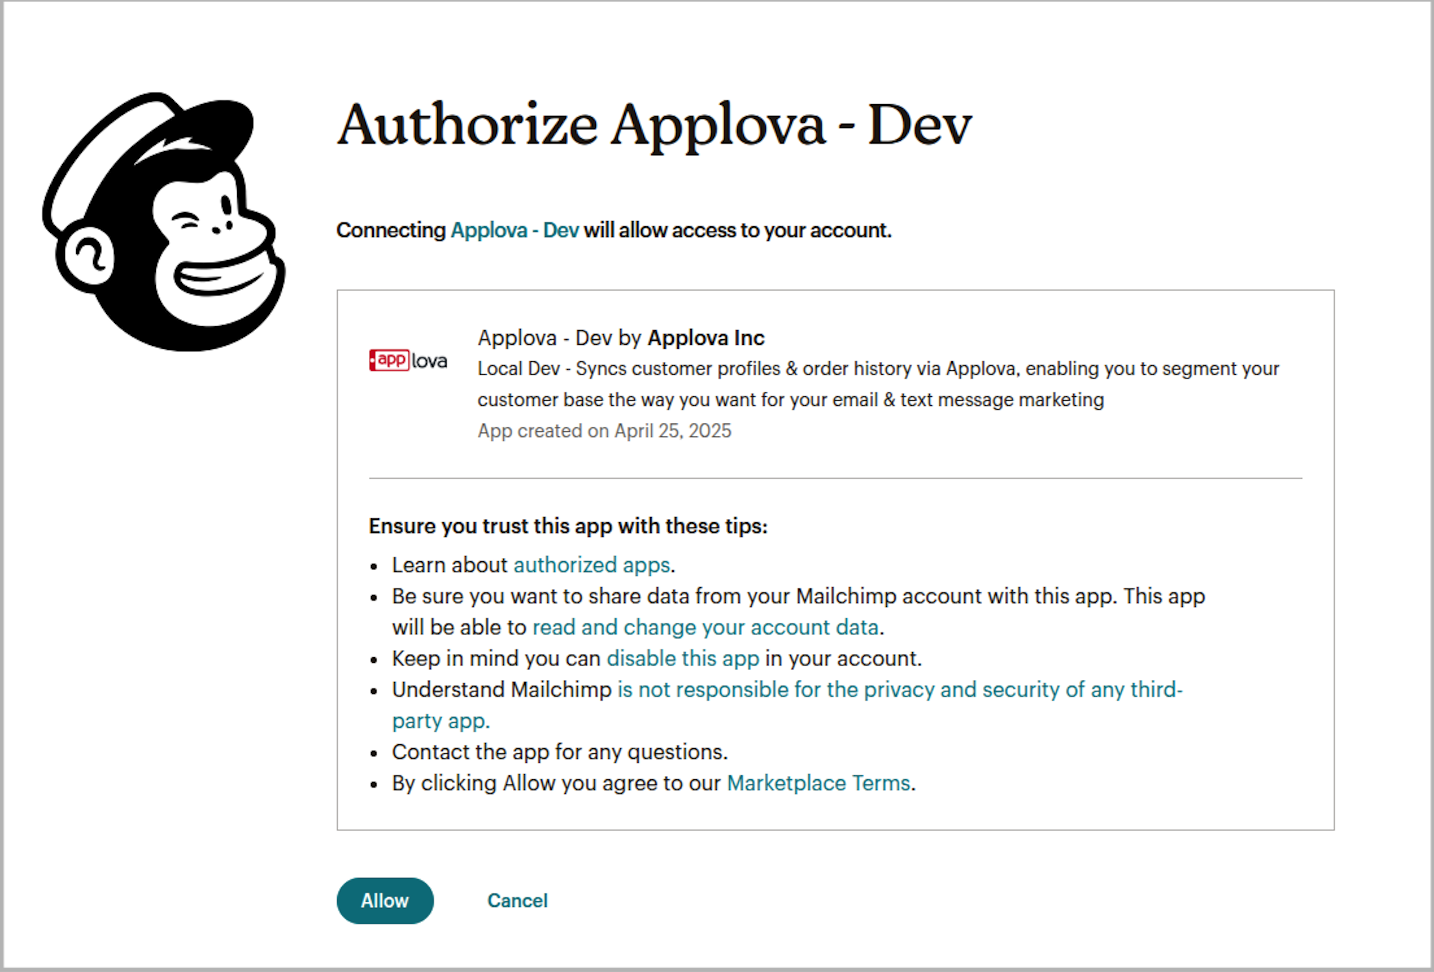
You will be redirected to Mailchimp’s Login page. Then enter your Mailchimp login details and click "Login".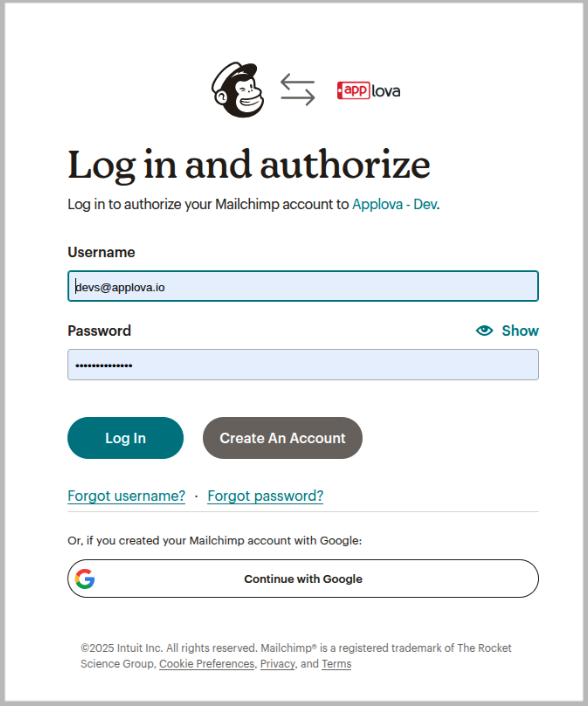
Image Link

Click on "Allow" to authorize Applova to share data with Mailchimp.
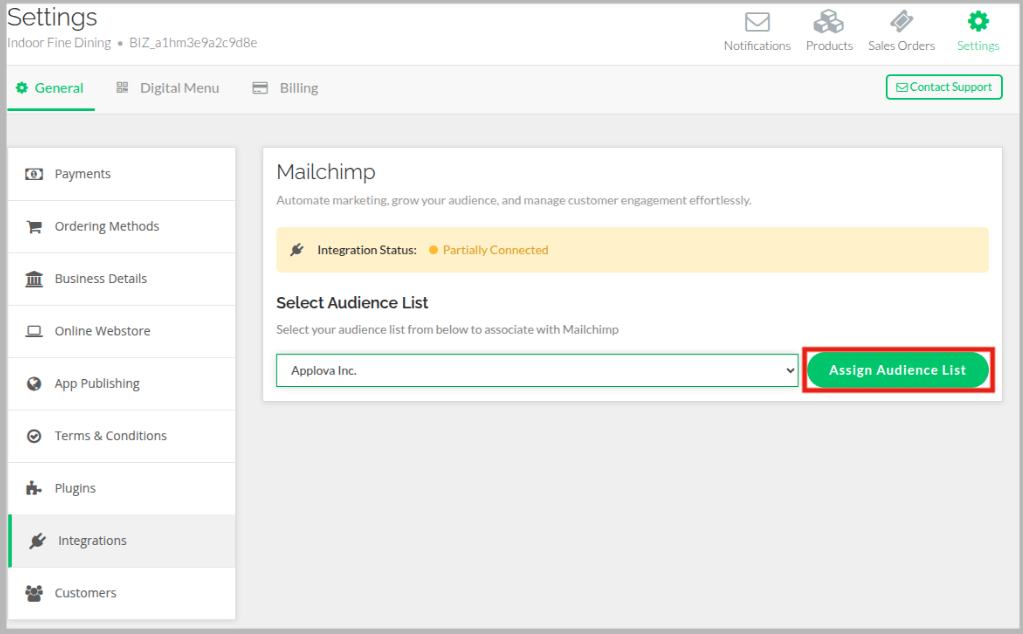
After successful authorization, select the required audience and click on "Assign Audience List".
Step 8
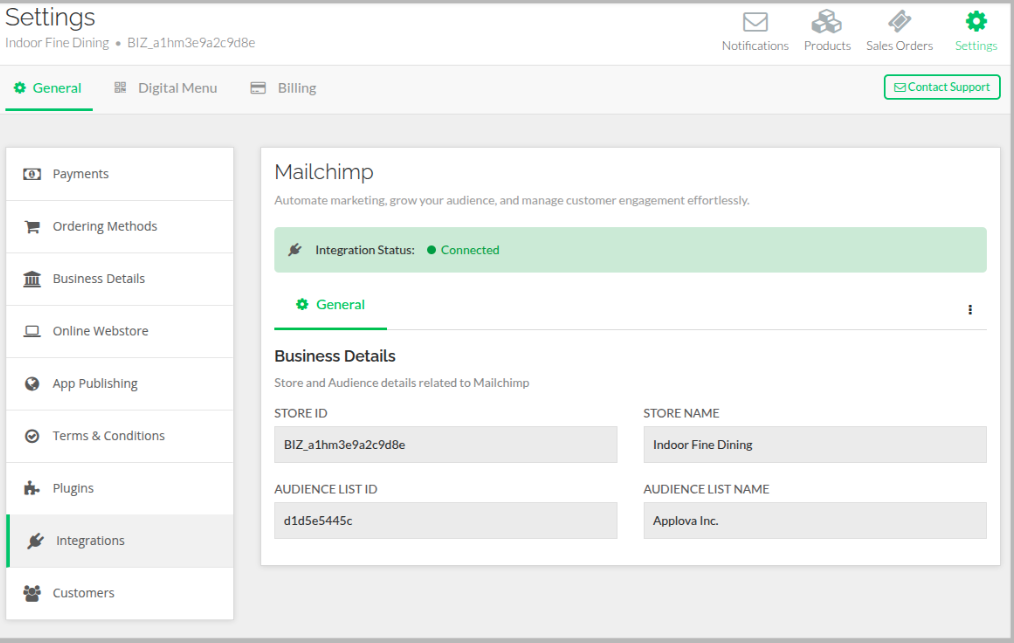
Once the Audience is assigned, the integration status will switch to "Connected".
Step 9
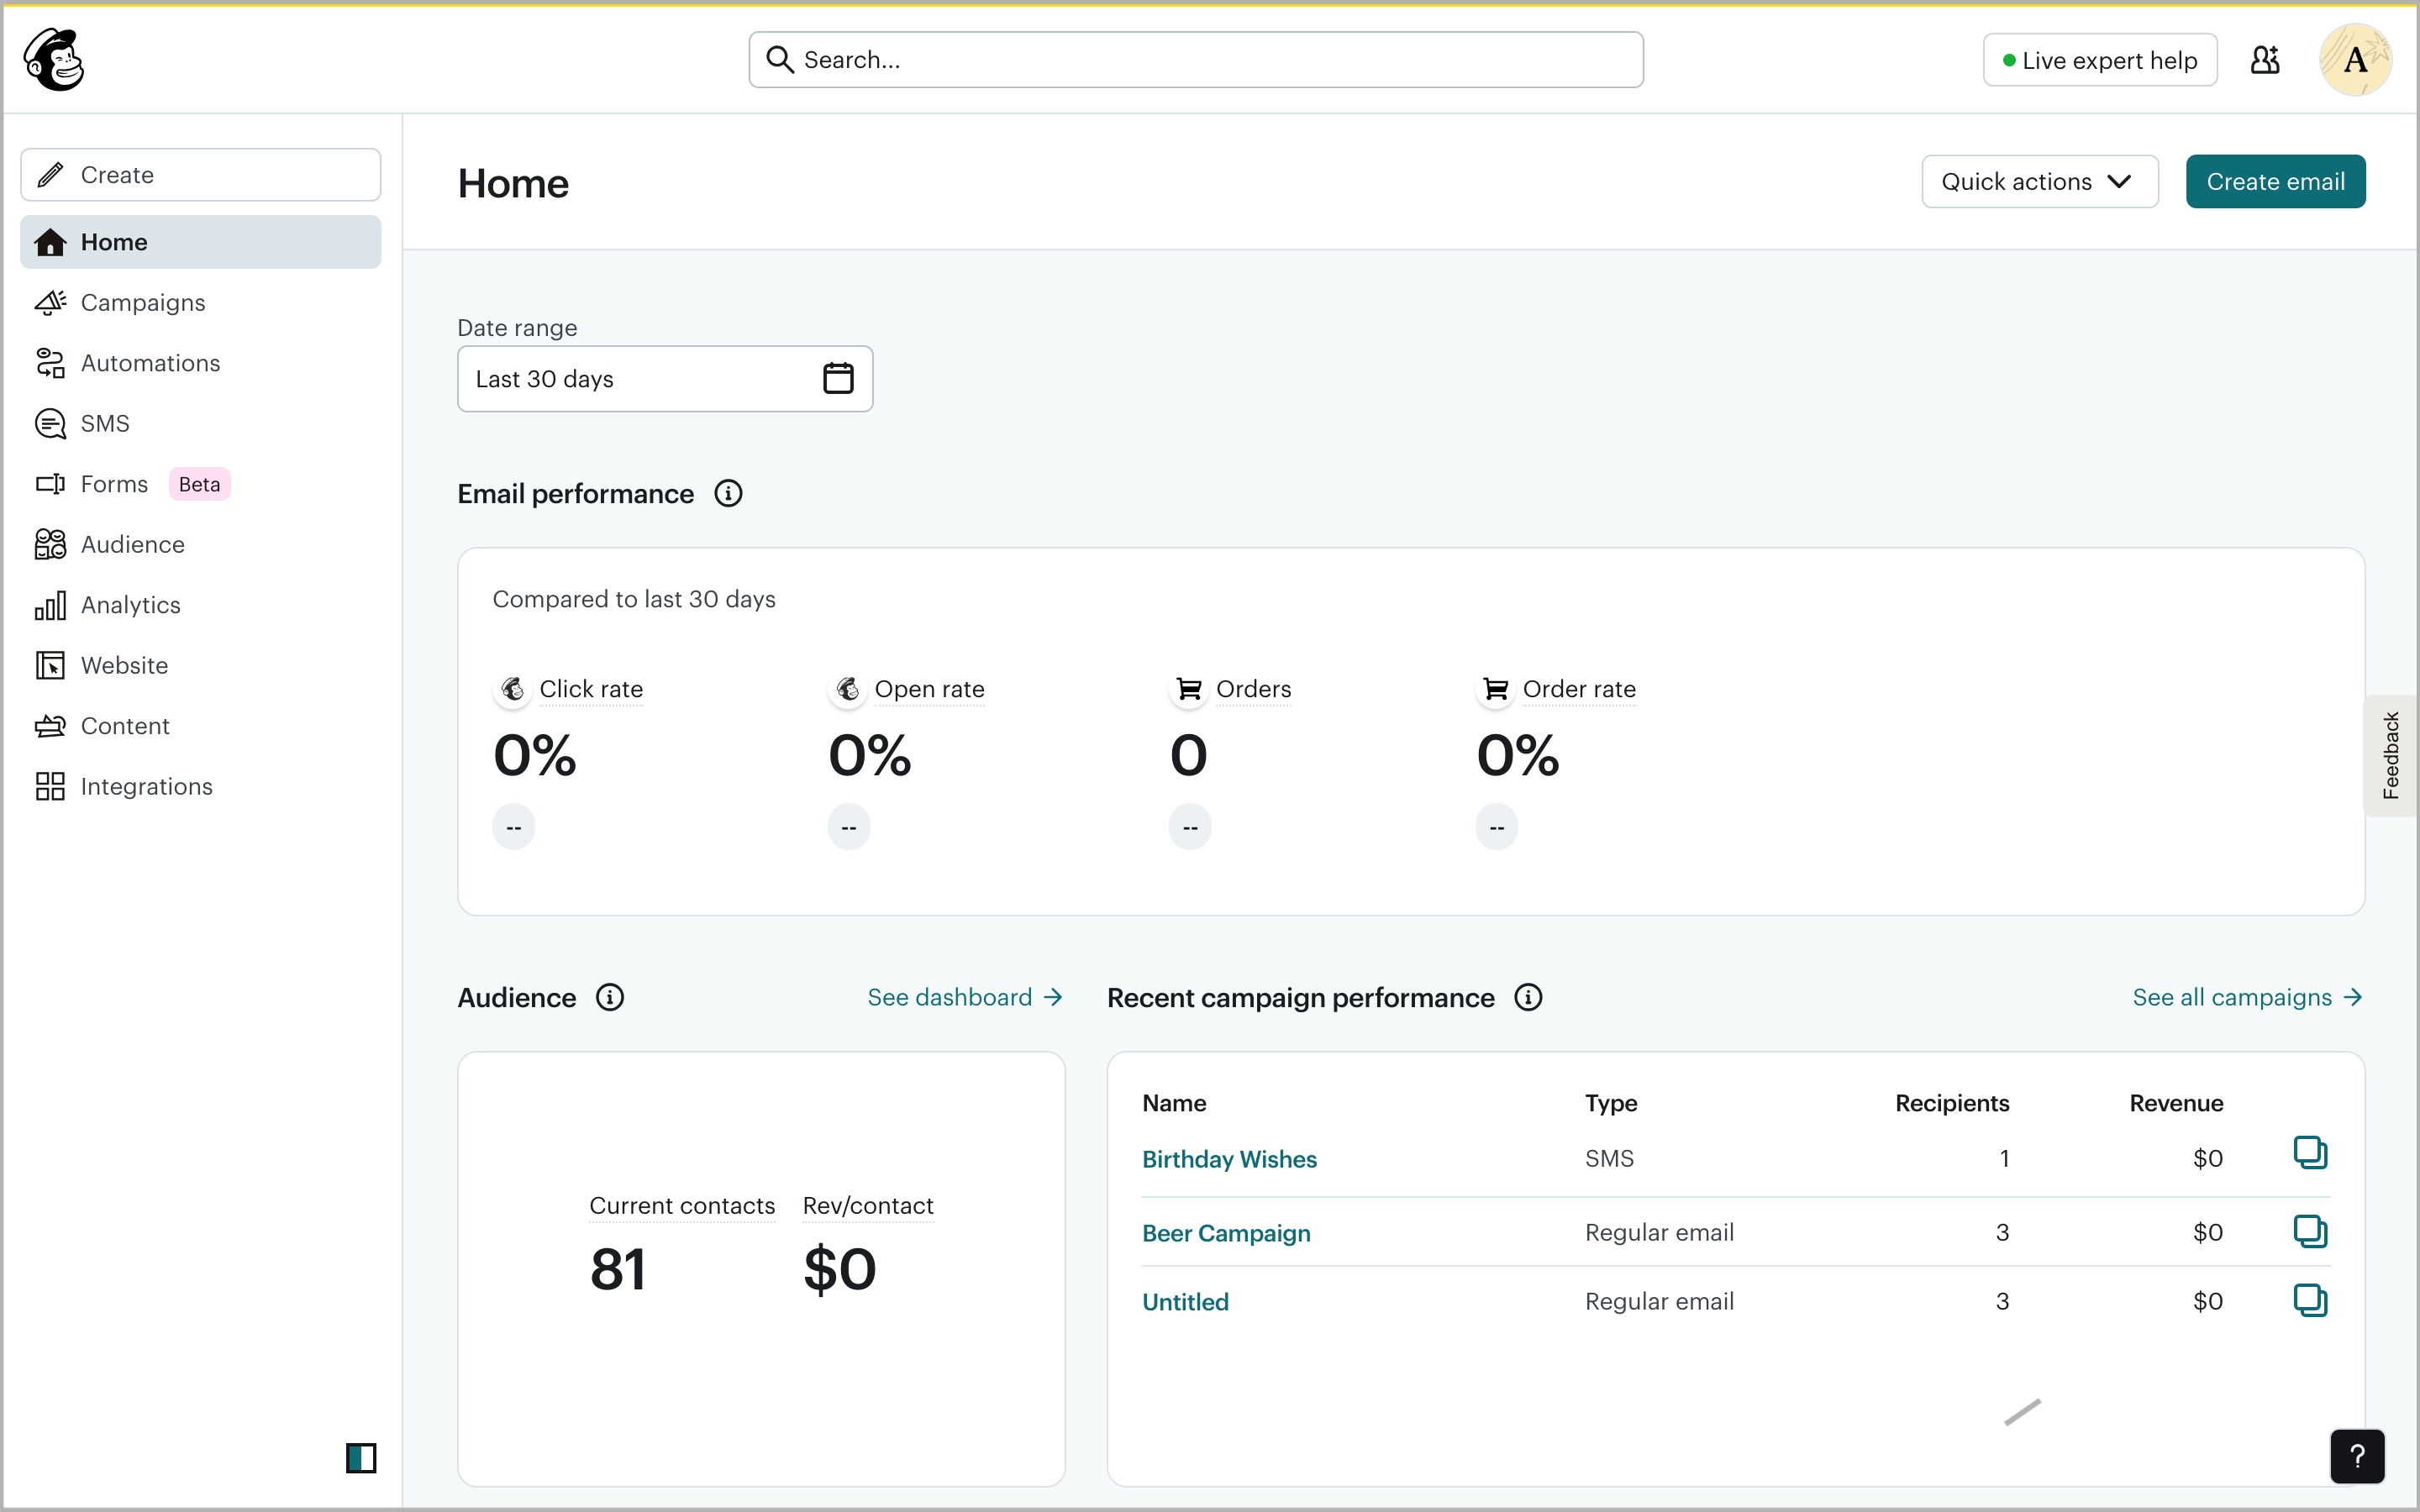
Once Integrated, Email campaigns and customer segments can be handled in Mailchimp.
How to perform a Targeted Email Campaign in Mailchimp?
Step 1
Log in to your Mailchimp account.
Step 2
Select "Audience", then "Segments".
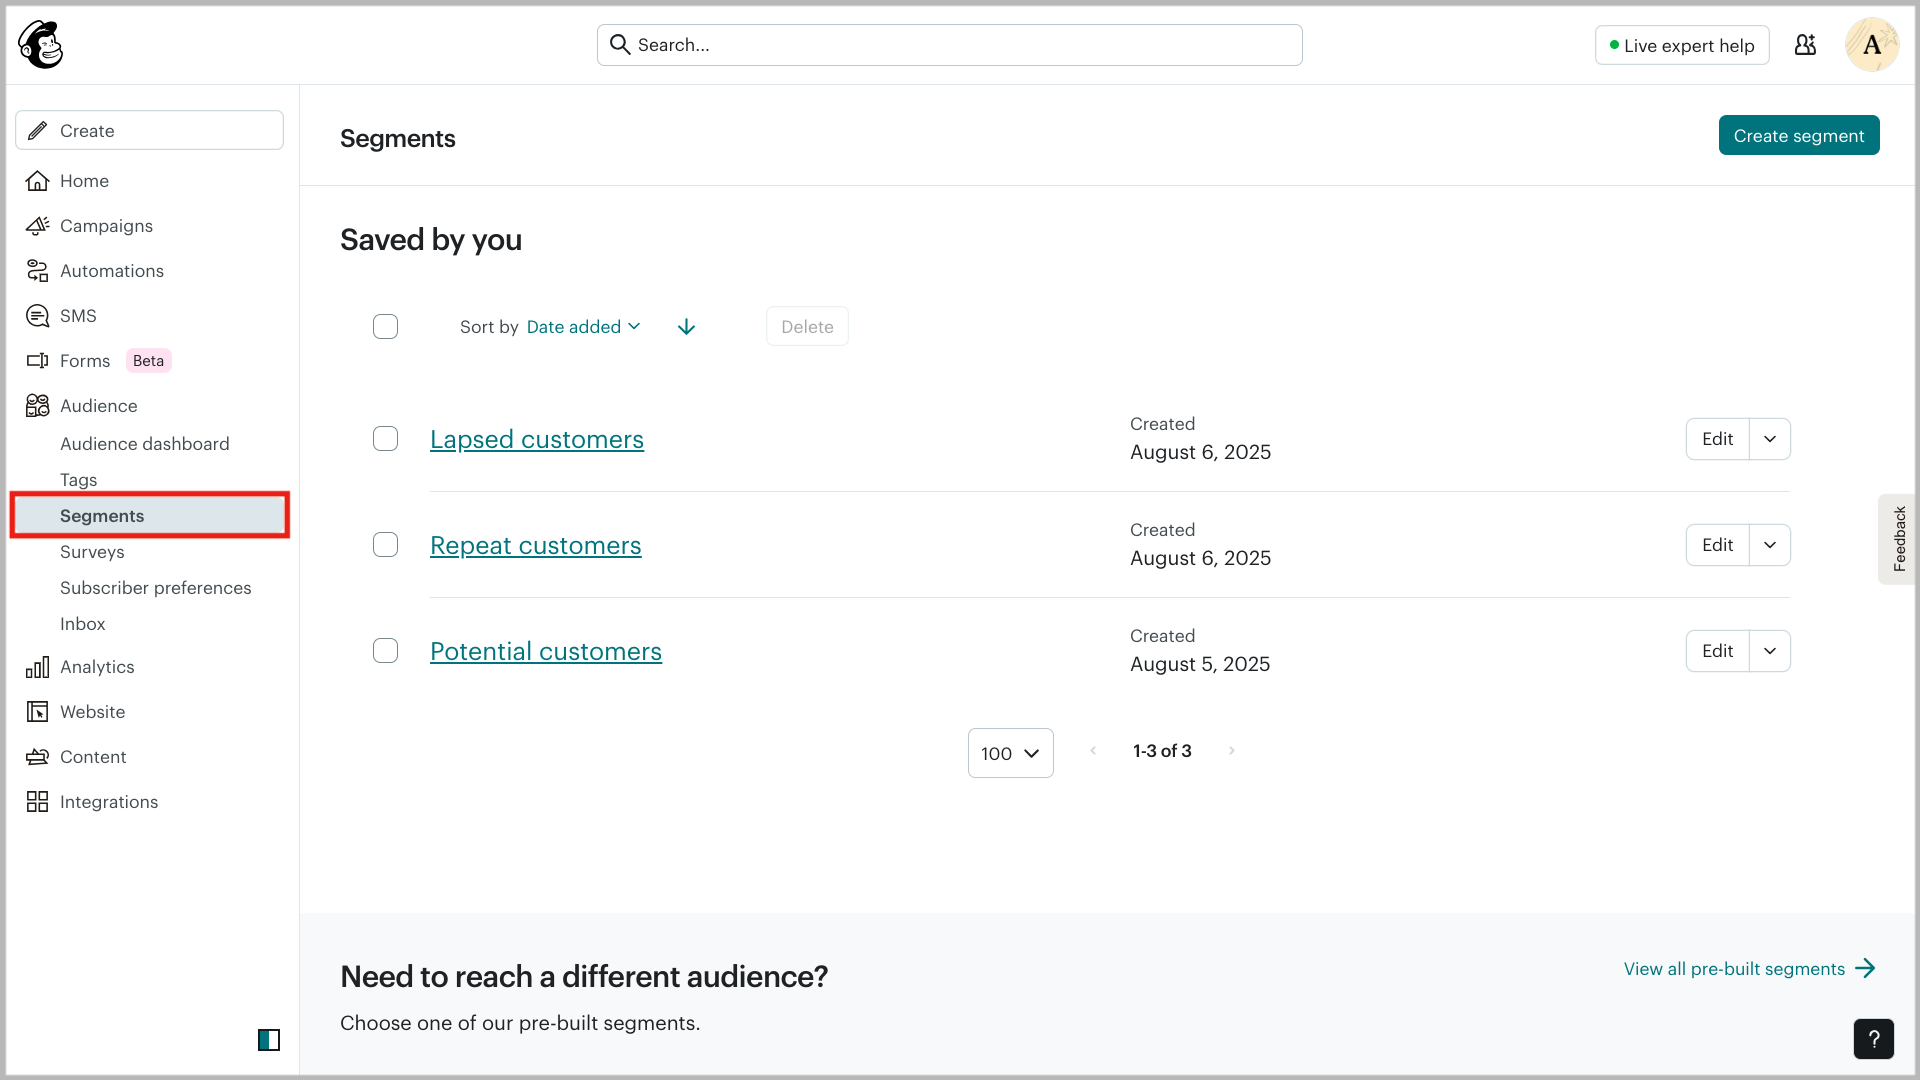
Step 3
Click on "View all pre-built segments".
Step 4
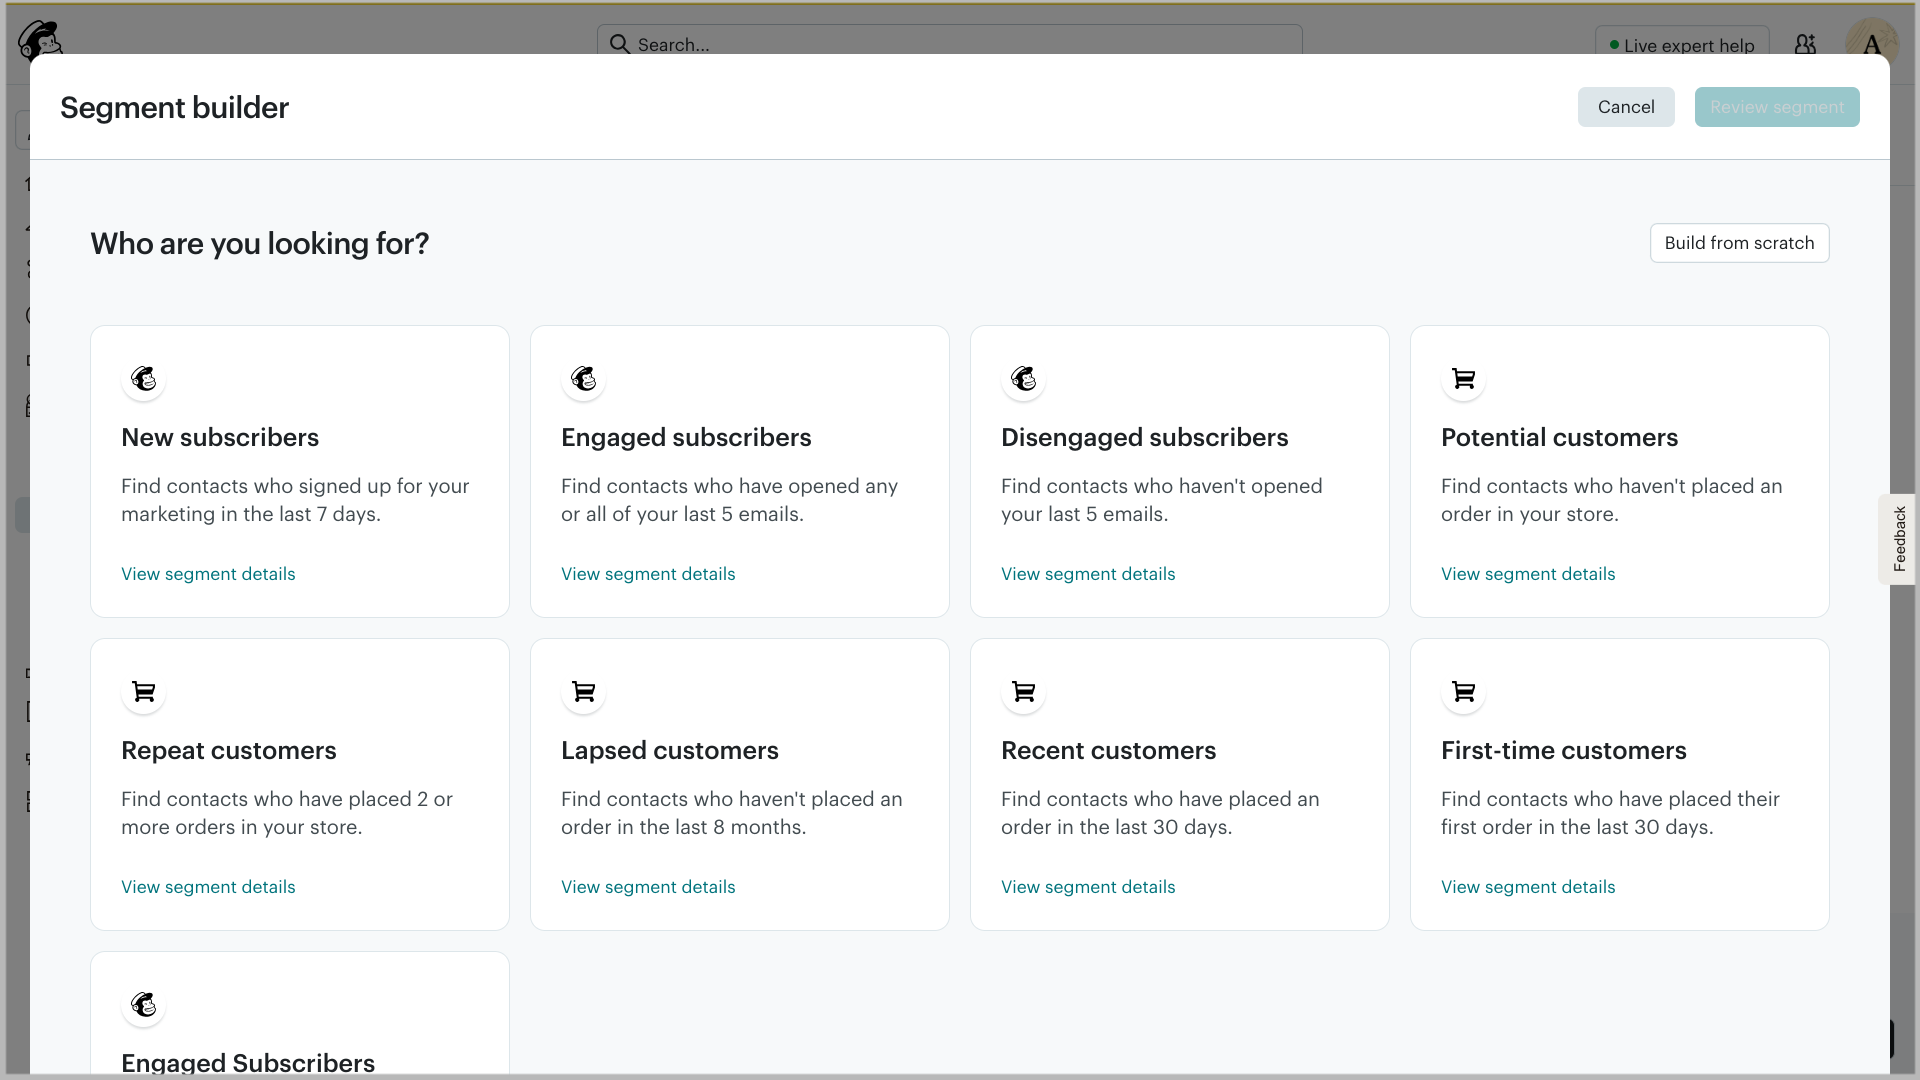
Select the required segment.
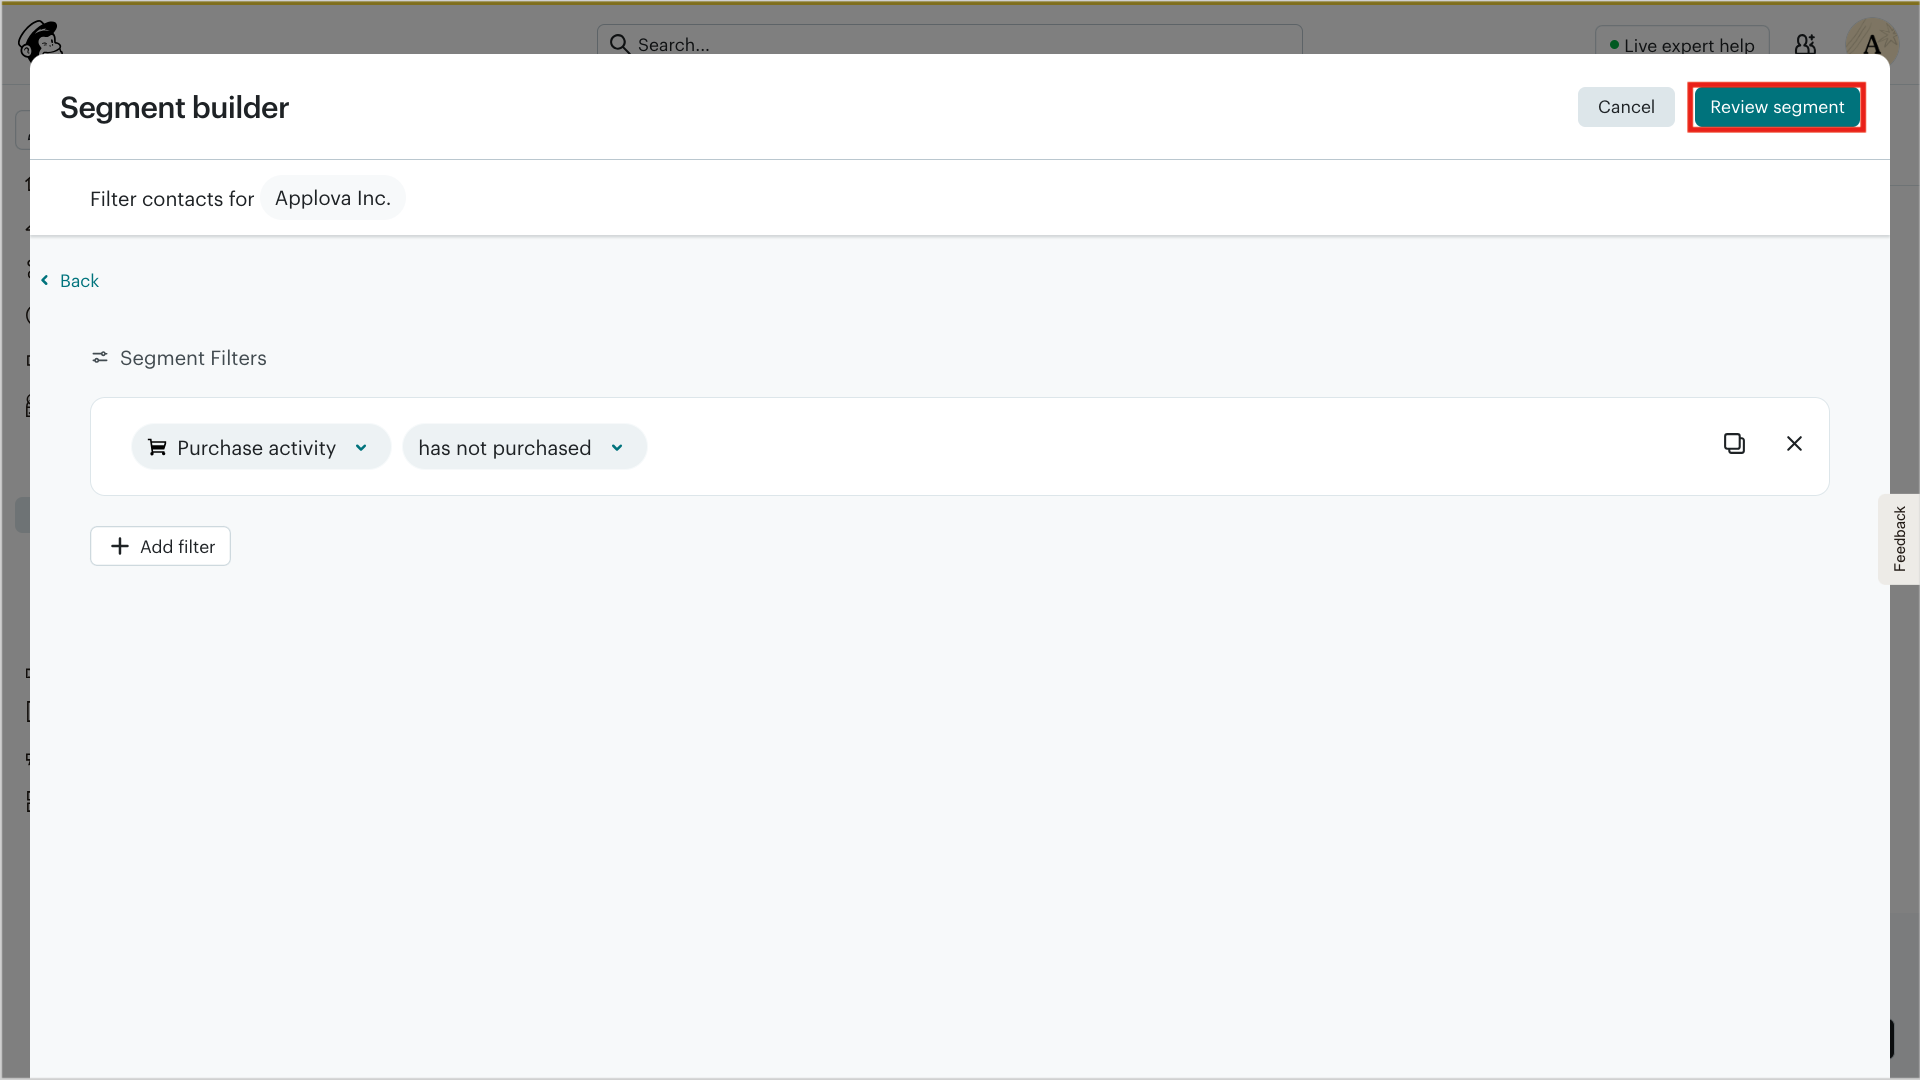
Step 5
Click "Review segment" to proceed.
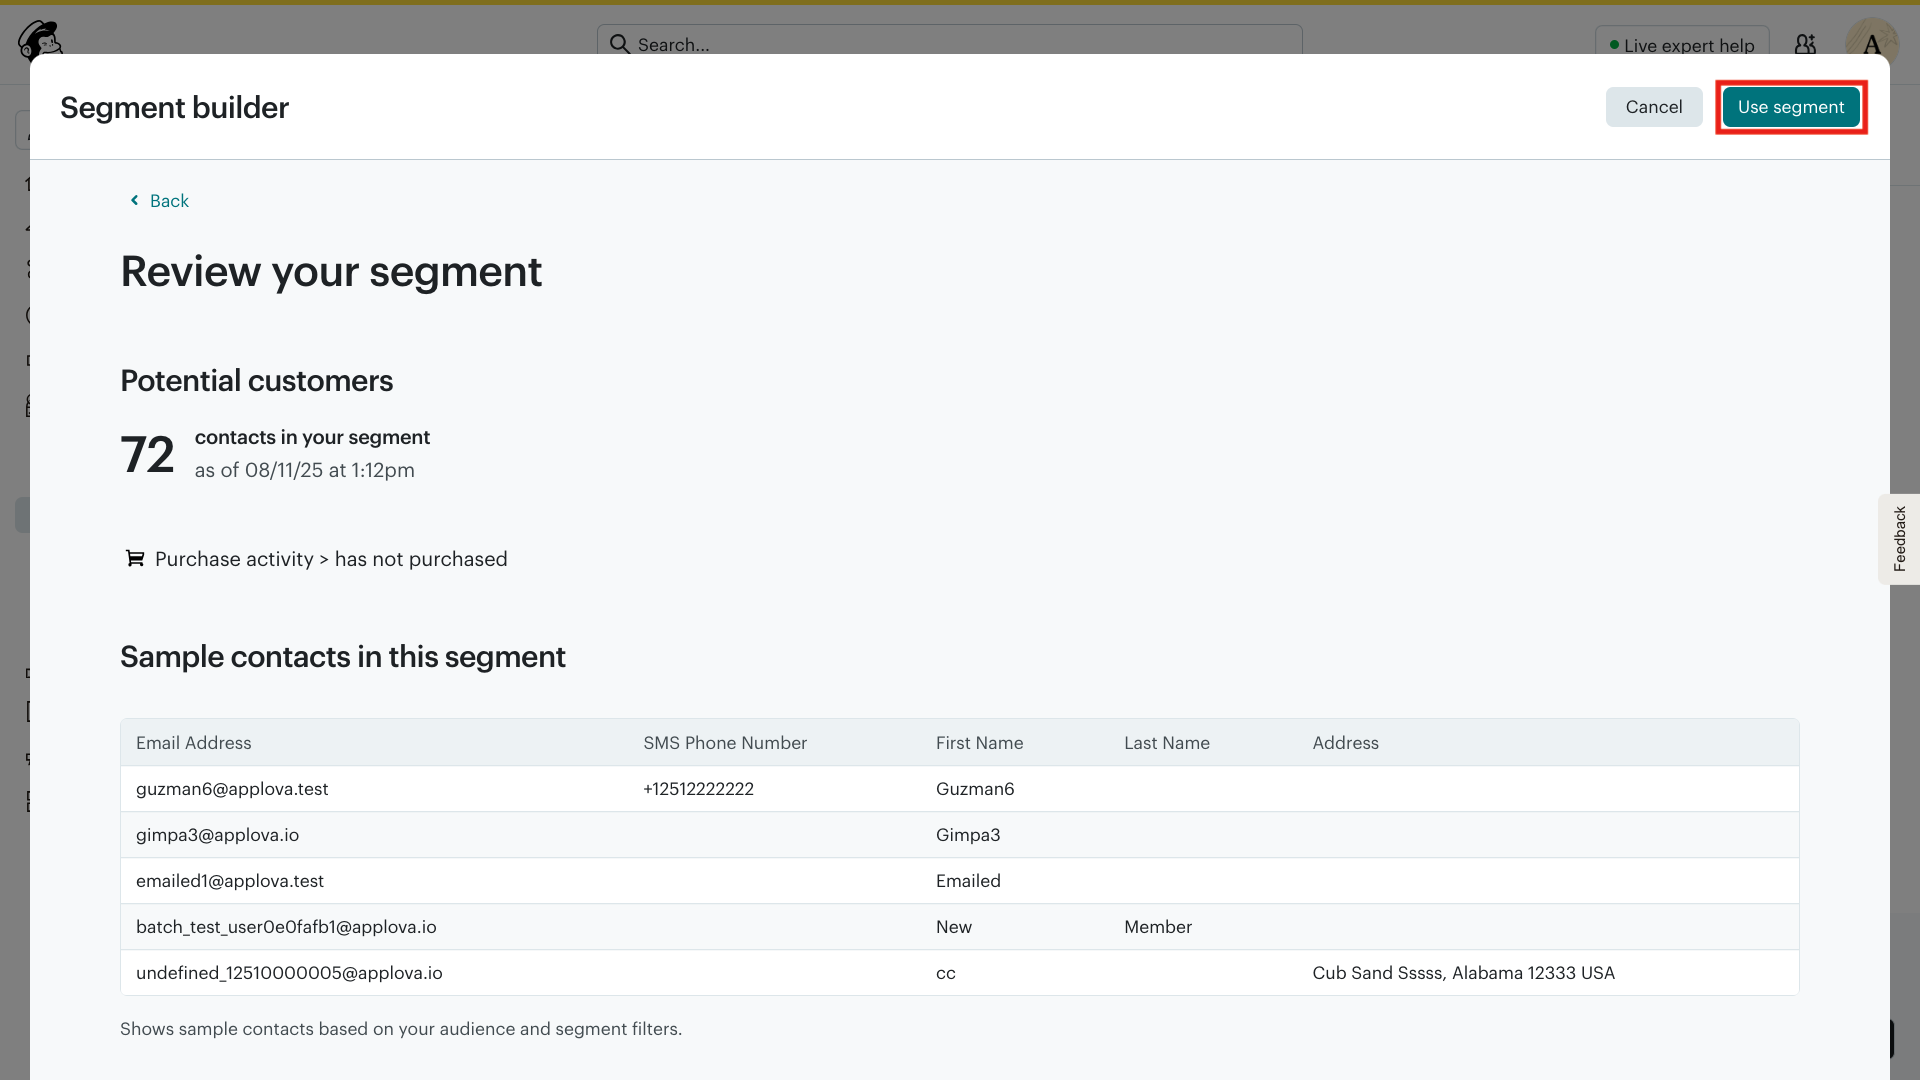
Step 6
After review, click on "Use Segment".
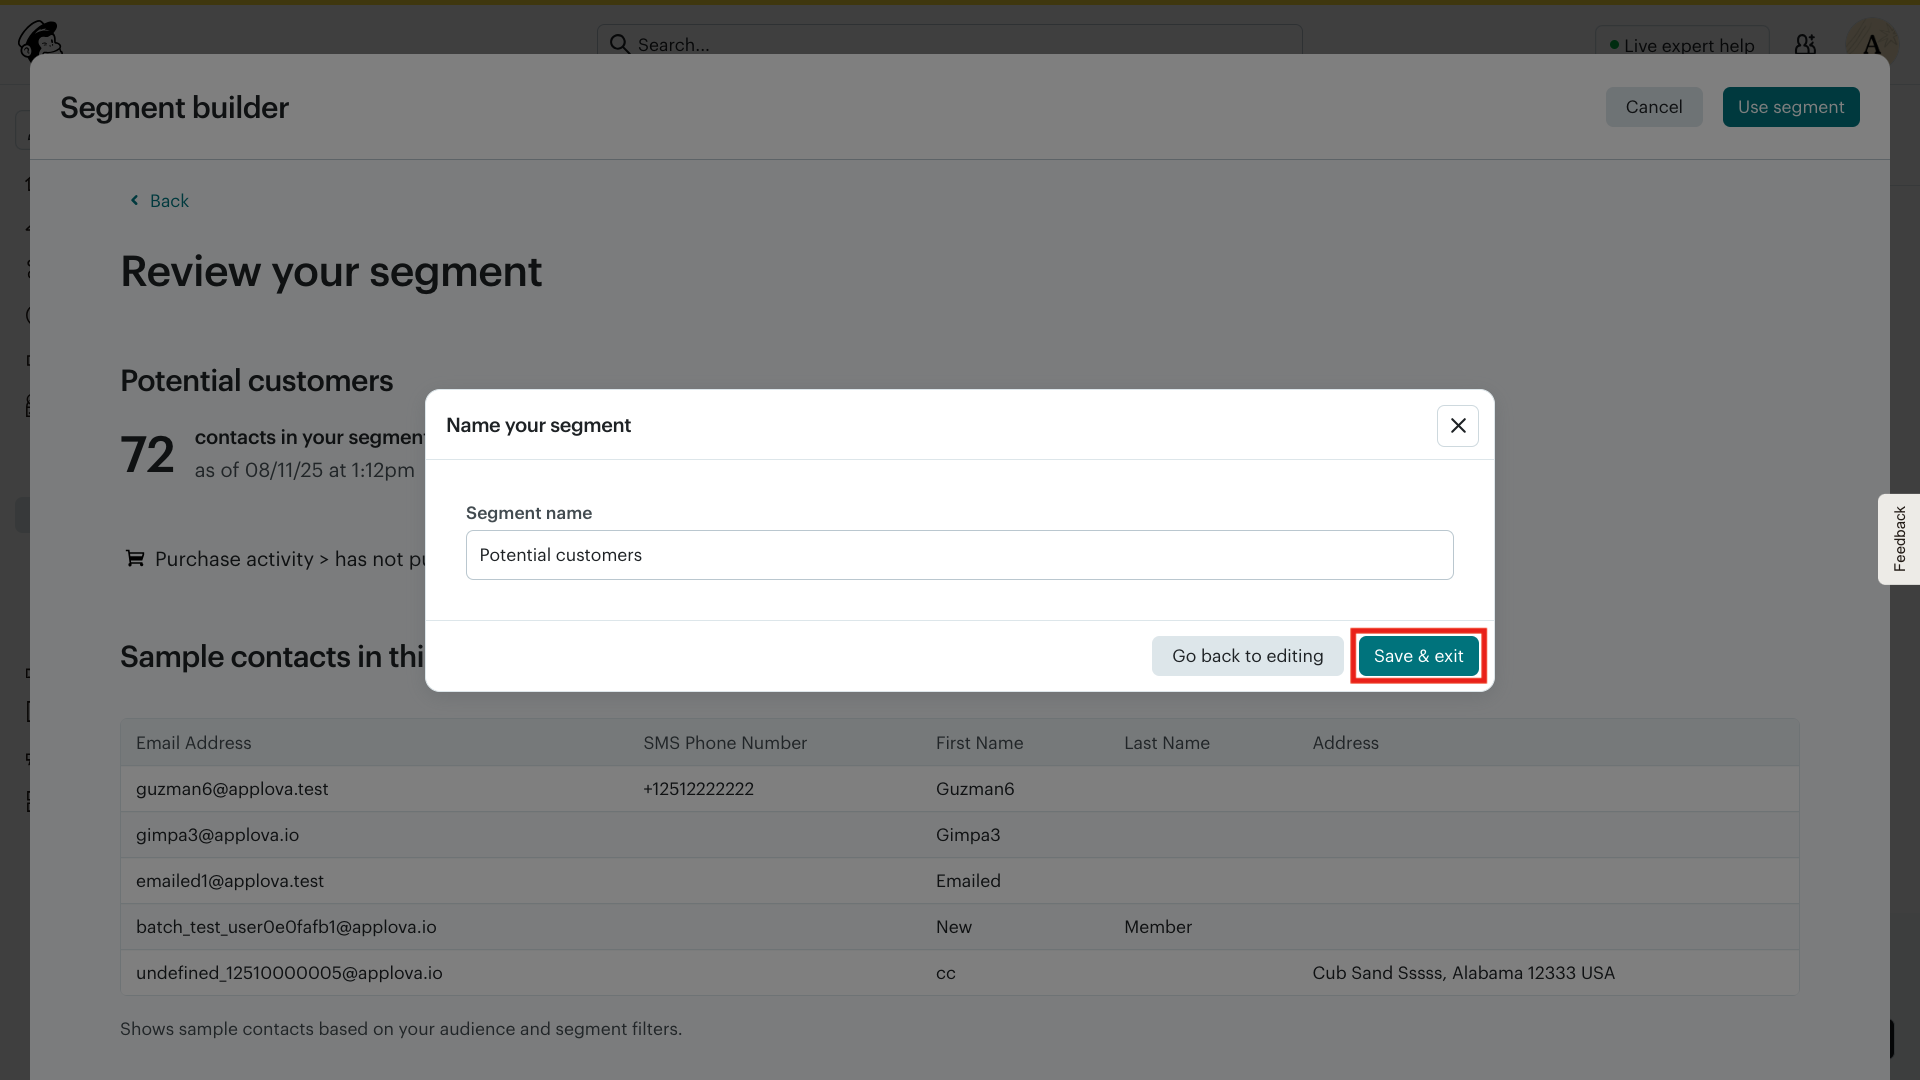
Step 7
Enter a name for your segment in the Segment name field and click on "Save & exit".
Step 8
It will get directed to the contacts view, from here click on "Send Campaign".

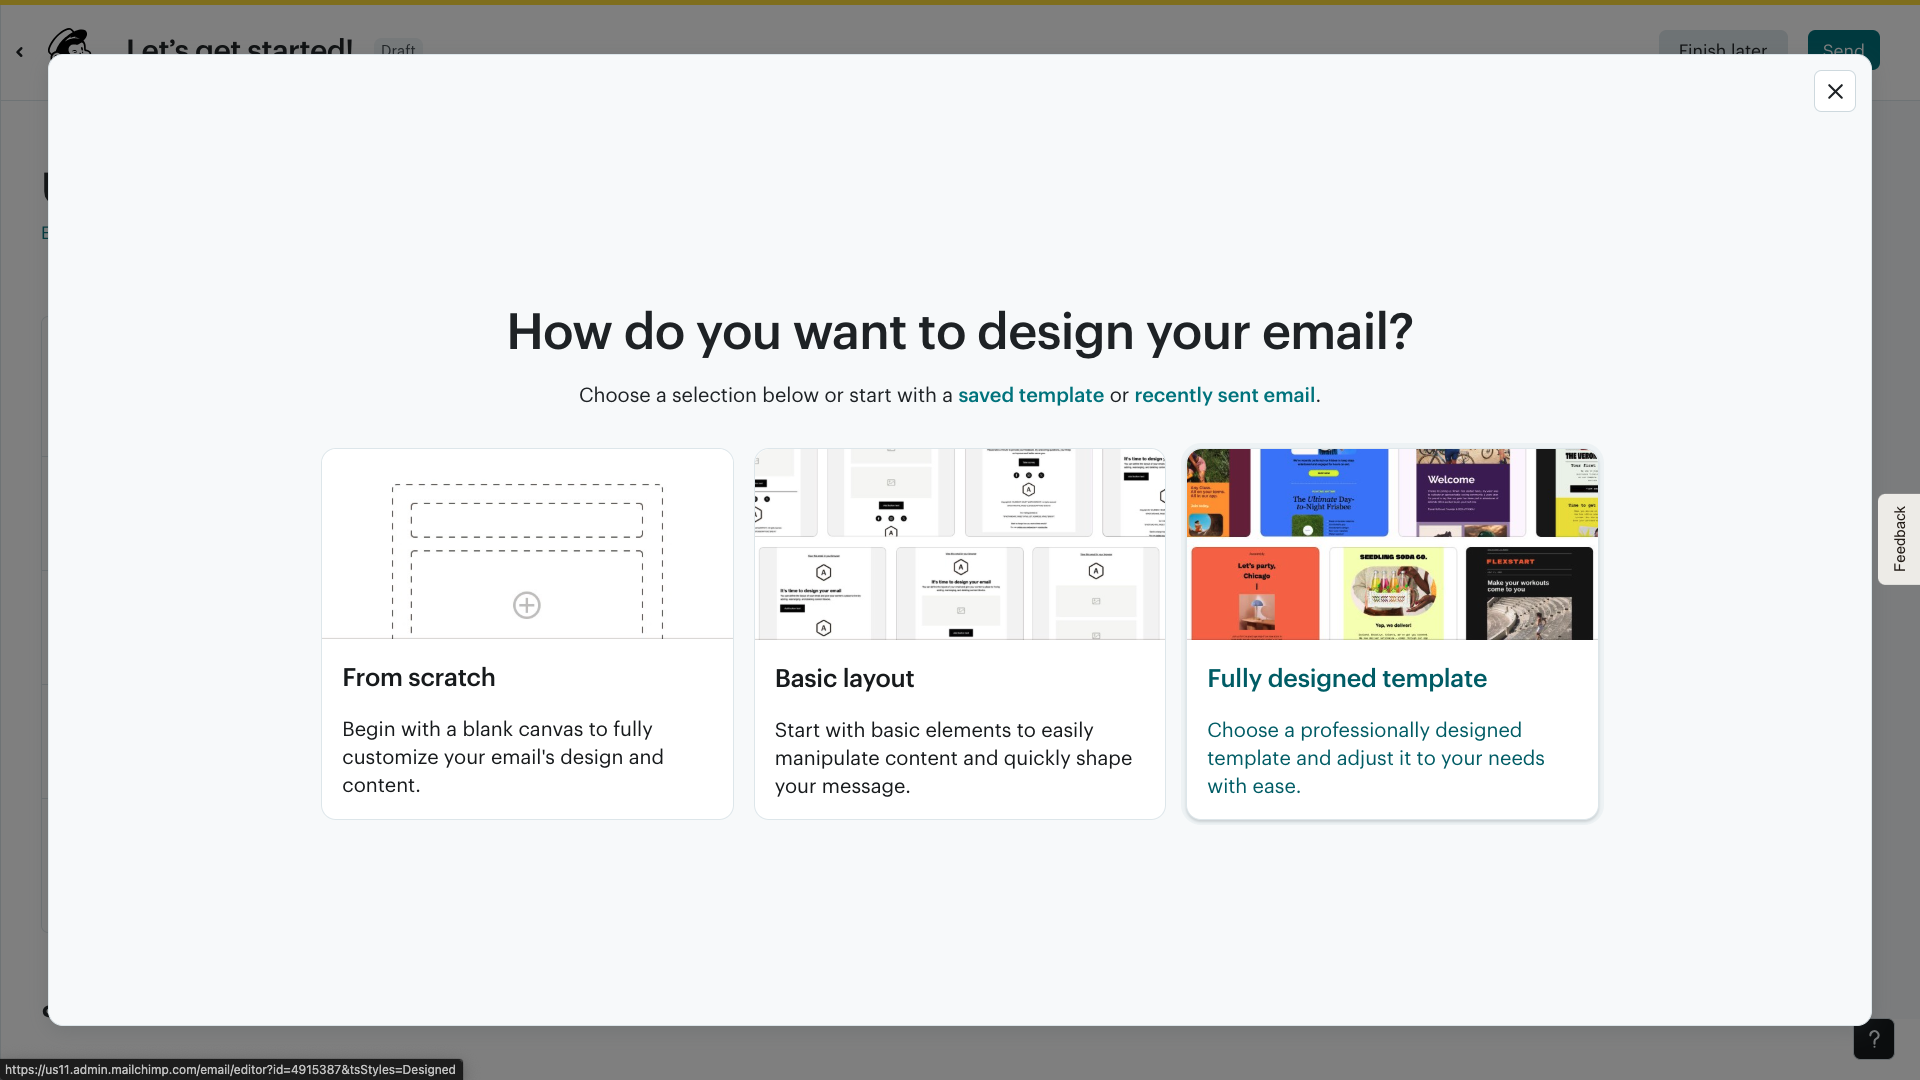
Step 9
In the campaign setup, choose an email design option.
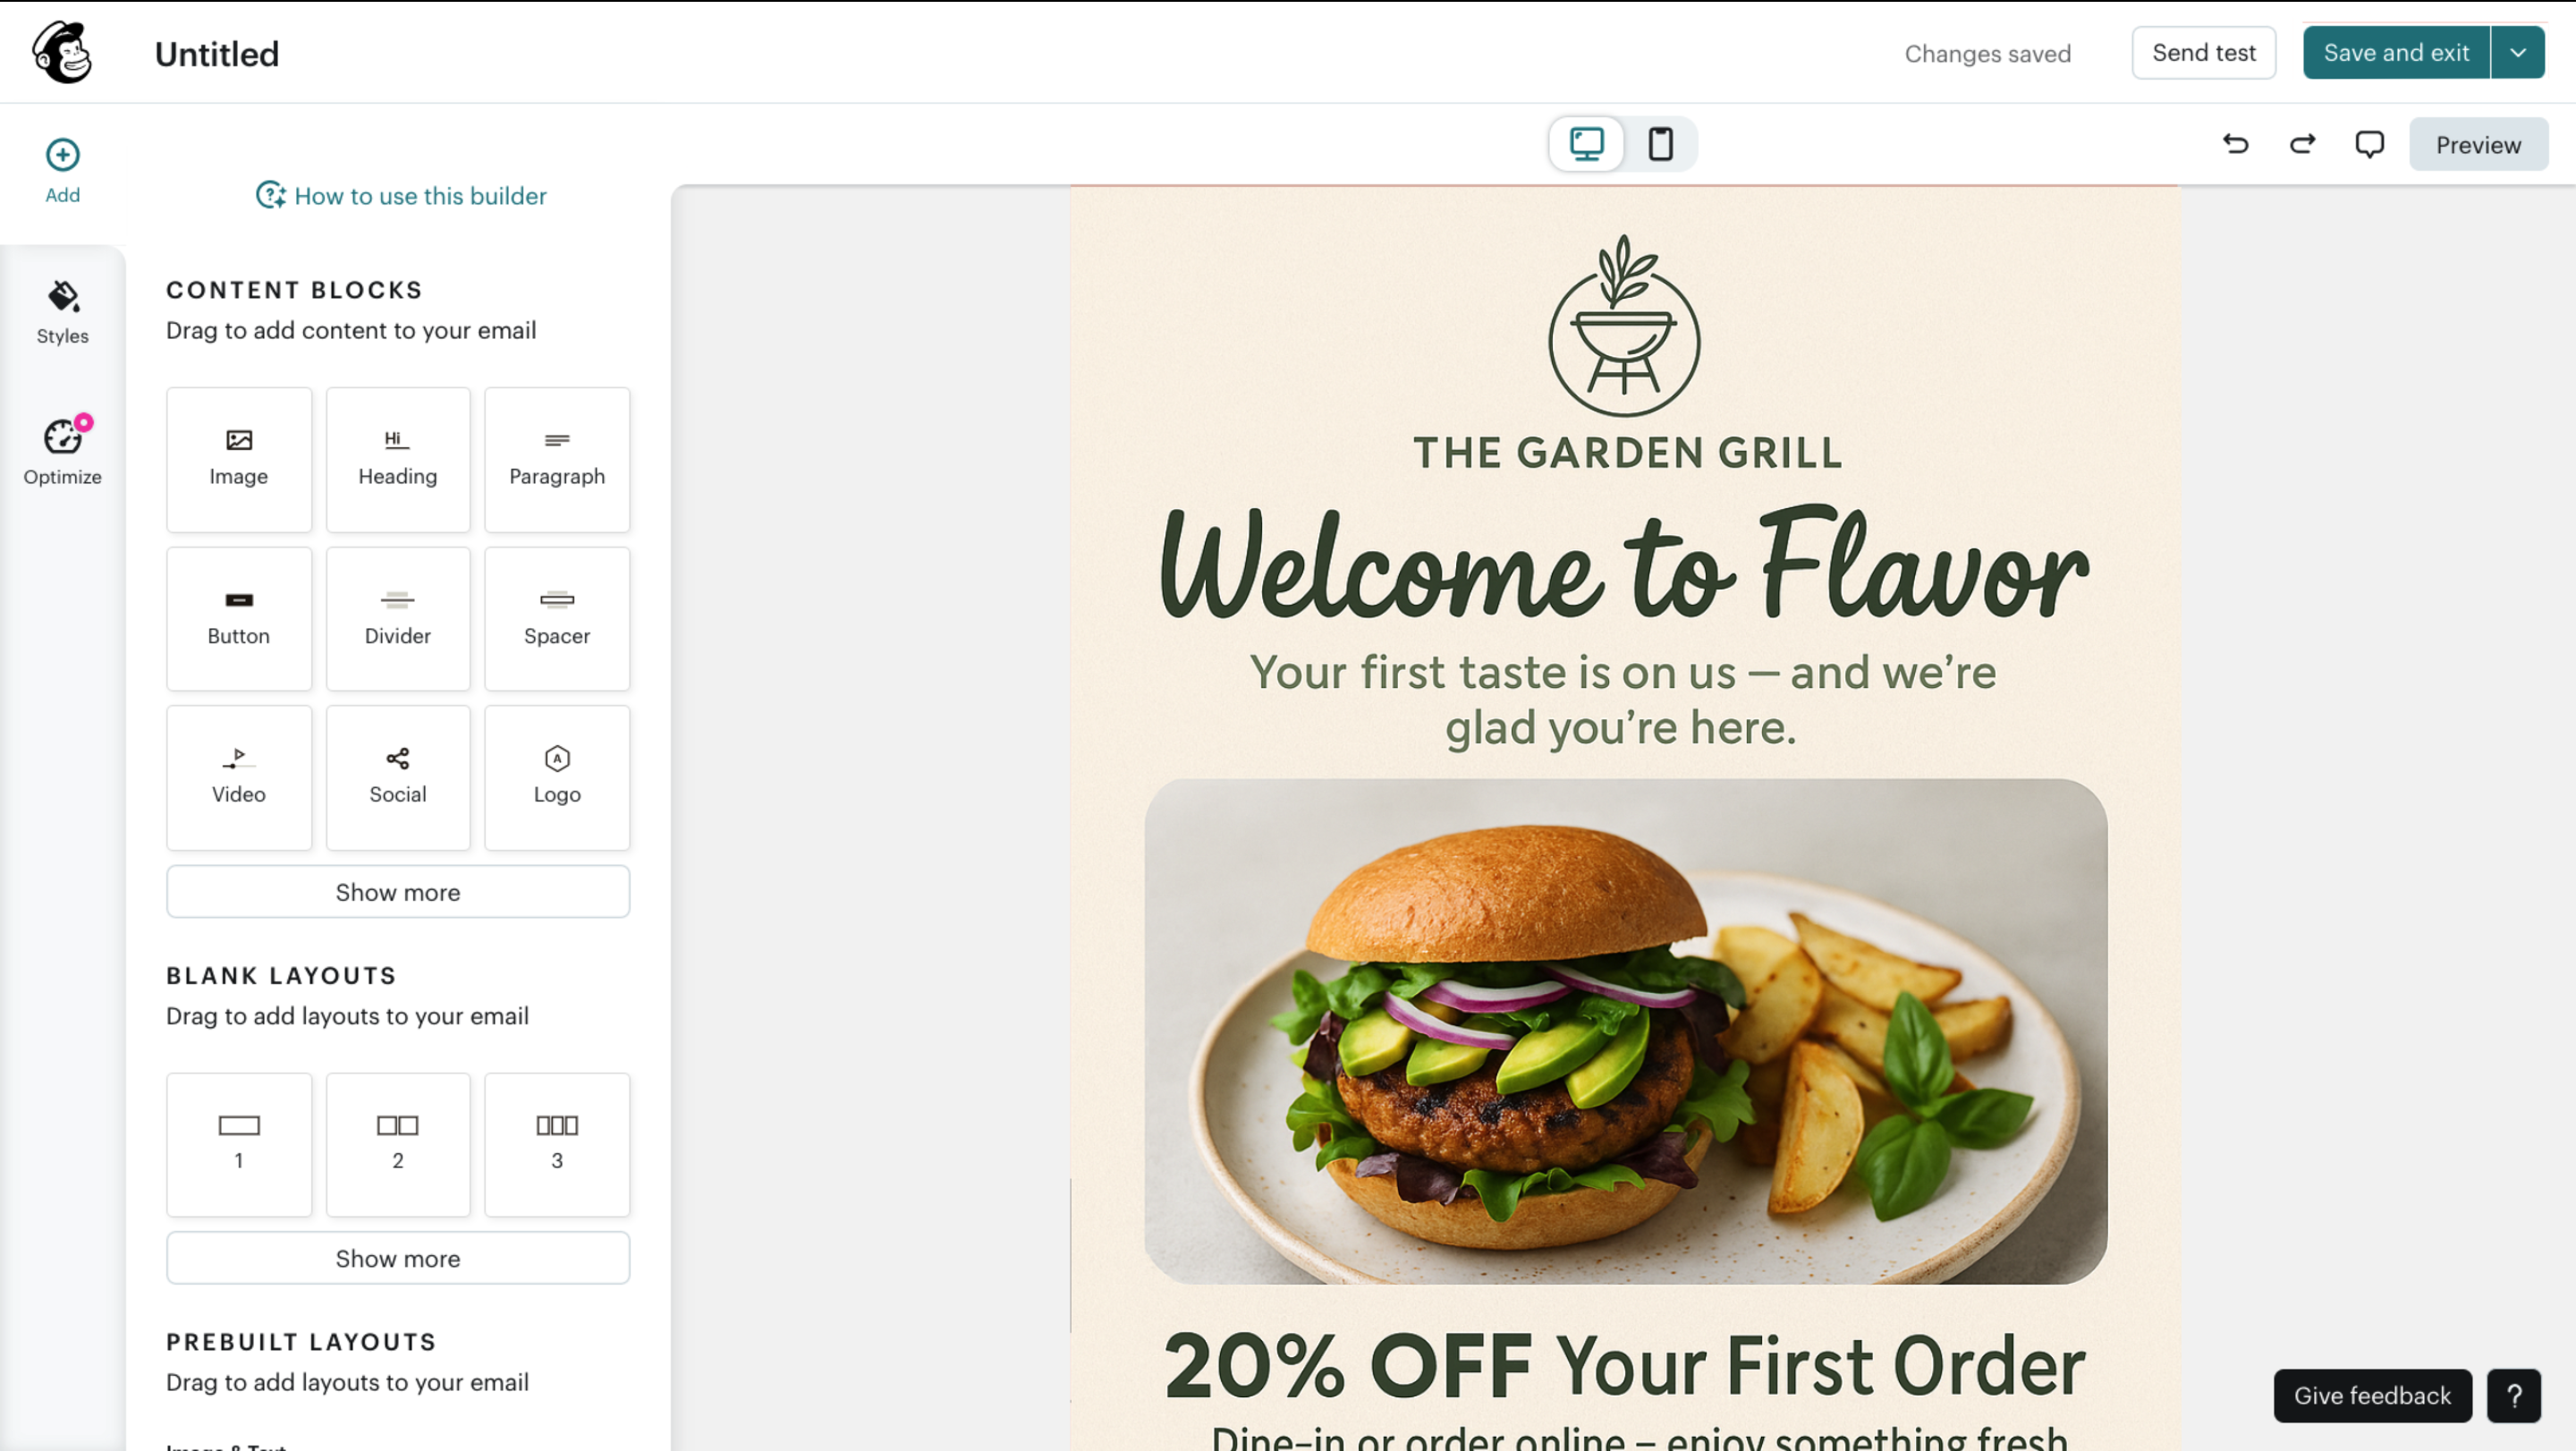
Step 10
Customize your email in the content editor by adding text, images, buttons, and other design elements.
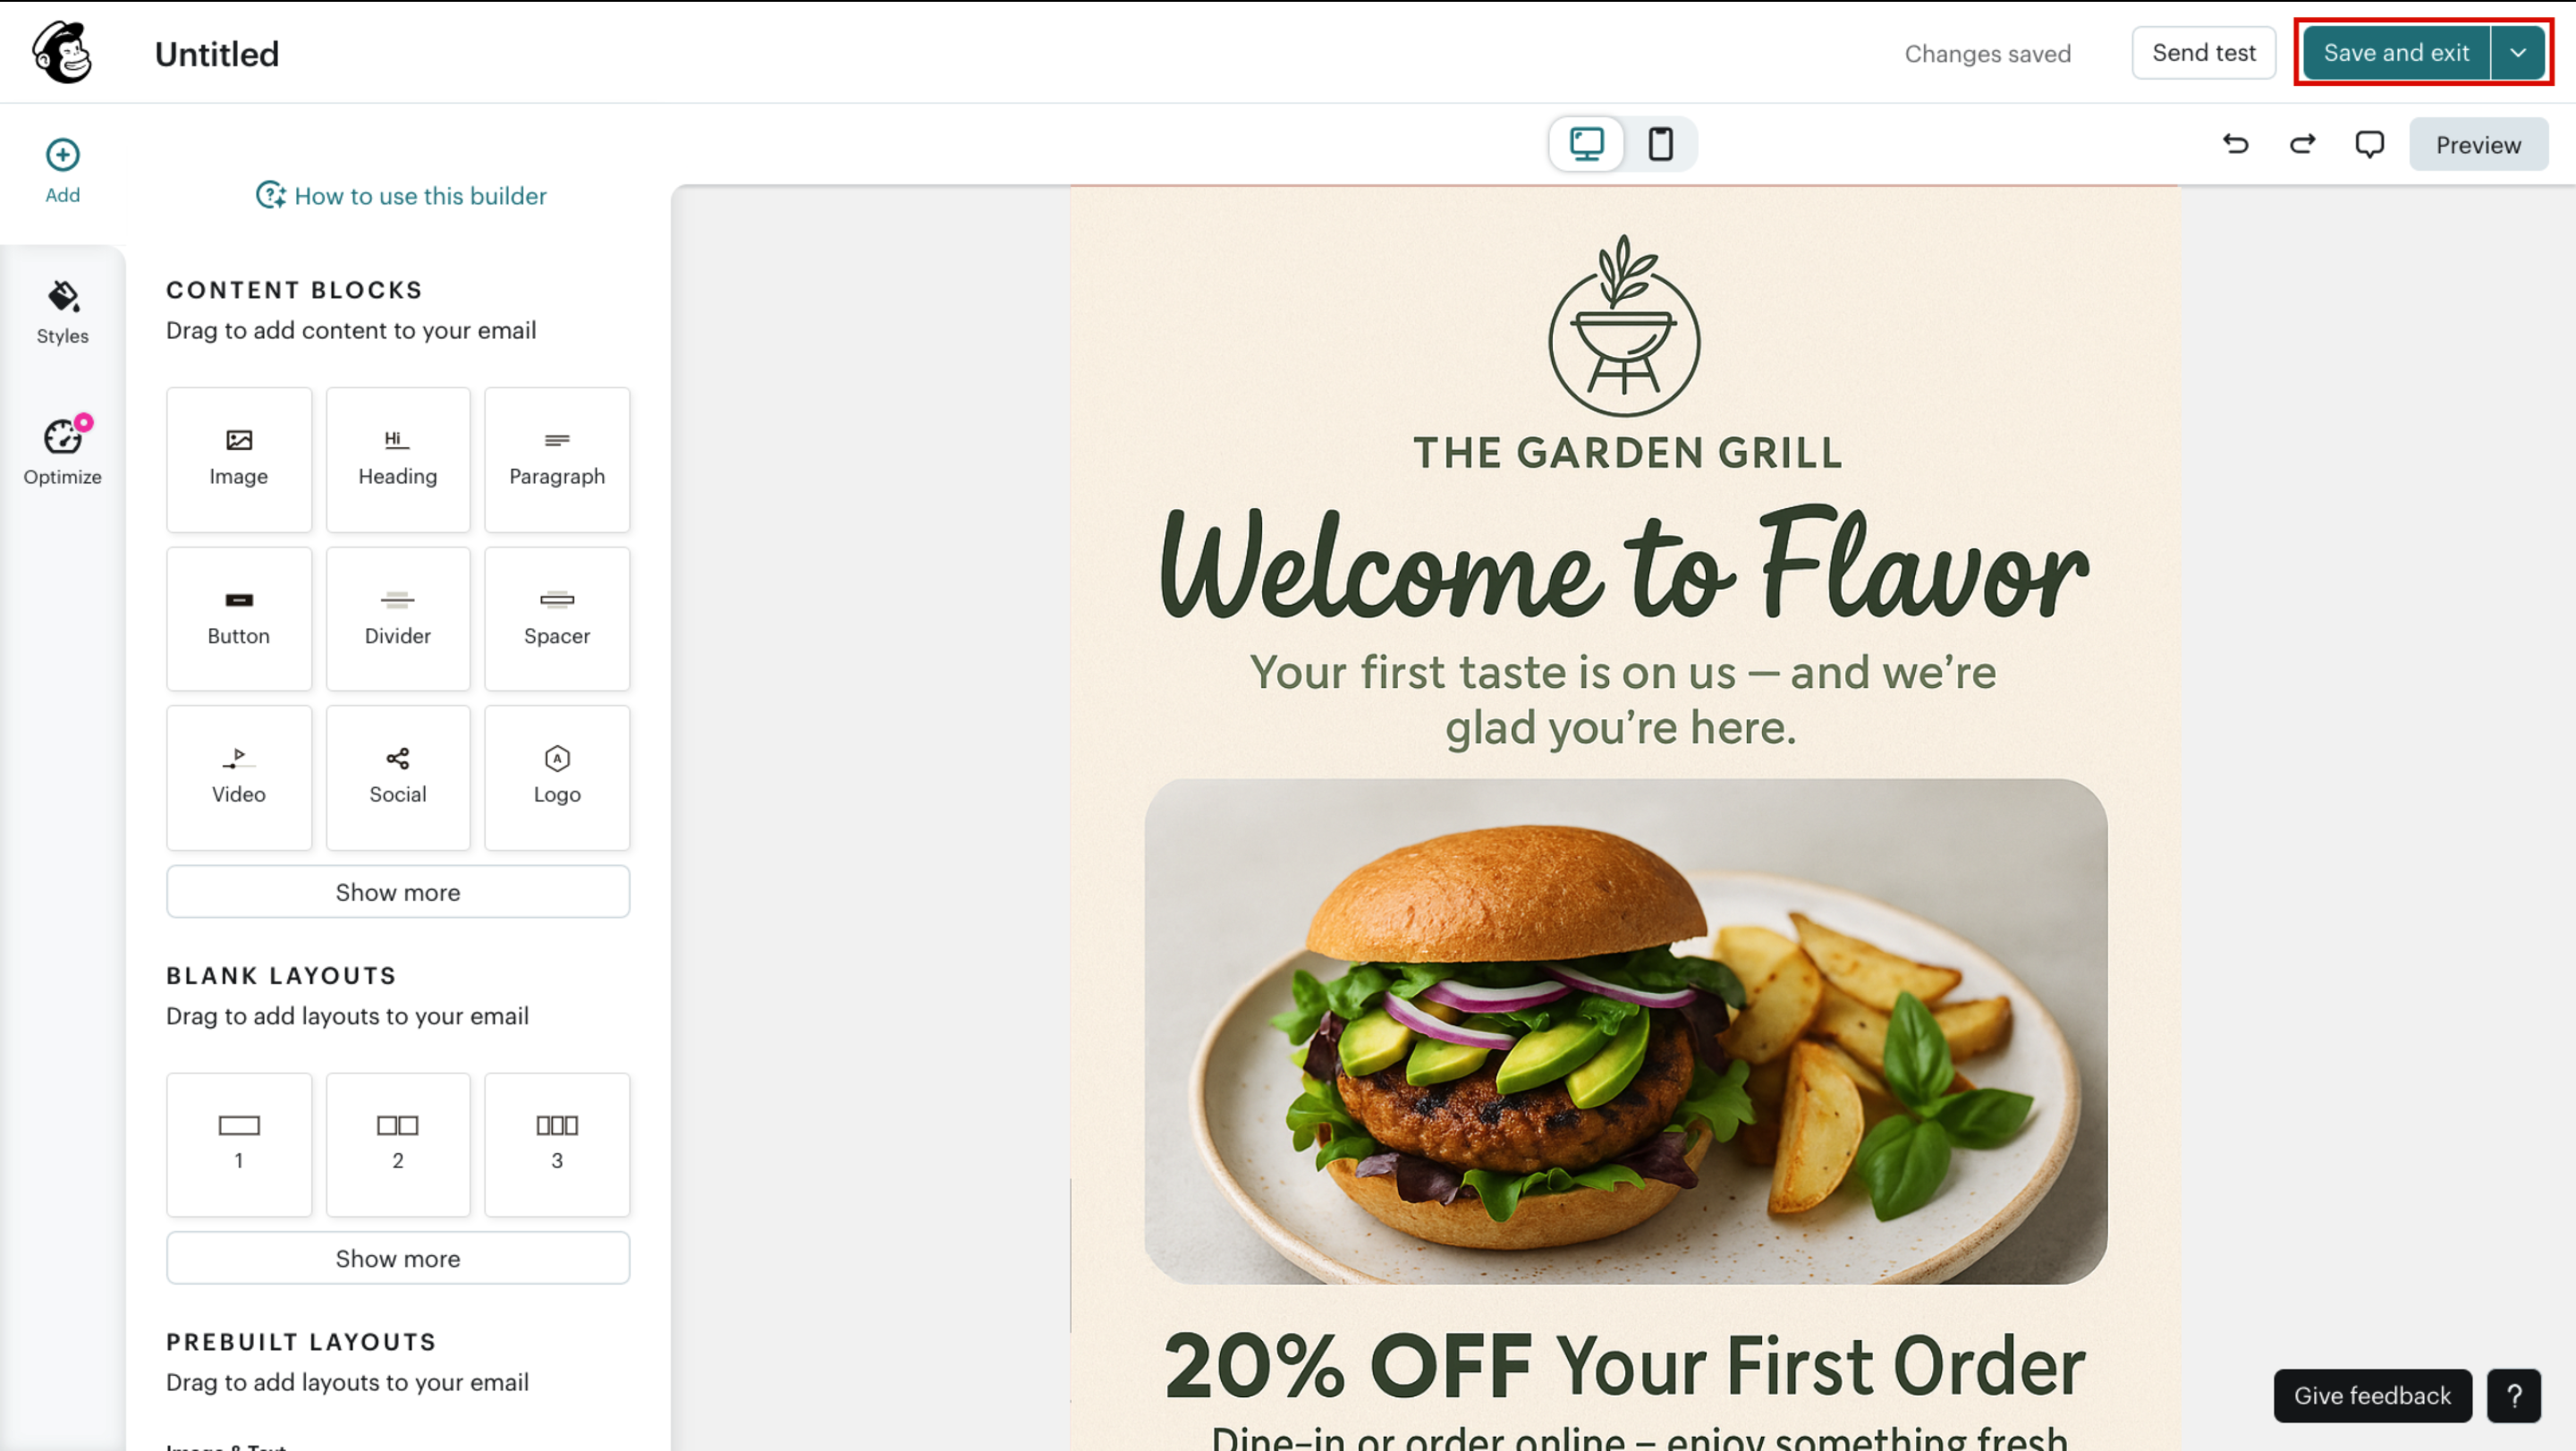
Step 11
Once your email design is complete, click on "Save and exit" to return to the campaign summary page.
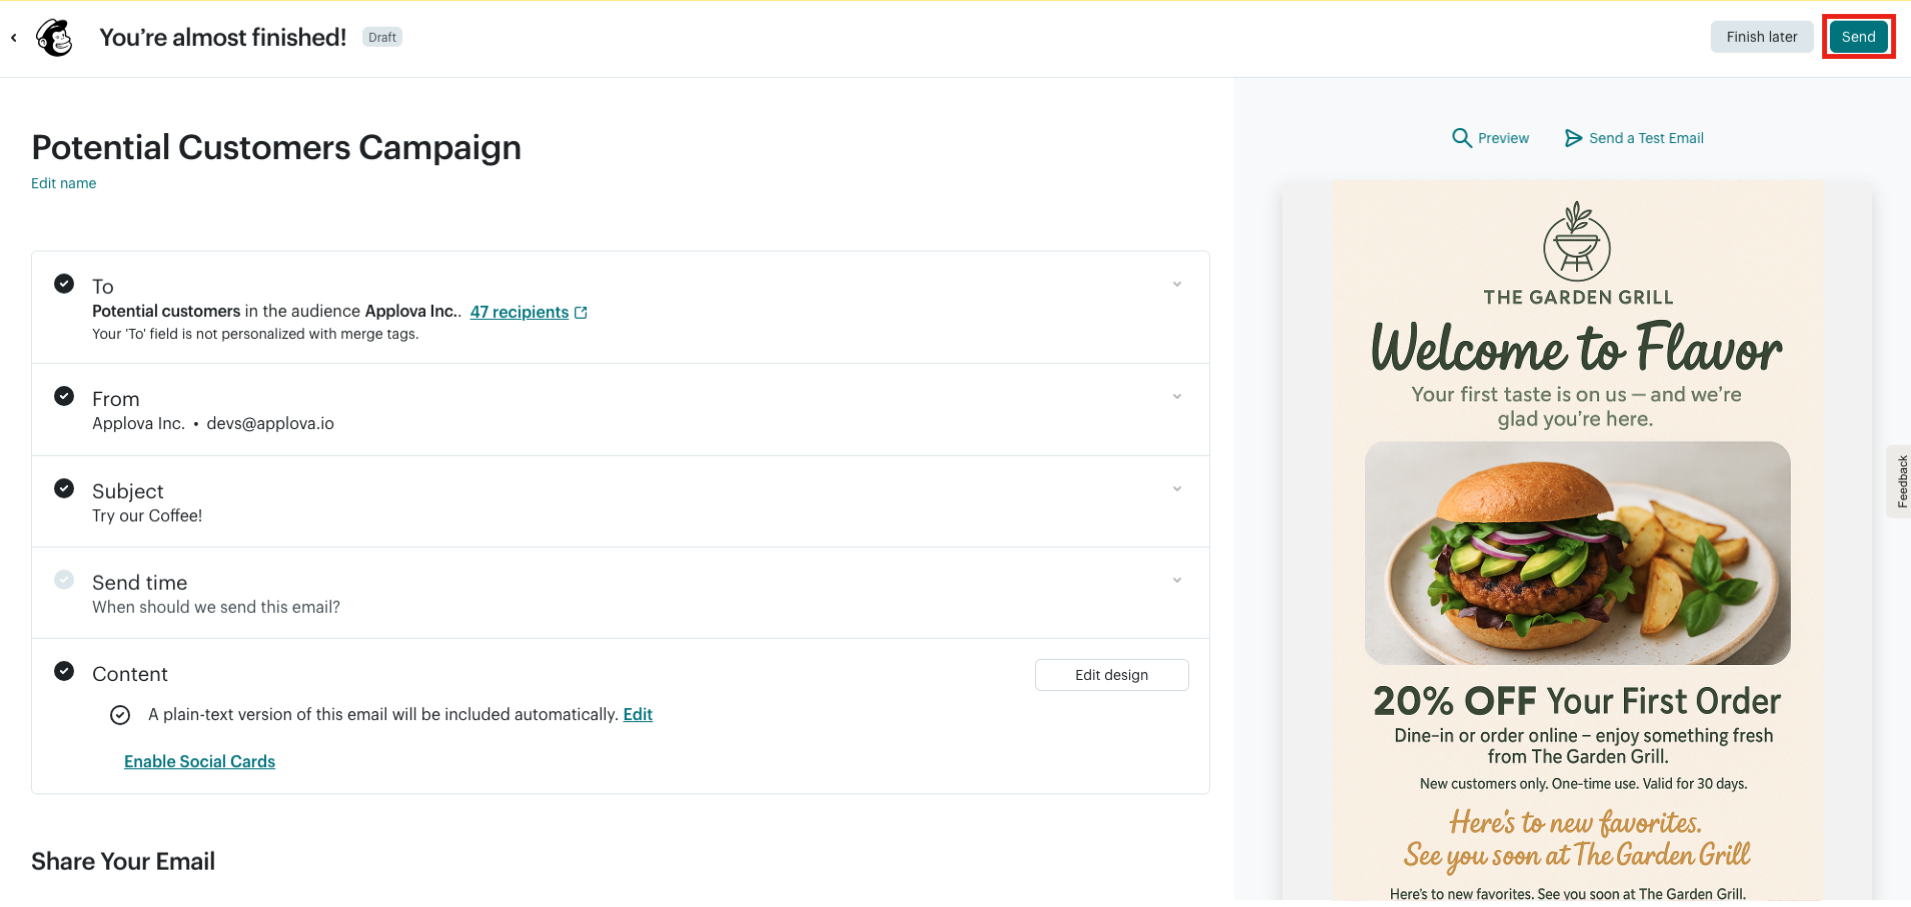
Step 12
Fill out the campaign details:
To: Confirm your targeted segment.
From: Select the sender name and email.
Subject: Enter an engaging subject line.
Send time: Choose when the email should be sent.

Step 13
Review all campaign details and press on "Send".
Watch Video