How to Customize Checkout Screen on Self-Service Kiosk
Easily brand and personalize your checkout screens on the self-service kiosk with checkout messages without any hassle.
How to Customize the Checkout Success Header?
Step 1
Navigate to "Merchant Portal" and go to "Settings".
Step 2
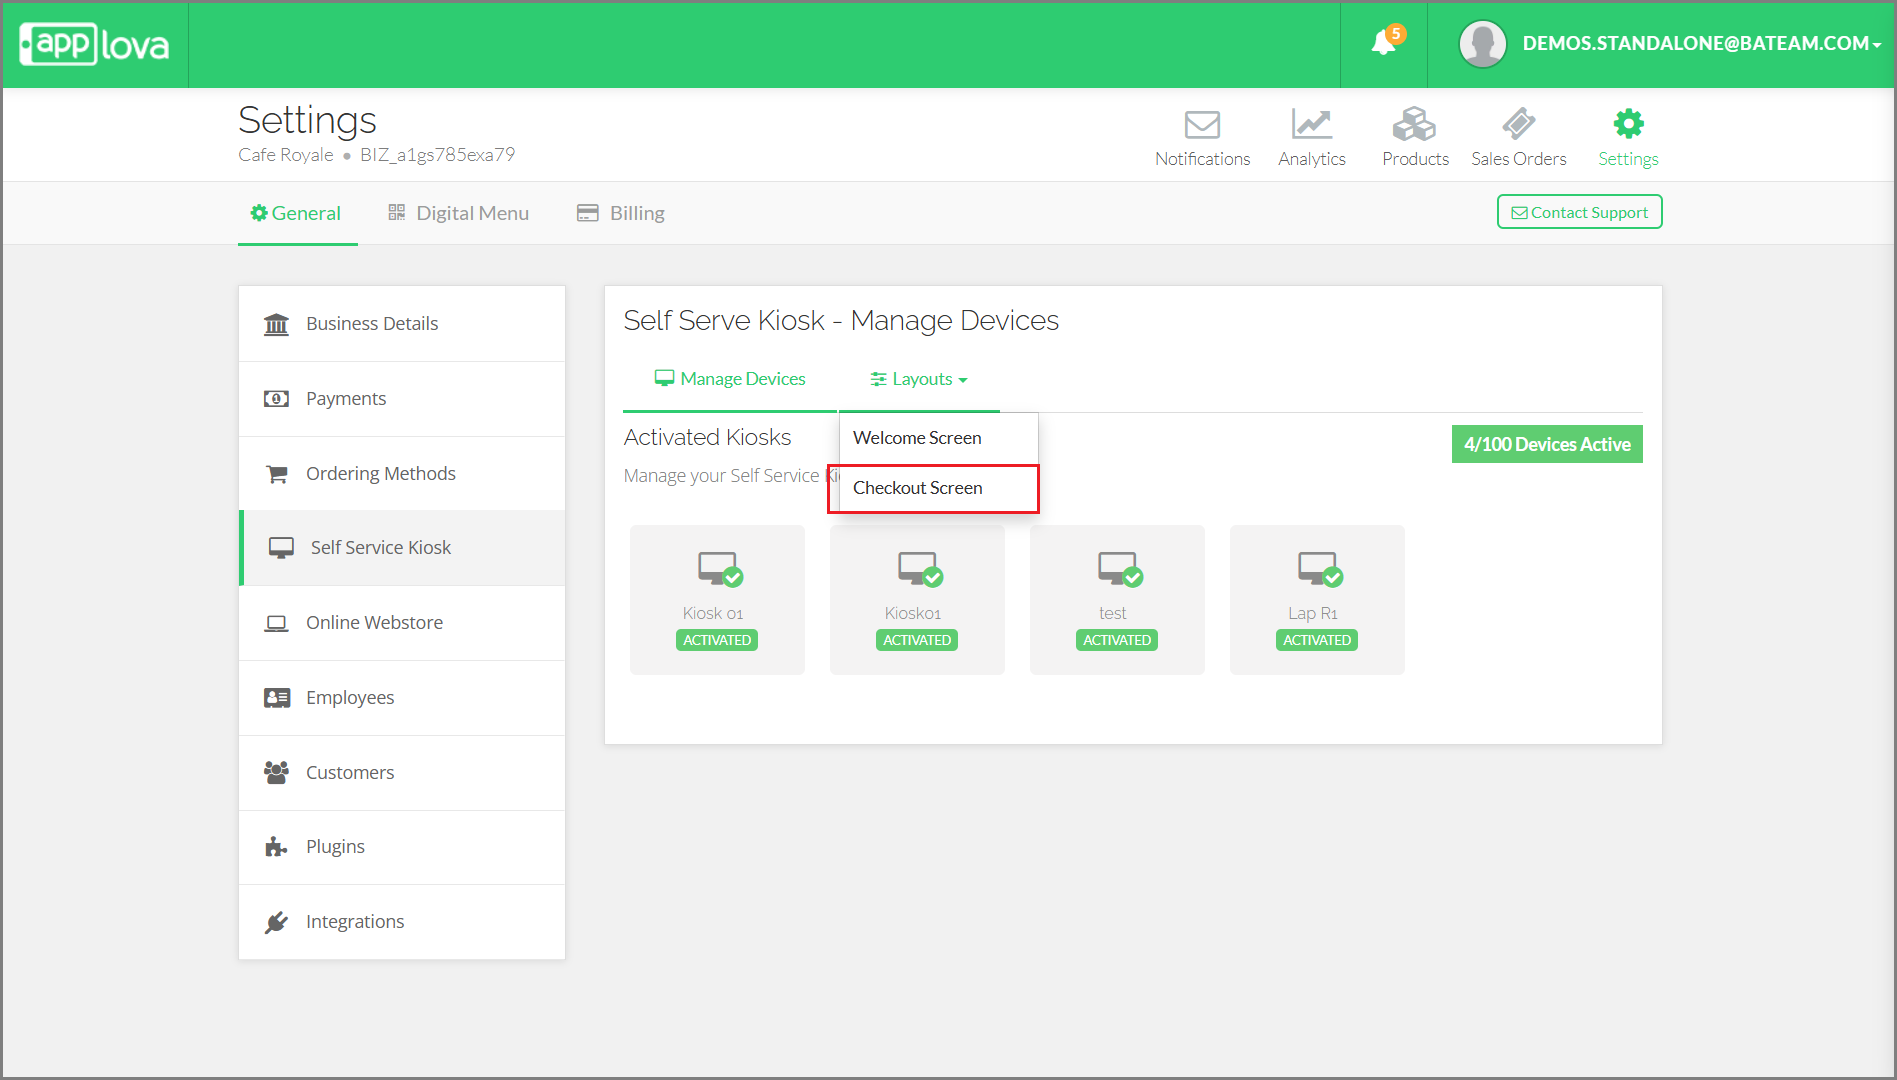
Click on the "Self Service Kiosk" section and from the "Layouts" dropdown, select the "Checkout Screen" tab.
Step 3
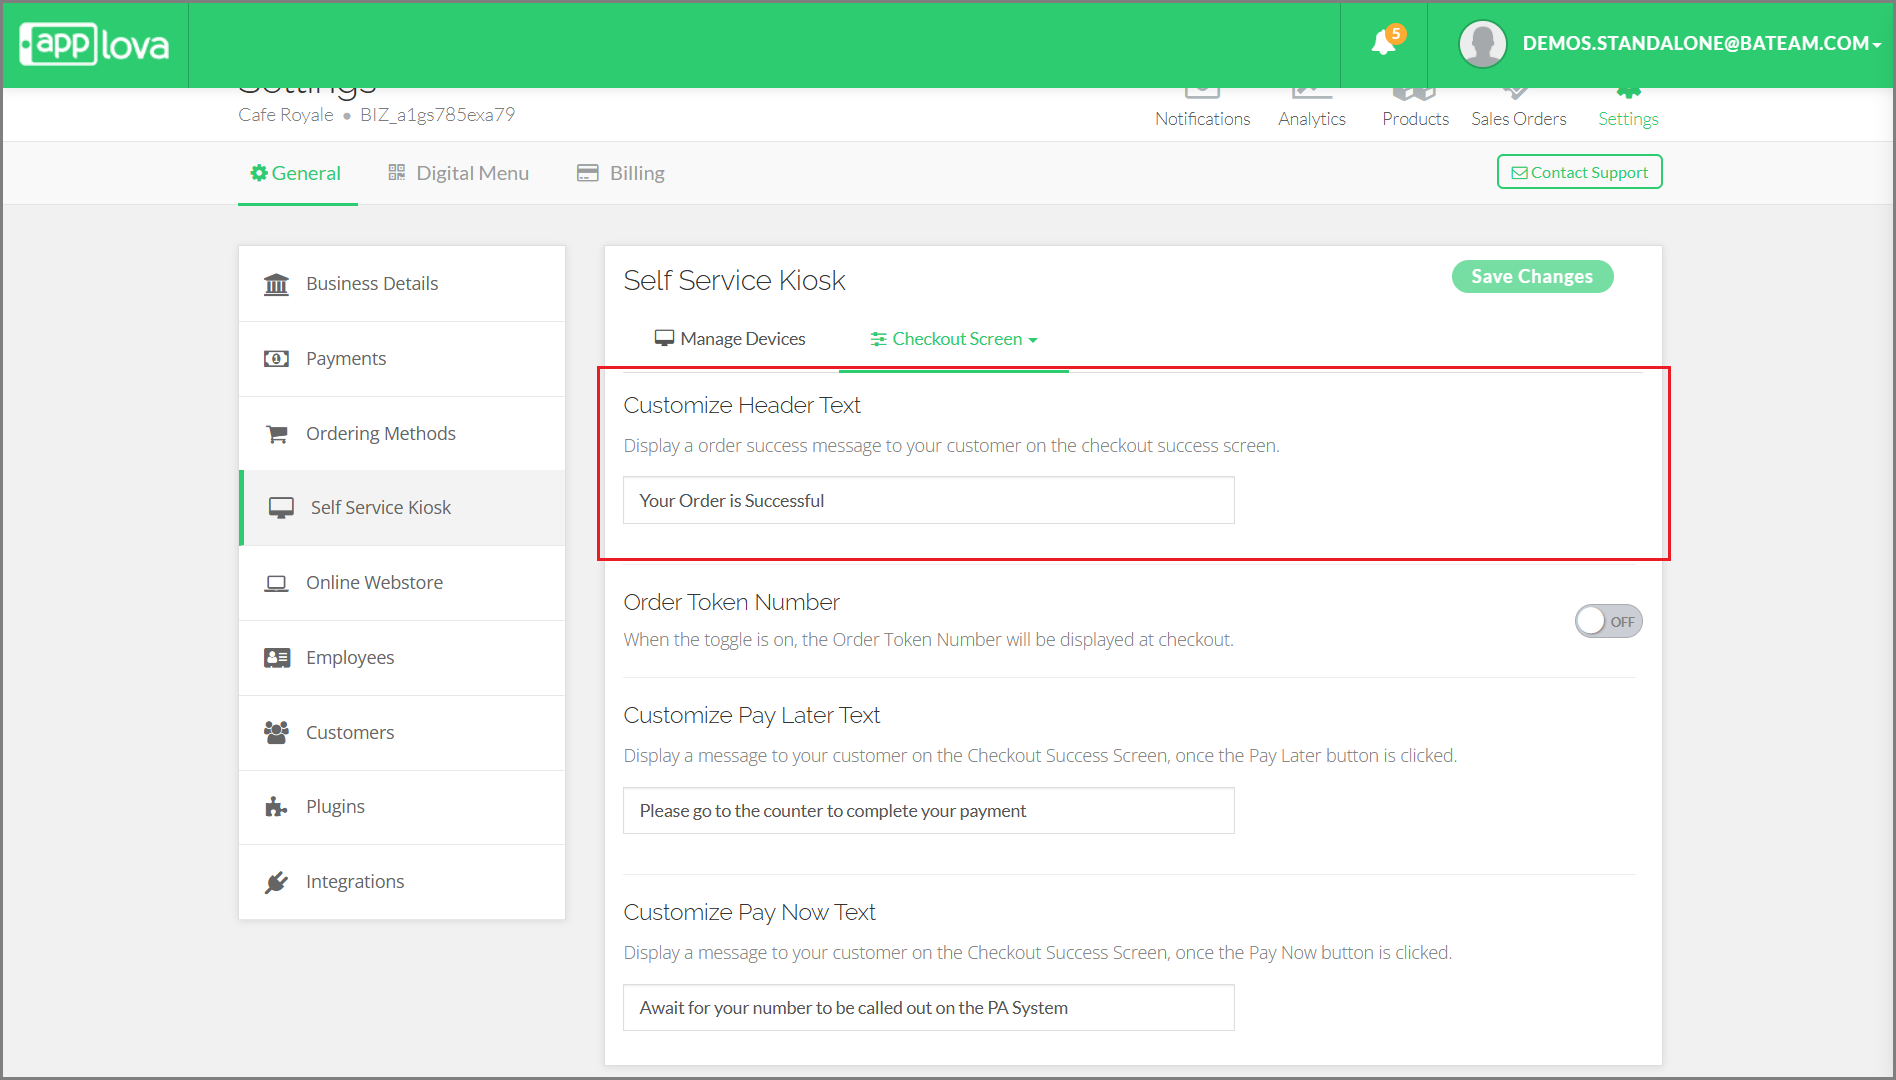
Locate the field labeled "Customize Header Text".
Step 4
Enter your custom header.
Step 5
Click "Save Changes" to confirm.
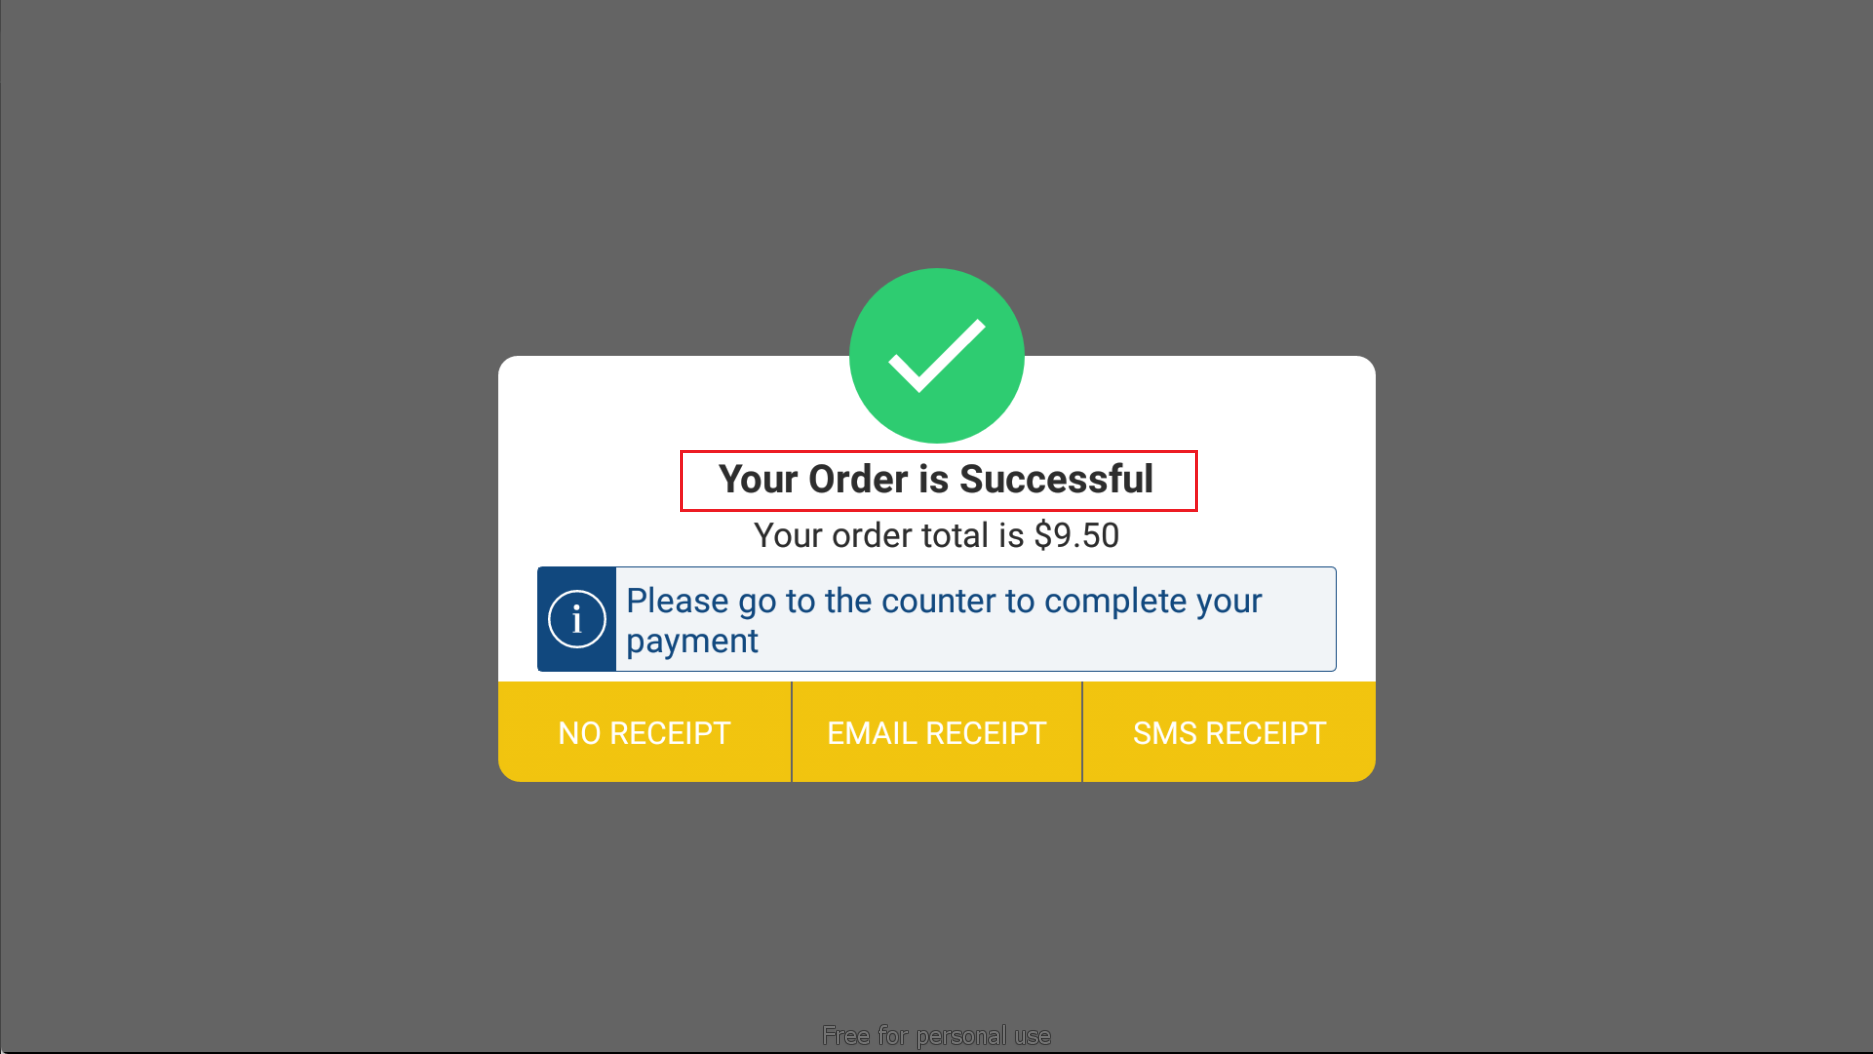
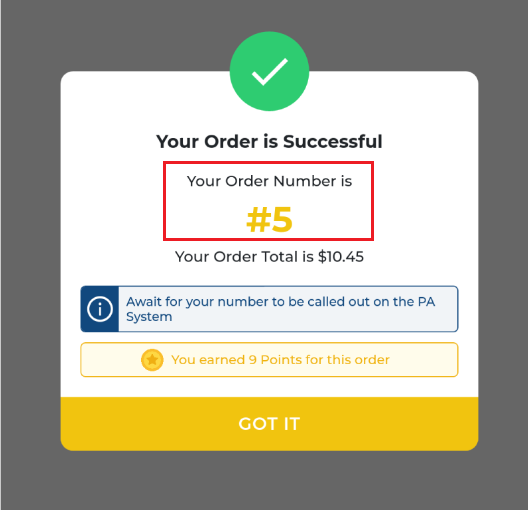
 The custom header text will appear at the top of the checkout success screen.
How it Reflects on the Kiosk
How to Show or Hide the Order Token Number?
Step 1
Navigate to "Merchant Portal" and go to "Settings".
Step 2
Click on the "Self Service Kiosk" section and from the "Layouts" dropdown, select the "Checkout Screen" tab.
Step 3
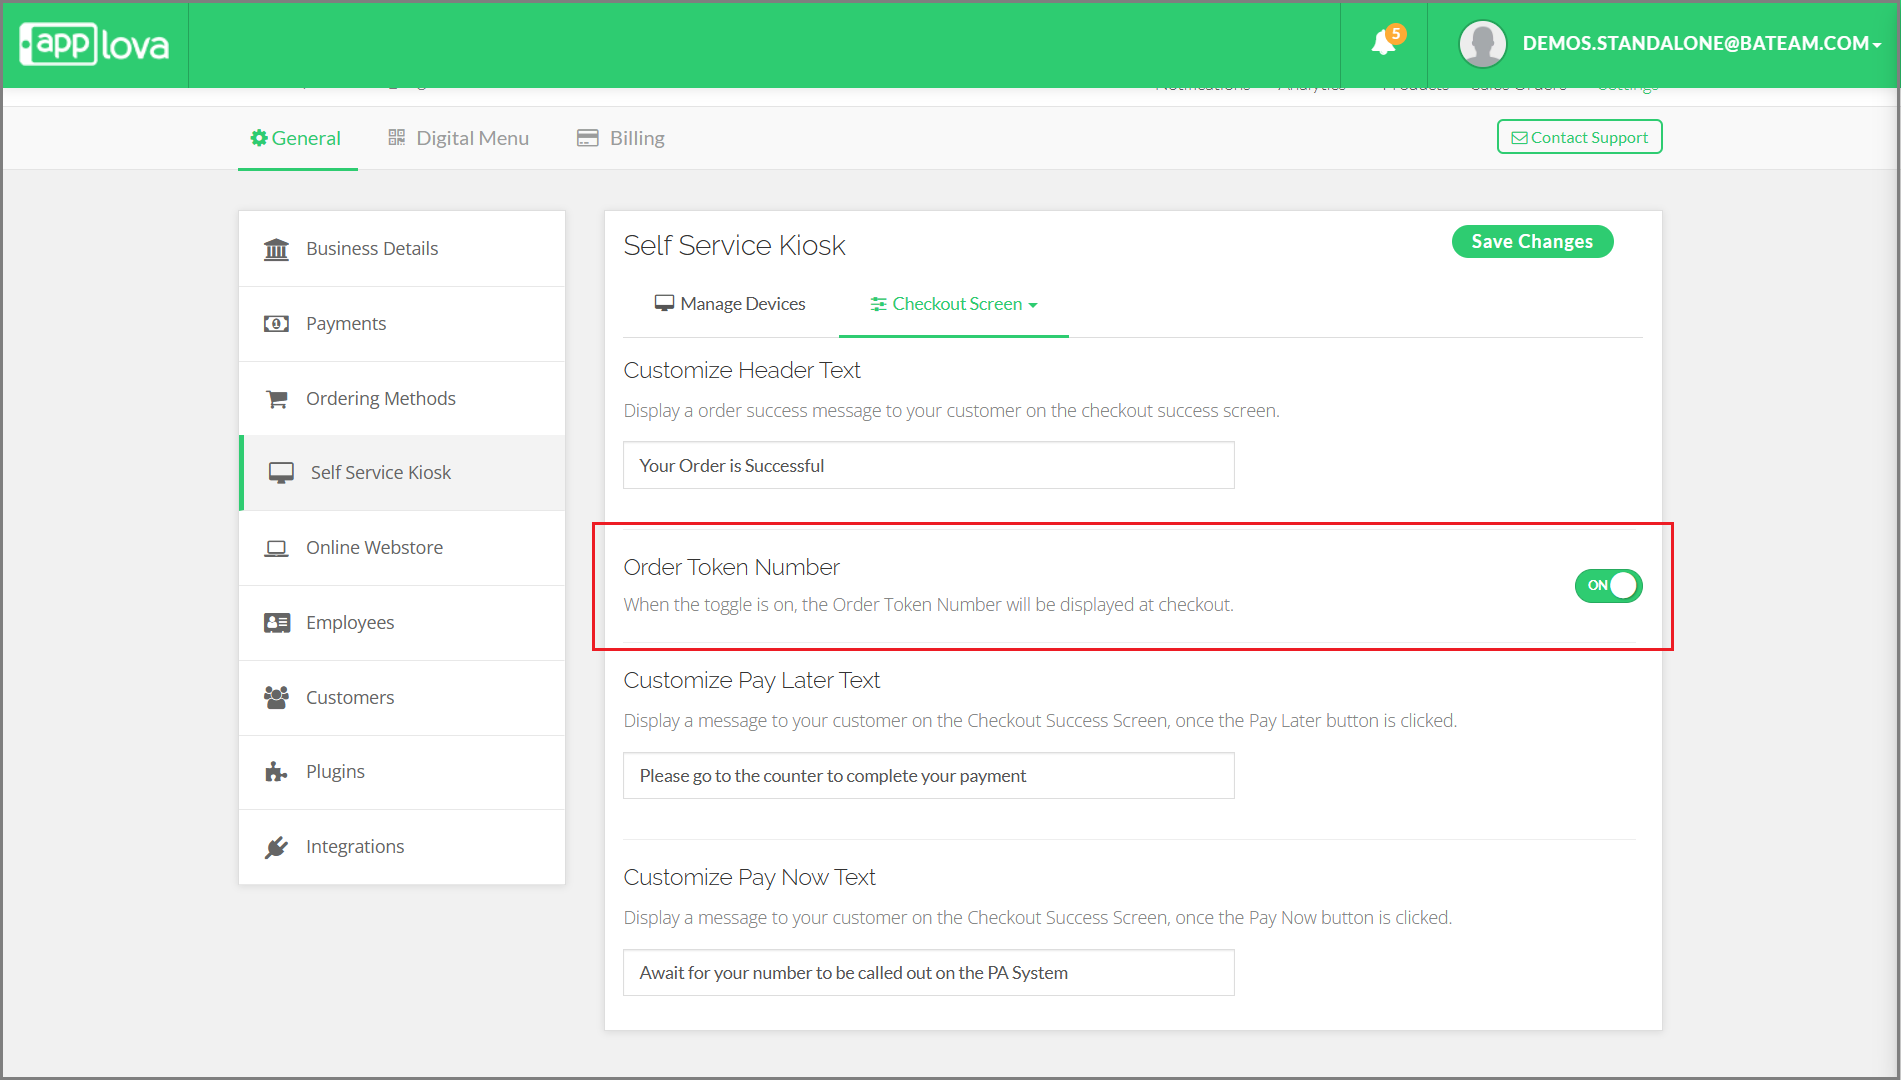
Locate the toggle labeled Order Token Number.
Step 4
Turn the toggle ON or OFF.
Step 5
Click "Save Changes" to apply.
How it Reflects on the Kiosk
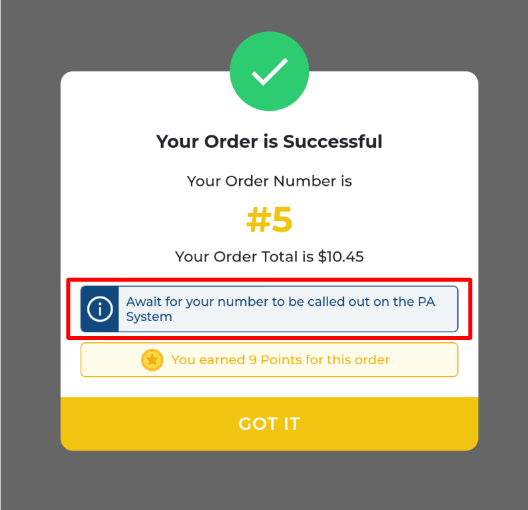
How to Customize the “Pay Later” Message?
Step 1
Navigate to "Merchant Portal" and go to "Settings".
Step 2
Click on the "Self Service Kiosk" section and from the "Layouts" dropdown, select the "Checkout Screen" tab.
Step 3
Scroll to the field labeled "Customize Pay Later Text".
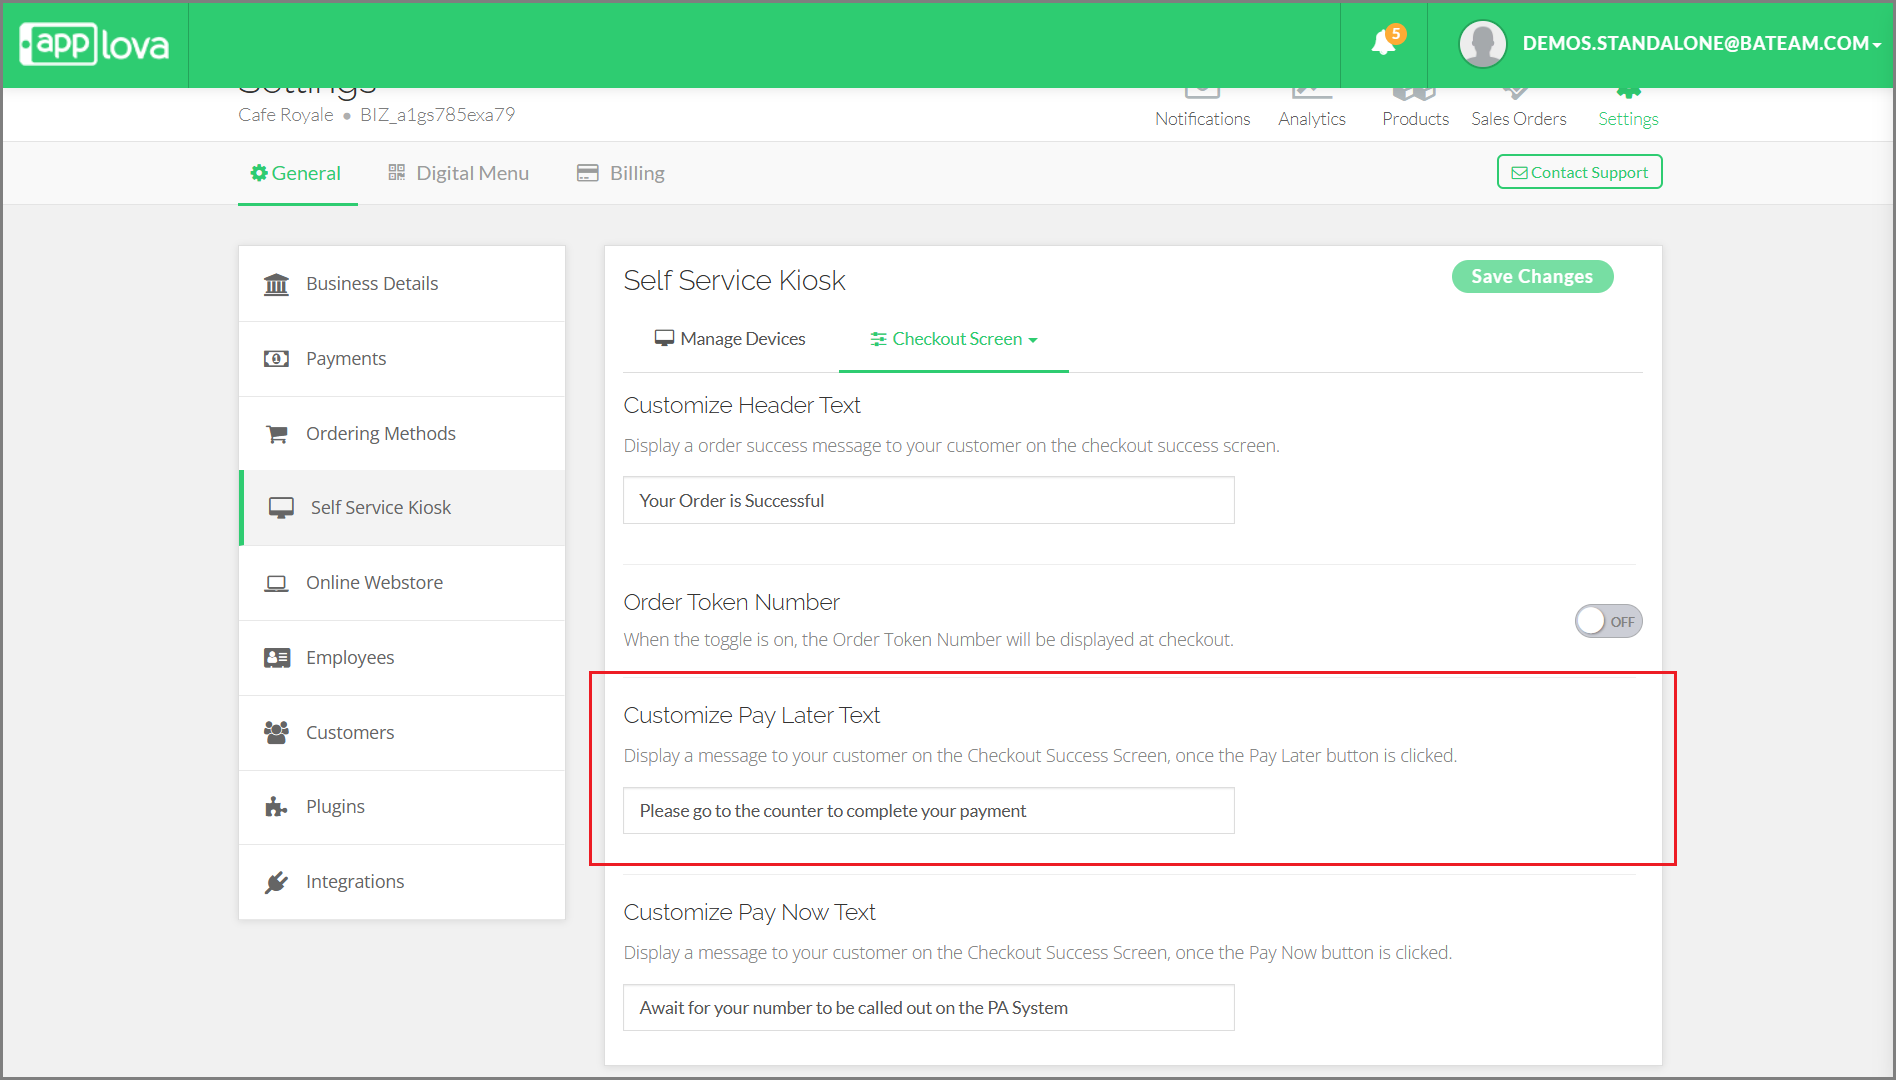
Step 4
Enter your custom message.
Step 5
Click "Save Changes" to confirm.
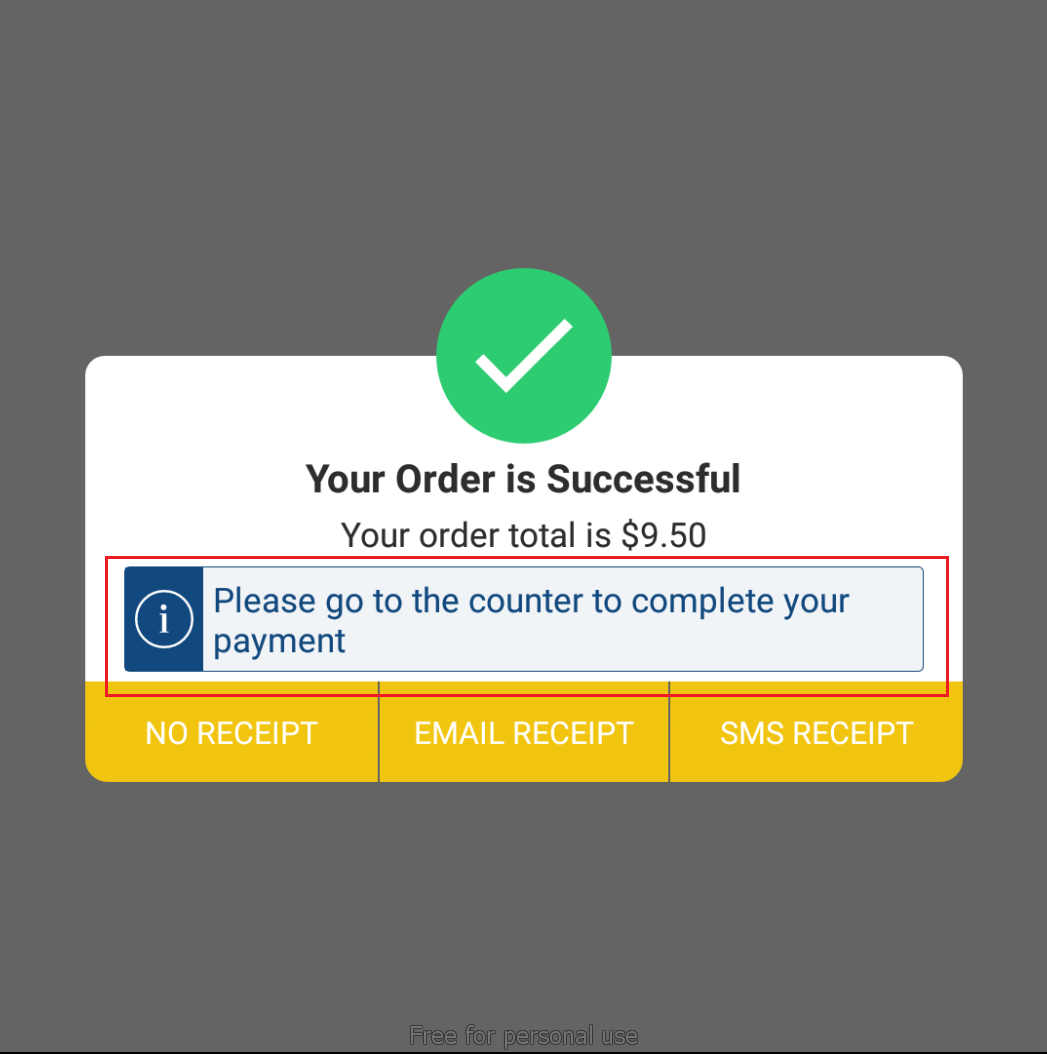
How it Reflects on the Kiosk
How to Customize the “Pay Now” Message?
Step 1
Navigate to "Merchant Portal" and go to "Settings".
Step 2
Click on the "Self Service Kiosk" section and from the "Layouts" dropdown, select the "Checkout Screen" tab.
Step 3
Scroll to the field labeled "Customize Pay Now Text".
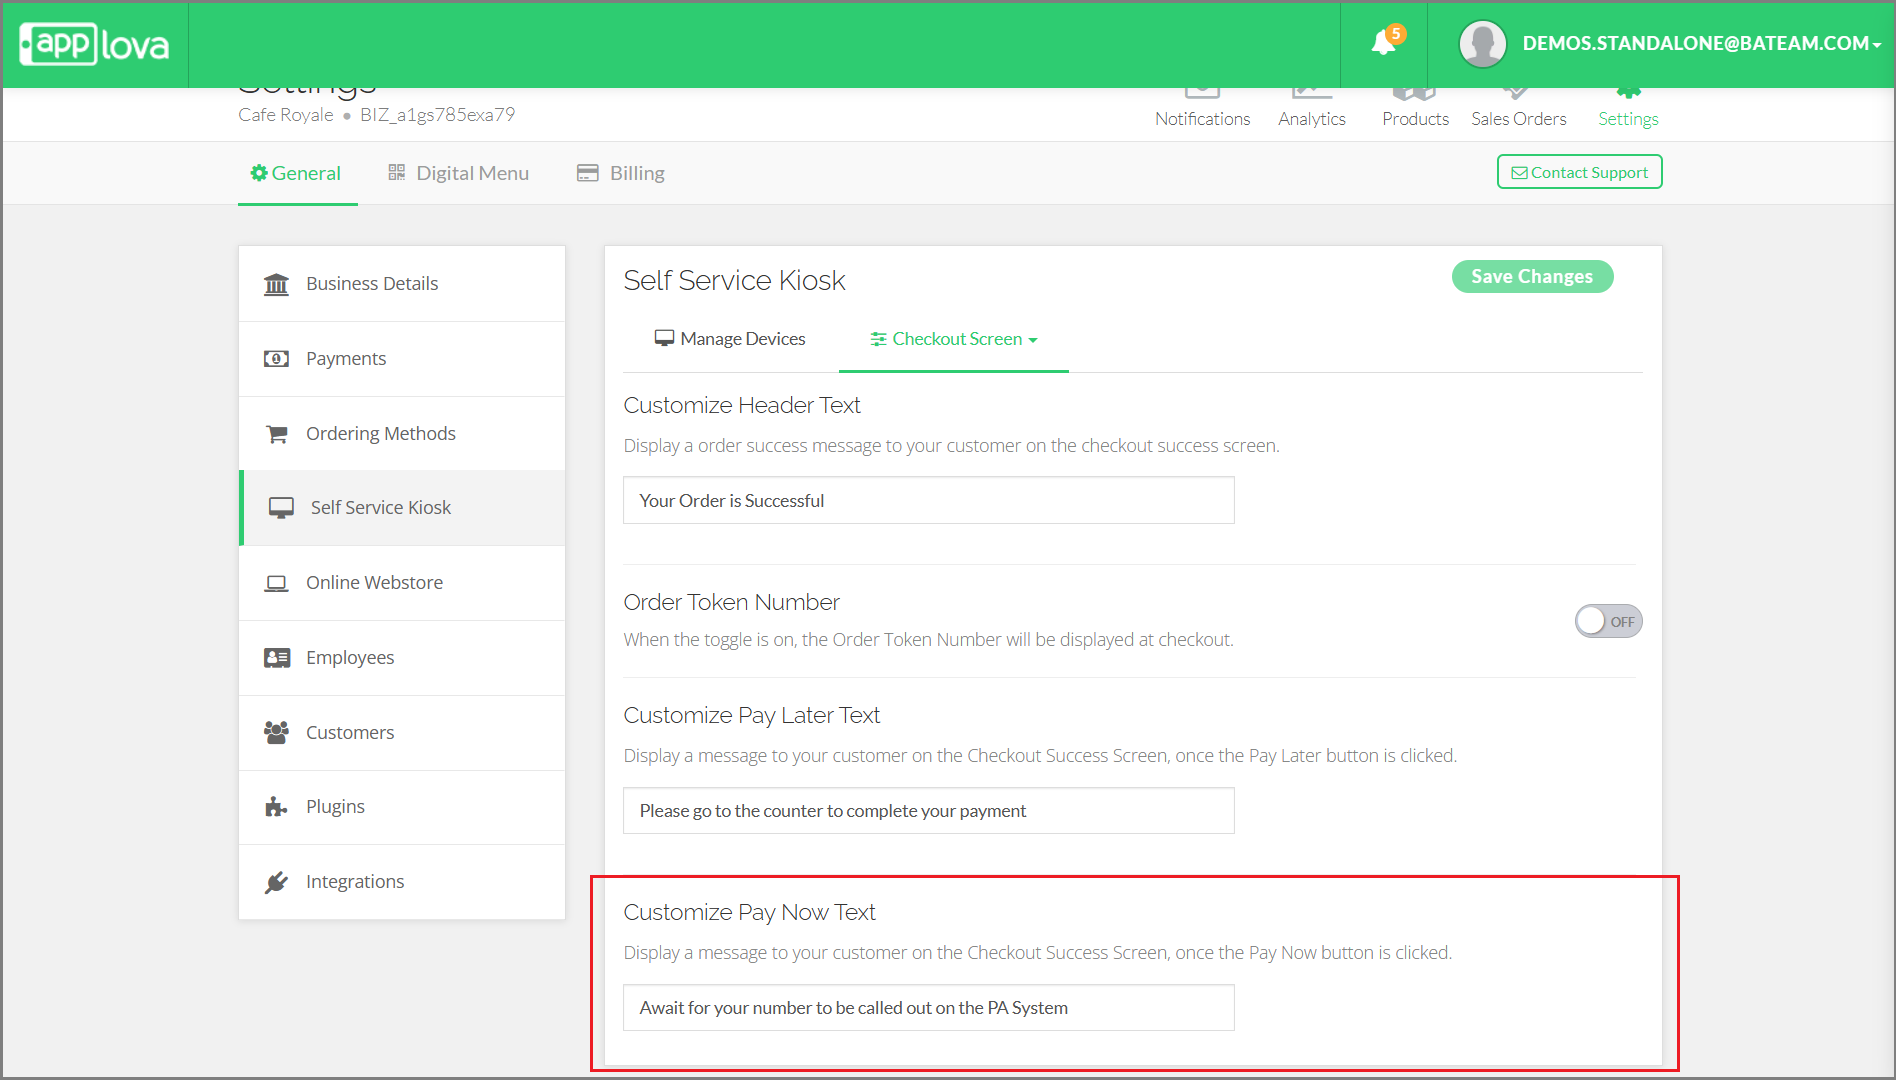
Step 4
Enter your custom message.
Step 5
Click "Save Changes" to confirm.
How it Reflects on the Kiosk
Related Articles
How to Enable Order Type Selection on Self-Service Kiosk
Easily brand and personalize your welcome screens on the self-service kiosk with order type settings without any hassle. If enabled dine-in and to-go will be displayed. Step 1 Navigate to "Merchant Portal" and go to "Settings". Step 2 Click on the ...How to Upload a Welcome Screen Image on Self-Service Kiosk?
Easily brand and personalize your welcome screens on the self-service kiosk with order type settings, and images without any hassle. Step 1 Navigate to "Merchant Portal" and go to "Settings". Step 2 Click on the "Self Service Kiosk" section and from ...Configuring Tips via Merchant Web Portal
This feature allows the merchant to configure tip settings through the Merchant Web so that tips can be selected and applied during the checkout process. Step 1 Login to "Applova Merchant Web". Step 2 Go to "Settings" and then "General" tab Step 3 ...AI-Curated Cross-Sell Suggestions via Merchant Portal
This feature helps merchants boost sales by using AI to suggest complementary products through cross-sell recommendations directly in the Merchant Portal. What is Cross-Sell? Cross-sell is the practice of recommending additional products that are ...How to Manage Special Pricing via Merchant Portal?
What is Product Special Pricing? Product special pricing defines setting different pricing to your variants on different days (E.g: Lower prices on Holidays or Weekends) How to Add Product Special Pricing? Step 1 Login to the "Applova Merchant ...